Ultimate Guide to Healthy & Festive Sugar Cookie Cups (Vegan, GF, RSF)
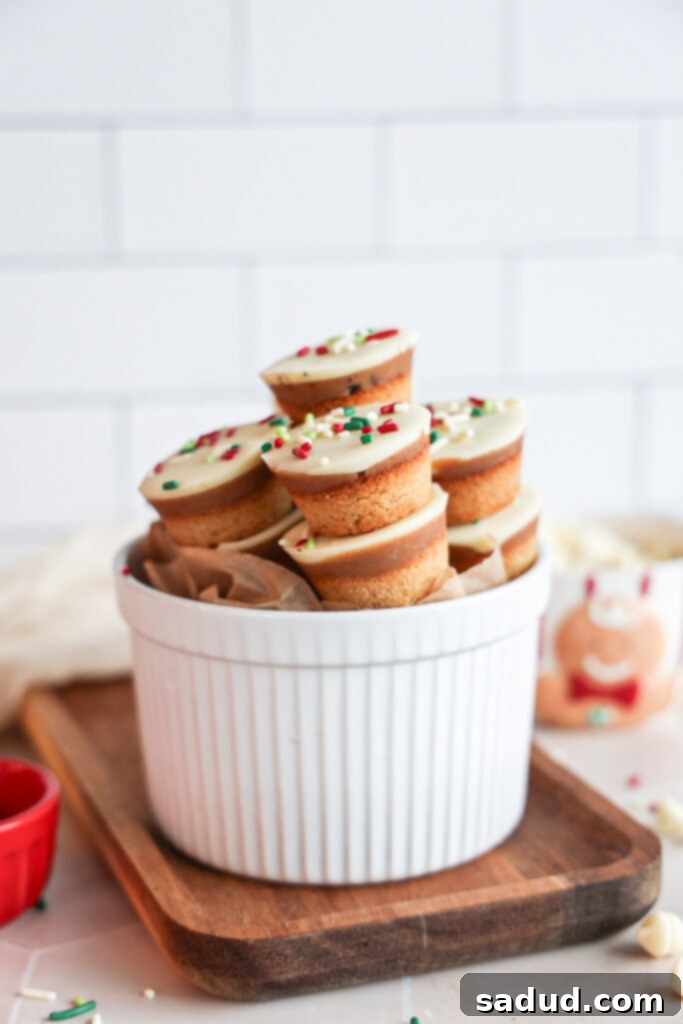
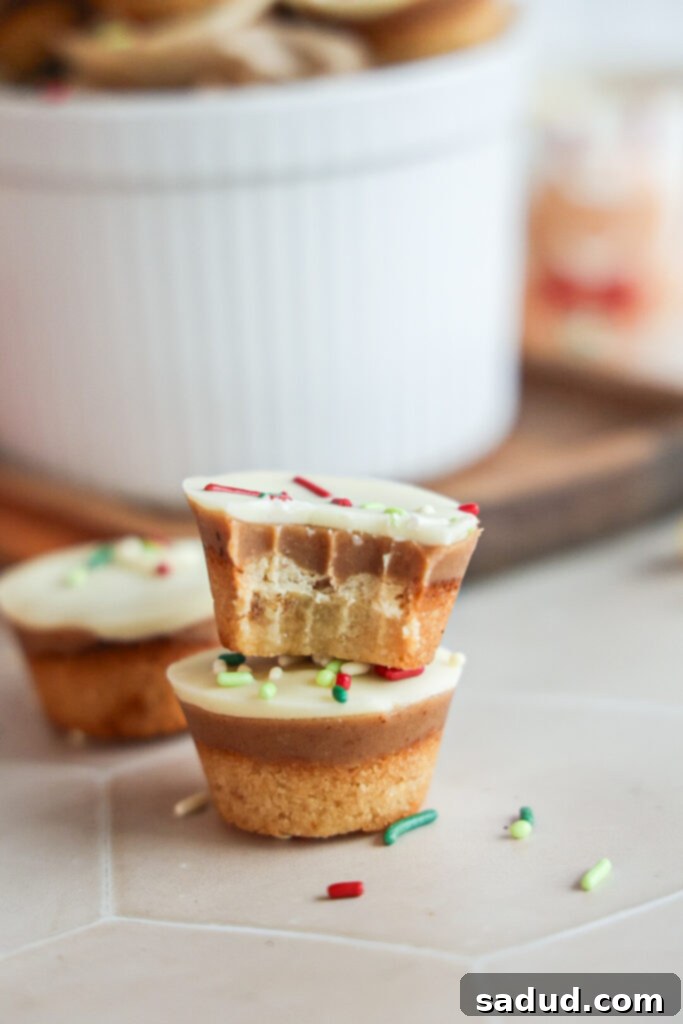
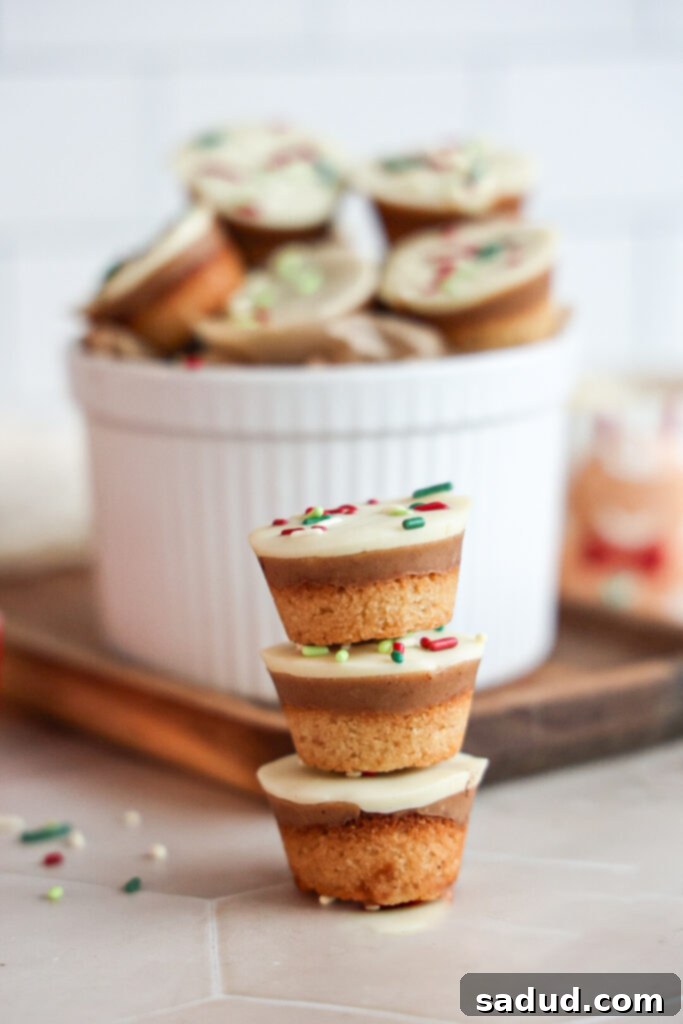
Prepare to fall in love with these adorable and irresistible Festive Sugar Cookie Cups! Designed to be the perfect bite-sized treat for any celebration, they boast a tender almond flour sugar cookie base, a rich and creamy cashew butter caramel filling, and are elegantly topped with luscious white chocolate and a showering of festive sprinkles. What makes them truly special is that they are thoughtfully crafted to be entirely vegan, gluten-free, and refined sugar-free, yet their delightful taste will completely surprise everyone! We’ve even included a fantastic nut-free, oat flour version to ensure that absolutely everyone can indulge in this holiday magic.

There’s a special charm to mini desserts that just captivates me – they are undeniably cute and possess an irresistible allure! Among them, little cookie cups hold a particularly cherished spot in my heart. They are perfectly portioned, making them an ideal dessert for holiday gatherings, potlucks, and any festive occasion. For years, my go-to recipe was hot chocolate cookie cups, but this year, I felt inspired to create something new, fresh, and even more festive, leading to the delicious birth of these delightful sugar cookie cups!
Many traditional sugar cookie recipes often feature fillings like simple pie filling, tangy cream cheese, or a light fruity option such as fresh berries or a zesty lemon curd. However, with the holidays in mind, I envisioned something richer and more celebratory. My goal was to craft a treat reminiscent of my beloved healthy Twix Cups, but with a distinct sugar cookie twist. Imagine: a tender, slightly crumbly sugar cookie or shortbread-like base, generously filled with a velvety, caramel-inspired cashew butter filling, all crowned with a crisp layer of white chocolate and a vibrant scattering of Christmas sprinkles. It’s truly a symphony of textures and flavors that embodies the spirit of the season!
Watch How to Make These Sugar Cookie Cups
Why These Festive Sugar Cookie Cups Will Become Your New Favorite
- **Unmatched Versatility for Any Occasion:** While perfect for the holiday season, these cookie cups are incredibly adaptable. Simply swap out the color of the sprinkles to match any theme! Think patriotic red, white, and blue for the Fourth of July, vibrant greens for St. Patrick’s Day, or delicate pastel sprinkles for an enchanting Easter dessert. Their charming presentation and delightful taste make them a hit year-round.
- **Dietary-Friendly & Inclusive:** Catering to various dietary needs has never been easier or tastier. These cookie cups are inherently gluten-free, dairy-free, vegan, and made without refined sugars, making them a healthier indulgence for almost everyone. Plus, with our carefully crafted nut-free option (using oat flour and sunflower seed butter), you can confidently serve these to guests with nut allergies, ensuring no one misses out on the deliciousness!
- **Surprisingly Simple & Effortless:** Don’t let their elegant appearance fool you – these treats are incredibly easy to make! They require minimal ingredients, many of which you likely already have in your pantry, and involve straightforward steps. Aside from a bit of chilling time (which is mostly hands-off!), the active preparation is quick, making them perfect for busy bakers who still want to impress.

Crafting Healthier Sugar Cookie Cups: Our Wholesome Approach
Creating “healthier” desserts doesn’t mean sacrificing flavor or texture. For these Festive Sugar Cookie Cups, our approach focuses on substituting conventional ingredients with nutrient-dense, plant-based alternatives that still deliver on taste and satisfaction. We’ve meticulously selected ingredients that align with a refined sugar-free, gluten-free, and vegan lifestyle, ensuring each bite is as guilt-free as it is delicious. By utilizing wholesome flours, natural sweeteners, and healthy fats, we achieve a dessert that is not only festive and fun but also provides a more nourishing experience without anyone realizing it’s a healthier spin on a classic.
Essential Equipment for Perfect Sugar Cookie Cups
Having the right tools can make all the difference in your baking experience. For these cookie cups, a few key pieces of equipment will ensure a smooth process and perfect results:
- Mixing bowl: A medium-sized bowl for combining your cookie base and filling ingredients. Make sure it’s spacious enough for easy stirring.
- Spatula: A sturdy silicone spatula is ideal for mixing the dough and scraping down the sides of the bowl, ensuring no precious ingredients are left behind.
- Mini muffin mold/pan: This is crucial for shaping your cookie cups. While metal pans work, I cannot stress enough how much easier a **silicone pan** makes the entire process. The flexibility of silicone allows for effortless removal of the delicate cookie cups without any sticking or breakage, eliminating the need for liners or excessive greasing. It truly streamlines cleanup and ensures beautifully intact treats every time!
Wholesome Ingredients Spotlight for Your Cookie Cups
Each ingredient in this recipe plays a vital role in creating the perfect flavor, texture, and dietary benefits:
- Almond flour: This is the star of our cookie base, providing an incredibly tender, melt-in-your-mouth shortbread texture. It’s naturally gluten-free and adds a delicate nutty flavor. For those with nut allergies or who prefer an alternative, both cashew flour and tiger nut flour can be used as a 1:1 substitute. I also offer a specific oat flour base variation in the recipe card below, ensuring a delicious option for everyone!
- Maple syrup: Our preferred natural liquid sweetener, maple syrup lends a subtle caramel note without any refined sugars. Its sticky consistency is essential for binding the dough and creating the rich caramel filling. Feel free to use other sticky sweeteners like honey (if not strictly vegan) or agave nectar as a direct substitute.
- Cashew butter: This is my top choice for the creamy caramel filling due to its wonderfully neutral flavor profile, which allows the “caramel” notes to shine without overpowering nuttiness. High-quality almond butter also works beautifully and provides a slightly different, equally delicious taste. For a completely nut-free option, sunflower seed butter (like SunButter) is an excellent alternative, delivering a rich and satisfying texture. To add an extra festive twist, consider using GroundUp’s Snickerdoodle nut butter (don’t forget code: DANI10 for a discount!).
- Coconut oil: This healthy fat is crucial for both the cookie base and the filling, contributing to their structure and smooth texture. When melted, it helps bind the ingredients and creates a satisfying mouthfeel. Avocado oil can be used as an alternative if you prefer.
- Vanilla extract & sea salt: These pantry staples are essential for enhancing the overall flavor profile. Vanilla adds warmth and depth, while a pinch of sea salt perfectly balances the sweetness and elevates all the other flavors, making the caramel truly pop.
- White Chocolate chips: The crowning glory of our cookie cups! For a truly vegan option, I highly recommend white chocolate chips from the brand Pascha. If you’re focusing on refined sugar-free alternatives, Lily’s white chocolate chips are an excellent and delicious choice that melt beautifully. These provide that classic sweet, creamy topping that contrasts wonderfully with the base and filling.
- Sprinkles: What’s a festive treat without sprinkles? I always opt for high-quality, all-natural sprinkles made with plant-based dyes. This allows you to add vibrant color and celebratory flair without any artificial ingredients, and they can be customized for any holiday!

Step-by-Step Guide to Creating Your Delicious Sugar Cookie Cups
Follow these simple instructions to bake a batch of these irresistible healthier sugar cookie cups:
- **Prepare the Cookie Base:** Begin by thoroughly mixing all the ingredients for the cookie base in a bowl until a cohesive dough forms. It might seem a little crumbly at first, but keep mixing, and it will come together. Evenly divide this dough among the wells of your mini muffin tin or silicone mold, pressing it down to form the base of each cup. Bake them until lightly golden and set, then let them cool completely in the pan to maintain their shape.
- **Craft the Creamy Filling:** While your cookie bases are baking and cooling, combine all the filling ingredients in a separate bowl. Mix until you achieve a smooth, luscious, and caramel-like consistency. This filling is incredibly flavorful and adds a rich, gooey center to your cups.
- **Assemble the Layers:** Once the cookie bases are entirely cooled, carefully spoon the prepared cashew butter caramel filling into each cup. Make sure to leave a small amount of space at the top – roughly one-third of the cup – for the final chocolate layer. This layering creates a beautiful visual and textural contrast. Briefly pop the tray into the freezer for about 10-15 minutes to allow the filling to firm up slightly. This makes the next step much easier!
- **Add the Chocolate Topping & Sprinkles:** Melt your chosen white chocolate chips until completely smooth. This can be done using a double-boiler method or carefully in the microwave in 30-second intervals, stirring well between each to prevent burning. If the chocolate is too thick, stir in the coconut oil to thin it slightly. Pour or spoon the melted chocolate over the firmed-up filling, gently spreading it to cover the caramel layer. Immediately after adding the chocolate, generously sprinkle your festive decorations on top before the chocolate sets.
- **Chill to Perfection:** Transfer the entire tray of assembled cookie cups back into the freezer. Allow them to chill for at least 2-3 hours, or until they are completely firm. This setting time is crucial for the cups to hold their shape and for the layers to properly meld together. Once firm, they will pop out of a silicone mold with incredible ease, or from a lined metal pan.
Creative Recipe Variations to Elevate Your Cookie Cups
These Festive Sugar Cookie Cups are already a delight, but don’t be afraid to experiment with these exciting variations to customize them even further:
- **Chocolate Peanut Delight:** Instead of white chocolate, use melted milk or dark chocolate for the topping. Before adding the chocolate, stir a handful of finely chopped roasted peanuts into the cashew butter caramel filling. This creates a delightful nutty crunch and a classic chocolate-peanut butter flavor combination.
- **Decadent Caramel Pecan:** For a rich, textural twist, stir chopped pecans directly into the caramel center before spooning it into the cookie cups. This adds a wonderful crunch and a warm, earthy flavor that pairs perfectly with the sweet caramel. It’s like a mini pecan pie, but in a cookie cup!
- **Chewy Fruity Surprise:** Elevate the filling with natural sweetness and chewiness! Finely chop some dried raisins or dates and stir them into the caramel filling. These fruit pieces will soften slightly and provide a delightful, chewy surprise when bitten into, beautifully complemented by the white chocolate topping.
- **Spiced Sugar Cookie Base:** Give your cookie base a warm, aromatic kick! Add about half a teaspoon of ground cinnamon to the almond flour base mixture. If you want to further emphasize the spice, you can even consider omitting the almond extract in favor of a bit more vanilla or a touch of nutmeg for a true “snickerdoodle” vibe.
Storing Your Delicious Leftovers
To keep your Festive Sugar Cookie Cups fresh and firm, store any leftovers in an air-tight container in the freezer. They will last for several weeks, making them a fantastic make-ahead treat! When you’re ready to enjoy one, simply take it out of the freezer and let it sit on the counter for about 5 to 10 minutes. This brief resting period allows the cookie base to soften slightly and the caramel filling to become wonderfully gooey, enhancing the overall texture and flavor experience.
More Healthy Holiday Recipes You’ll Love!
- Healthy Twix Cups
- Healthy Homemade Cookie Butter
- Snickerdoodle Marshmallows (Paleo)
- Pumpkin Spice Infused Maple Syrup
- Vegan Pumpkin Twix Bars
- Snickerdoodle Creme Pies (Paleo)
- Paleo Millionaire’s Shortbread Bars
- Easy, Healthy Banana Pudding (Vegan & Paleo)
If you try this recipe, it’d mean the world to me if you left a star rating and review below and tag me in your creations on Instagram @danishealthyeats!

Festive Sugar Cookie Cups
Pin Recipe
10 minutes
10 minutes
20 minutes
Dessert, Snack
American
18
Ingredients
Cookie base
- 1 cup almond flour *tiger nut flour works for nut-free or there is an oat flour option below.
- 3 tbsp maple syrup
- 2 1/2 tbsp coconut oil, melted
- 1/2 tsp almond extract
- 1/2 tsp vanilla extract
- pinch of sea salt
Filling
- 1/2 cup cashew or almond butter *use sunflower butter or granola butter for nut-free
- 1/4 cup maple syrup
- 2 tbsp coconut oil, melted
- 3/4 tsp vanilla extract & good pinch of sea salt
Chocolate topping
- 1 1/4 cups white chocolate chips or chopped white chocolate bars
- 2 tsp coconut oil (helps thin the chocolate)
Oat flour base (almond free)
- 1 cup rolled oats (or about 3/4 cup oat flour)
- 1/4 cup coconut flour
- 1/4 cup coconut oil, melted
- 1/4 cup maple syrup
- 1/2 tsp almond extract
- 1 tsp vanilla extract & pinch of sea salt
Instructions
-
Preheat the oven to 325F. If using a metal mini muffin pan, I recommend using mini muffin liners or else you’ll have trouble popping them out of the mold. I like to use a silicone pan – you don’t even have to spray it with oil or anything!
-
Mix together the base ingredients until the dough forms. It may seem like it won’t come together at first, but it will! Divide the dough amongst the pan, filling each crevice about 1/3 of the way full.
-
Bake for 8-10 minutes until slightly golden around the edges. Remove from the oven and cool completely. While the bases are baking, combine all of the caramel filling ingredients in the bowl, mixing until smooth. Once the bases have cooled, add some of the caramel filling to each base, leaving a little less than 1/3 for the chocolate. Pop the tray in the freezer for 10 or so minutes to firm up.
-
Melt the chocolate using the double-boiler method or in the microwave by adding the chocolate & oil together in a bowl and heating in 30 second increments, stirring well between each, until smooth. Fill the remaining 1/3 of each cup with the chocolate, covering the fillings.
-
Place in the freezer for at least 2-3 hours to firm up, before popping them out of the pan.
-
Store cups in an air-tight container in the freezer! You can let them sit out for 5 minutes or so before enjoying if you want a gooier/softer cup!
Oat flour version
-
Blend the oats into flour consistency, in a high powered blender. Then mix together with the remaining ingredients to form the dough. Follow the rest of the instructions above!
Video
