Healthy Vegan Klondike Bars: Dairy-Free, Paleo-Friendly, and Irresistibly Delicious
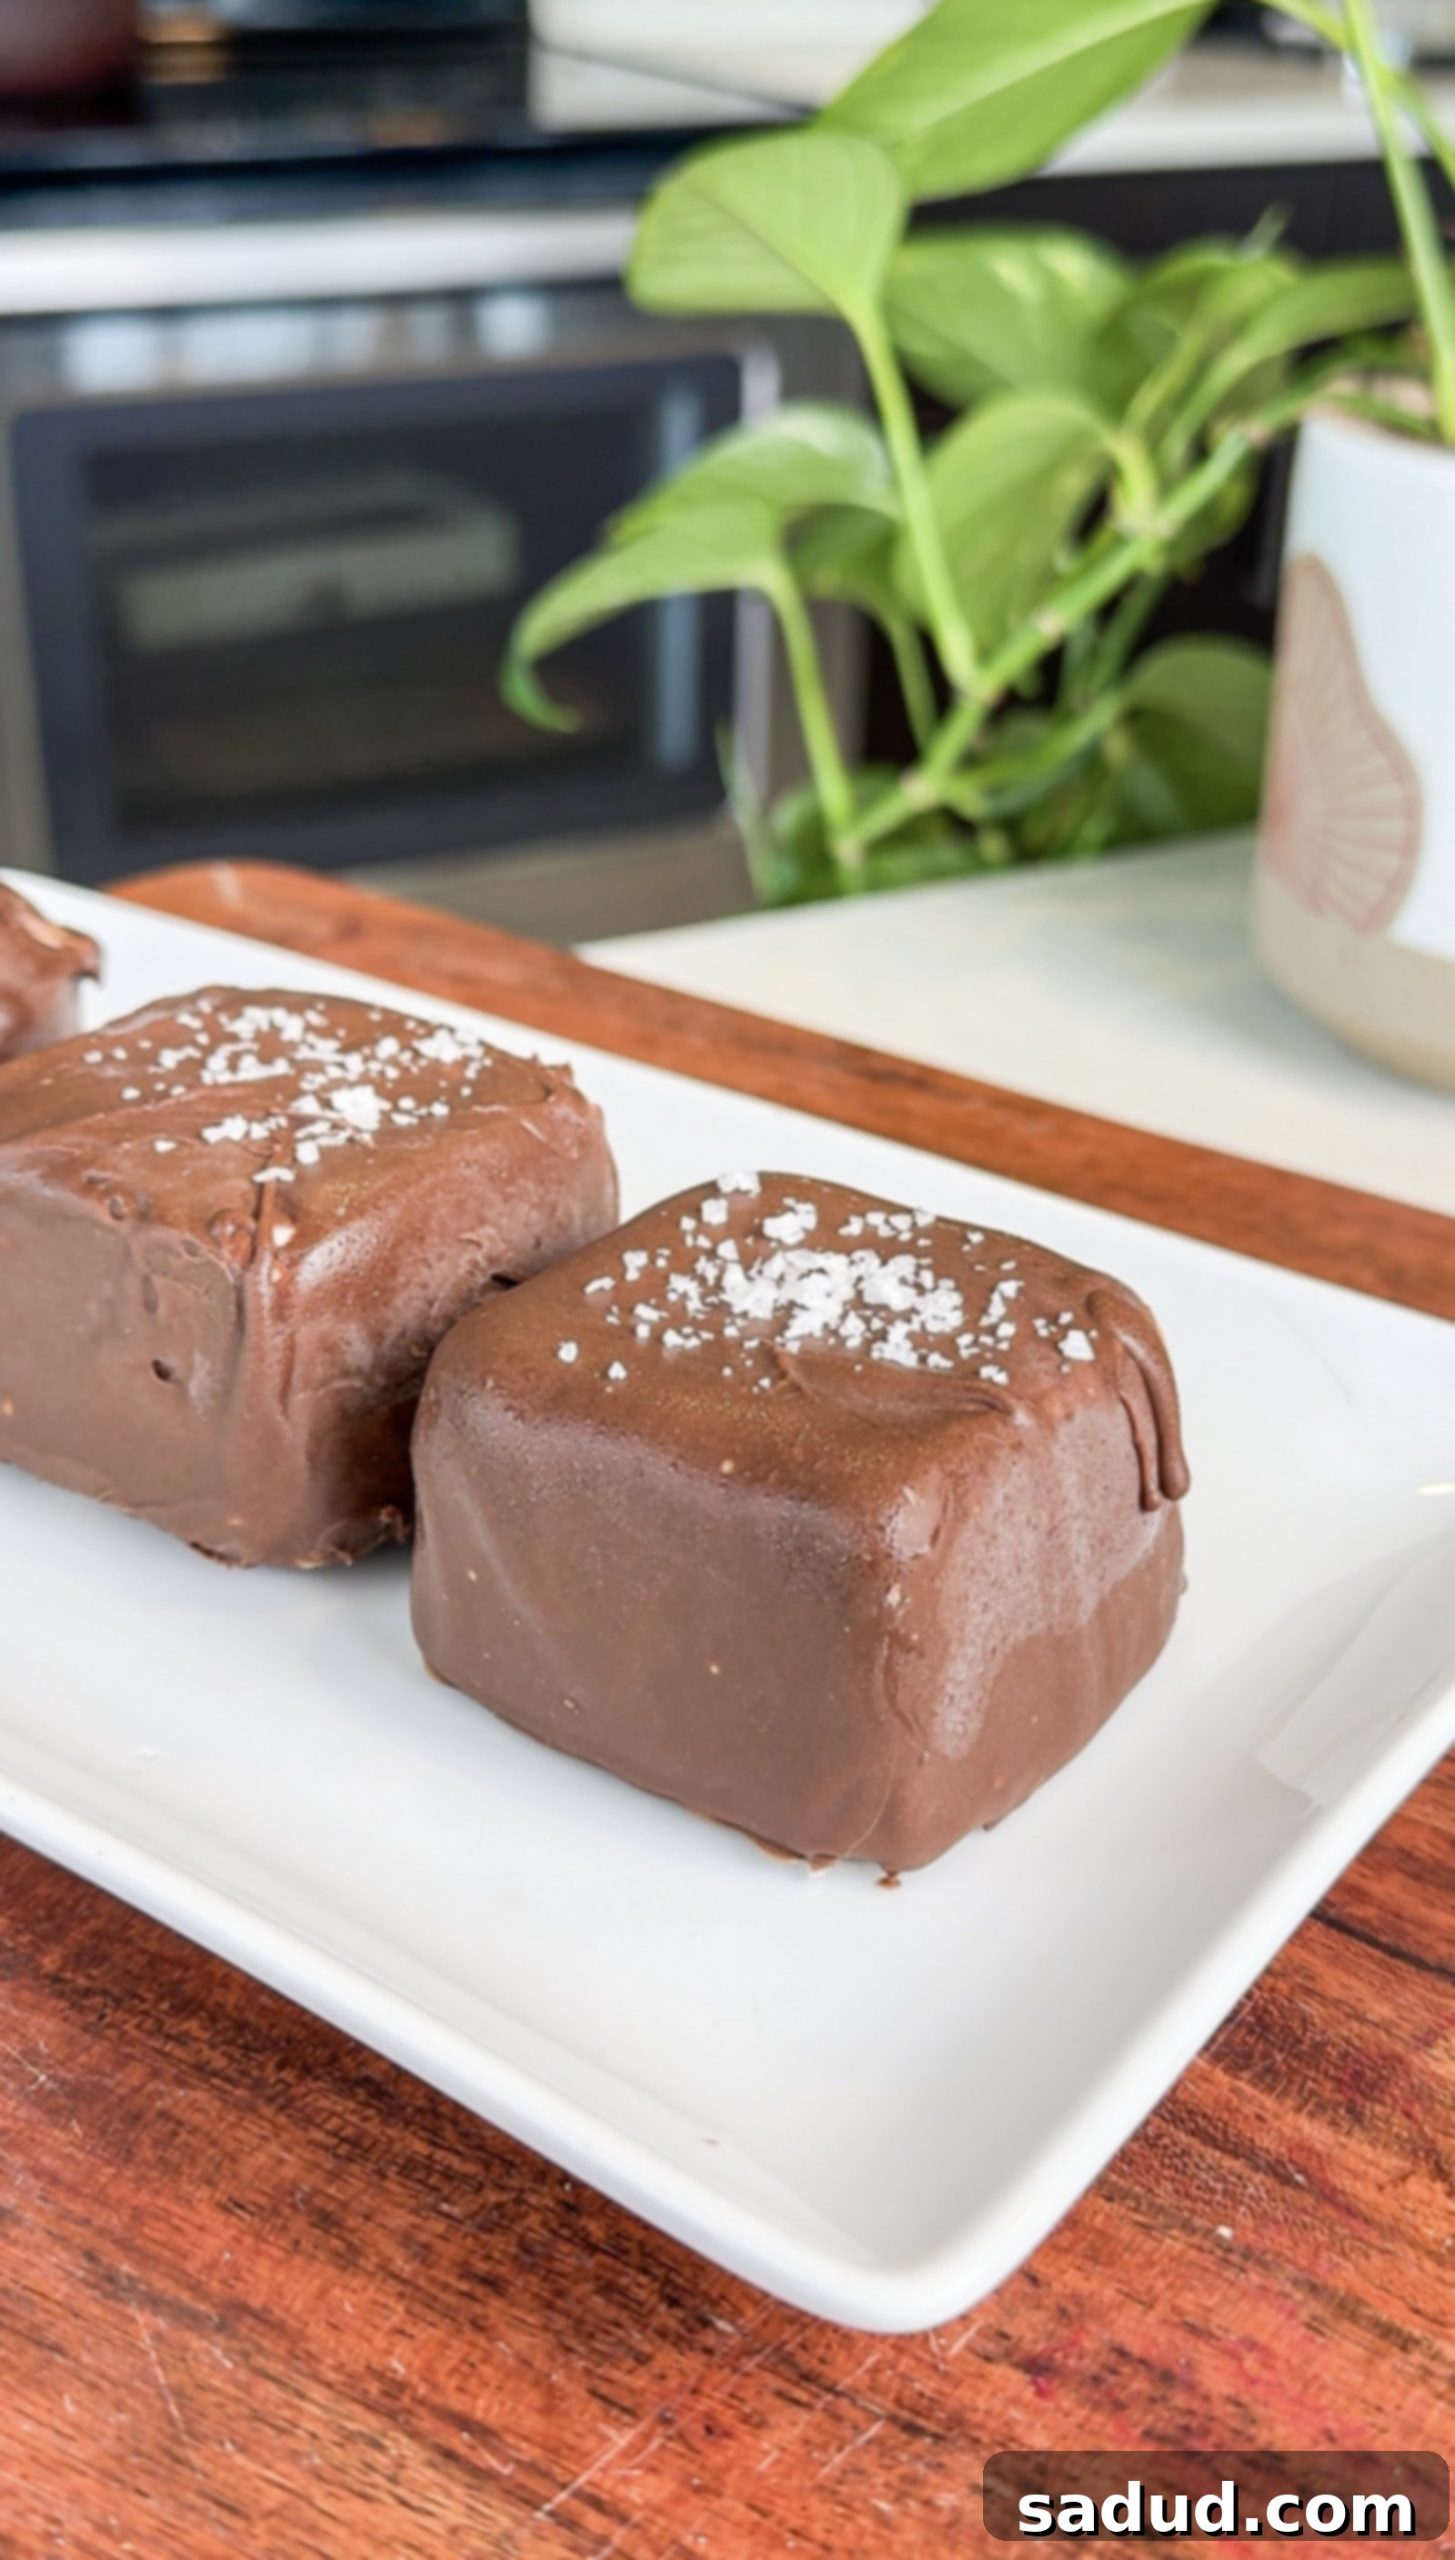
Indulge your sweet tooth without the guilt with these incredible **Healthy Vegan Klondike Bars**! Imagine dreamy, creamy vanilla ice cream enveloped in a rich, crisp chocolate shell – a treat so good, you won’t believe it’s made with wholesome, natural ingredients. This recipe proves that dessert can be both delicious and nutritious, offering a delightful twist on a classic favorite that’s perfect for a hot summer day or any time you crave a frozen treat.
Forget the refined sugars, dairy, and artificial ingredients often found in store-bought ice cream bars. Our homemade version is not only **vegan** and **paleo**, but also **free of refined sugars**, making it suitable for a variety of dietary needs. Best of all, you can whip up these healthier Klondike bars in under 10 minutes of active prep time, then simply let your freezer do the rest. Get ready to satisfy your cravings for a rich, satisfying, and refreshingly cool dessert that genuinely tastes even better than the original!
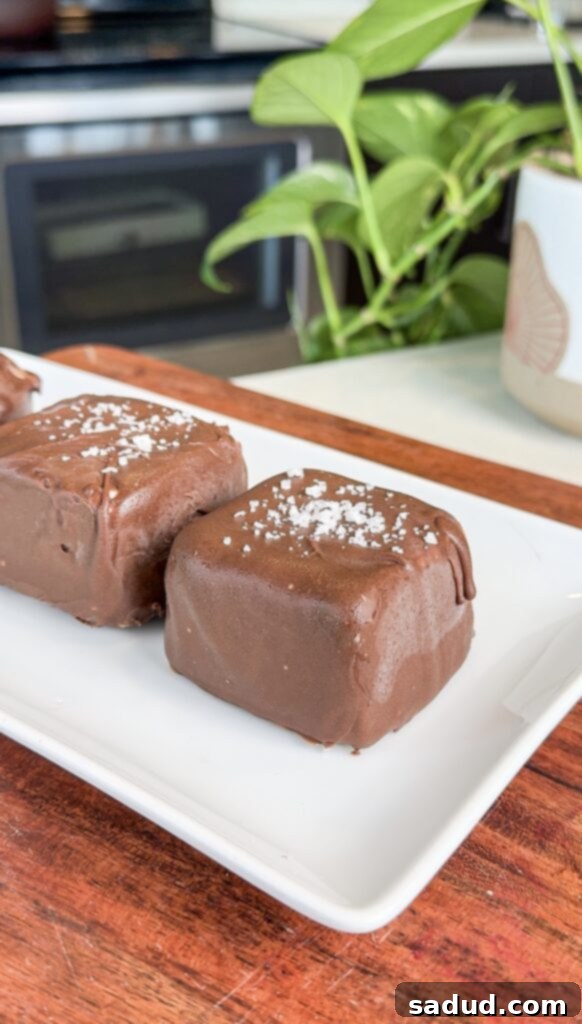
Why These Healthy Klondike Bars Will Be Your New Favorite
These homemade healthy ice cream bars are more than just a dessert; they’re a guilt-free indulgence that offers numerous benefits and fits into various healthy lifestyles. Here’s why this recipe will quickly become a staple in your freezer:
- 100% Vegan & Dairy-Free: Made entirely from plant-based ingredients, these bars are perfect for those avoiding dairy due to allergies, intolerances, or ethical choices. You’ll achieve an unbelievably creamy texture without a drop of cow’s milk, making them accessible to everyone.
- Boosted with Plant-Based Protein: Unlike most traditional desserts, this recipe includes an optional protein powder, turning a simple treat into a more satisfying, protein-rich snack. This helps keep you feeling fuller for longer and supports muscle recovery, making it a smart choice after a workout or as an afternoon pick-me-up.
- Grain-Free & Paleo-Friendly: Adhering to a paleo diet or looking to reduce grains? These bars are naturally grain-free, focusing on whole, unprocessed ingredients. The use of coconut milk and cashews creates a decadent base that perfectly aligns with paleo principles without compromising on flavor or texture.
- Naturally Sweetened with Maple Syrup: Say goodbye to refined sugars! We use natural sweeteners like maple syrup (or honey for non-vegans) to provide just the right amount of sweetness, ensuring a delicious taste without the sugar crash. This makes it a healthier alternative for managing blood sugar levels.
- No Bake & Freezer-Friendly: No oven required! This recipe is incredibly easy to make, relying solely on your freezer to do the heavy lifting. Plus, these bars are perfectly freezer-friendly, meaning you can make a big batch and store them for up to two weeks, always having a healthy treat ready to go.
The Secret to Perfectly Creamy, Healthy Ice Cream Bars: Key Ingredients
The magic behind these healthy Klondike bars lies in a carefully selected list of ingredients that work together to create an incredible texture and flavor. Each component plays a vital role in making these bars taste genuinely indulgent while keeping them wholesome and nourishing.
For the Dreamy Ice Cream Center:
- Full-Fat Canned Coconut Milk: This is the superstar ingredient for achieving that unbelievably rich and creamy ice cream texture without any dairy. The high fat content in full-fat coconut milk (specifically the cream from the top of the can) is crucial for a smooth, luscious base. Do not use light coconut milk or the carton variety, as your ice cream will be icy.
- Raw Cashews: When soaked and blended, raw cashews become incredibly soft and contribute significantly to the thick, velvety consistency of the ice cream. They are essential for body and creaminess. If you have a cashew allergy, you could experiment with a thick coconut yogurt, full-fat Greek yogurt (if not vegan/paleo), or even a high-quality granola butter, though results may vary.
- Protein Powder (optional): While not strictly necessary for the structure, a scoop or two of vanilla protein powder, like Macro Mike vanilla buttercream, enhances the flavor profile and adds a nutritional boost. It also contributes to a slightly thicker, more satisfying consistency. If using, opt for a vanilla flavor that complements ice cream. Use my code “amb-dani” for a discount!
- Maple Syrup or Honey: As our natural sweetener, maple syrup (for vegan) or honey (for paleo, non-vegan) provides a deep, complex sweetness that pairs beautifully with vanilla and chocolate. Adjust the amount to your preferred sweetness level.
- Peanut Butter (or other nut/seed butter): This adds a wonderful depth of flavor and another layer of creaminess. You can blend it directly into the ice cream base or, for a surprise center, dollop it into the molds before freezing. Any smooth nut butter like almond butter or even sunflower seed butter for a nut-free option works great.
- Pantry Staples: A touch of **vanilla extract** is crucial for that classic vanilla ice cream taste, while a **pinch of sea salt** enhances all the flavors and balances the sweetness, making the other ingredients pop.
For the Irresistible Chocolate Coating:
- Chocolate Chips: The quality of your chocolate chips will directly impact the taste of your coating. Choose your favorite dark chocolate, milk chocolate (if not vegan), or a sugar-free/dairy-free variety to fit your dietary needs.
- Coconut Oil: This is the secret ingredient for creating that perfect “magic shell” effect. When melted with the chocolate, coconut oil thins it out, allowing for a smooth, even coating. Upon contact with the frozen ice cream, the chocolate rapidly hardens, creating that satisfying crack when you bite into it.
How to Make Homemade Healthy Klondike Bars: A Step-by-Step Guide
Crafting these delectable, healthy Klondike bars is surprisingly simple, requiring minimal effort for maximum reward. Follow these steps to create your own batch of frozen bliss:
1: Craft the Dreamy Vanilla Ice Cream Filling
- In a high-speed blender or food processor, combine the **full-fat coconut milk** (make sure to scrape out the thick cream from the top of the can), **raw cashews** (no need to soak if you have a powerful blender, but soaking for 30 minutes in hot water can help with extra smoothness), **maple syrup** (or honey), **vanilla extract**, optional **protein powder**, and a **good pinch of sea salt**.
- Blend until the mixture is incredibly smooth and creamy. There should be no grainy bits of cashews left. Taste and adjust sweetness if desired.
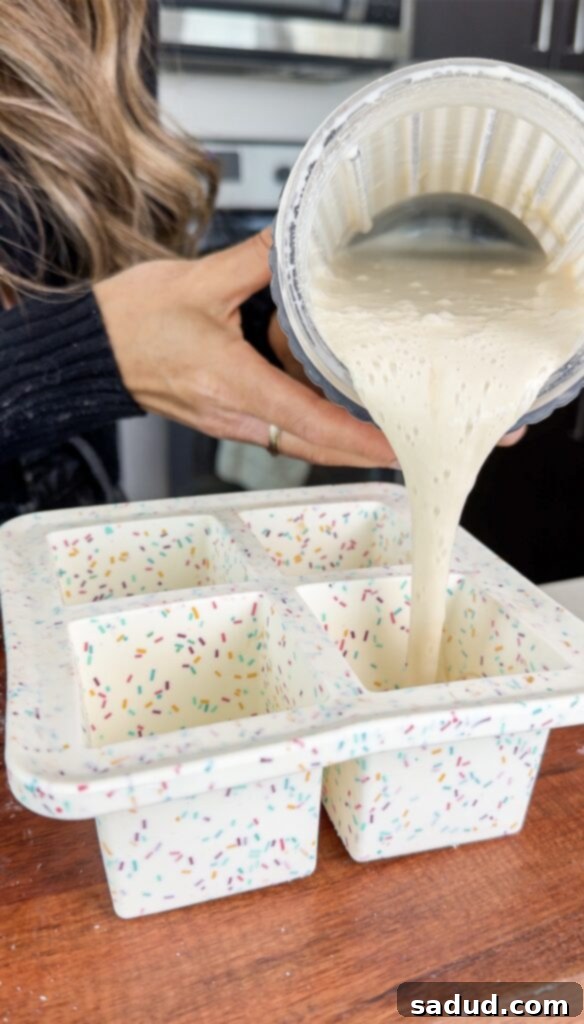
- Carefully divide this luscious mixture among a silicone ice cube mold (like this one for perfect square bars!) or even a silicone cupcake mold for round “Klondike bites.” If you’re adding peanut butter as a filling, dollop a small amount into the center of each mold before topping with the ice cream mixture, or swirl it in gently.
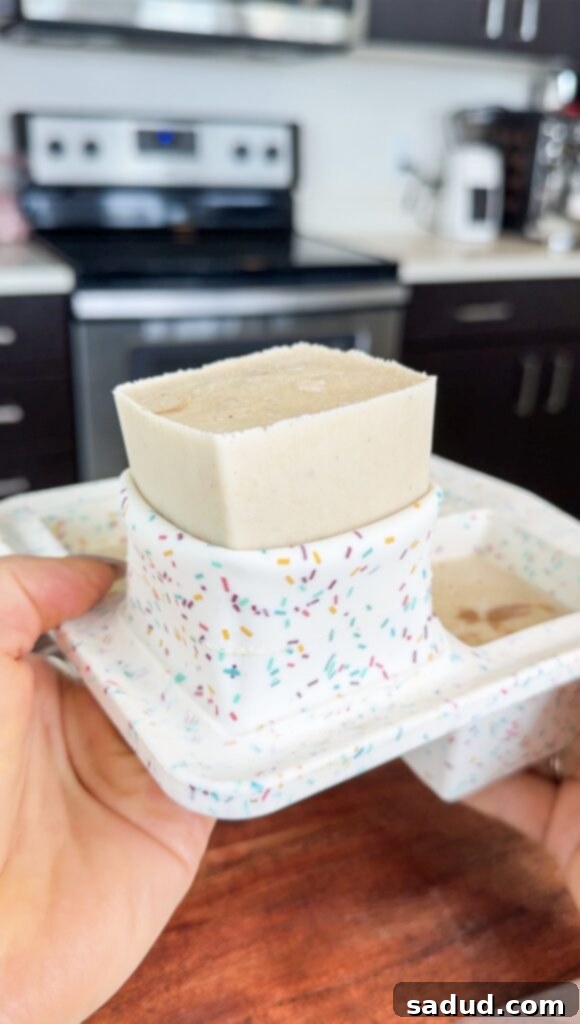
- Place the filled molds in the freezer for 3-4 hours, or until the ice cream centers are completely solid and firm. This is crucial for easy dipping.
2: Prepare the Irresistible Chocolate Shell
- Once your ice cream centers are thoroughly frozen, it’s time to prepare the chocolate coating. In a microwave-safe bowl or using a double boiler, melt the **chocolate chips** and **coconut oil** together.
- If microwaving, heat in short 30-second intervals, stirring well after each interval, until the mixture is completely smooth and liquid. Be careful not to overheat the chocolate, as it can seize. The coconut oil helps achieve a perfectly thin consistency for easy dipping.
3: Dip, Freeze, and Enjoy!
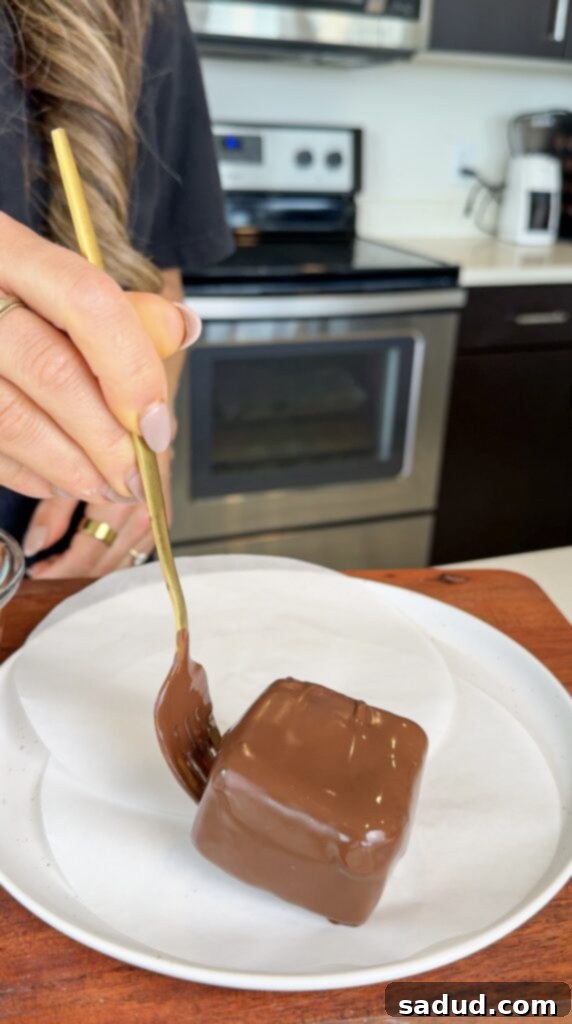
- Working quickly, one bar at a time, carefully remove a frozen ice cream center from its mold. Dip each frozen bar into the melted chocolate coating, using a fork to completely submerge and coat it. Let any excess chocolate drip off.
- Immediately place the coated bar onto a parchment-lined tray or baking sheet. Return the tray to the freezer without delay to allow the chocolate shell to harden rapidly. Repeat with the remaining bars.
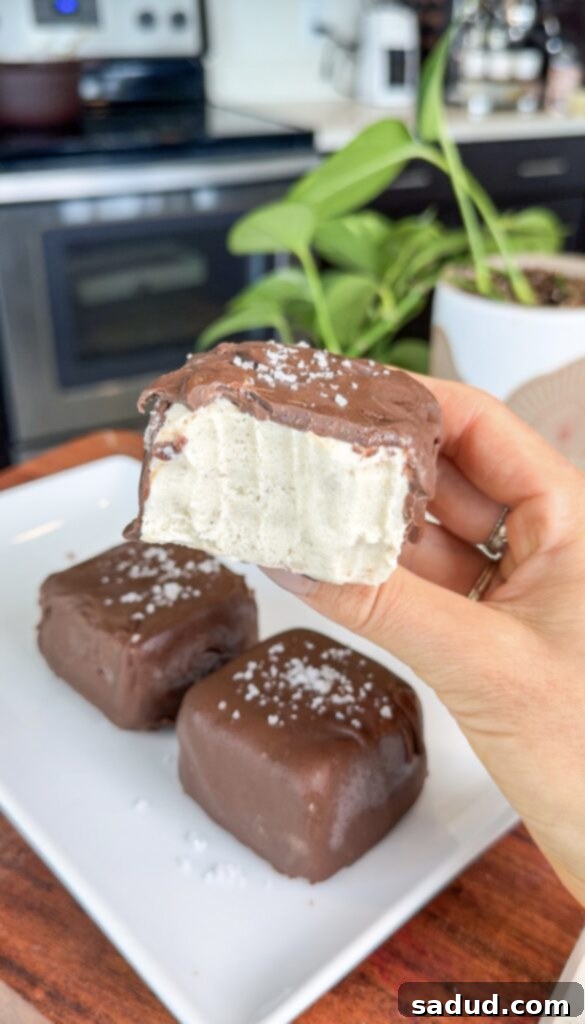
- Once all bars are coated and the chocolate has set (this should happen quickly due to the cold bars), store them in an airtight container in the freezer. Before serving, let them sit at room temperature for at least 10 minutes. This short thaw time ensures the ice cream softens slightly to a wonderfully creamy, scoopable consistency, making them absolutely perfect!
Pro Tips for the Best Healthy Klondike Bars
Achieving bakery-worthy results with your homemade healthy ice cream bars is easier than you think with a few expert tricks up your sleeve:
- Choose Full-Fat Coconut Milk Wisely: Always use full-fat canned coconut milk, and ideally, refrigerate the can overnight. This allows the thick cream to separate and rise to the top, which you’ll want to scoop out for the creamiest ice cream base. The liquid coconut water at the bottom can be saved for smoothies!
- Ensure Cashews are Smooth: If your blender isn’t super powerful, give your raw cashews a quick soak in hot water for about 30 minutes, then drain thoroughly. This will help them blend into an extra smooth, undetectable consistency, avoiding any grittiness in your ice cream.
- Don’t Skimp on Freezing Time: The ice cream centers must be completely solid before dipping. If they are even slightly soft, they will melt into the chocolate, making dipping messy and leading to a thinner coating. Plan for at least 3-4 hours, or even overnight, for best results.
- Work Quickly While Dipping: Have your melted chocolate ready and your frozen bars easily accessible. Dip one bar at a time and immediately return it to the freezer. This rapid temperature change is what creates that classic, satisfyingly crisp chocolate shell.
- The 10-Minute Thaw is Key: This is perhaps the most important tip for optimal enjoyment! Letting the bars sit at room temperature for about 10 minutes before eating allows the ice cream inside to soften just enough to become wonderfully creamy, mimicking the texture of traditional ice cream. Don’t skip this step!
Storage and Make-Ahead Instructions
These healthy Klondike bars are perfect for meal prepping your desserts! Once the chocolate coating has fully hardened, transfer the bars to an airtight freezer-safe container. They will keep beautifully in the freezer for up to 2 weeks, meaning you can always have a delicious, healthy treat on hand. Remember to allow them to thaw for about 10 minutes at room temperature before enjoying for the most satisfying creamy texture.
Frequently Asked Questions (FAQs)
Here are some common questions about making these healthy vegan Klondike bars:
- Can I make these nut-free? Yes, you can! For the ice cream center, substitute the cashews with a thick, full-fat coconut yogurt or even silken tofu (though the taste and texture might be slightly different). For the peanut butter, use sunflower seed butter or a similar nut-free spread.
- What if I don’t have protein powder? No problem! The protein powder is optional and mainly adds extra flavor and a slight boost in nutrition. You can simply omit it, and your bars will still be delicious and creamy. You might want to add an extra splash of vanilla or a tiny bit more sweetener if you prefer.
- Can I use a different sweetener? While maple syrup and honey work best for flavor and texture, you could experiment with other liquid sweeteners like agave nectar. Granulated sweeteners are not recommended as they won’t dissolve properly and could make the ice cream gritty.
- Why did my chocolate coating turn out too thick or thin? The consistency of your chocolate coating is key. If it’s too thick, add a tiny bit more coconut oil (1/2 teaspoon at a time) and stir until smooth. If it’s too thin, you may have added too much coconut oil or your chocolate was too hot; try chilling it briefly in the fridge to thicken slightly, or add a few more chocolate chips and melt them in.
- How many bars does this recipe make? The yield will depend on the size of your silicone molds. Typically, this recipe makes around 8-12 standard ice cream bar sizes, or more if using smaller bite-sized molds.
More Healthy Frozen Desserts to Explore
If you loved these healthy Klondike bars, you’re in for a treat! Explore some of our other favorite healthy frozen desserts:
- Homemade Dilly Bars
- Cookie Dough Ice Cream Bars
- Strawberry Frozen S’mores
- Strawberry Shortcake Protein Ice Cream (Ninja Creami)
- 2 Ingredient Orange Sorbet
- Healthy Snickers Bites
- 2 Ingredient Rolo’s
If you try this recipe and love it, it’d mean the world to me if you left a star rating & review below! Tag me in your creations on Instagram @danishealthyeats!
Homemade Healthy Klondike Bars
Pin Recipe
Ingredients
Ice Cream Center
- 1 can full-fat coconut milk
- 1/2 cup raw cashews
- 2 scoops vanilla protein powder (optional, but can add extra flavor & sweetness!)
- 3-4 tbsp maple syrup or honey
- 1 1/2 tsp vanilla extract
- good pinch sea salt
- 3-4 tbsp peanut butter *you can blend it in with the other ingredients or dollop it into the center of each one for a peanut butter filling!
Chocolate Coating
- 1 1/3 cups chocolate chips
- 2 tsp coconut oil
Instructions
-
In a blender or food processor, combine the full-fat coconut milk, maple syrup, vanilla extract, raw cashews, optional protein powder, and sea salt. Blend until super smooth and creamy. Taste the mixture and adjust the sweetness as needed.
-
Divide the mixture amongst a silicone mold (like this one!) or even a silicone cupcake tin. If using peanut butter, you can dollop some into the center for a delicious “filling” or swirl it in. Freeze for 3-4 hours or until completely solid.
-
Once the ice cream centers are completely frozen, prepare the chocolate coating. Melt the chocolate chips and coconut oil together using a double boiler or microwave in 30-second intervals. Stir until smooth and liquid.
-
Working one at a time, dip each frozen bar into the chocolate coating, using a fork to ensure it’s completely covered. Place bars on a parchment-lined tray and return to the freezer immediately to harden the chocolate shell.
-
Store these bars in an airtight container in the freezer for up to 2 weeks. For the perfect creamy texture, let them thaw for 10 minutes before enjoying!
Video
