Homemade Gluten-Free Brown Sugar Cinnamon Pop Tarts: A Healthier Childhood Classic
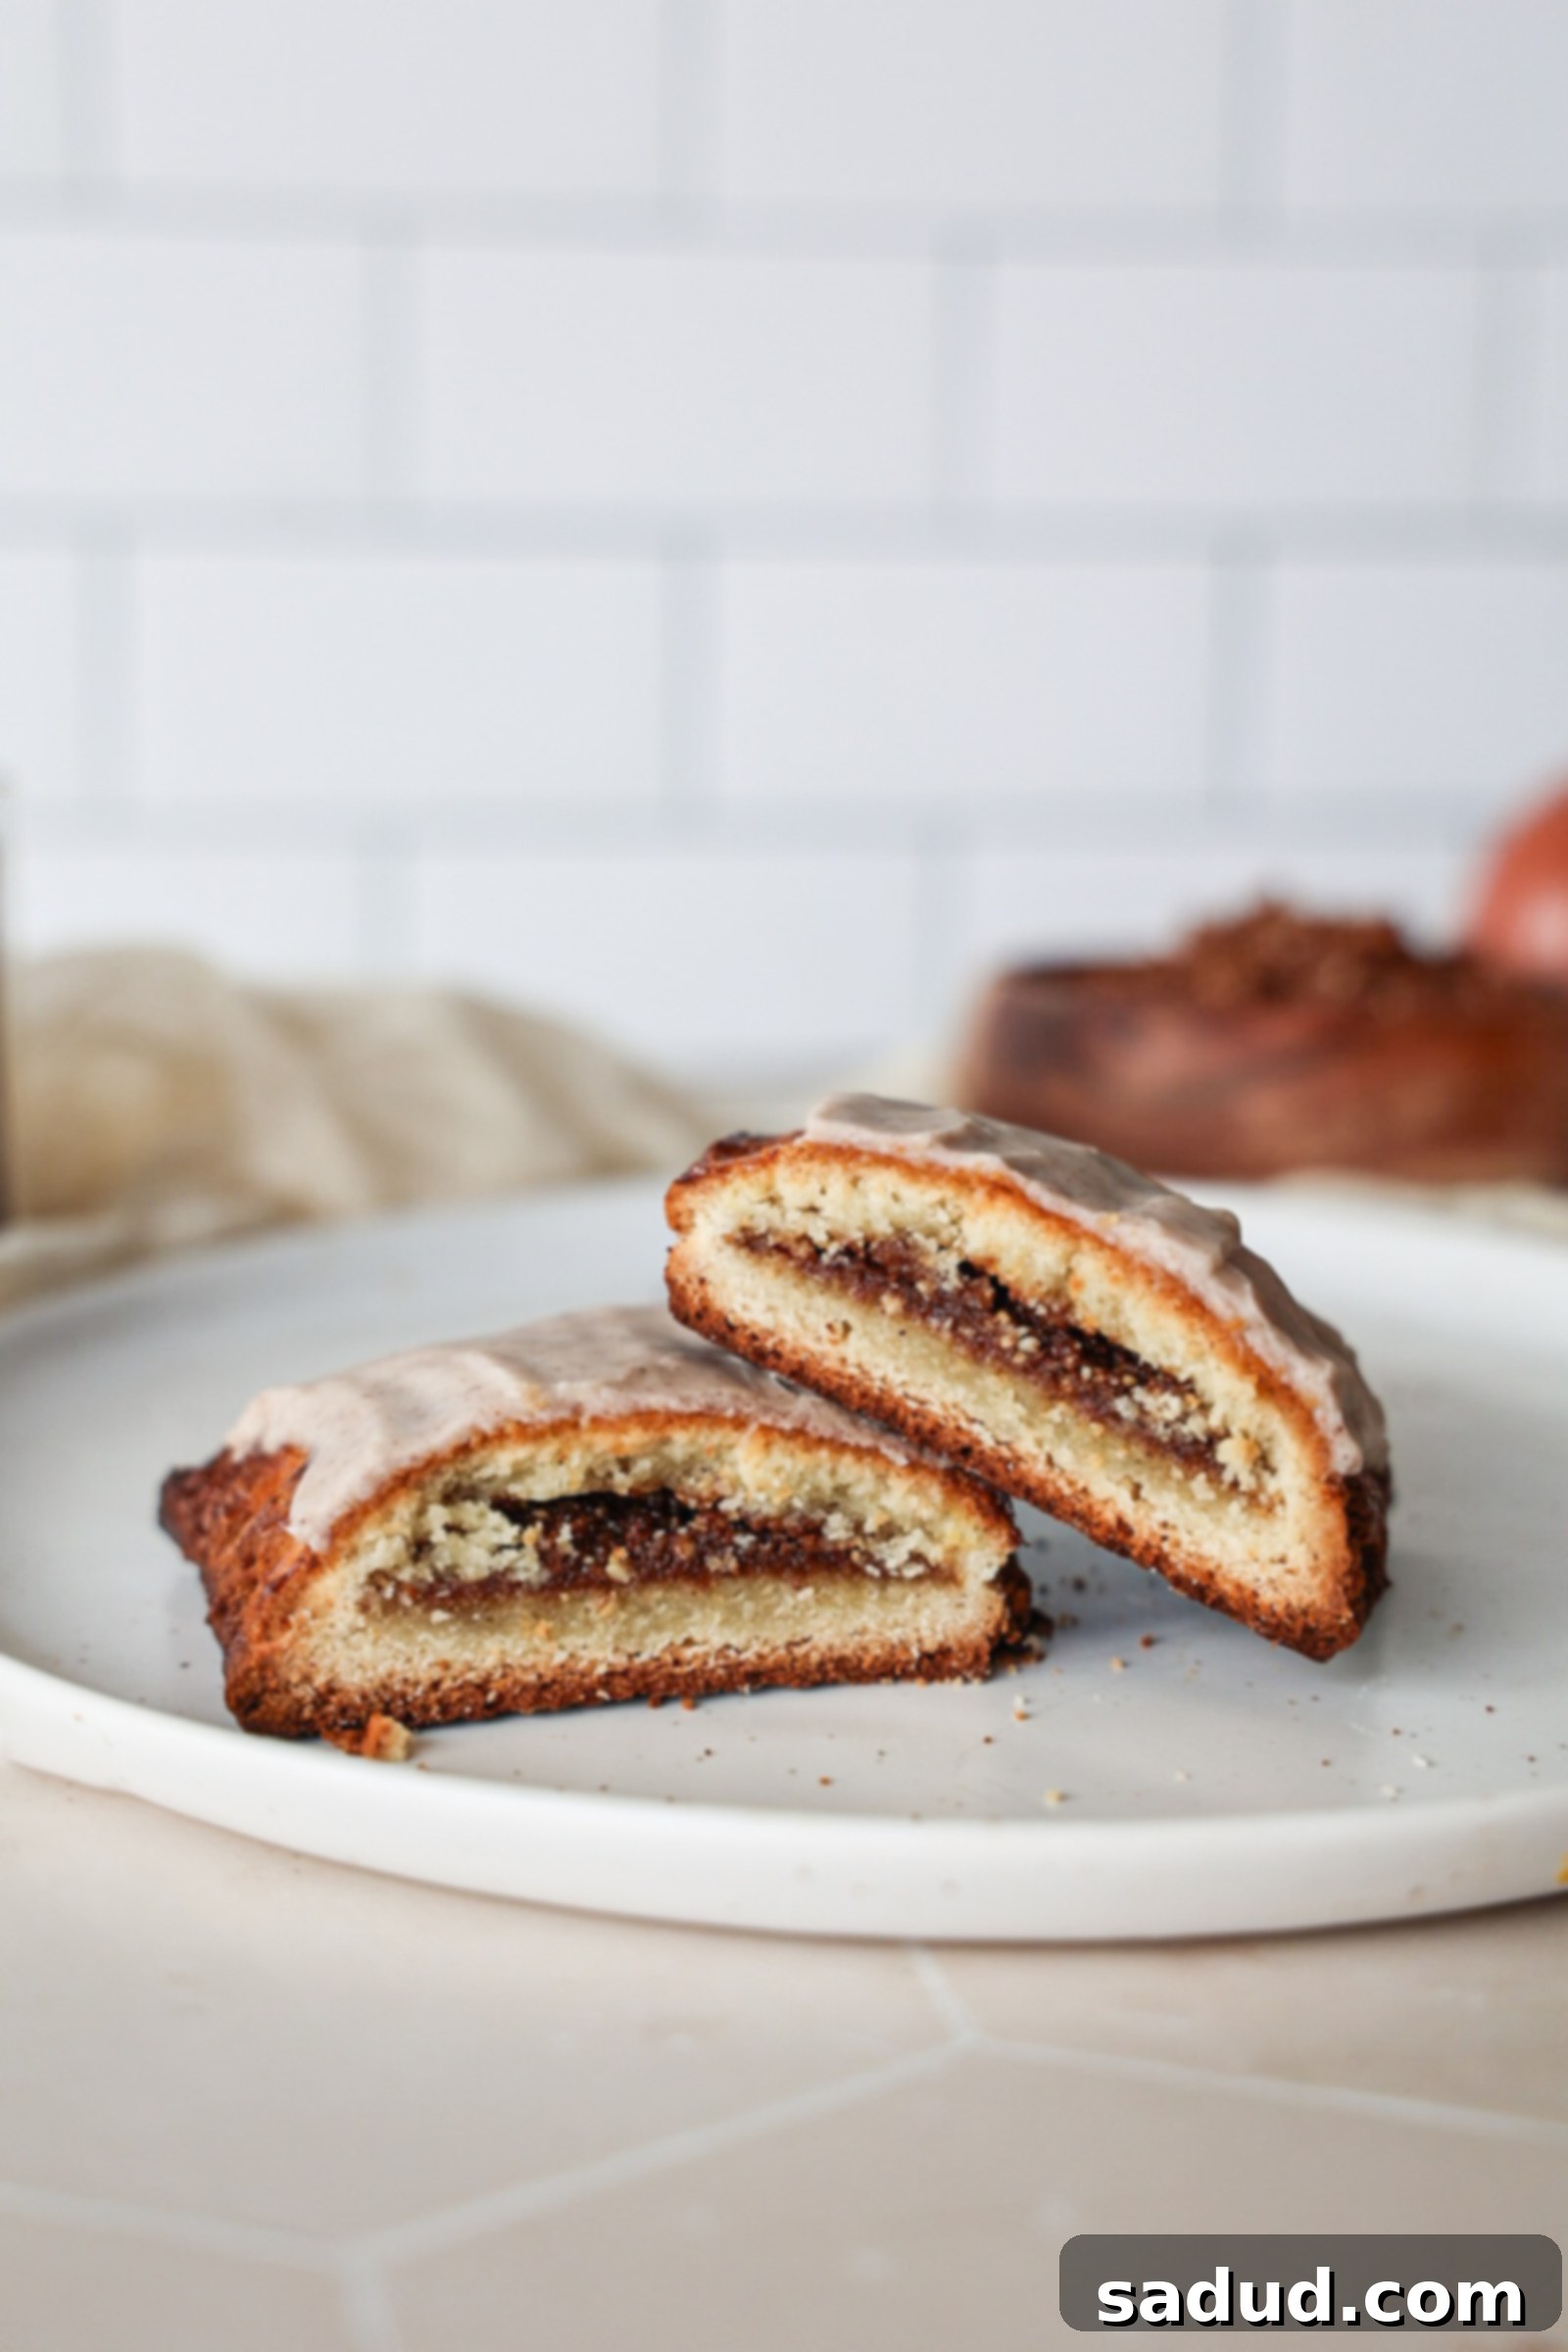
Craving the nostalgic comfort of a warm Pop Tart but seeking a healthier, dietary-friendly option? Look no further! These healthier homemade gluten-free brown sugar cinnamon pop tarts are designed to transport you straight back to your childhood, but with a wholesome twist you can feel good about. Imagine a perfectly flaky, golden-baked, gluten-free and paleo-friendly crust, generously stuffed with a warm, comforting cinnamon sugar filling, and finished with a dreamy cinnamon glaze. These delightful toaster pastries are not only gluten-free and paleo-friendly but also entirely dairy-free, and can even be adapted to be nut-free!
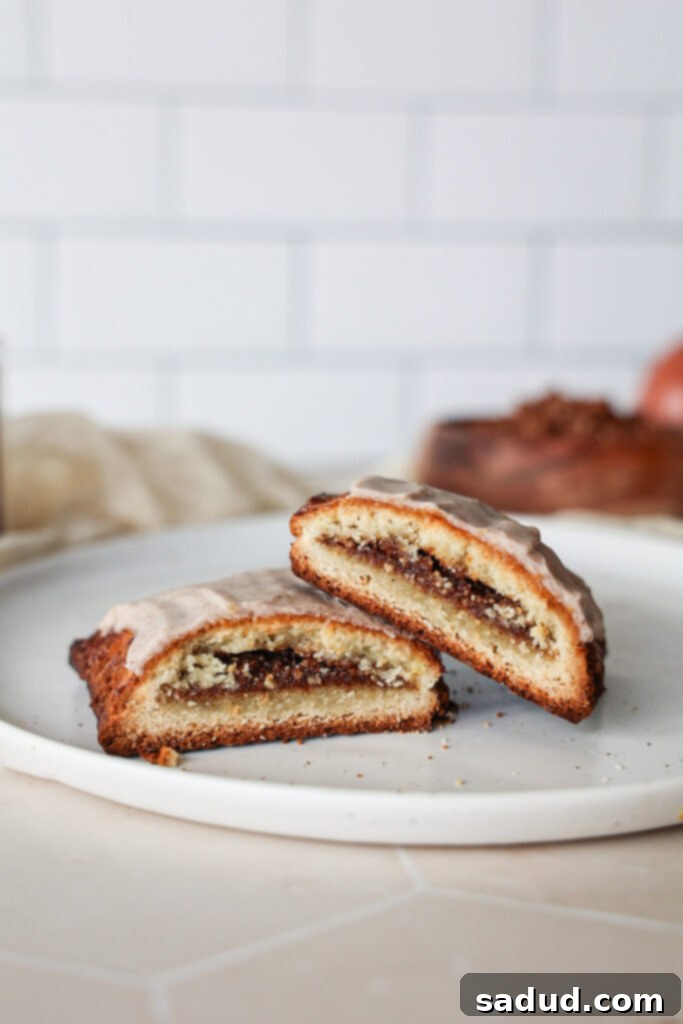
Growing up, were you firmly on team Toaster Strudel or team Pop Tarts? For many, Pop Tarts were an undeniable childhood pleasure. I fondly remember enjoying almost any flavor of those classic toaster pastries, but only if they were perfectly toasted! There was truly nothing quite like a warm Pop Tart, fresh from the toaster. And if we’re talking favorites, the brown sugar cinnamon pop tarts reigned supreme in my book – a true classic, closely followed by S’mores or strawberry.
This particular obsession probably stems from my deep love for cinnamon toast, a simple yet beloved childhood favorite my mom often made. It was just basic toast, butter, and a generous sprinkle of cinnamon sugar on top – pure comfort in every bite!
Now, as someone who follows a dairy-free and gluten-free diet, I was determined to recreate this cherished treat. My goal was to develop a more wholesome, homemade option that wasn’t just *as* good as its store-bought counterpart, but even tastier and more satisfying. This recipe perfectly captures that iconic flaky crust and the gooey, sweet cinnamon sugar goodness inside. To truly complete the experience, they’re crowned with the classic cinnamon glaze, tying all the flavors together in perfect harmony. The best part? These homemade gluten-free pop tarts are incredibly easy to make, making them accessible for bakers of all skill levels!
If you’re eager for more cinnamon sugar delights, be sure to explore my other irresistible recipes: my cinnamon roll overnight oats, decadent no-bake cinnamon roll bites, energizing cinnamon roll energy bites, or my adorable mini paleo baked cinnamon rolls!
Brown Sugar Cinnamon Pop Tarts Recipe Video
Watch this quick video to see just how simple it is to whip up these delicious homemade gluten-free brown sugar cinnamon pop tarts!
Why You’ll Adore These Healthier Homemade Pop Tarts
These healthier gluten-free brown sugar cinnamon pop tarts aren’t just a delicious treat; they’re a thoughtful upgrade to a classic. Here’s why you’ll absolutely fall in love with them:
- Wholesome & Nutrient-Rich: Unlike highly processed store-bought versions, these homemade pop tarts are crafted with adult-friendly, nourishing ingredients. The gluten-free dough features a thoughtful blend of almond flour, tapioca flour, and wholesome coconut oil, naturally sweetened with maple syrup. These simple, high-quality ingredients are key to a more satisfying and nutritious snack. Plus, they are significantly lower in refined sugar than typical store-bought options, allowing the natural flavors to truly shine.
- Dietary Needs & Incredible Adaptability: This recipe is a champion of dietary flexibility! It’s naturally gluten-free, dairy-free, grain-free, and refined sugar-free, making it suitable for a wide range of dietary preferences.
- Keto-Friendly Option: For those following a ketogenic diet, simply swap the coconut sugar for golden monk fruit sweetener in the filling.
- Nut-Free Alternative: If you have nut allergies, you can easily make these pop tarts nut-free by substituting tiger nut flour for almond flour. Tiger nut flour offers a similar texture and a delicious, slightly earthy flavor, ensuring everyone can enjoy this delightful treat.
- Minimal Effort, Maximum Reward: Don’t let the idea of homemade pastries intimidate you! This recipe requires minimal ingredients and surprisingly little active time. The process comes together quickly, with the longest step being the two-hour chilling time for the dough – perfect for meal prepping or making ahead. You’ll find that crafting these toaster pastries is far easier than it appears, making them an ideal project for bakers of any experience level, from novice to seasoned.
- Irresistibly Tasty & Aromatic: There’s an undeniable magic in warm cinnamon sugar pastries. Beyond their incredible taste, with every sweet and spicy note perfectly balanced, these pop tarts fill your home with an incredibly nostalgic and inviting aroma. It’s the scent of comfort, childhood, and pure deliciousness, making them a treat for all your senses.
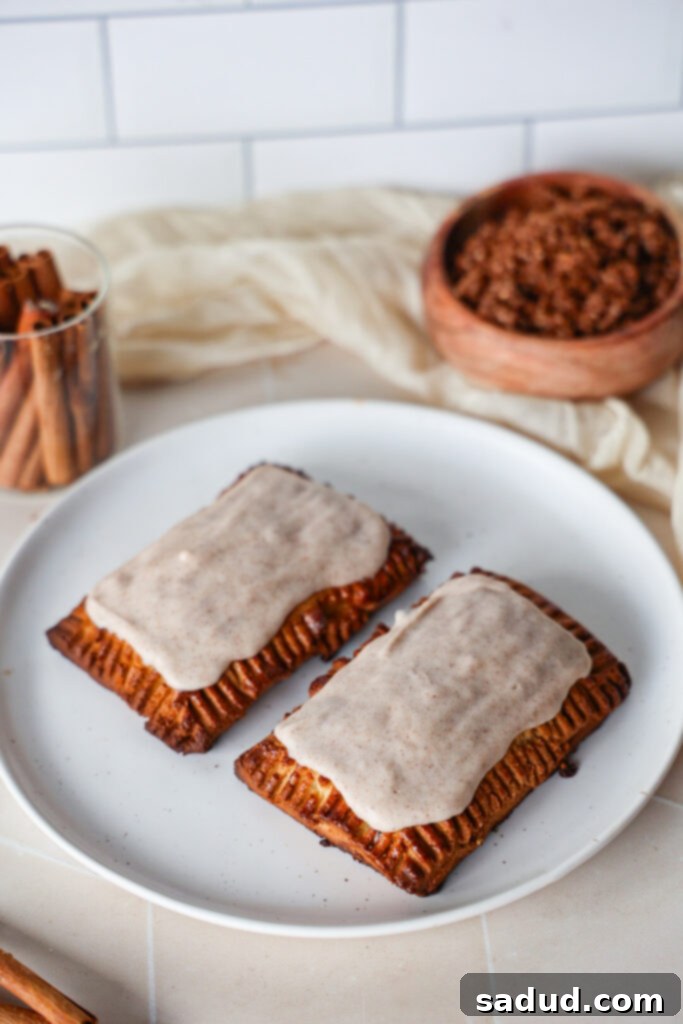
Are Traditional Pop Tarts Gluten-Free?
Many people land on this page wondering if conventional Pop Tarts are safe for gluten-free diets. The straightforward answer is no, traditional Pop Tarts are NOT gluten-free. They are primarily made with wheat flour, which contains gluten, rendering them unsuitable for individuals with Celiac disease, a gluten intolerance, or wheat allergies. While you might find some gluten-free store-bought options in specialty grocery stores, they often fall short in texture and flavor, tending to be dry and lacking the authentic flakiness we all love.
This is precisely why I embarked on creating my own version – a homemade gluten-free Pop Tart that delivers on all fronts: perfectly flaky, incredibly flavorful, and just as satisfying as the original, without any of the gluten!
How to Make Delicious Brown Sugar Cinnamon Pop Tarts
Crafting these homemade gluten-free brown sugar cinnamon pop tarts is a rewarding process that yields delicious results. You’ll find the full, detailed measurements and ingredients in the recipe card located at the bottom of this post, but here’s an overview of the simple steps and essential components.
Essential Equipment
Having the right tools can make your baking experience even smoother:
- Food Processor: This is a game-changer for preparing the dough, significantly reducing effort and time. It quickly pulses the ingredients to create a perfectly uniform dough in just a minute or two. While you can mix the dough by hand, a food processor ensures the best consistency with minimal fuss.
- Parchment Paper: Indispensable for rolling out the dough without sticking and for easy transfer to the baking sheet. It also makes cleanup a breeze.
- Baking Sheet: A standard baking sheet is needed to bake your pop tarts to golden perfection.
- Pastry Brush: Ideal for evenly applying the egg wash, which helps achieve that beautiful golden-brown crust and seals the edges. If you don’t have one, a clean soft-bristled brush or even your fingertips can work in a pinch.
- Rolling Pin: Crucial for rolling the dough to an even thickness.
Wholesome Ingredients
You’ll only need a handful of common gluten-free pantry staples to create these delightful homemade brown sugar cinnamon pop tarts. Forget complicated pie crust recipes; we’re making a simple shortbread-like dough from scratch with just a few key ingredients. This dough is naturally sweetened with maple syrup and boasts a perfect blend of almond and tapioca flours for optimal texture.
- Almond Flour: This finely ground flour is the secret to a beautifully light, tender, and flaky crust. It provides a rich flavor and a delicate crumb. If you need a nut-free option, tiger nut flour is an excellent 1:1 substitute, offering a similar texture and a naturally sweet, nutty flavor profile.
- Tapioca Flour: Working in tandem with almond flour, tapioca flour acts as a crucial binder, providing elasticity and helping to achieve that desirable, chewy-yet-tender dough texture. Arrowroot flour can also be used as an alternative.
- Coconut Oil: Essential for creating the “shortbread” or pie crust-like texture. It needs to be firm for the best results. If your coconut oil is liquid, simply place it in the fridge for a few minutes until it solidifies. Alternatively, you can use cold vegan butter or grass-fed butter if you are not strictly dairy-free.
- Maple Syrup: A natural, unrefined sweetener that adds moisture and a subtle caramel note to the dough. Honey or another liquid sticky sweetener can be used as a substitute.
- Egg: The egg helps bind the dough ingredients together and contributes to the overall structure and richness of the crust. While I haven’t tested it personally, an egg replacer like Bob’s Red Mill might work as a substitute.
- Coconut Sugar: This unrefined sugar forms the core of our luscious brown sugar cinnamon filling, offering a deep, caramel-like sweetness. For a lower-sugar option, golden monk fruit sweetener is a fantastic alternative that closely mimics the taste and texture of brown sugar.
- Pantry Staples: Don’t forget the classics! Pure vanilla extract enhances both the dough and the filling, while ground cinnamon provides that signature warm, spicy aroma and flavor that defines these pop tarts. A pinch of sea salt balances the sweetness.
- Powdered Sugar: For the irresistible glaze, I recommend monk fruit powdered sugar to keep the recipe lower in sugar. However, regular powdered sugar works perfectly well if you prefer.
Step-by-Step Guide to Making Homemade Pop Tarts
Follow these easy steps to create your own batch of delicious gluten-free brown sugar cinnamon pop tarts:
- Step 1: Prepare the Dough. In a food processor, combine the almond flour and tapioca flour, pulsing until they are thoroughly mixed. Add the firm coconut oil (or butter/vegan butter) and process for about a minute until the mixture resembles wet sand – this helps create a flaky texture. Finally, add the maple syrup, egg, vanilla extract, and sea salt, processing for another minute or so until a uniform, cohesive dough ball begins to form. Be careful not to overmix.
- Step 2: Chill the Dough. Transfer the dough onto a piece of parchment paper. Gently form it into a flattened disk or ball. Wrap it tightly in plastic wrap or fold the parchment paper securely around it, then place it in a bowl and chill in the refrigerator for at least 2 hours. This chilling step is crucial for making the dough firm enough to roll out and preventing it from becoming too sticky.
- Step 3: Mix the Filling. While the dough chills, prepare your delectable cinnamon sugar filling. In a small bowl, combine the coconut sugar, cinnamon, cashew or almond butter, melted coconut oil, vanilla extract, and a pinch of sea salt. Mix everything together until it forms a smooth, well-combined paste.
- Step 4: Preheat & Roll the Dough. Once the dough is adequately chilled, preheat your oven to 350°F (175°C). Remove the dough from the fridge. Place it on a piece of parchment paper, then lay another piece of parchment paper on top. Use a rolling pin to roll the dough out evenly into a large, thin rectangle, approximately 1/8 inch thick. Aim for an even thickness to ensure uniform baking. Remove the top piece of parchment paper.
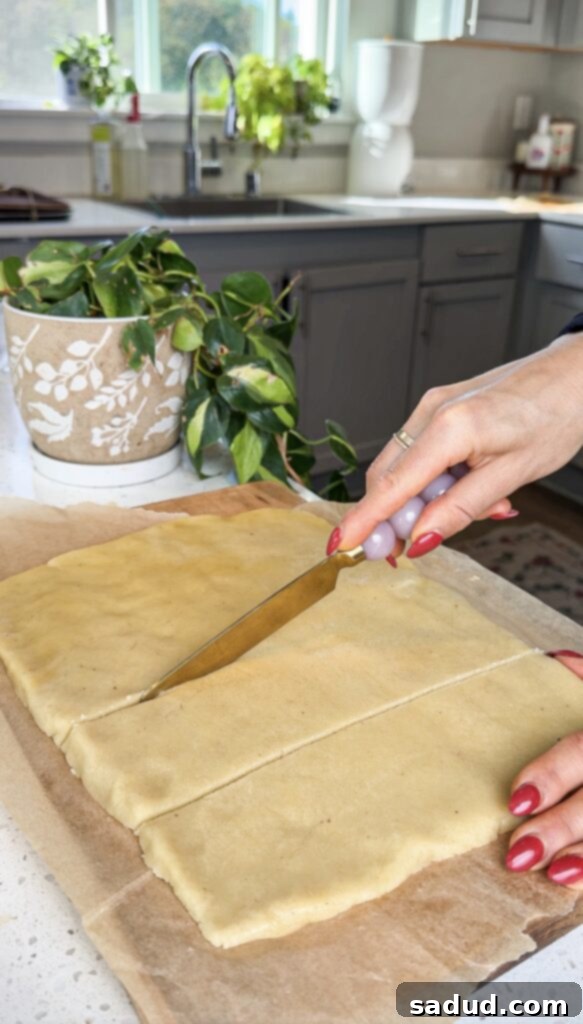
- Step 5: Form the Pop Tarts. Carefully lift the rolled-out dough (still on its parchment paper base) and transfer it to a baking sheet. Using a sharp knife or a pastry wheel, cut the dough into eight rectangles, each approximately 4×5 inches. Arrange these rectangles about 2 inches apart on the parchment paper, making sure they aren’t touching.
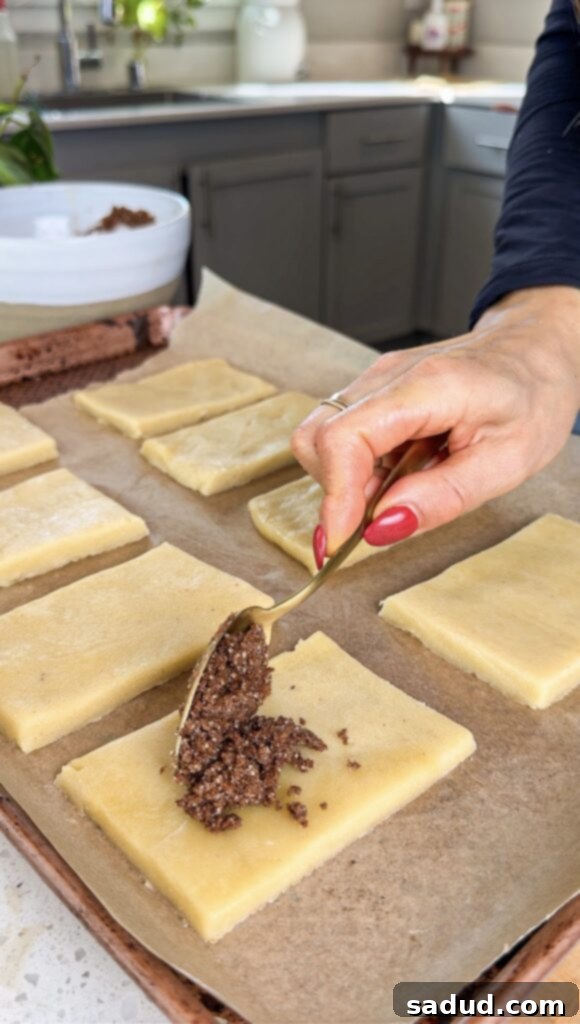
- Step 6: Fill and Seal. Take half of your dough rectangles and generously spread the cinnamon sugar filling in the center of each, leaving a clear border of about half an inch around the edges. This space is essential to prevent the filling from oozing out during baking. Place an empty dough rectangle on top of each filled one. Use the tines of a fork to firmly press and seal the edges all around each pop tart, creating a decorative crimped edge.
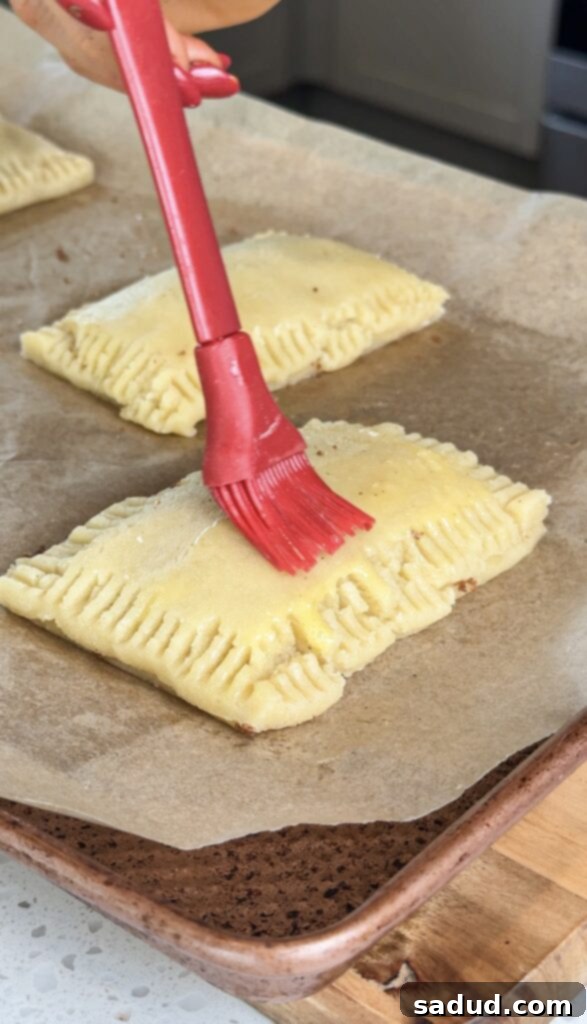
- Step 7: Egg Wash & Bake! In a small bowl, whisk together one egg with one teaspoon of water to create an egg wash. Using a pastry brush, lightly brush the top of each pop tart with the egg wash. Be sparing; a thin layer is all you need for that beautiful golden color and a slight sheen. Bake the tarts in the preheated oven for 20-25 minutes, or until they are golden brown and cooked through. Remove them from the oven and allow them to cool completely on the baking sheet before proceeding to the icing step.
- Step 8: Glaze and Enjoy. While the pop tarts cool, prepare the glaze by whisking together the powdered sugar, cinnamon, vanilla extract, and milk of choice (start with the lesser amount and add more as needed) until you achieve a smooth, pourable consistency. Once the pop tarts are completely cool, drizzle or spread the glaze generously over each one. Let the glaze set for a few minutes before serving.
Embracing Dairy-Free and Gluten-Free Baking
It’s a common misconception that dairy-free and gluten-free baking sacrifices flavor or texture. This recipe, however, proves that you can achieve incredibly delicious and satisfying results without relying on traditional dairy and gluten-containing ingredients! These homemade brown sugar cinnamon pop tarts are formulated to be every bit as tasty and flaky as their conventional counterparts, perhaps even more so with their wholesome ingredients.
For those who aren’t restricted by dairy allergies or preferences, you certainly have the flexibility to use grass-fed butter or ghee in place of coconut oil. These alternatives will also contribute a rich flavor and a lovely tender crust. Similarly, if you prefer, vegan butter is another excellent dairy-free substitute for coconut oil, offering a similar fat content and texture profile.
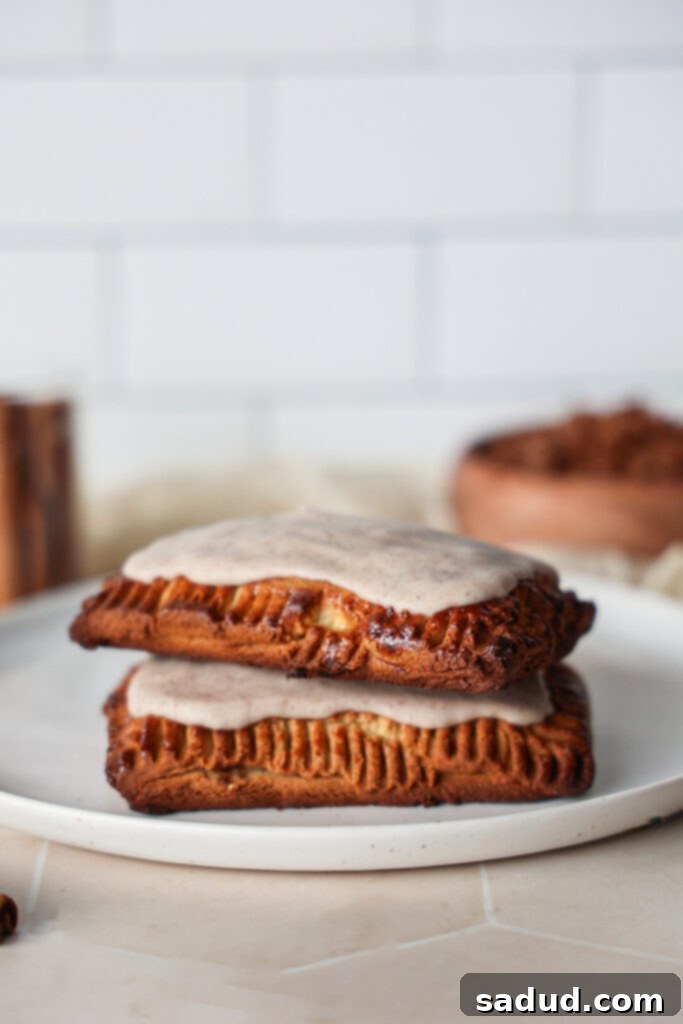
Frequently Asked Questions (FAQs)
Here are some common questions about making and storing these homemade gluten-free brown sugar cinnamon pop tarts:
- Can I Freeze Pop Tarts? Absolutely! These pop tarts freeze beautifully, allowing you to enjoy them for longer. Once the pop tarts have cooled completely and the icing has set, place them in an airtight freezer bag or container. They can be stored in the freezer for up to 3 months. To enjoy, thaw them overnight in the refrigerator, then reheat in a toaster, toaster oven, or air fryer for a crispy exterior, or simply warm them in the microwave for 30 seconds to 1 minute for a softer texture.
- Can I make the dough ahead of time? Yes, preparing the dough in advance is a great time-saver! You can make the dough, form it into a ball, cover the bowl tightly with plastic wrap, and store it in the fridge overnight. When you’re ready to bake the next day, you might need to let the dough sit on the counter for 5-10 minutes to soften slightly before it’s easy to roll out.
- Can I just use a 1:1 gluten-free flour blend instead? This particular pastry dough was specifically developed using a precise combination of almond flour and tapioca flour. This blend is crucial for achieving the ideal flaky, tender texture that makes these pop tarts so delicious. I highly recommend sticking to these flours for the best results. Substituting other gluten-free flours might alter the texture significantly. However, if you require a nut-free option, Tiger Nut flour is a fantastic substitute for almond flour and will work well in this recipe.
- How should I store leftover pop tarts? For optimal freshness, any leftover homemade pop tarts should be stored in an airtight container. They will remain fresh for up to 5 days when stored in the refrigerator, or for about 3 days if kept at room temperature on the counter.
Expert Tips for Perfect Gluten-Free Pop Tarts
Achieve bakery-quality results with these helpful tips:
- Use a Ruler for Uniformity: To ensure all your dough pieces are the same size and bake evenly, use a ruler when cutting your rectangles. This also helps in creating consistent pop tarts.
- Avoid Overmixing the Dough: Because this is a gluten-free dough, overmixing can make it dry and difficult to roll out. Mix just until a uniform dough forms, then stop. A slightly soft dough is easier to work with after chilling.
- Don’t Skip the Egg Wash: The egg wash serves two important purposes: it helps to seal the pastry edges, preventing the filling from escaping, and it gives the pop tarts that beautiful, characteristic golden-brown sheen when baked.
- Mind the Filling Amount: Be careful not to “overstuff” your pop tarts. You want an even, moderate layer of filling in the center of each square, leaving enough space around the edges for the top dough layer to seal securely without oozing.
- Cool Completely Before Icing: Patience is key here! Allow your baked pop tarts to cool down completely to room temperature before applying the glaze. If you ice them while they’re warm, the glaze will simply melt and run off, rather than setting into a beautiful, firm topping.
How to Serve Your Homemade Gluten-Free Pop Tarts
These homemade gluten-free brown sugar cinnamon pop tarts are truly best enjoyed fresh, once the cinnamon glaze has had a chance to firm up slightly. The combination of the warm, flaky pastry and the sweet, set icing is simply irresistible.
If you prefer your pop tarts toasted, especially after they’ve cooled completely or been stored, I recommend using a toaster oven or an air fryer oven. This method allows them to crisp up beautifully without the risk of the icing melting off and creating a sticky mess at the bottom of a conventional toaster. A quick warm-up will bring back that fresh-baked feel and aroma!
Exciting Gluten-Free Pop Tart Variations to Try
While the brown sugar cinnamon flavor is a classic, these gluten-free pop tarts are wonderfully versatile. Get creative with these delicious variations:
- Cream Cheese Icing: Elevate your pop tarts by topping them with a luscious dairy-free cream cheese icing instead of the standard cinnamon glaze. A tangy and sweet frosting adds an extra layer of decadence.
- Nutty Cinnamon Filling: Stir in some finely chopped pecans or walnuts into the cinnamon sugar filling for an added crunch and depth of flavor. This creates a delightful texture contrast.
- Blueberry Bliss Pop Tarts: Fill your pop tarts with a generous spoon of your favorite blueberry jam or fresh blueberry compote. For the ultimate blueberry experience, top them with a vibrant blueberry-flavored icing (simply mix powdered sugar with a tiny bit of blueberry juice or puree).
- Sweet Strawberry Pop Tarts: Transform these into a classic fruit flavor by filling them with sweet strawberry jam. Finish with a delicate strawberry icing made by adding a drop of natural red food coloring and a hint of strawberry extract to your powdered sugar glaze.
- S’mores Inspired Pop Tarts: For a truly indulgent treat, cut up some mini marshmallows into small pieces and gently stir them into the brown sugar cinnamon filling. The marshmallows will melt and get gooey as the pop tarts bake, creating a delightful S’mores experience. You can even add a tiny bit of dairy-free chocolate chips for extra richness!
More Healthy Recipes to Try
If you loved these healthier pop tarts, you’ll surely enjoy these other wholesome and delicious recipes:
- 2 Ingredient Rolo’s: Simple, quick, and incredibly satisfying!
- Healthy Twix Cups: All the flavor of the classic bar, made better for you.
- Healthy Almond Joys: A tropical-inspired treat without the guilt.
- Pumpkin Streusel Bread: Perfect for fall, with a delicious crumb topping.
- Banana Nut Scones (Paleo, Gluten-Free): A delightful breakfast or snack option.
- Cinnamon Swirl Banana Bread: A cozy twist on a beloved classic.
- Gluten-Free Pumpkin Spice Scones: Flavorful and perfect for the season.
- Cinnamon Roll Energy Bites: A quick and easy way to get your cinnamon fix on the go.
I’m confident you will absolutely adore these paleo, gluten-free brown sugar cinnamon Pop Tarts! If you make this recipe, it would truly mean the world to me if you left a star rating and a review below to share your experience. Also, don’t forget to tag me in your delightful creations on Instagram @danishealthyeats! Happy baking!
Homemade Brown Sugar Cinnamon Pop Tarts (Gluten-free)
Pin Recipe
Ingredients
Dough
- 2 1/2 cups almond flour
- 1 cup tapioca flour
- 1/4 cup solid coconut oil or butter
- 1/4 cup maple syrup
- 1 egg room temp
- 1 tsp vanilla extract
- sea salt
Filling
- 3/4 cup coconut sugar
- 1 tbsp cinnamon
- 1/4 cup cashew or almond butter
- 2 tbsp melted coconut oil or butter
- 1 tsp vanilla extract & pinch of sea salt
Glaze/icing
- 1 cup monk fruit powdered sugar or regular powdered sugar
- 3-4 tbsp milk of choice, as needed
- 1 tsp cinnamon
- 1/4 tsp vanilla extract
Instructions
-
In a food processor or in the bowl of a stand mixer, pulse together the almond flour and tapioca flour until well mixed. Then add in the coconut oil, processing a minute or so until the dough resembles wet sand. Add in the remaining ingredients, processing another minute or so until a uniform dough forms.
-
Chill the dough. Dump the dough onto a piece of parchment paper. Form it into a ball. Cover it in saran wrap or fold the parchment paper over on itself and store the dough in a bowl in the fridge for 2 hours.
-
Mix the filling. In a small bowl, combine all of the filling ingredients until well mixed.
-
Preheat the oven to 350F. Remove the chilled dough from the fridge. Roll it out on parchment paper, into a large, thin rectangle about 1/8″ thick (I made mine extra thick in these photos – don’t be like me! lol). I like to place a piece of parchment paper on top of the dough, use a rolling pin to roll it out, then remove the top piece of paper.
-
Lift the rolled out dough (using the parchment paper) and place it onto a baking sheet. Use a knife to cut the dough into 8 rectangles (three cuts from the top down and one through the center sideways) about 4×5″. Spread them out about 2 inches apart on the piece of parchment paper.
-
Fill the pop tarts. Add some cinnamon sugar filling to the center of half of the squares, leaving some space around the edges so that it doesn’t ooze through. Then place an empty square on top. Use a fork to seal the edges shut.
-
In a small bowl, whisk together 1 egg and 1 tsp water. Brush each tart lightly with the egg wash – don’t use too much. Then bake the tarts for 20-24 minutes until golden. Remove from the oven and let cool completely before icing.
-
Mix together the icing, cinnamon, and milk (starting with the lesser amount) until you reach desired glaze consistency. Ice each tart!
Video
Notes
-
- Note: For smaller portions: You can make mini pop tarts for smaller portions, creating 8 smaller tarts rather than 4 large ones. The baking time will need to be adjusted, checking in on them around 12-15 minutes.
- Can I Freeze Pop Tarts? You can freeze the pop tarts for up to 3 months. Once the pop tarts are completely cooled, place the pastries into a freezer bag and store in the freezer. Thaw the pop tarts in the refrigerator overnight and either pop them in the toaster or air fryer to toast them up or reheat in the microwave for 30 seconds-1 minute.
-
- Can I make the dough ahead of time? Yes! You can prepare the dough, cover the bowl with saran wrap, then store in the fridge overnight. You may need to let the dough sit on the counter for 5-10 minutes before you roll it out.
-
- Can I just use a 1:1 gluten-free flour instead? The pastry dough was formulated specifically with almond flour and tapioca flour. The mix of the two creates the perfect flaky dough. I wouldn’t recommend trying to sub any other flours – unless you are nut-free, then you can use Tiger Nut flour in place of almond flour!
-
- Storing leftover pop tarts: They will stay fresh for up to 5 days in the fridge and 3 days out on the counter
This post contains affiliate links.
