Healthy & Easy Blueberry Cobbler: Your Go-To Vegan & Gluten-Free Dessert
Craving a truly satisfying dessert that’s also incredibly good for you? Look no further! This healthy blueberry cobbler recipe is the ultimate delightful treat. With a mere 10 minutes of hands-on prep time, this fuss-free recipe is destined to become a family favorite. Bursting with flavor and loaded with beneficial antioxidants, plant-based protein, and fiber, this absolutely delicious vegan and gluten-free blueberry cobbler truly offers the best of both worlds – indulgence without the guilt!
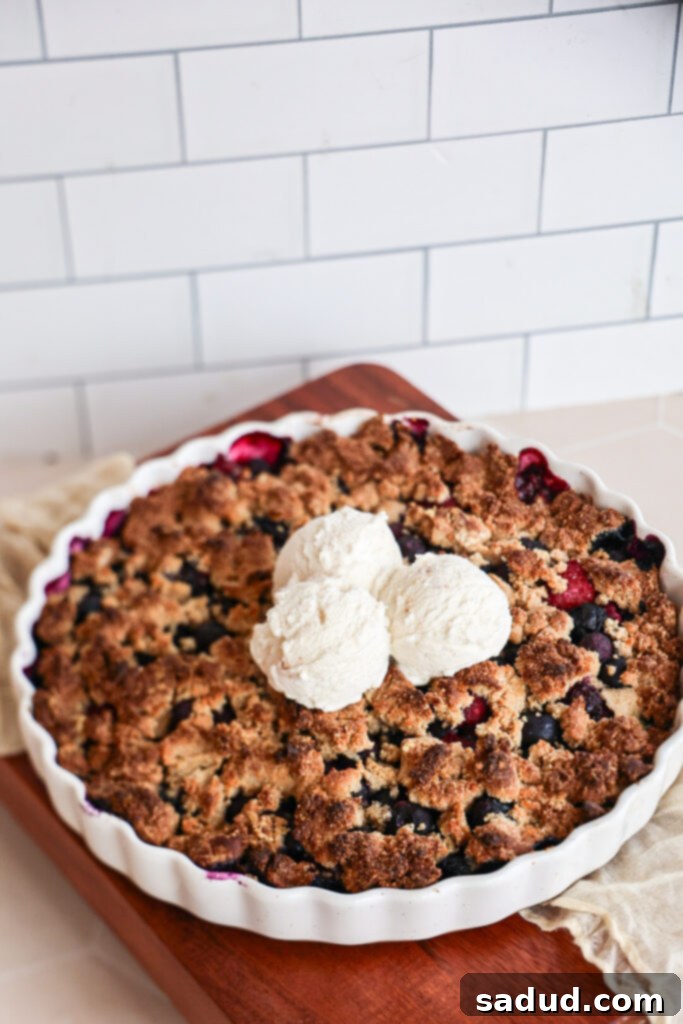
Easy Berry Cobbler: A La Mode – Any Time of Day!
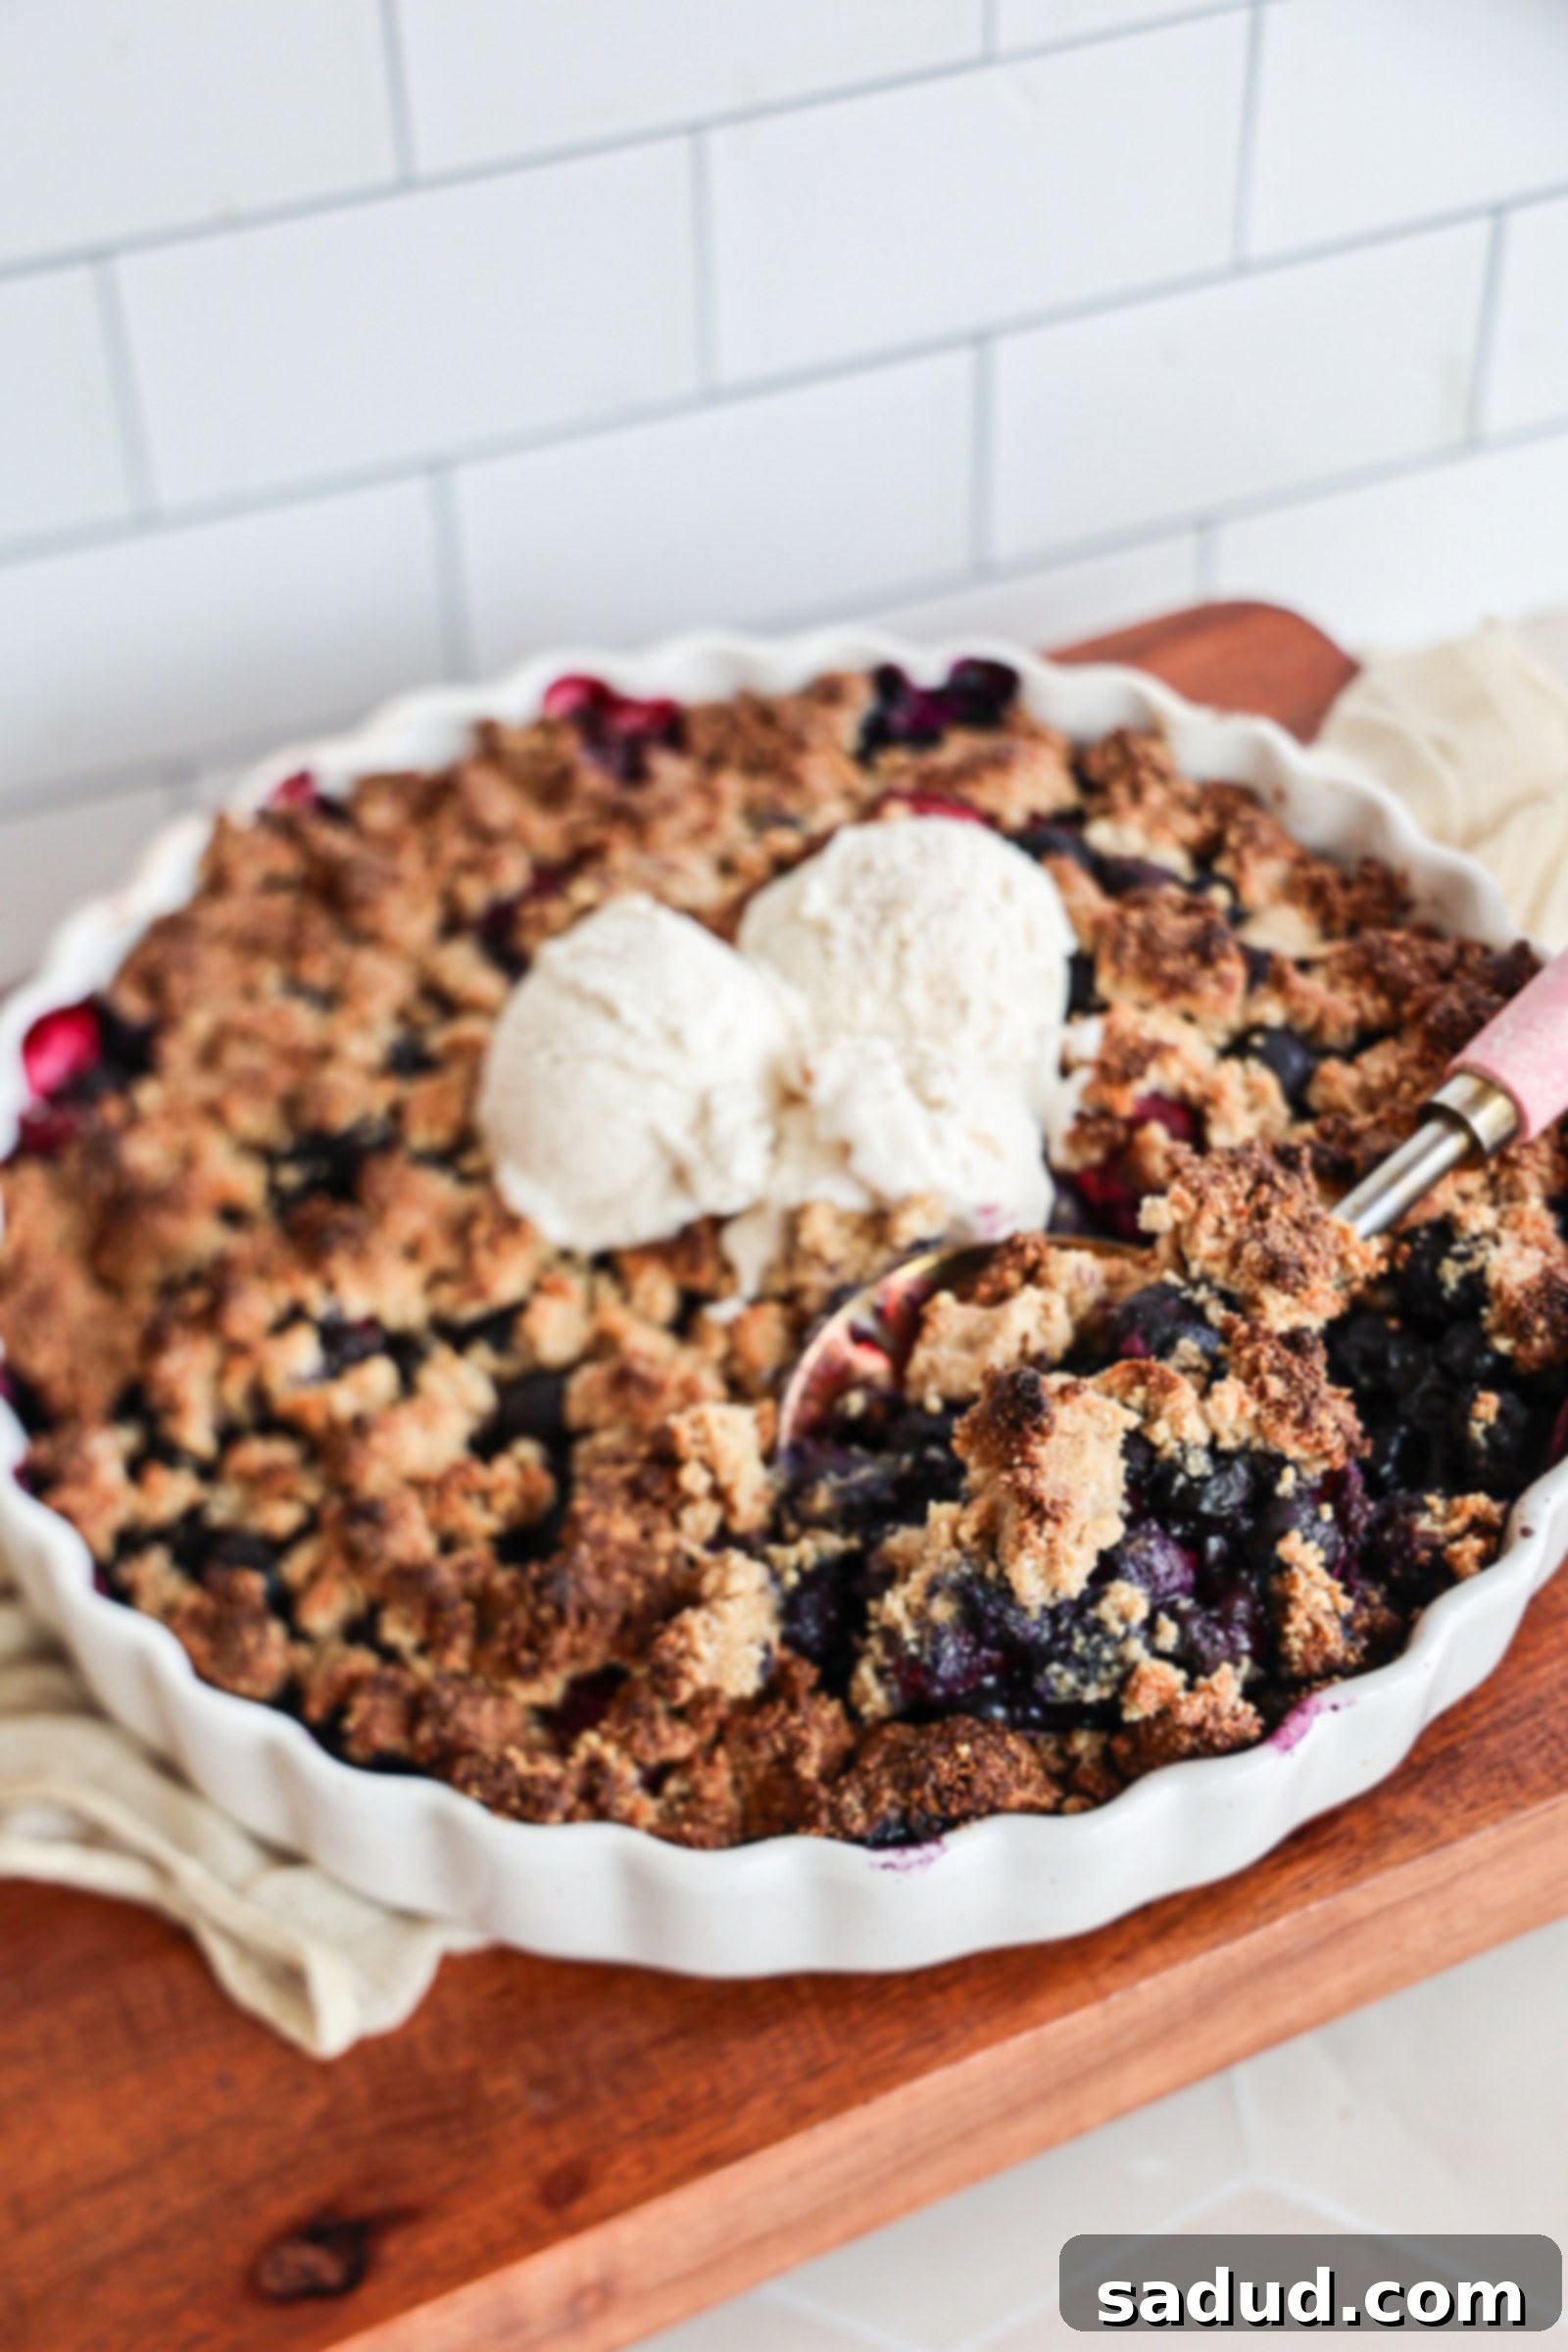
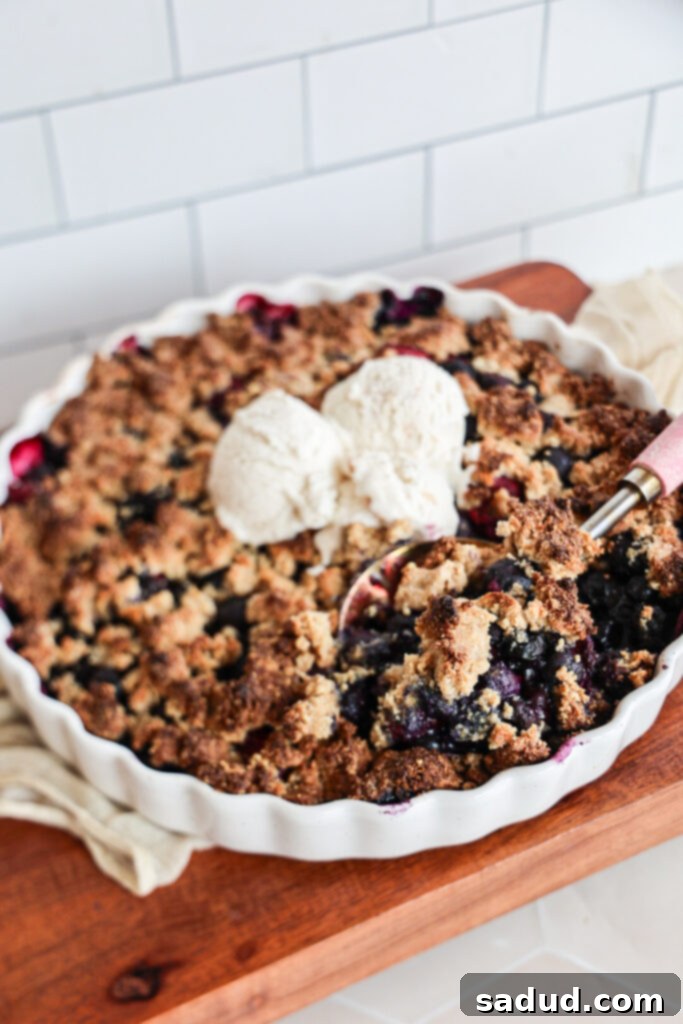
Imagine this: a warm, bubbling mixed berry cobbler, served a la mode, that’s so healthy you could legitimately enjoy it for breakfast. But don’t let its wholesome ingredients fool you – it’s so incredibly delicious, nobody would ever guess it’s packed with goodness! Top it with generous scoops of creamy coconut whipped topping, tangy coconut yogurt (or traditional Greek yogurt if that’s your preference), or even a scoop of dairy-free ice cream if you’re feeling extra decadent. This berry cobbler isn’t just divine; it’s practically a culinary miracle!
Beyond its incredible taste, this is quite possibly one of the easiest recipes you’ll ever make. It looks impressive enough to serve at special occasions, yet comes together with minimal effort. It’s the perfect last-minute dessert that promises to delight every palate.
While many people associate cobblers with the vibrant flavors of summer, I find myself making them regularly throughout the colder winter months. This is precisely why I always keep my freezer stocked with an assortment of frozen berries. They are far too delicious to be confined to just one short season! Picture the scene: tender berries bubbling into a thick, syrupy sweetness, while the almond flour “biscuit topping” bakes to a golden, buttery, and perfectly crunchy-sweet finish. It’s truly a chef’s kiss moment every single time!
Whether you’re looking for a high-protein dessert, a satisfying breakfast option, or a crowd-pleasing dish for holidays, parties, and family get-togethers, this cobbler fits the bill perfectly. If you adore blueberry desserts as much as we do, you absolutely must try some of my other favorites: my gluten-free blueberry quick bread, the refreshing lemon blueberry chia pudding with cashew cream, or my innovative blueberry crisp ice cream!
Watch Me Make Berry Cobbler for Breakfast!
Seeing is believing! Get a visual guide to just how simple and quick it is to whip up this amazing berry cobbler. Watch the video below to follow along with every step and see why this recipe is perfect for breakfast, dessert, or any time you need a healthy, flavorful treat.
The Perfect Healthy, Delicious, and Versatile Dessert
This cobbler recipe truly blurs the lines between an indulgent dessert and a perfectly acceptable, wholesome breakfast. I guarantee your entire family will fall in love with its irresistible taste and texture. Despite being a much healthier alternative to traditional cobblers, this recipe makes no compromises on flavor or satisfaction. You absolutely have to give it a try because it ticks all the right boxes:
- Effortlessly Easy – Forget complicated baking! This healthy blueberry cobbler is unbelievably simple to prepare. It takes less than 10 minutes to combine all the ingredients and just about 25-30 minutes to bake to golden perfection. Minimal effort for maximum deliciousness!
- Packed with Wholesome Goodness – Every spoonful of this cobbler is packed with beneficial antioxidants from the berries, quality protein (especially if you add protein powder), and dietary fiber. It’s a truly wholesome treat that you can feel great about enjoying, even as a nutritious breakfast option.
- Dietary Friendly for Everyone – One of the best aspects of this blueberry cobbler is its incredible versatility for various dietary needs. It’s completely dairy-free, vegan, gluten-free, grain-free, egg-free, and made without refined sugars, making it suitable for almost everyone at your table. For those with nut allergies, it can easily be made nut-free by swapping almond flour for Tiger nut flour, which is a fantastic 1:1 substitute!
- Perfectly Paleo & Grain-Free – This cobbler recipe is thoughtfully crafted to be both grain-free and paleo-friendly, as it doesn’t include oats. However, if you enjoy the added texture and health benefits of oats, feel free to incorporate them into the topping mixture!
Understanding the Difference: Cobblers vs. Crisps
While often used interchangeably, cobblers and crisps have distinct characteristics that set them apart, primarily in their topping. A cobbler typically features a thicker, more biscuit-like or scone-like topping. This dough is often dropped spoonfuls over the fruit, which then bakes into a denser, cakey, or bread-like crust, often resembling a cobblestone street (hence the name!).
In contrast, a crisp is defined by its lighter, streusel-style topping. This crumbly mixture is usually made with oats, flour, butter, and sugar, and it bakes up to a crispier, crunchier finish. The presence of oats is a key differentiator for crisps. Some creative cobbler variations can also be made with cake batter or even cookie dough for a fun, unique spin, showcasing the versatility of this beloved dessert category. Both are excellent choices to serve at potlucks, parties, and casual get-togethers, offering comforting fruit-based goodness.
How to Make This Healthy Blueberry Cobbler: A Simple Overview
Making this healthy blueberry cobbler is surprisingly straightforward! The full, detailed recipe and ingredient measurements can be found in the recipe card at the bottom of this post. But here’s a quick overview to get you excited about how easy it is:
Essential Equipment
You won’t need a lot of specialized equipment to make this delicious cobbler. Here are the basics:
- Baking Pan: I personally love using my tart pan for its beautiful presentation, but a standard 9×9 inch baking dish or a similar sized oven-safe dish will work perfectly.
- Mixing Bowl: A medium-sized mixing bowl is all you need to prepare the simple cobbler topping.
Key Ingredients & Smart Substitutions
Frozen Berry Cobbler: Year-Round Freshness
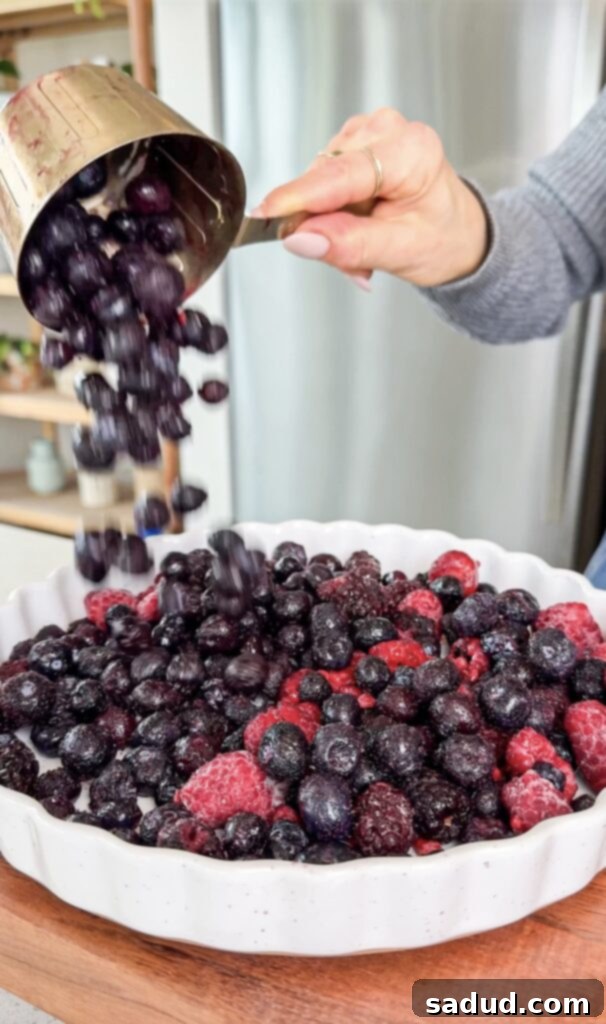
This recipe specifically calls for frozen berries, and for good reason! Using frozen berries makes this recipe incredibly convenient and accessible throughout the entire year. They are often significantly more economical than fresh berries and equally nutritious. Feel free to use any mix of your favorite berries – the more variety, the better! I typically opt for a colorful blend of blackberries, strawberries, raspberries, and blueberries. However, don’t hesitate to customize based on your preferences; if you don’t like a particular berry, simply swap it out or omit it. Beyond berries, other fantastic fruits like peaches, cherries, or even sliced apples make wonderful additions to cobblers!
Crafting a Delicious Gluten-Free Cobbler
Many gluten-free cobbler recipes rely on gluten-free all-purpose flour blends. However, I often find these blends can yield inconsistent results depending on the brand, which can be frustrating. That’s why I prefer using almond flour (or tiger nut flour for a nut-free version) – it delivers reliable results every time and adds nutritional value!
- Almond Flour: This is the star ingredient for our healthy cobbler topping! While traditional cobblers often feature a dense biscuit topping, we’re putting a healthier, gluten-free, and grain-free spin on it. Almond flour provides a fantastic texture, mimicking a biscuit-like consistency without any gluten. It’s my preferred choice because it’s more nutrient-dense than traditional all-purpose flour, naturally gluten-free, and boasts a higher protein content. For a completely nut-free alternative, Tiger Nut flour can be used as a simple 1:1 swap.
- Frozen Mixed Berries: You’ll need about 1-2 16oz bags of your favorite frozen berries. Adjust the quantity based on how generously sized you want your cobbler to be.
- Protein Powder: If you’re making this cobbler for a special breakfast or to boost its nutritional profile, adding protein powder is a great idea. It helps keep blood sugar balanced and adds a lovely flavor. I haven’t tested it, but I believe oat flour could work as a 1:1 substitute if you prefer not to use protein powder or want a slightly different texture. I personally used vanilla Ka’Chava, which not only enhances the flavor but also provides a wealth of nutrients and superfoods.
- Maple Syrup: Just a touch of pure maple syrup is used to provide a subtle sweetness to the cobbler topping and help bind the ingredients together.
- Coconut Oil: Melted coconut oil acts as another crucial binder for the topping, ensuring it bakes up beautifully. You can easily substitute it with avocado oil, grass-fed butter, ghee, or your favorite vegan butter alternative.
- Tapioca Flour (or Starch): This is a secret weapon for achieving the perfect consistency in your berry filling. Tapioca flour helps to thicken the berries as they bake, preventing them from becoming too watery and soaking up those delicious juices. Arrowroot starch is another excellent 1:1 substitute.
- Lemon Juice: This ingredient is entirely optional, but a squeeze of fresh lemon juice adds a wonderful zing and brightens the overall flavor profile of the berries.
- Pantry Staples: Don’t forget your baking powder (for lift), a pinch of sea salt (to enhance all the flavors), and a splash of vanilla extract (for aromatic depth).
Simple Steps to Make Your Healthy Blueberry Cobbler
Follow these easy steps to create your own warm and delicious berry cobbler:
- Step 1: Prepare the Berries & Oven. Begin by preheating your oven to 350°F (175°C). Grab your tart pan or 9×9 inch baking dish and add your frozen berries. Sprinkle the tapioca starch (or flour) evenly over the berries. Gently toss or use your fingers to mix everything together, ensuring the berries are well-coated. This will help create that beautiful, thick, and luscious filling.
- Step 2: Mix the Cobbler Topping. In a separate mixing bowl, combine all the remaining topping ingredients: almond flour, plant-based vanilla protein powder (if using), baking powder, melted coconut oil, and maple syrup. Mix thoroughly with your fingers until a cohesive, somewhat moist, crumbly mixture forms. Remember, for a cobbler, the topping is meant to resemble “biscuits” rather than a fine crumble, so it will be a bit thicker and stickier than a crisp topping.
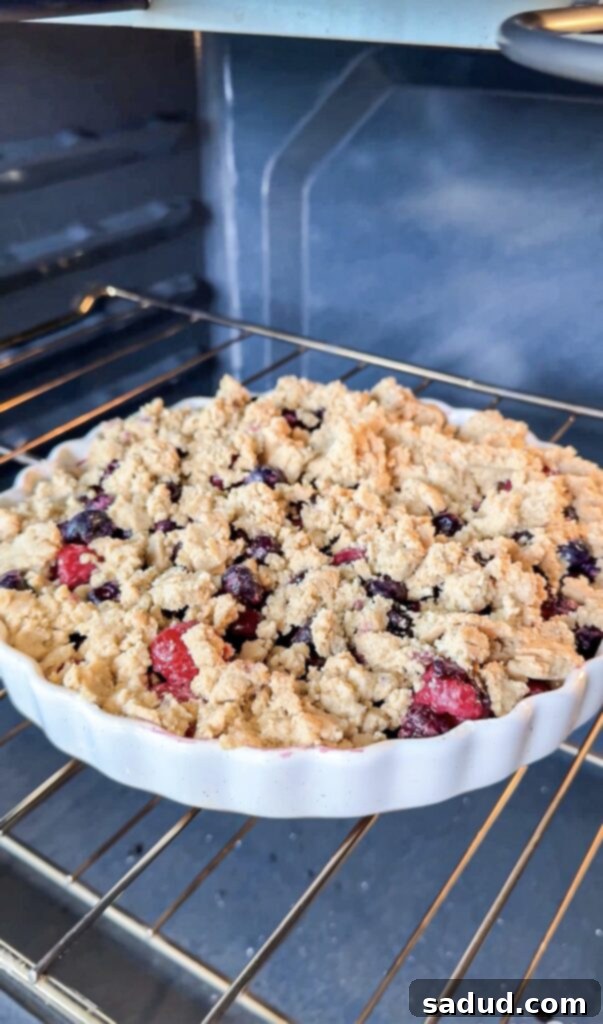
- Step 3: Assemble & Bake. Evenly distribute spoonfuls of the cobbler topping mixture over the prepared berries in your baking dish. Once covered, transfer the dish to your preheated oven and bake for 25-30 minutes. You’ll know it’s ready when the topping is gorgeously golden brown and the berries beneath are visibly bubbling with sweet, syrupy juices.
- Step 4: Cool & Serve. Once baked, carefully remove the cobbler from the oven. This is the hardest part, but crucial: let it cool for at least 15-20 minutes. As the cobbler cools, the fruit filling will continue to thicken and set, giving you that perfectly gooey and irresistible texture. If you dive in too soon, it might be too runny. Serve warm in individual bowls with your favorite toppings!
Expert Tips & FAQs for the Perfect Cobbler
Making a perfect cobbler is easy, especially with these helpful tips and answers to common questions:
- Can I substitute fresh berries for frozen in this recipe? Absolutely! While frozen berries are convenient and often more affordable, fresh berries work beautifully too. If using fresh berries, you might slightly reduce the baking time or keep an eye on it to prevent overcooking, as they may release less liquid initially.
- How do you thicken berry cobbler? The secret to a perfectly thick, non-soupy berry cobbler lies in adding a starch or flour to the fruit filling. Common choices include cornstarch, tapioca starch, or arrowroot powder. For this recipe, we specifically use tapioca (or arrowroot) flour, which creates a wonderful consistency.
- Don’t skip the tapioca flour! It may seem like a small amount, but tapioca flour plays a vital role in thickening the berry juices. If you’re tempted to skip it, resist! Without it, your cobbler filling will likely be too watery and soupy, rather than beautifully gooey. If you don’t have tapioca, potato starch or corn starch can be used as a 1:1 substitute.
- Double the topping for extra indulgence! If you’re a big fan of the delicious, biscuit-like topping, feel free to double the topping ingredients. This will result in an even more generous and satisfying crust over your berries.
- Patience is key: Cool before eating! This is perhaps the most important tip. It’s tempting to dig into a warm cobbler straight from the oven, but letting it cool for at least 15-20 minutes (or even longer) allows the filling to set and thicken properly. This process creates that irresistible, thick, and gooey texture you crave. Eating it too soon will result in a much runnier consistency.
- Make ahead options: You can prepare the berry mixture and the topping mixture separately a day in advance. Store them in airtight containers in the fridge. When ready to bake, assemble and follow the baking instructions.
Delightful Topping & Serving Suggestions
Elevate your healthy blueberry cobbler experience with these delicious serving ideas:
- Get Nutty! Add a wonderful crunch and extra flavor by sprinkling some fun toppings like chopped walnuts, pecans, almond slivers, or even a handful of peanuts over your cobbler before serving.
- Classic Ice Cream Pairing: A warm cobbler is perfectly complemented by a scoop of cold vanilla ice cream. Opt for a dairy-free vanilla ice cream for a fully vegan treat!
- Creamy Yogurt Dollop: For a lighter, tangy touch, add a dollop of coconut yogurt or Greek yogurt (if not strictly vegan). It adds a lovely creaminess and a hint of tartness that balances the sweetness of the berries.
- Whipped Topping Heaven: Finish with a generous swirl of coconut whipped topping, dairy-free cool whip, or your favorite traditional whipped cream.
- When in doubt… chocolate! Chocolate and berries are a match made in heaven. A scoop of vanilla ice cream with a decadent melted chocolate drizzle on top of your warm cobbler is absolutely delicious. Dark chocolate shavings would also be exquisite.
Storing Your Healthy Blueberry Cobbler
If you happen to have any leftovers (which is a rare occurrence!), store the cooled cobbler in an airtight container in the refrigerator for up to 2-3 days. To reheat, you have a few options:
- Microwave: For a quick reheat, individual servings can be warmed in the microwave for 30-60 seconds, or until heated through.
- Oven or Air Fryer: For the best texture, especially if you want to revive that crispy topping, reheat the entire cobbler or individual portions in an air fryer or oven at 350°F (175°C) for 10-15 minutes, or until it’s heated through and the topping is crisp to your liking.
More Healthy & Delicious Recipes to Try
If you loved this healthy blueberry cobbler, you’ll definitely want to explore these other fantastic healthy and wholesome recipes from my kitchen:
- Frozen Strawberry Protein S’mores
- Blueberry Crisp Ice Cream
- Wholesome Breakfast Crumble
- Healthy Samoa Cookie Recipe
- Super Moist Protein Banana Bread
- Cinnamon Streusel Dessert Pizza
- Gluten-Free Sugar Cookie Fruit Pizza
If you do make this delicious Healthy Mixed Berry Cobbler recipe, it’d mean the world to me if you left a comment and/or a star rating/review below! Your feedback helps other readers discover and enjoy these recipes. Don’t forget to tag me on Instagram (@danishealthyeats) so I can see your wonderful creations!
Healthy Blueberry Cobbler
Pin Recipe
Ingredients
- 2 16oz bags frozen mixed berries
- 1 1/2 tbsp tapioca flour
- 1 cup almond flour
- 1/2 cup plant-based vanilla protein powder *do not use whey!
- 1 tsp baking powder
- 1/4 cup melted coconut oil
- 3 tbsp maple syrup
Instructions
-
Preheat oven to 350F. Add the berries to a tart pan or 9×9 (or similar size) baking dish.
-
In a mixing bowl, combine the remaining ingredients. I like to mix it up with my fingers to create the crumbly mixture. It may be slightly sticky/thick – that’s okay! This isn’t a crips, so the topping is meant to be more biscuit-like.
-
Using your fingers, disperse the topping over the berries. Bake for 25–30 minutes or so, until the top is golden and berries are bubbling. Let cool for 15 minutes or so to allow the berries to thicken up.
-
Cool before eating: Be sure to let the cobbler cool before digging in. As the cobbler cools, the inside begins to thicken, creating that perfect thick, gooey texture! If you eat it too soon, it will be too runny!
-
Serve with coconut whip topping, yogurt, or even ice cream!
Video
