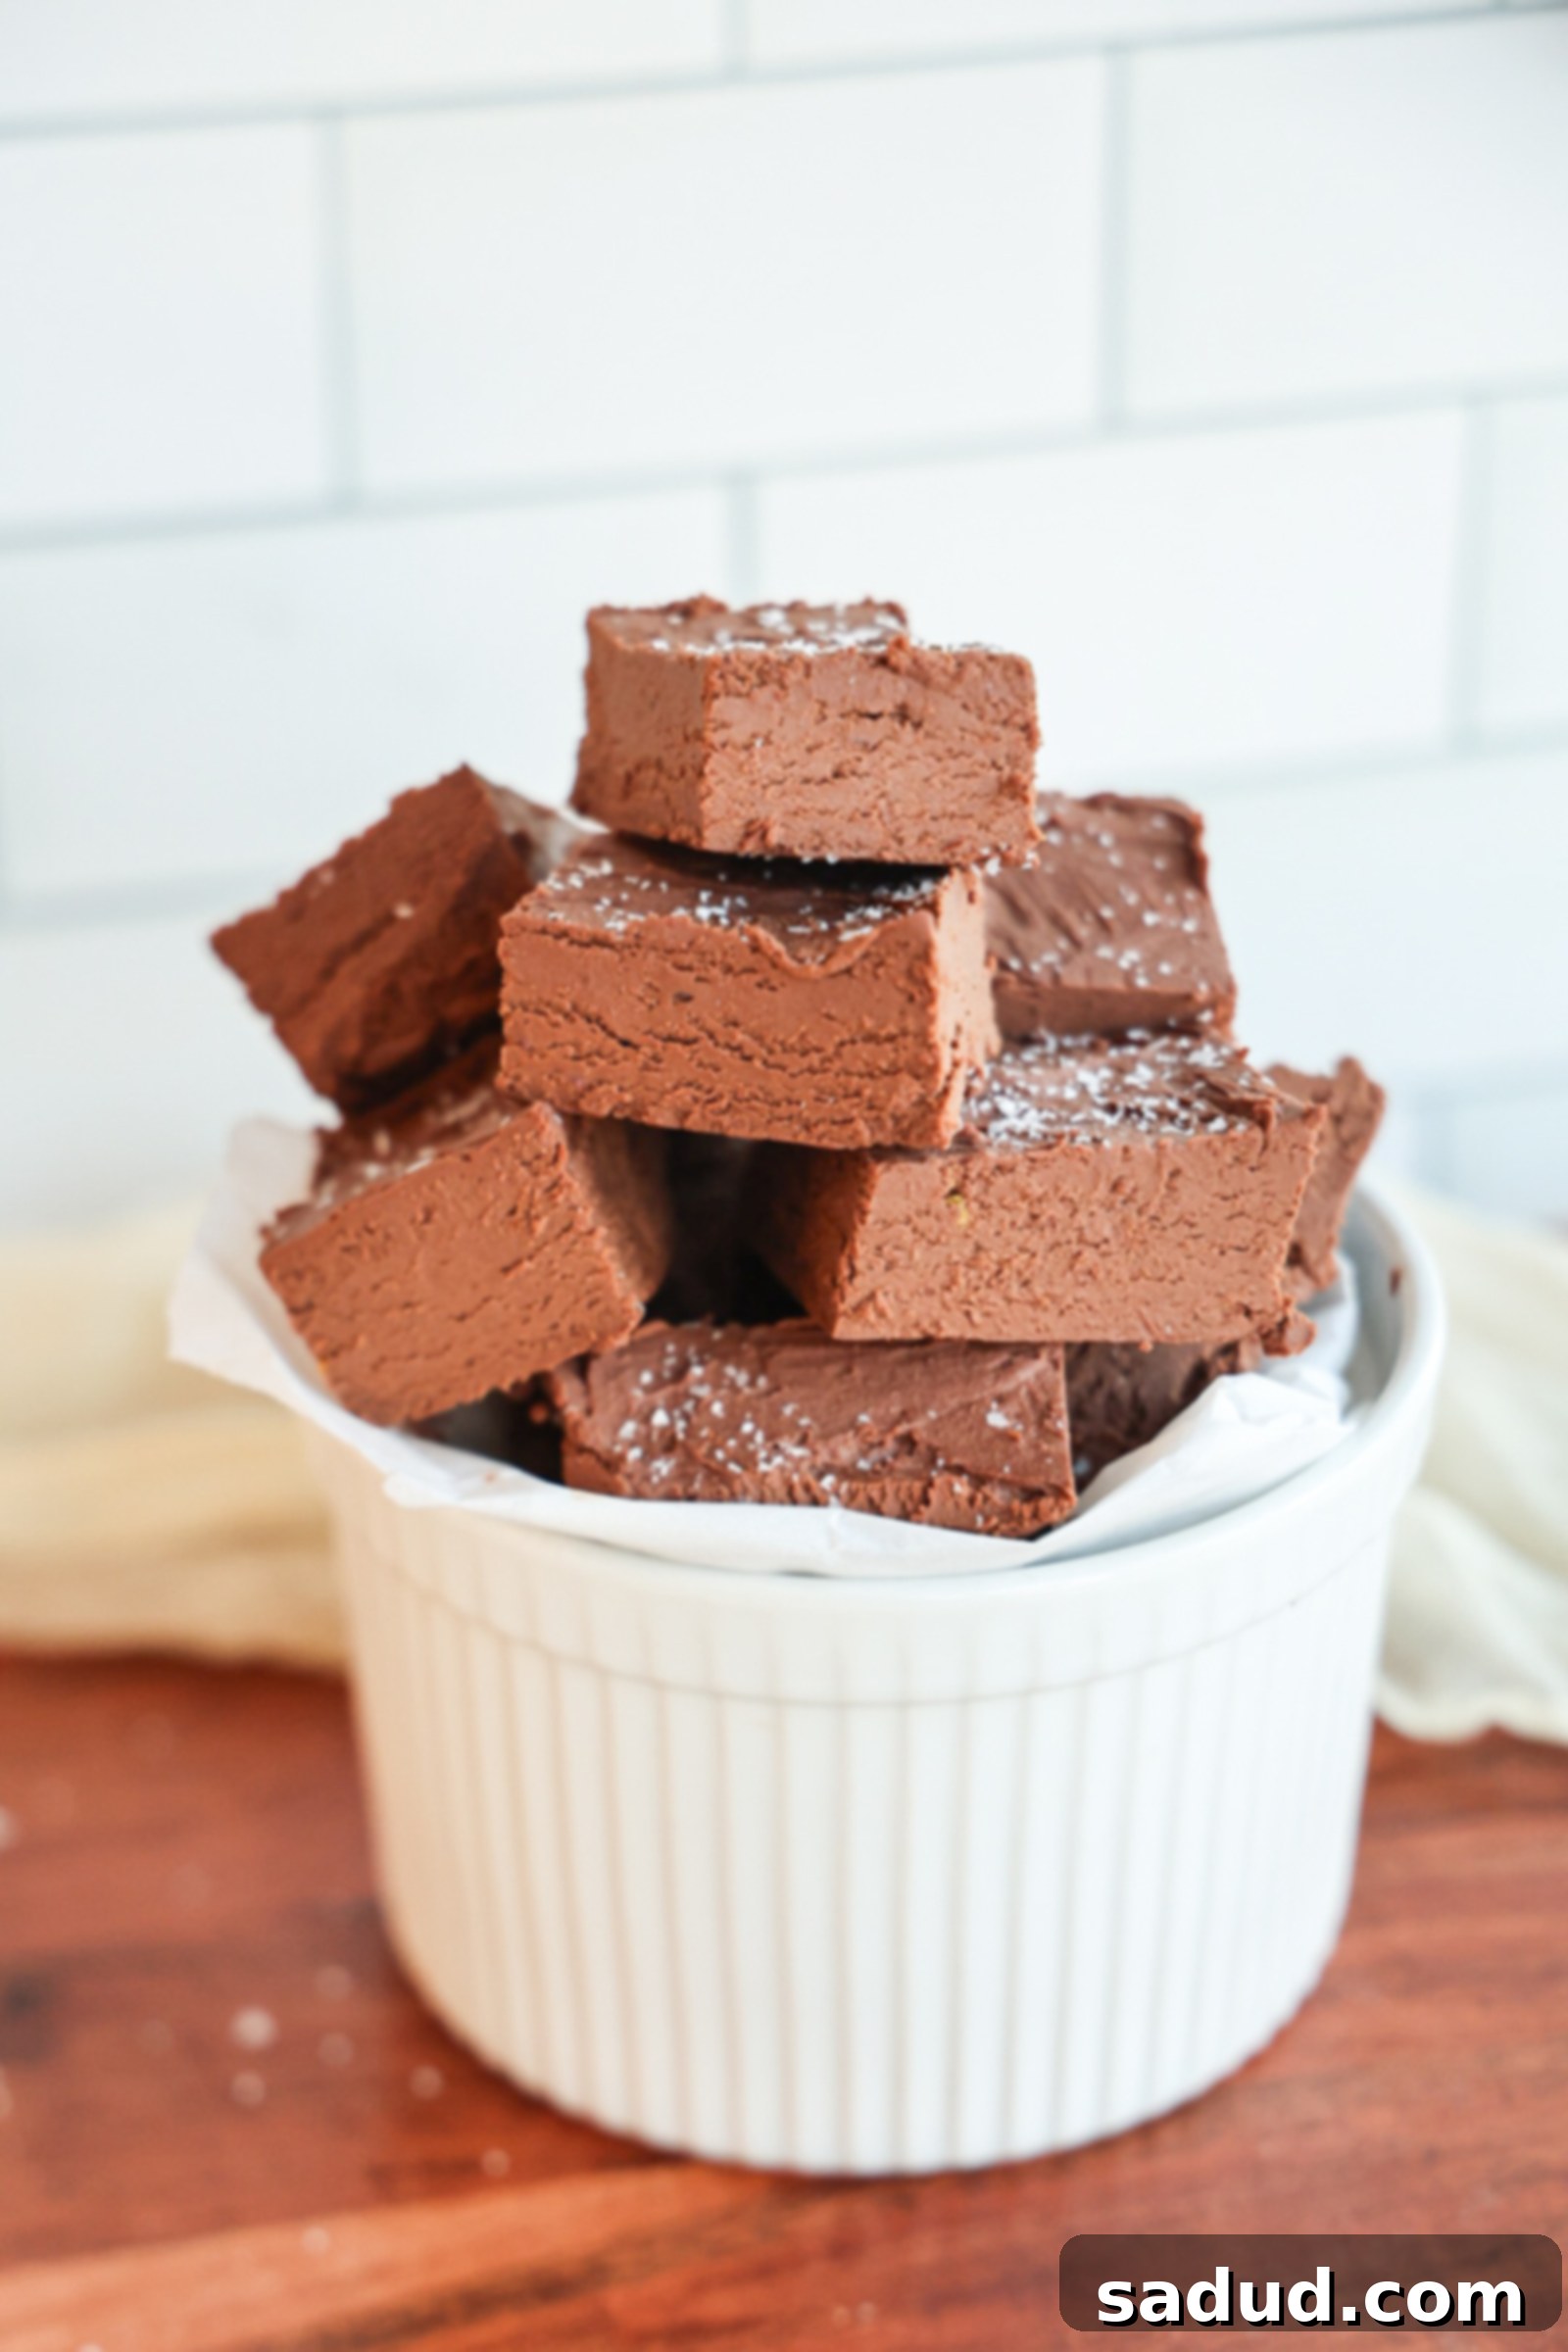
Indulge Guilt-Free: The Best 2-Ingredient Healthy Chocolate Fudge (No Refined Sugar!)
Prepare your taste buds for an unforgettable treat! This healthy fudge recipe is nothing short of decadent – smooth, rich, and truly melts in your mouth. You’d never believe that this incredible dessert is crafted with just two simple ingredients: yogurt and dark chocolate! Forget refined sugar, heavy cream, or butter; this naturally high-protein, wholesome fudge is here to revolutionize your dessert game.
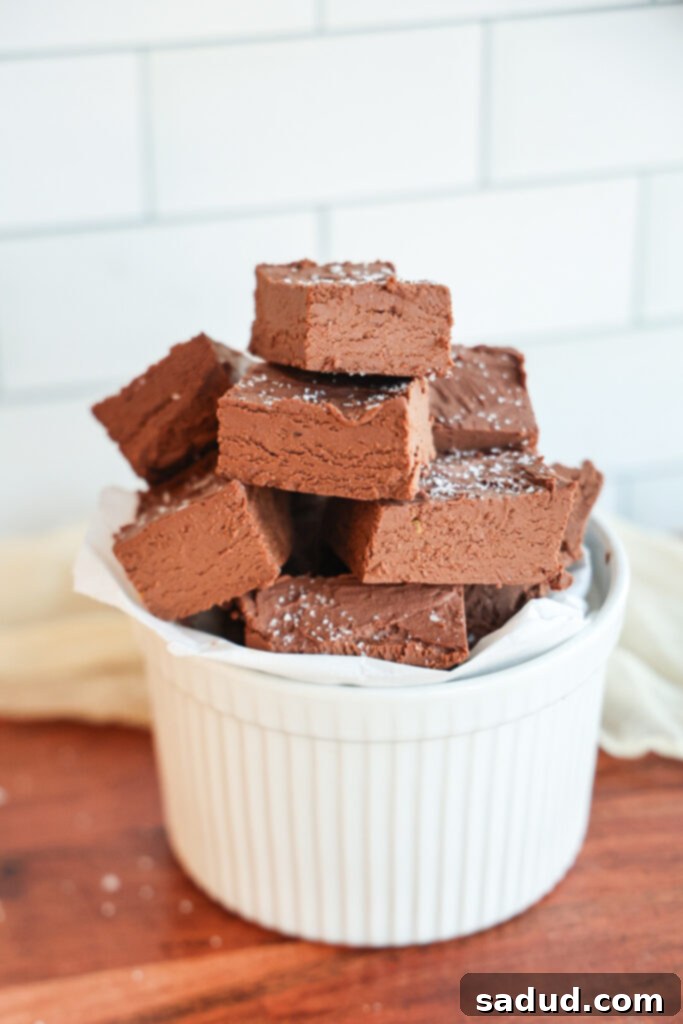
Healthy Chocolate Fudge: Your New Go-To Dessert
Creamy, rich, smooth, and utterly melt-in-your-mouth – these are all the qualities I crave in a chocolate dessert, and this healthy chocolate fudge delivers on every front. It’s the perfect sweet treat for any occasion, whether you need a little pick-me-up during the day or a satisfying dessert after a meal. The absolute best part? It couldn’t be simpler to make. Seriously, this lazy gal (and anyone else looking for an easy recipe!) appreciates a fuss-free approach to deliciousness. There’s absolutely no baking required! All you need to do is gently melt the two star ingredients together, pour the mixture into a pan, and let your freezer do the rest of the work.
If you’re a fan of high-protein desserts that feature the versatile goodness of yogurt, you’re in for a treat. This healthy fudge fits perfectly into a collection of scrumptious, guilt-free indulgences. Be sure to also try my chocolate covered yogurt clusters, my recipe for healthy vegan frozen yogurt/ice cream, or these incredibly easy frozen yogurt bites. Each offers a unique way to enjoy creamy, dreamy yogurt in a healthier dessert format.
Why You’ll Fall in Love with This 2-Ingredient Healthy Fudge
- Wholesome & Clean Ingredients: Unlike most store-bought fudges that are laden with butter, heavy cream, high fructose corn syrup, and excessive added sugars, this recipe keeps it incredibly clean. You only need two genuinely healthy ingredients: nutrient-rich yogurt and antioxidant-packed dark chocolate. This means you’re nourishing your body while satisfying your sweet cravings.
- Dietary Friendly & Adaptable: This healthy fudge is a dream come true for various dietary needs. It contains no refined sugar and is naturally gluten-free. Plus, with a few simple substitutions, it can effortlessly be made dairy-free, low-carb, keto-friendly, nut-free, and entirely vegan. It’s a versatile dessert that everyone can enjoy!
- Unbelievably Easy & No-Bake: Ditch the complex candy thermometers and hot ovens! This is arguably the easiest fudge recipe you’ll ever encounter. The process involves simply melting the ingredients together, pouring them into a pan, and freezing. That’s it! Perfect for beginner cooks or anyone short on time but big on dessert desires.
- Excellent for Meal Prep: Whip up a batch of this healthy fudge at the beginning of the week, and you’ll have delicious, high-protein snacks or desserts ready to grab and go. It’s a smart way to ensure you always have a wholesome option on hand when your sweet tooth calls, preventing you from reaching for less healthy alternatives.
- High in Protein: Thanks to the yogurt base, this fudge boasts a significantly higher protein content than traditional fudge. Protein helps keep you feeling fuller for longer and supports muscle recovery, making this a more satisfying and beneficial treat.
Step-by-Step Recipe Video: Watch Me Make Healthy Fudge at Home
Prefer visual guidance? Watch the video above to see exactly how simple it is to prepare this delicious 2-ingredient healthy fudge. Follow along as I demonstrate each step, ensuring you achieve perfect, melt-in-your-mouth results every time.
Is Homemade Fudge Really Healthy? A Deep Dive
When it comes to desserts, the term “healthy” can often feel like a stretch. However, I am a huge proponent of making homemade treats precisely because it puts *you* in complete control of the ingredients. This particular healthy fudge recipe is a prime example of how you can transform a typically indulgent dessert into a nourishing one. By using just two wholesome staples – yogurt and dark chocolate – we’re ditching the empty calories and artificial additives often found in store-bought or traditional fudge recipes.
Let’s talk about the nutritional powerhouse behind this recipe. Dark chocolate, especially with a high cacao percentage, is packed with beneficial antioxidants. These compounds help fight free radicals in your body, contributing to overall health. It’s also a surprising but excellent source of essential minerals like magnesium, which plays a role in hundreds of bodily functions, including muscle and nerve function, blood sugar control, and blood pressure regulation. So, yes, you can absolutely use its magnesium content as a delicious excuse to enjoy this healthy fudge as a late-night treat before bed – you’re welcome! Yogurt, our other star ingredient, brings a boost of protein and beneficial probiotics, which are fantastic for gut health. Choosing unsweetened yogurt also helps to keep the sugar content low, focusing on the natural flavors of chocolate.
The Secret to 2-Ingredient Fudge Without Condensed Milk
Many popular “2-ingredient fudge” recipes rely heavily on a single ingredient: sweetened condensed milk. While convenient, a typical can of sweetened condensed milk alone contains an astonishing 180 grams of sugar! This figure doesn’t even account for the sugar content of the chocolate chips often used alongside it. While I firmly believe in treating yourself to the “real deal” occasionally, for someone with a consistent sweet tooth like mine, a daily indulgence laden with that much sugar isn’t sustainable or healthy. It can lead to blood sugar spikes and crashes, leaving you feeling sluggish and craving more.
This is precisely why I embarked on creating a healthier 2-ingredient fudge recipe that completely bypasses sweetened condensed milk. By substituting it with thick, creamy yogurt, we achieve that desirable smooth texture and rich mouthfeel without all the added refined sugar. This ingenious swap not only cuts down on sugar significantly but also adds a boost of protein and beneficial probiotics from the yogurt, making it a much more nourishing choice that won’t send your blood sugar spiraling. It’s a game-changer for satisfying those chocolate cravings in a balanced way!
Creating Delicious Vegan Fudge Options
One of the many fantastic aspects of this healthy fudge recipe is its adaptability, especially for those following a vegan or dairy-free diet. Transforming this recipe into a completely vegan fudge is remarkably simple. The key lies in selecting the right dairy-free yogurt and vegan chocolate.
For the yogurt component, it is crucial to use a thick, dairy-free yogurt. Opt for varieties that mimic the consistency of traditional Greek yogurt, such as thick coconut yogurt, almond-based Greek-style yogurt, or cashew yogurt. Brands like Harmless Harvest Rich & Creamy, CocoJune, or Culina are excellent choices that provide the necessary richness and thickness for the fudge to set properly. Avoid thinner, runnier yogurts, as they won’t yield the desired firm and creamy texture. Pair this with your favorite high-quality vegan dark chocolate, ensuring it’s at least 60% cacao or higher, and you’re all set to enjoy a luscious, plant-based chocolate fudge that’s just as decadent as its dairy counterpart.
How To Make The Best 2-Ingredient Healthy Chocolate Fudge
Making this healthy chocolate fudge is incredibly straightforward, requiring minimal effort for maximum indulgence. The full detailed recipe is available in the recipe card at the bottom of this post, but here’s a comprehensive overview to guide you through each step, ensuring perfect results every time.
Essential Kitchen Tools Required
You’ll be pleased to know that there’s no need for fancy equipment like a candy thermometer or even an oven to create this simple and satisfying fudge. Here’s what you’ll need:
- Small Loaf Pan: The size of your pan will directly influence the thickness of your fudge. A smaller pan will result in thicker pieces, while a larger one will yield thinner squares. Choose according to your preference! You can also use a similar-sized glass tupperware container.
- Mixing Bowl: A medium to large mixing bowl is essential for combining your two magical ingredients.
- Spatula: A silicone spatula works best for thoroughly mixing the ingredients and scraping the bowl clean.
- Parchment Paper: This is crucial for easy removal of your fudge once it’s set and makes cleanup a breeze.
Key Ingredients for Your Healthy Fudge
- Thick Yogurt: This is the foundation of your creamy fudge. The success of this recipe hinges on using a very thick yogurt. Greek yogurt or a thick, Greek-style dairy-free alternative like coconut yogurt will yield the best, creamiest texture. Runny yogurts will simply not set properly and will result in a soft, un-fudge-like consistency. As someone who follows a dairy-free diet, I often use coconut yogurt, and brands like Harmless Harvest Rich & Creamy, CocoJune, and Culina are my favorites for their ideal thickness and flavor. If using plain yogurt, consider adding a touch of vanilla extract for extra flavor.
- 60% Dark or Higher Quality Chocolate: The quality and cacao percentage of your chocolate are paramount here, as it provides the primary flavor and structure for the fudge. It’s vital to use dark chocolate with at least 60% cacao content (or higher). Chocolate with a lower cacao percentage, particularly milk chocolate, contains more milk solids and sugar, which prevents it from firming up as effectively. If you prefer a slightly sweeter fudge, you *can* experiment by substituting up to 1/4 cup of the darker chocolate with milk chocolate, but be aware that it might result in a slightly softer final texture. For specific dietary needs, here are some recommendations:
- Sugar-Free Fudge: Lily’s Chocolate Chips are an excellent choice for a sugar-free option (this link is for a convenient pack of 3!).
- Dairy-Free/Vegan Fudge: Look for Enjoy Life Chocolate Chips, which are certified dairy-free and vegan.
- Organic Refined Sugar-Free Fudge: Hu Kitchen Chocolate Gems are a personal favorite for their high quality and commitment to being refined sugar-free.
- Keto Fudge: For a strict keto option, try Pascha Organic Keto Sugar-Free Bitter Sweet 70% Chocolate.
Step-by-Step Instructions for Perfect Healthy Fudge
Follow these simple steps to create your own batch of delicious 2-ingredient healthy chocolate fudge:
- Prepare the Yogurt: In a large mixing bowl, add your thick yogurt. It is critically important that the yogurt is not super cold, as a drastic temperature difference can cause the melted chocolate to seize and become a crumbly mess. To avoid this, either let the yogurt sit out on the counter for at least 15-20 minutes to come closer to room temperature, or if you’re in a hurry, gently warm it in the microwave for about 15 seconds (do not make it hot!). If you’re using unflavored yogurt, this is a great time to stir in 1 teaspoon of vanilla extract for an enhanced flavor profile.
- Prep Your Pan: Line a small loaf pan or a glass tupperware container with parchment paper. Ensure the parchment paper hangs over the edges, creating “handles” that will make it easy to lift the set fudge out later. Set this prepared pan aside.
- Melt the Chocolate: Now it’s time to melt your high-quality dark chocolate. You can use either the double boiler method (placing a heatproof bowl over a simmering pot of water) or the microwave. For the microwave method, place the chocolate in a medium, microwave-safe bowl. Heat in short bursts of 30 seconds, stirring thoroughly after each interval, until the chocolate is completely smooth and glossy. Be careful not to overheat the chocolate, as this can cause it to burn or seize.
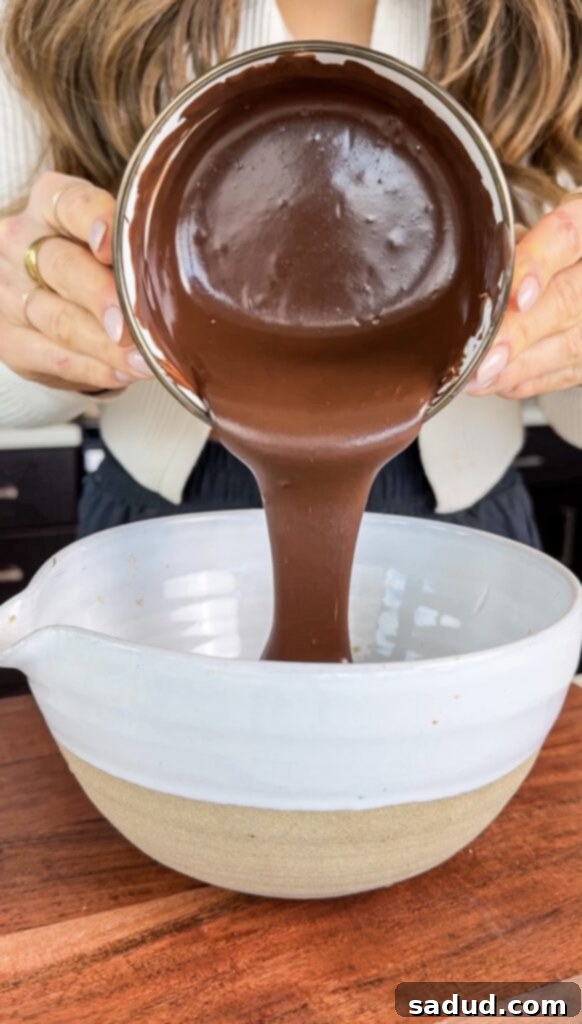
- Combine & Mix: Once the chocolate is perfectly smooth and still hot, immediately pour it over the room-temperature yogurt in the large bowl. Using your spatula, work quickly to mix the two ingredients together until they are completely uniform and smooth. The mixture will begin to thicken and harden as it cools, so efficiency is key here to achieve a silky consistency.
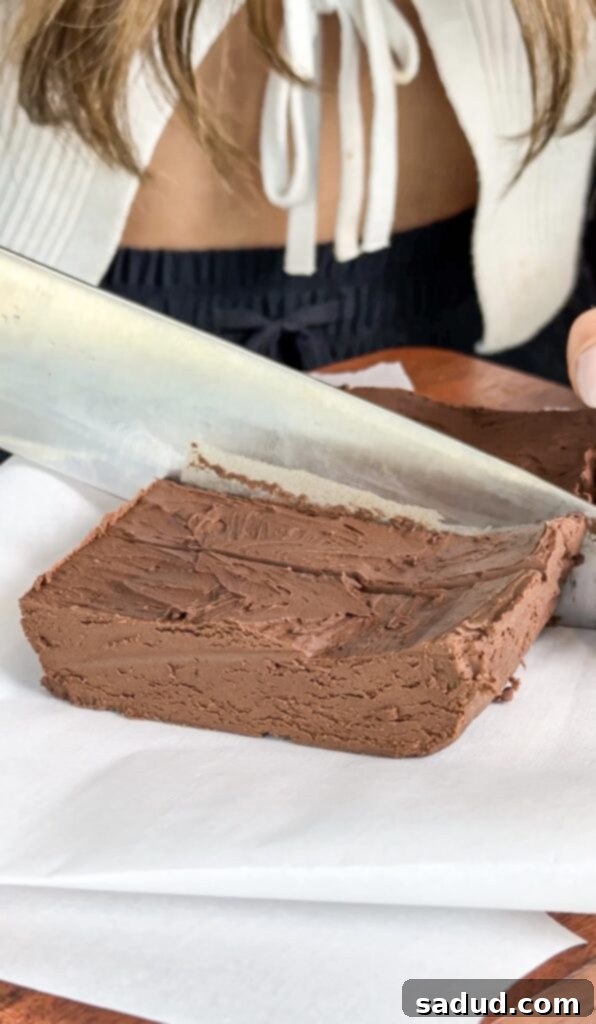
- Set the Fudge: As soon as the yogurt and chocolate are fully combined, pour the mixture quickly into your prepared loaf pan. Use the spatula to spread it evenly. Place the pan in the freezer for a minimum of a few hours, or until the fudge has firmed up completely. Once firm, use the parchment paper handles to lift the fudge out of the pan, then cut it into your desired pieces. For an extra touch of gourmet flavor, I love to sprinkle a pinch of flaky sea salt over the top before serving!
- Store Properly: Store the cut fudge pieces in an airtight container or a freezer-safe bag in the freezer. This fudge is specifically formulated to be kept in the freezer, and it will remain delicious for up to 2 months. Be aware that if stored in the refrigerator, the fudge may become too soft and lose its ideal texture.
FAQs & Expert Tips for Your Healthy Fudge
- Preventing Chocolate Seizing: This is a crucial step! To prevent your chocolate from seizing (turning into a hard, crumbly mess when mixed with yogurt), ensure your yogurt is not too cold and your melted chocolate is adequately hot when combining them. Letting the yogurt sit at room temperature for a few minutes or microwaving it for 15 seconds will help. Immediately add the hot melted chocolate to the prepared yogurt and mix quickly.
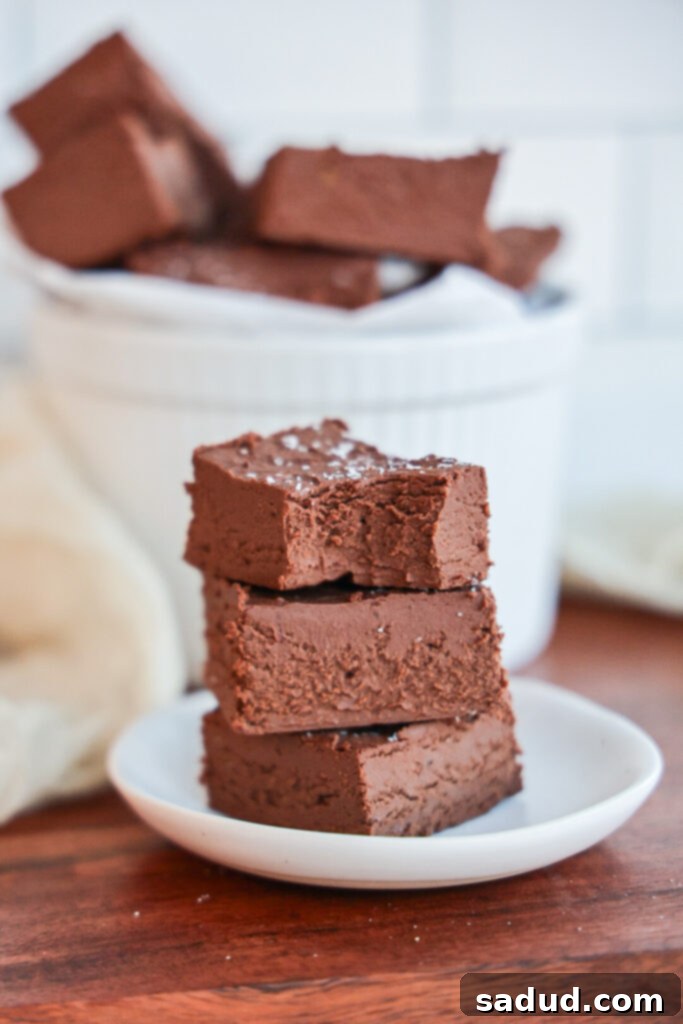
- What is the Texture & Taste Like? This healthy fudge offers a truly luxurious experience – it’s super creamy, incredibly smooth, and wonderfully rich. It will undoubtedly satisfy your chocolate cravings without being overly sweet, unlike many traditional fudges that can leave you with a sugar overload. You might notice a subtle, delightful tangy aftertaste from the yogurt, which beautifully complements the dark chocolate. Since it’s made with darker chocolate, it’s less sweet than milk chocolate-based fudges. If you desire a sweeter profile, try substituting up to 1/2 cup of milk chocolate chips for 1/2 cup of the darker chocolate, but be aware this might result in a slightly softer texture. Alternatively, you can add a few drops of a natural liquid sweetener like stevia or monk fruit to the mixture.
- Achieving Clean Cuts: For perfectly neat and attractive fudge squares, ensure the fudge is thoroughly frozen before cutting. For the cleanest cuts, you can slightly warm your knife under hot water, wipe it dry, and then slice. Repeat this process for each cut. Trimming the very edges of the block can also help achieve a uniform look.
- Can I use low-fat yogurt? While full-fat, thick Greek or coconut yogurt yields the best, creamiest results, a very thick, high-quality low-fat Greek-style yogurt *might* work. However, it’s generally advised to stick with full-fat for optimal texture and richness. Avoid any thin or runny low-fat yogurts.
- What if my fudge is too soft? If your fudge doesn’t firm up as much as you’d like, it’s likely due to using chocolate with too low a cacao percentage (below 60%), or a yogurt that was too thin. Ensure you’re using a high-quality dark chocolate (60% or higher) and a very thick, Greek-style yogurt. Give it extra time in the freezer, perhaps overnight.
Creative Healthy Chocolate Fudge Flavor Variations
This basic 2-ingredient healthy fudge recipe is a fantastic canvas for creativity! Feel free to experiment with these delicious flavor additions to customize your treat:
- Mint Chocolate Fudge: For a refreshing twist, stir in 1/4 teaspoon of pure peppermint extract into the chocolate-yogurt mixture before pouring into the pan.
- Chocolate Peanut Butter Fudge (Reese’s Style): Add 1/4 cup of your favorite creamy peanut butter (or other nut butter like almond butter) to the mixture, or simply swirl some into the top of the fudge for a beautiful marbled effect.
- Trail Mix Fudge: Fold in a handful of your favorite chopped nuts (almonds, walnuts, pecans) and dried fruits (raisins, cranberries, chopped apricots) into the fudge batter for added texture and nutrition.
- Rocky Road Fudge: Elevate your fudge by stirring in some finely chopped almonds and mini marshmallows (or vegan marshmallows) before transferring it to the pan.
- Mocha Fudge: For coffee lovers, dissolve 1/2 teaspoon of instant espresso powder or instant coffee into the warm chocolate-yogurt mixture for a delightful coffee-infused chocolate flavor.
- Nutella Hazelnut Fudge: Stir in 1/4 cup of hazelnut butter for a rich, nutty flavor, or fold in 1/3 cup of chopped toasted hazelnuts. You can also swirl homemade or store-bought Nutella/hazelnut butter over the top of the fudge after it’s in the pan. My healthy homemade Nutella recipe would be absolutely perfect for this!
- Orange Zest Fudge: For a bright, citrusy note, grate in 1-2 teaspoons of fresh orange zest into the fudge mixture. Chocolate and orange are a classic pairing!
Storing Your Healthy Fudge Bars for Freshness
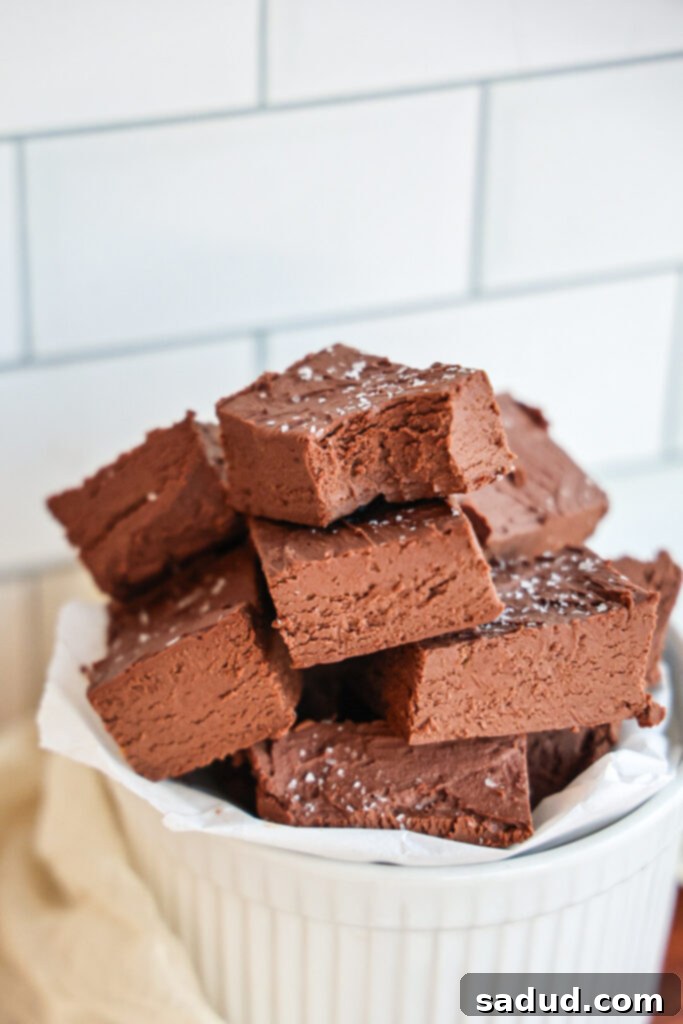
Proper storage is key to maintaining the perfect texture of your homemade healthy fudge. Always store the fudge in an airtight container in the freezer. When stored correctly, it will remain fresh and delicious for 2-3 months. It’s important to reiterate that this recipe is specifically designed for freezer storage. If you place the fudge in the refrigerator, it will likely become too soft and lose its desired firm, melt-in-your-mouth consistency.
If You Loved This Healthy Fudge Recipe, You’ll Want to Try These!
Once you experience the ease and deliciousness of this 2-ingredient healthy fudge, you might be eager to explore more wholesome dessert options. Here are some other fantastic recipes that I think you’ll absolutely love:
- No-Bake Peanut Butter Oatmeal Fudge Bars
- Healthy Vegan Fudge Bites
- 3-Ingredient Fudge Stripe Cookies
- Frozen Protein S’mores
- Peanut Butter Cup Frozen Yogurt Bars
- Healthy Dilly Bars
If you try this healthy 2-ingredient fudge recipe and absolutely love it, it would truly mean the world to me if you left a star rating and a review below! Your feedback helps others discover and enjoy these wholesome treats. Don’t forget to tag me in your delicious creations on Instagram @danishealthyeats! Happy fudging!
Healthy Fudge (2 ingredients)
Pin Recipe
Ingredients
Fudge
- 1 1/2 cups 60% dark or higher, chocolate (about 270g) *see notes
- 3/4 cup THICK coconut yogurt or greek style yogurt (I like to use unsweetened vanilla) *Runny yogurts won’t work! I used Harmless Harvest Rich & creamy. See notes.
Optional
- pinch of sea salt
- 1 tsp vanilla extract
- chopped nuts, dried fruit, etc!
Instructions
-
In a large bowl, add the yogurt. It’s important to note you want to work quickly once the chocolate is melted, as the mixture can seize and create a crumbly texture if the chocolate cools too much. Add the yogurt to a bowl and let it sit at room temperature for a few minutes until it’s almost at room temp. If you yogurt isn’t flavored, you can stir in a teaspoon of vanilla so that your fudge has some flavor.
-
Line a small loaf pan or glass tupperware container with parchment paper and set aside.
-
Either using the double boiler method or microwave, melt the chocolate. Microwave – In a medium bowl, add the chocolate. Heat in 30 second increments, stirring well between each, until completely smooth.
-
Once the chocolate is smooth, pour it over the yogurt. Using a spatula, mix the two together well until uniform. You’ll want to work quickly as the mixture will harden as it cools.
-
Once it’s mixed together, quickly pour it into the pan. Place the pan in the freezer for a few hours until it has firmed up. Then cut into pieces. I like to sprinkle over flakey sea salt!
-
Store the fudge pieces in an air-tight container or freezer bag in the freezer for up to 2 months! This recipe is formulated to be kept in the freezer and they may become too soft if kept in the fridge!
Video
Notes
*chocolate: It’s important that the chocolate is a somewhat darker chocolate (60% or higher) as milk chocolates don’t firm up correctly due to the milk content. Being it’s made with darker chocolate, it may not be as sweet as something made with milk chocolate. If you want something sweeter, you can try substituting 1/4 cup milk chocolate chips for 1/4 cup of the darker chocolate, but the fudge may come out just a tad bit softer in texture. Maybe try letting it freezer overnight or for a day or so to give it extra time to firm. Or you could also try adding a few drops of stevia or monk fruit.
