The Ultimate Homemade Gluten-Free Bagel Recipe: Chewy, Paleo & Easy (No Yeast!)
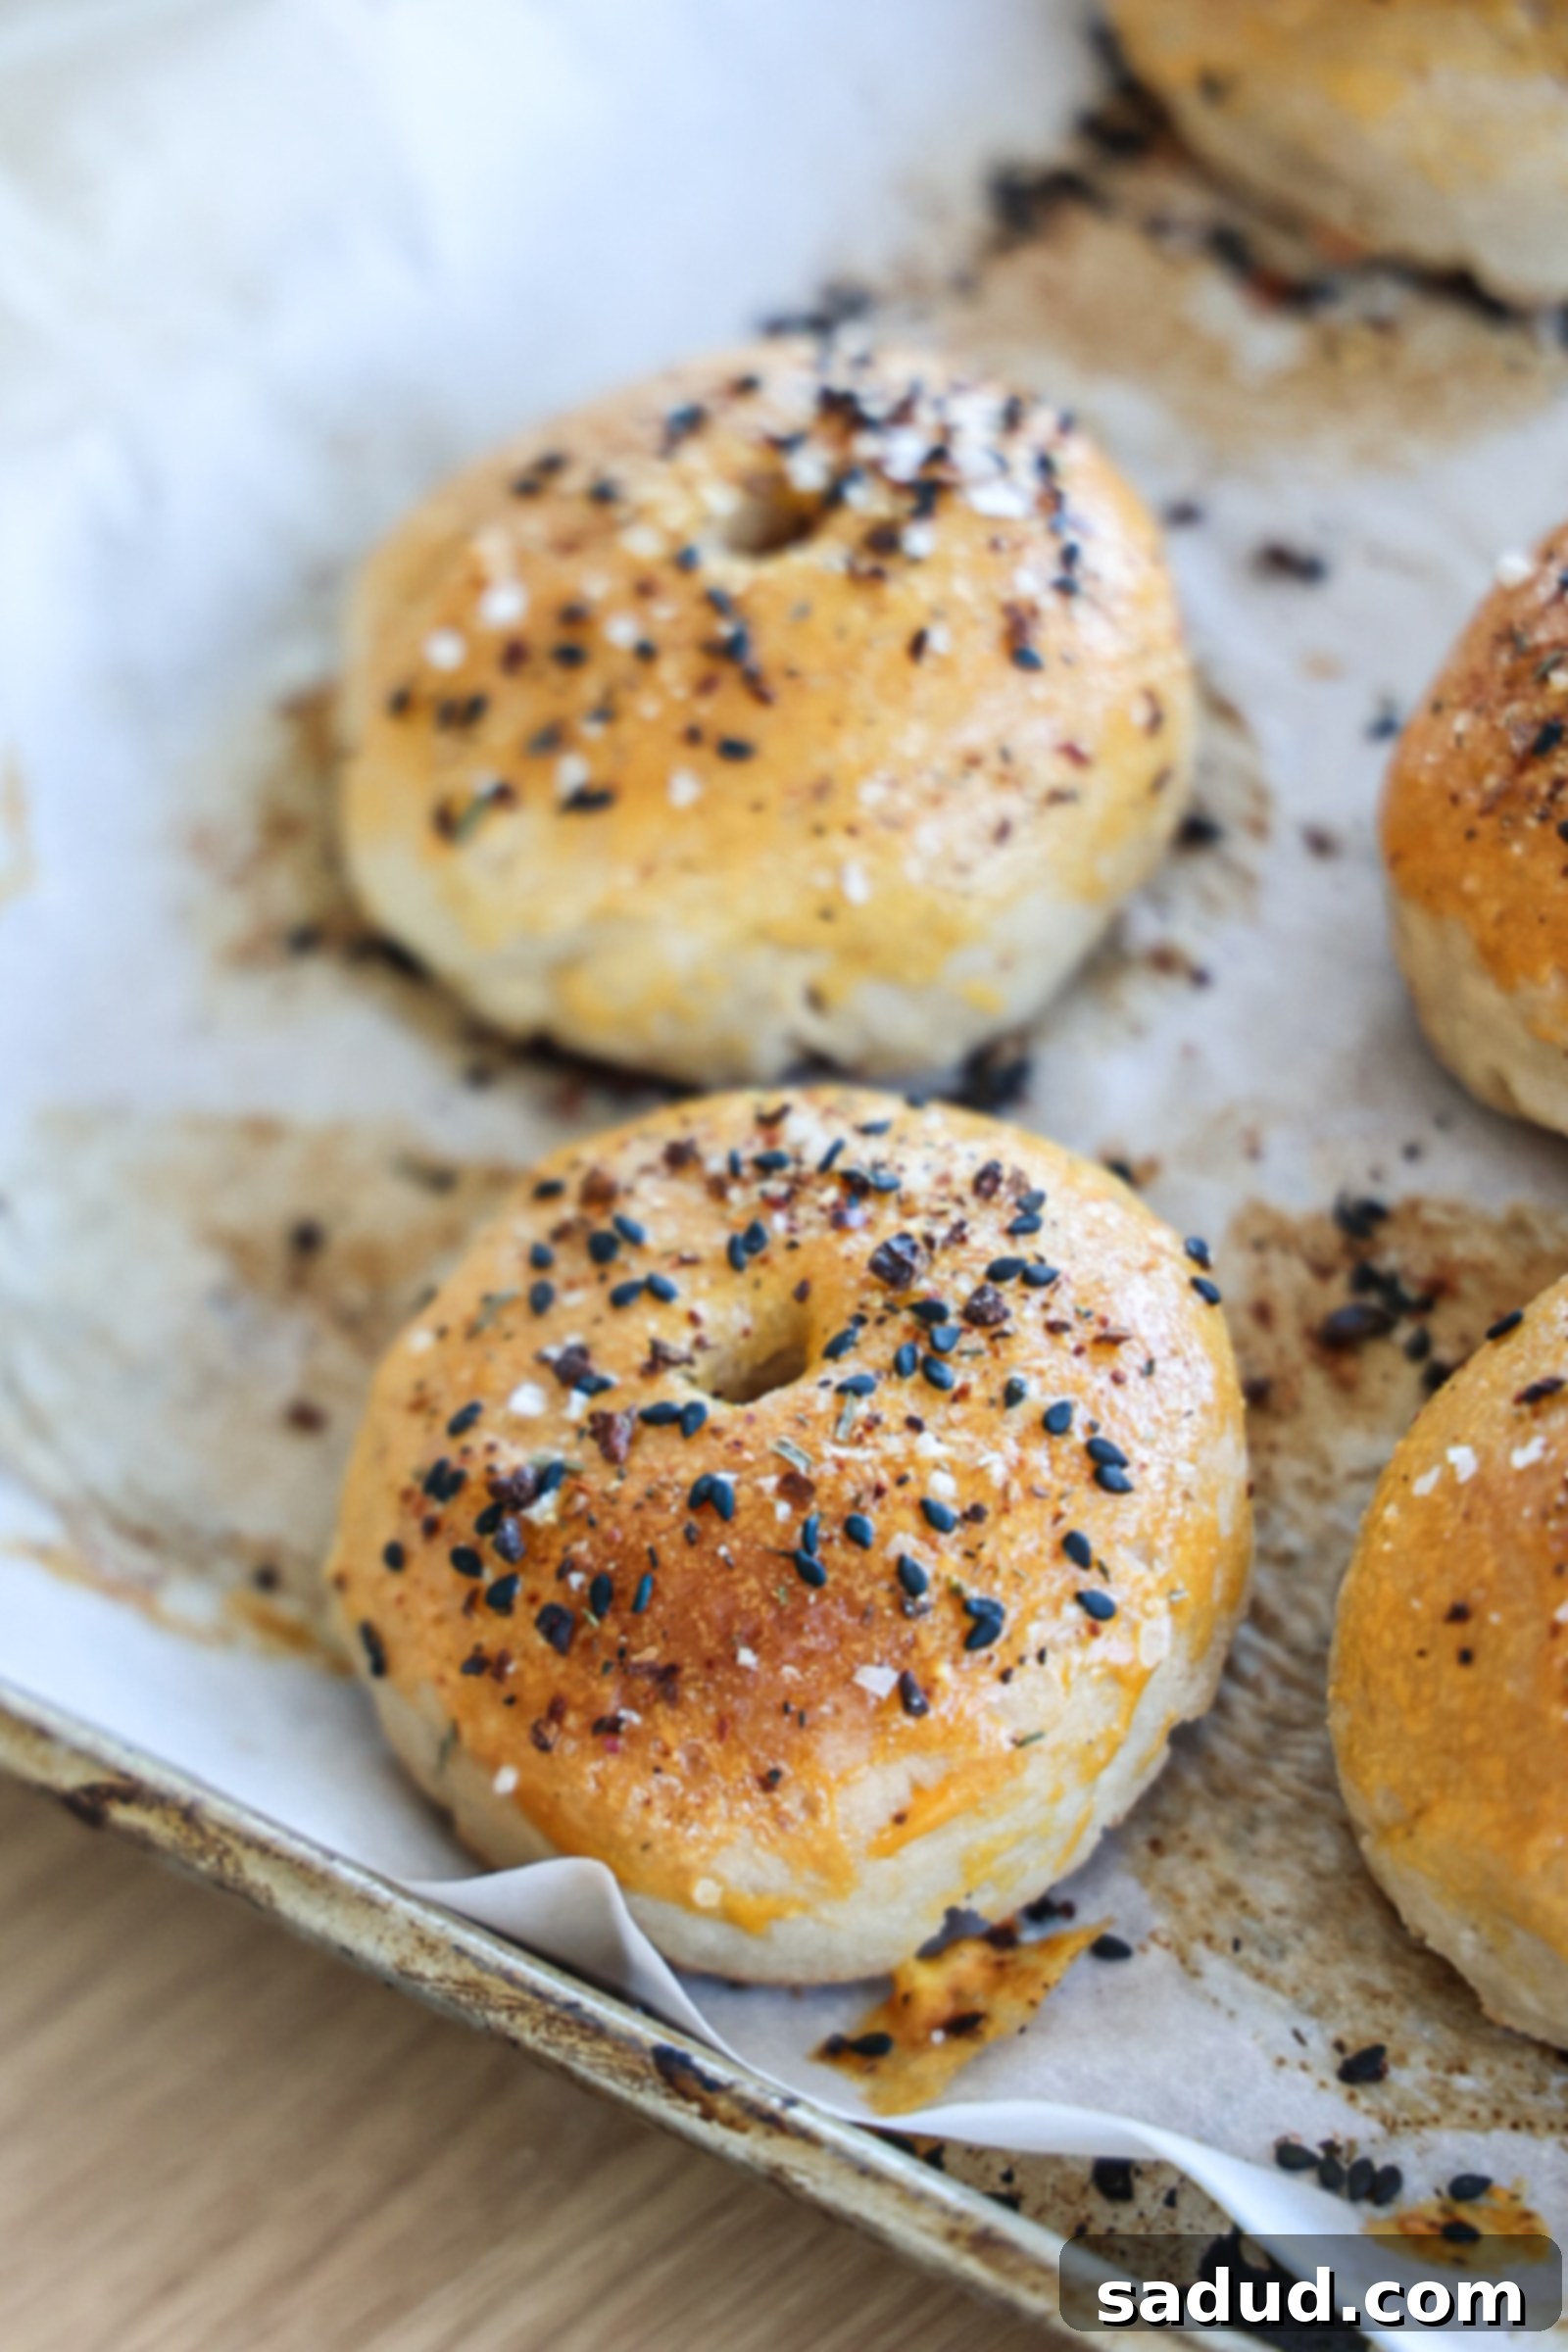
Are you craving the satisfying chew and delightful texture of a *real* bagel but navigating a gluten and dairy-free diet? Look no further! This is truly the **BEST homemade gluten-free bagel recipe** you’ll ever find. These bagels are wonderfully thick, boast a perfectly chewy exterior, and are surprisingly soft on the inside. You’ll barely believe they’re entirely gluten-free, paleo, and can even be made vegan!
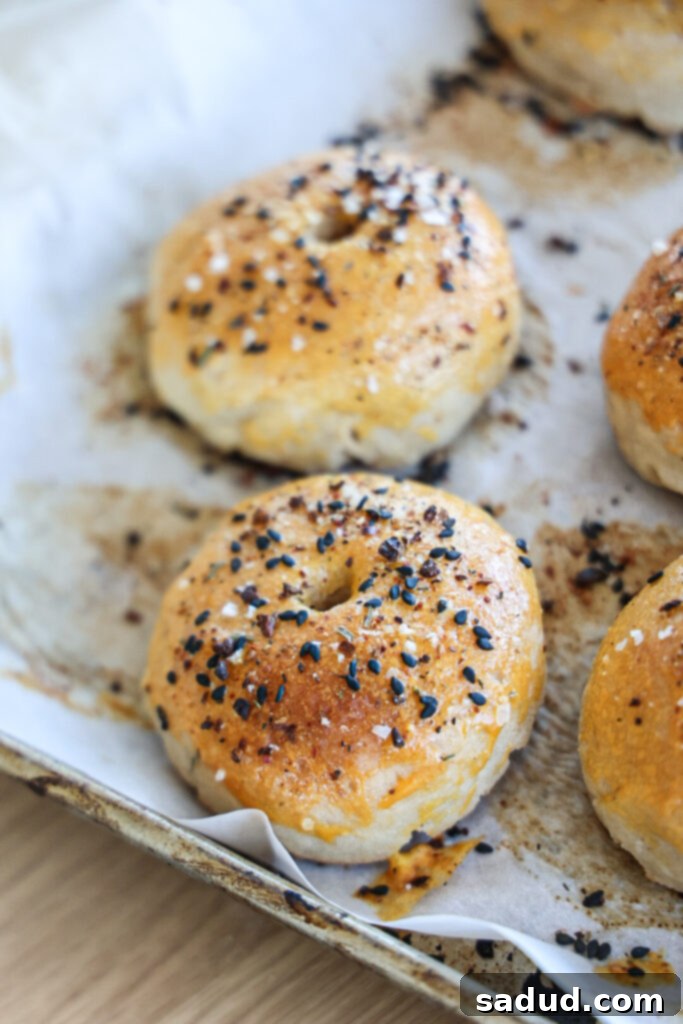
Finding the Best Gluten-Free Bagel: A Culinary Quest
There was a time when nothing beat a warm, toasted bagel breakfast sandwich, especially if it was a genuine New York-style bagel. However, adopting a gluten-free lifestyle often means saying goodbye to such simple pleasures, as the market for truly excellent gluten-free or paleo bagel options is notoriously limited. Many store-bought alternatives often disappoint, lacking that characteristic chewiness and sometimes tasting dry or crumbly. This culinary void led me straight to my kitchen, determined to crack the code and create a homemade version that genuinely satisfies.
After numerous trials and a few less-than-successful attempts, I am thrilled to share what I believe is a definitive winner – perfected with a little inspiration from The Shooks Life. The magic lies in the carefully balanced combination of almond flour and tapioca flour. This duo doesn’t just deliver a fantastic chewy texture and a rich, nutty flavor; it also keeps your blood sugar levels stable, making these bagels a truly wholesome choice for any meal.
A Better Alternative to Viral Yogurt Bagels
You’ve likely seen the viral yogurt bagel recipes making rounds online, celebrated for their simplicity of mixing flour and yogurt for an easy bake. While those offer quick convenience, my goal was to create something with more substance, a heartier texture, and a recipe that didn’t require an extra trip to the store for yogurt!
This particular gluten-free bagel recipe stands apart. It’s truly revolutionary because it demands **no yeast**, **no yogurt**, and therefore, **no rise time** whatsoever! This means you can whip up a batch of delicious, chewy bagels without any extensive planning or waiting around. They’re incredibly quick to prepare, perfect for those mornings when a bagel craving strikes unexpectedly. Imagine them toasted and slathered with my creamy vegan cashew cream cheese – an absolute dream! If you’re keen on exploring more paleo bread options, be sure to check out my paleo sandwich bread recipe too.
Gluten-Free & Paleo Bagel Recipe Video
Watch the full recipe in action to see just how easy it is to create these incredible bagels from scratch. This video guide walks you through each step, ensuring you achieve perfect results every time.
Why You’ll Fall in Love with This Recipe
This isn’t just another gluten-free recipe; it’s a game-changer for anyone who misses the simple joy of a truly great bagel. Here’s why this recipe will become a staple in your kitchen:
- Unbelievably Quick and Easy: Forget the long, arduous process of traditional bagel making. With no yeast to activate and no lengthy rise times, these bagels are prepped and ready for the oven in under 15 minutes. It’s perfect for busy mornings or spontaneous baking sessions.
- Infinitely Customizable: The base recipe is fantastic on its own, but it’s also a blank canvas for your creativity. Load them up with your favorite seeds, spices, or even some sweet mix-ins before baking. The possibilities are endless!
- Flawless Texture: This is where these bagels truly shine. They boast a wonderfully chewy crust and a soft, airy interior – exactly what you expect from a classic bagel. If you’ve been searching for a gluten-free bread that truly mimics the texture of its traditional counterpart, your search ends here.
- Perfect for Various Dietary Needs: This recipe is a fantastic solution for many restrictive diets. They are naturally gluten-free, dairy-free, paleo, and can easily be made vegan and grain-free. This means almost everyone can enjoy the authentic bagel experience without compromise.
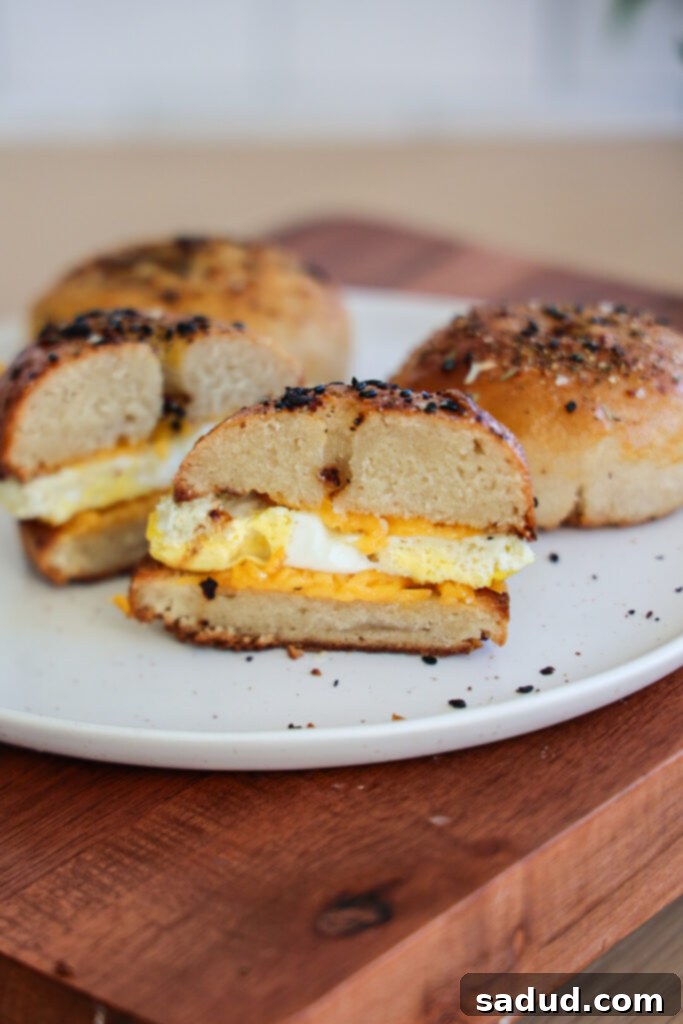
Making Homemade Gluten-Free & Paleo Bagels: A Step-by-Step Overview
While the detailed recipe card at the bottom of this post provides precise measurements and instructions, here’s a quick overview of the simple process. You’ll be surprised at how straightforward it is to achieve bakery-quality results right in your own kitchen.
Essential Equipment for Bagel Success
You don’t need fancy gadgets to make these bagels, but a few key pieces of equipment will make the process smoother and ensure the best results:
- Large Mixing Bowl: For combining all your dry and wet ingredients. A generously sized bowl ensures you have plenty of space to mix the dough thoroughly.
- Deep Pot: Crucial for the boiling step, which gives bagels their signature chew. I highly recommend Caraway pots – they’re exceptionally non-toxic and durable. (Use code **danishealthyeats10** for a discount!) Their even heat distribution is perfect for boiling.
- Baking Sheet: A sturdy baking sheet is essential for baking the bagels. I prefer stainless steel baking sheets to minimize exposure to any potentially toxic chemicals found in some non-stick cookware. Line it with parchment paper for easy cleanup and to prevent sticking.
Naturally Gluten-Free & Dairy-Free Bagels
One of the most impressive aspects of this recipe is its inherent freedom from common allergens. These bagels are naturally gluten-free and dairy-free, making them accessible to a wider audience without sacrificing flavor or texture. Through extensive recipe testing, I’ve discovered that wheat and dairy are not prerequisites for crafting truly delicious bagels. You can achieve that coveted chewy, dense, and slightly crumbly texture using just a few high-quality, wholesome ingredients that nourish your body while delighting your taste buds.
Gluten-Free & Egg-Free Bagels (with a vegan option for the wash!)
Beyond being gluten and dairy-free, this bagel recipe is also naturally egg-free in the dough itself, adhering to paleo and vegan dietary principles. However, for that authentic crispy, golden top and classic bagel appearance, we typically use an egg wash during the second bake. Don’t worry if you need to keep it completely egg-free; I’ve provided fantastic vegan egg wash substitutes later in this post, ensuring everyone can achieve a beautiful finish.
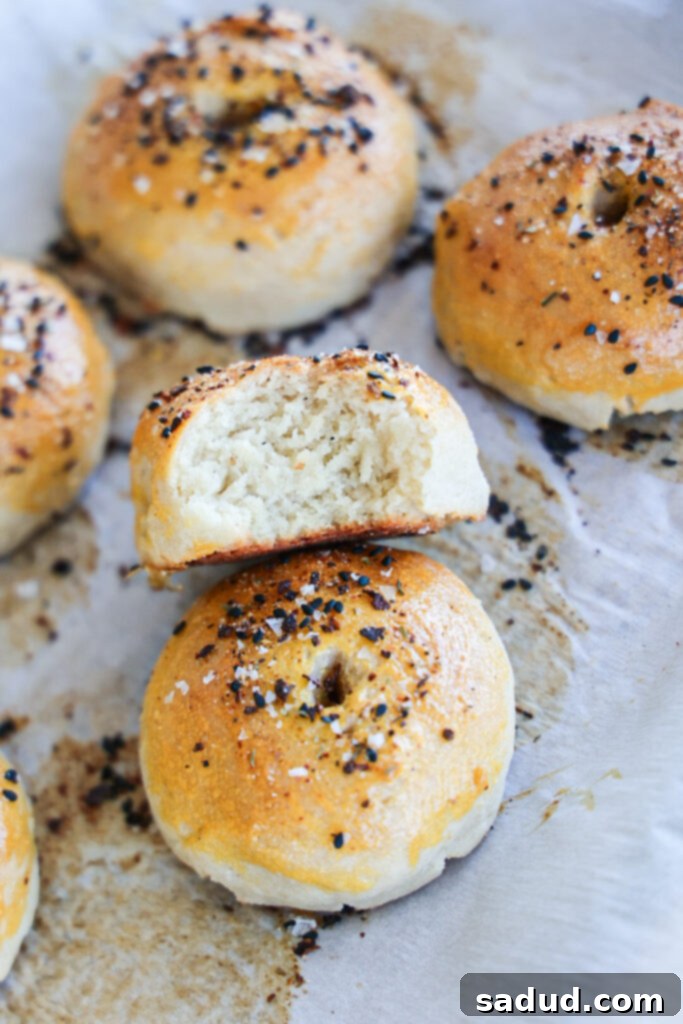
Key Ingredients and Their Roles
Each ingredient in this recipe plays a vital role in achieving the perfect gluten-free bagel. Using high-quality ingredients will yield the best results:
- Almond Flour: This is the base of our dough, providing a rich, nutty flavor and a good structure. When looking for alternatives, cashew flour can often work as a 1:1 substitute, offering a similar texture and flavor profile. For a completely nut-free option, Tiger Nut Flour is typically a reliable 1:1 substitute. While I haven’t personally tested these specific substitutes with this recipe, they are generally known to perform similarly in paleo baking.
- Tapioca Flour (or Tapioca Starch): This ingredient is absolutely crucial for the characteristic chewiness and structural integrity of the bagels. It helps to bind the dough and prevent it from becoming crumbly. Arrowroot flour or starch is often a 1:1 substitute for tapioca, but I haven’t tested it in this particular recipe, so results may vary slightly. Do not skip this!
- Baking Powder: Our leavening agent! Since we’re not using yeast, baking powder works with the apple cider vinegar to give the bagels a light, fluffy interior.
- Apple Cider Vinegar: This acidic ingredient is essential for activating the baking powder, producing the carbon dioxide needed for lift. It also adds a subtle tang that complements the bagel flavor.
- Maple Syrup: Adds a touch of sweetness and helps with browning. You can also use honey if preferred. This is a crucial element for balancing flavors.
- Sea Salt: Enhances all the flavors in the bagel dough. Don’t underestimate its importance!
- Everything But The Bagel Seasoning: This beloved blend is perfect for topping your bagels. Of course, you can choose any seasoning you like – sesame seeds, poppy seeds, or even a cinnamon-sugar sprinkle for a sweet bagel.
- Egg: Used for the egg wash. This provides that classic golden, shiny, and slightly crisp crust. If following a vegan diet, be sure to use one of the vegan alternatives mentioned below.
- Warm Water: Essential for combining the flours and creating a pliable dough. Ensure it’s warm, not hot, to avoid ‘cooking’ the flour.
The Science Behind Boiling Bagels: Why it’s Non-Negotiable!
Many first-time bagel makers wonder why boiling is such a critical step. It’s what truly distinguishes a bagel from a mere bread roll with a hole! Boiling bagels before baking them is a traditional technique that gelatinizes the starch on the exterior of the dough. This process effectively “sets” the crust, creating a firmer, chewier shell that locks in moisture during baking.
Typically, bagels are boiled for about 30 to 60 seconds on each side. The duration of the boil directly impacts the final texture: a longer boil will result in a thicker, chewier crust. This step is absolutely fundamental and should **NOT** be skipped, even for gluten-free and paleo versions. It only takes a minute or two but makes an enormous difference in achieving that authentic bagel chewiness that we all love.
Step-by-Step Guide to Crafting Your Homemade Bagels
Creating these gluten-free and paleo bagels is a straightforward process. Follow these main steps, and you’ll have delicious, freshly baked bagels in no time!
- Prepare the Dough: In a large mixing bowl, combine all the dry and wet ingredients. Mix thoroughly until a uniform, cohesive dough forms. Don’t be discouraged if it seems a bit crumbly at first; keep mixing, and it will come together into a pliable ball. I find mixing by hand is best to truly feel the consistency.
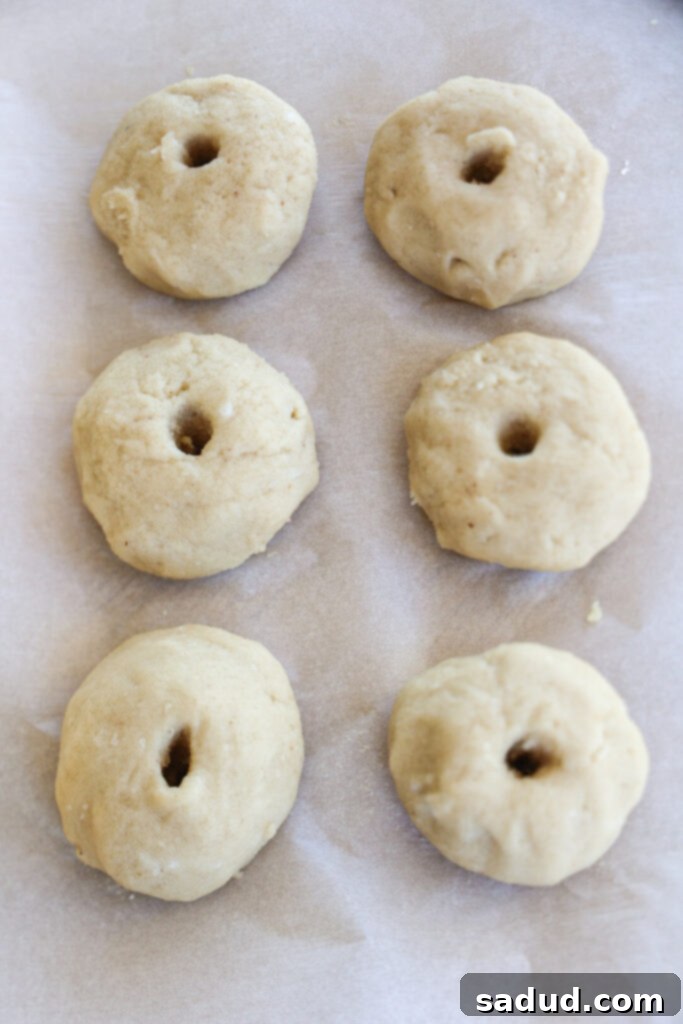
- Shape the Bagels: Divide the dough into 6 to 8 equal portions. Lightly wet your hands to prevent sticking, then roll each portion into a smooth ball. Flatten the ball slightly, then use your finger or a chopstick to create a hole in the center, shaping it into a classic bagel ring. Place the shaped bagels on your prepared baking sheet.
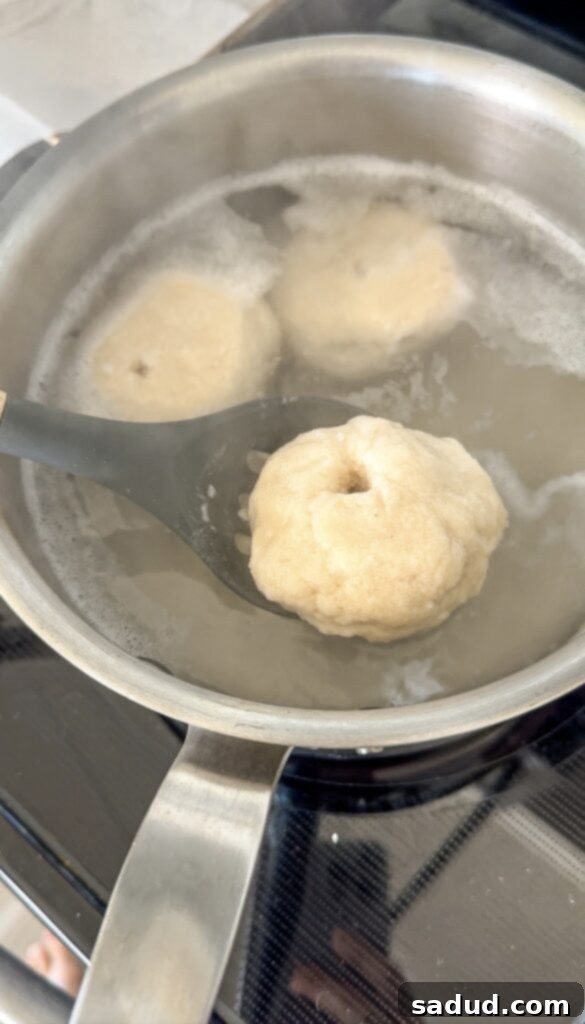
- Boil the Bagels: Bring a large pot of water to a gentle simmer (not a rolling boil). Using a slotted spoon, carefully drop 2-3 bagels into the simmering water. Boil them for approximately 1 minute per side, or until they float to the top. Remember, a longer boil yields a chewier crust! Remove them with the slotted spoon and return them to the baking sheet. Repeat this process until all bagels have been boiled.
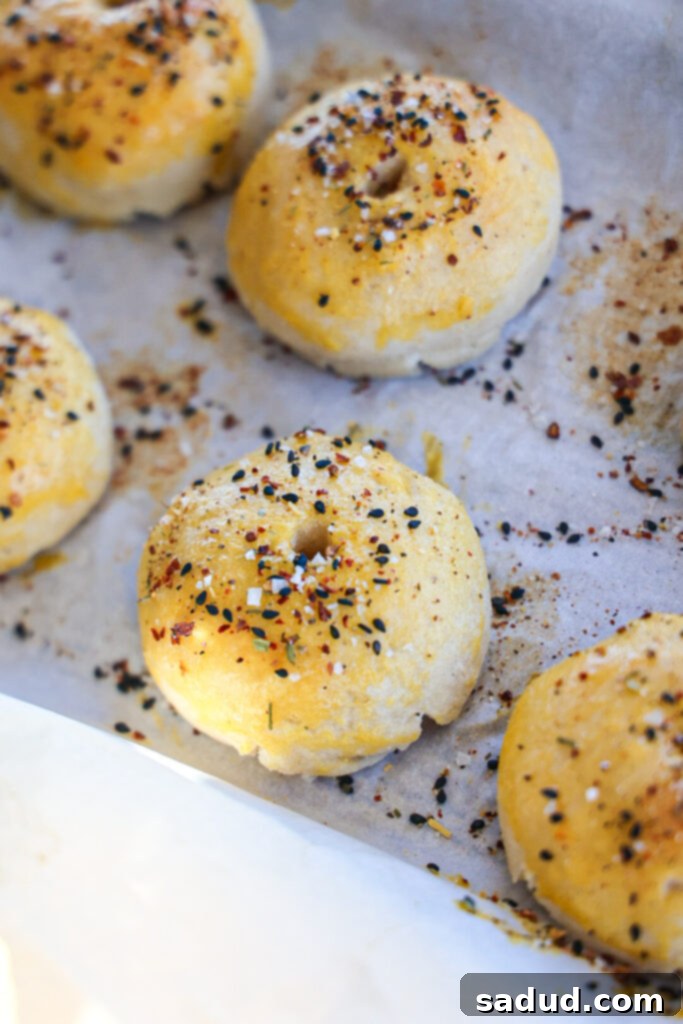
- Bake the Bagels: Transfer the boiled bagels to your preheated oven. Bake for an initial 10 minutes. Then, remove them from the oven, brush each bagel generously with the egg wash (or vegan alternative), and sprinkle with your chosen seasoning, such as “everything but the bagel” blend. Return them to the oven and bake for another 15-20 minutes, or until they are beautifully golden brown and firm to the touch.
-

Dough being formed into gluten-free bagels. -

Gluten-free bagels boiling in water. -

Freshly baked bagels with everything but the bagel seasoning.
Achieving a Golden Crust: Vegan Egg Wash Substitutes
While the bagel dough itself is naturally vegan, an egg wash is traditionally used to create that beautiful, shiny, golden-brown crust and help toppings adhere. If you need a vegan alternative, here are a couple of excellent options that will give you similar results:
- Maple Syrup & Plant Milk Wash: A simple 1:1 ratio of maple syrup and plant milk works wonders. This combination provides a lovely light golden-brown color and a subtle sheen. Oat milk or soy milk tend to give the best color due to their richness and protein content. Whisk them together until well combined, then brush onto the bagels.
- Just Egg (Thinned): Products like “Just Egg” can serve as a fantastic egg substitute for washing. However, since “Just Egg” can be quite thick on its own, it’s best to thin it slightly with a dash of plant milk (about 1-2 tablespoons per 1/4 cup of Just Egg) to ensure it spreads smoothly and evenly over the bagels.
Expert Tips for Perfect Gluten-Free Bagels Every Time
Follow these tried-and-true tips to ensure your homemade gluten-free bagels turn out perfectly delicious and satisfying:
- Cool Completely Before Slicing: This is arguably the most important tip! It’s tempting to slice into a warm, fragrant bagel, but resist the urge! Allowing the bagels to cool completely (ideally for at least 30-60 minutes) allows the centers to finish cooking and setting. Slicing too early can result in a gummy or dense interior.
- Customize Your Crust: For those who love an extra-thick, super-chewy crust, simply extend the boiling time by an additional 30 seconds per side. Experiment to find your perfect level of chewiness!
- Proper Storage for Freshness:
- Refrigeration: Store leftover bagels in an airtight container in the refrigerator for up to 5 days.
- Freezing: For longer storage, freeze cooled bagels in an airtight container or a freezer-safe bag for up to 3 months. Slice them before freezing for easier toasting later!
Regardless of storage method, these bagels are always best when toasted before enjoying, which helps revive their texture.
- Don’t Overmix the Dough: While you want a uniform dough, excessive mixing can sometimes make gluten-free dough tough. Mix until just combined and smooth.
- Wet Hands for Shaping: Gluten-free dough can sometimes be a bit stickier than traditional wheat dough. Lightly wetting your hands before shaping the bagels will prevent the dough from sticking and make the process much easier.
Creative Ways to Enjoy Your Homemade Gluten-Free Bagels & Topping Ideas
Once you’ve mastered these delicious gluten-free bagels, the fun really begins with how you choose to enjoy them! Here are some fantastic ideas to get you started:
- Classic Cream Cheese Pairing: Toast them and slather with my creamy vegan scallion cashew cream cheese for an irresistible savory treat.
- Breakfast Sandwich Bliss: Elevate your morning routine! Toast these bagels and fill them with your favorite breakfast components – scrambled eggs (or tofu scramble for vegan), crispy bacon or plant-based alternatives, avocado, and a slice of cheese (dairy or non-dairy).
- Savory Lunch Sandwich Base: Forget regular bread! These sturdy bagels make the perfect vessel for any lunch sandwich. Think turkey and avocado, hummus and veggies, or a classic BLT.
- Unique Burger Buns: For a twist on burger night, use toasted bagel halves instead of traditional burger buns. The dense, chewy texture holds up beautifully to juicy patties and all your favorite toppings.
- Sweet Treat Variations: If you prefer a sweeter bagel, skip the savory “everything but the bagel” seasoning. Instead, sprinkle with cinnamon sugar, or enjoy them simply toasted with butter (dairy or vegan) and your favorite fruit jam or preserves. Peanut butter and banana slices also make for a fantastic, wholesome sweet option!
- Upscale Lox & Dill: For an elegant brunch, top your toasted bagel with vegan cream cheese, slices of plant-based lox (or smoked salmon if not vegan), fresh dill, and capers.
- Avocado & Red Pepper Punch: Load up a toasted bagel with mashed avocado, a fried egg (or chickpea egg for vegan), and a generous sprinkle of red pepper flakes for a satisfying and vibrant meal.
More Healthy Recipes to Discover
If you loved this recipe, explore some of my other healthy and delicious creations that cater to various dietary needs:
- Paleo Sandwich Bread
- Perfect Gluten-Free Popovers
- Hearty Cornbread Chili Casserole (Paleo, Gluten-Free)
- Viral TikTok Egg Breakfast Sandwich (One-Pan)
- Creamy Vegan Broccoli Cheese Soup
- Wholesome Chicken Broccoli Rice Casserole
- Comforting Healthy Chicken Pot Pie Soup
I poured my heart into perfecting these gluten-free bagels, and I genuinely hope you enjoy them as much as I do! If you try this recipe, please consider leaving a star rating and a review below to share your experience. And don’t forget to tag me on Instagram @danishealthyeats – I absolutely love seeing your delicious creations!
The Best Gluten-Free Bagel Recipe (Paleo)
Pin Recipe
Ingredients
- 3 1/4 cups almond flour
- 1 cup tapioca flour
- 2/3 cup warm, filtered water
- 2 tsp baking powder
- 2 tbsp apple cider vinegar
- 2 tbsp maple syrup
- 1 tsp sea salt
- 1 egg yolk, for egg wash (or vegan alternative)
- everything but the bagel seasoning *or other seasoning of your choice
Instructions
-
Preheat the oven to 350F. Line a baking sheet with parchment paper. Fill a large pot with water and bring it to a boil on the stovetop. Once boiling, lower it to a low simmer (not a rolling boil). Leave it here as you prepare the bagels!
-
Make the dough: In a mixing bowl, combine all ingredients, mixing well until uniform dough forms. I like to mix the dough by hand, as it might seem like it won’t come together at first, but it will!
-
Shape the bagels: Divide dough into 6-8 equal portions. Wet hands and form dough into a ball shape. I like to use a chopstick or something similar to create the hole in the center of the bagel, but you can also use your finger. Repeat until all bagels have been formed. Place the bagels on the baking sheet.
-
Boil the bagels: Using a slotted spoon, drop 2-3 bagels into the boiling water for 1 minute or so, until they float to the top. The longer they boil, the thicker the crust. Remove them with the slotted spoon and place them back on the baking sheet. Repeat until all bagels have been boiled.
-
Bake the bagels: Bake the bagels for 10 minutes, then remove from the oven. Brush each bagel with the egg wash and sprinkle over some of the everything but the bagel seasoning. Place the bagels back in the oven to bake another 15-20 minutes, until golden.
-
Let the bagels cool completely before cutting into them to prevent gummy centers!
-
Note: these are best toasted!
Video
Notes
