Creamy Homemade Oat Milk: Your Ultimate Easy & Healthy Dairy-Free Recipe Guide
Dreaming of a perfectly creamy, delightfully delicious oat milk without the store-bought price tag or additives? You’ve come to the right place! This comprehensive guide will show you how to master the art of making homemade oat milk with incredible ease, using just a few simple ingredients likely already in your pantry. Forget the stress of elaborate recipes; this dairy-free alternative is a game-changer for your coffee, cereal, and countless culinary creations, all crafted in the comfort of your kitchen.
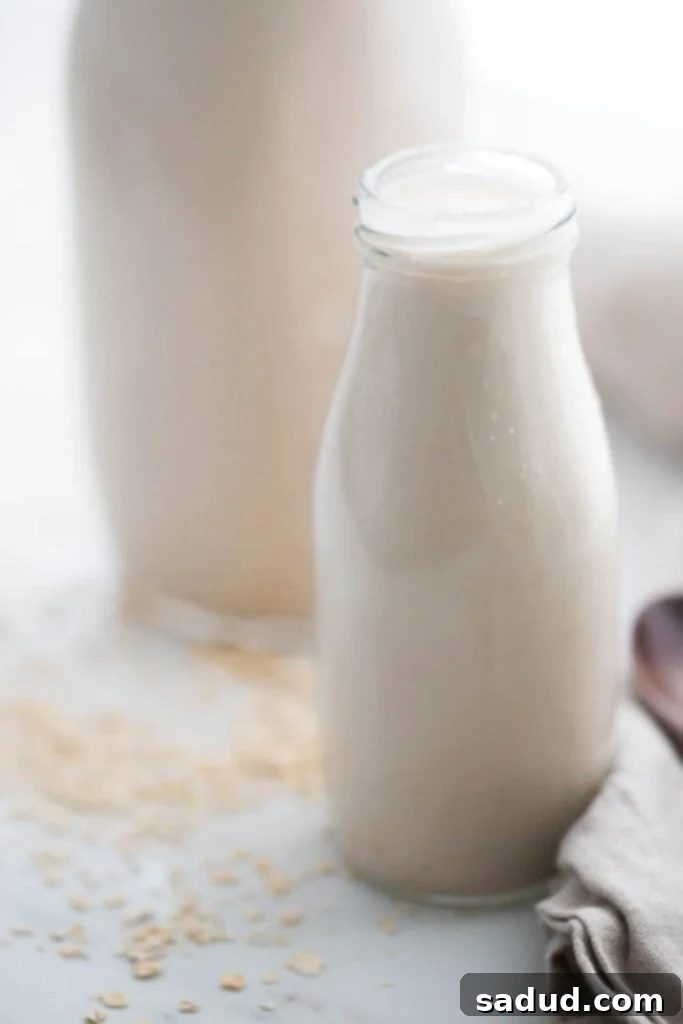
Essential Ingredients & Equipment You’ll Need
Crafting your own creamy oat milk is surprisingly straightforward, requiring minimal equipment and basic pantry staples. Here’s a detailed look at what you’ll need to get started on your homemade dairy-free journey:
- A High-Powered Blender: While a high-speed blender like a Vitamix can achieve a super smooth consistency more quickly, any standard blender will work. You might just need to blend a little longer to break down the oats fully.
- Fine-Mesh Sieve or Cheesecloth/Nut Milk Bag: This is crucial for separating the liquid from the oat pulp. A fine-mesh sieve will work, but for the silkiest texture, a cheesecloth (doubled or tripled) or a dedicated nut milk bag is highly recommended.
- Rolled Oats and Filtered Water: The stars of our show! Opt for old-fashioned rolled oats (not instant or steel-cut, as they can lead to a slimy texture or don’t blend as smoothly). Fresh, filtered water is essential for the best taste.
- A Pinch of Salt: A tiny bit of salt goes a long way in enhancing the natural flavors of the oats and bringing out a subtle sweetness.
- Optional Flavor Enhancers (Vanilla Extract, Cinnamon, Dates): These ingredients are not essential but can transform your basic oat milk into a gourmet treat.
- Vanilla Extract: Adds a warm, aromatic depth.
- Cinnamon: Provides a comforting spice note, especially lovely in coffee.
- Pitted Dates: A natural sweetener that also contributes to a richer, creamier texture. Start with a few and adjust to your preference.
Why You’ll Fall in Love with This Homemade Oat Milk Recipe
This oat milk recipe isn’t just good; it’s genuinely fantastic. Its appeal lies in its unparalleled ease of preparation, incredible versatility, and numerous benefits that extend beyond just taste. Once you try it, you’ll wonder why you ever bought store-bought!
Unbeatable Simplicity and Convenience: Forget rushed trips to the grocery store. This creamy oat milk comes together effortlessly in your own kitchen with hardly any effort. Most of the ingredients are likely already stocked in your pantry, making it a spontaneous and stress-free project any day of the week.
Remarkable Versatility for Every Occasion: Oat milk is incredibly adaptable and perfect for a wide range of uses:
- Coffee & Tea: It froths beautifully, creating a silky, dairy-free latte or a smooth addition to your morning brew.
- Cereal or Granola: A wonderful, creamy base for your breakfast bowls.
- Smoothies: Adds a delightful creaminess and subtle sweetness to any blend.
- Baking & Cooking Variations: An excellent substitute for dairy milk in virtually any recipe, from pancakes and muffins to creamy sauces and soups.
Health-Conscious Choice: Made with wholesome ingredients, homemade oat milk offers a healthier alternative to many store-bought options that can contain added sugars, oils, and stabilizers. You control exactly what goes into it!
Cost-Effective and Eco-Friendly: Making your own oat milk is significantly cheaper than purchasing cartons regularly. Plus, it drastically reduces packaging waste, making it a kinder choice for both your wallet and the planet.
Embrace the satisfaction of creating a delicious, wholesome, and customizable plant-based milk right at home!
Step-by-Step Guide: How To Make Creamy Oat Milk at Home
Creating your own oat milk is a straightforward process, but a few key techniques will ensure you achieve the creamiest, most delicious results without any sliminess. Follow these simple steps for perfect homemade oat milk every time:
- Soak the Oats (15 Minutes is Key): Begin by adding 2 cups of rolled oats to a medium-sized bowl. Cover them generously with cold water. Allow the oats to soak for approximately 15 minutes. This crucial step helps to soften the oats, making them easier to blend into a smooth liquid, and also helps to break down some of the starches that can lead to a slimy texture.
- Rinse Thoroughly to Prevent Sliminess: Once the oats have finished soaking, discard the soaking water. Transfer the oats to a fine-mesh sieve and rinse them very well under cold running water. Rinsing helps to wash away excess starches and enzymes, which are often responsible for that undesirable slimy consistency in homemade oat milk. Be gentle but thorough.
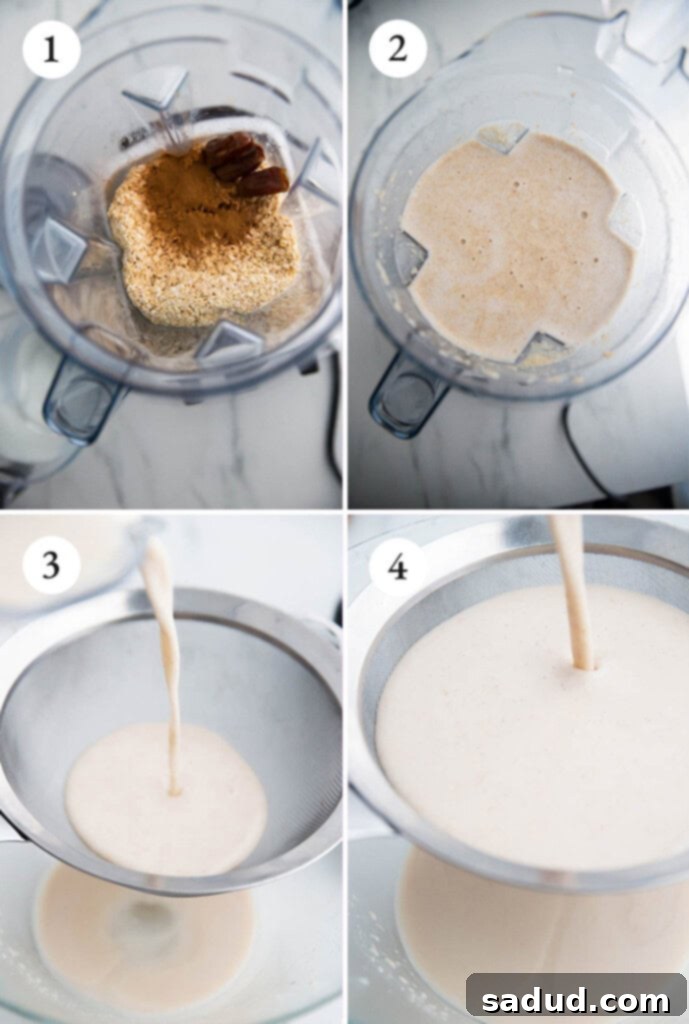
- Initial Blend with Flavorings: Transfer the rinsed oats to your blender. Add any optional flavorings you desire, such as pitted dates, vanilla extract, a pinch of salt, and cinnamon. Pour in four cups of fresh, filtered water.
- Blend Until Super Smooth (But Don’t Over-Blend!): Begin blending the ingredients. If you have a high-speed blender, this might only take 30-60 seconds. For standard blenders, blend for 1-2 minutes until the mixture is incredibly smooth and creamy. The key is to blend just enough to fully emulsify the oats, but avoid over-blending, which can generate heat and activate starches, again leading to sliminess.
- Add Remaining Water & Final Blend: Now, add the remaining four cups of water to the blender. Blend again briefly (another 15-30 seconds) until everything is perfectly combined and silky smooth. This method helps achieve a rich, consistent texture. This process should yield about eight cups of delicious oat milk.
- Strain for a Silky Finish: Place a large bowl or container beneath a fine-mesh sieve, cheesecloth, or nut milk bag. Carefully pour the blended oat mixture through your chosen straining tool. Allow gravity to do most of the work. For the creamiest, pulp-free milk, avoid squeezing the pulp aggressively, as this can force starches through and result in a slimy texture. If using a nut milk bag, a very gentle squeeze is acceptable.
- Optional Double Strain & Storage: Depending on your preferred consistency, you may wish to strain your milk a second time through an even finer mesh or clean cheesecloth for an extra-smooth result. Once strained, transfer your homemade oat milk into an airtight container or bottle with a lid. Store it in the refrigerator, where it will stay fresh for about 5-7 days. It’s normal for separation to occur; simply give it a good shake before each use!
Chef’s Expert Tips for Perfect Homemade Oat Milk
Elevate your homemade oat milk game with these insider tips from the kitchen:
- The Importance of Soaking & Rinsing: Do not skip soaking the oats! This step is paramount for a creamy texture and helps minimize sliminess. Coupled with a thorough cold water rinse, it removes excess starch that can otherwise make your oat milk gummy.
- Creative Uses for Leftover Oat Pulp: Don’t let that nutritious oat pulp go to waste! Instead of throwing it in the compost, repurpose it creatively:
- Smoothies: Add a tablespoon or two for extra fiber.
- Baking: Incorporate into cookies, muffins, or bread for added texture and nutrients.
- Energy Balls: Mix with nut butter, dates, and other ingredients for a healthy snack.
- Body Scrubs: Combine with coconut oil and essential oils for a natural, exfoliating skin treatment.
- Achieving Optimal Consistency Through Straining: The fineness of your straining tool directly impacts the texture of your oat milk. For truly optimal, silky-smooth consistency, invest in a good quality nut milk bag. If using cheesecloth, layer it several times. Remember the golden rule: do not squeeze the pulp too hard during straining. Let the liquid drain naturally, pressing only very gently at the end if desired. Over-squeezing pushes starch through, resulting in a less desirable, slimy texture.
- Temperature Matters: Always use cold water when soaking and blending. Heat can activate the starches in oats, contributing to a slimy consistency. Keep everything cool!
- Don’t Over-Blend: While you want your oats fully broken down, blending for too long can also create heat and make the milk slimy. Blend just until smooth, usually 30-90 seconds, depending on your blender.
- Sweetener & Flavor Variations: Experiment with different natural sweeteners like a touch of maple syrup or agave nectar. Beyond vanilla and cinnamon, consider adding a dash of cardamom, a pinch of nutmeg, or even a tablespoon of cocoa powder for a chocolatey treat.
Is Homemade Oat Milk a Healthy Choice for You?
Absolutely! Homemade oat milk is not only delicious but also packed with a myriad of health benefits that make it an excellent addition to most diets. Oats are a powerhouse of nutrition, and transforming them into milk retains much of their goodness.
Oats are notoriously loaded with essential nutrients. They are a fantastic source of B vitamins, which are crucial for energy production and maintaining healthy nerve function. Beyond that, oats are rich in dietary fiber, particularly beta-glucans. This soluble fiber is known for its ability to help lower cholesterol levels, stabilize blood sugar, and promote a healthy digestive system. These beta-glucans also contribute to the unique creamy texture of oat milk.
Furthermore, know what else makes oats truly great? They can be beneficial for those who are lactating! Oats are often considered a galactagogue, a substance that helps increase milk supply in breastfeeding mothers, making oat milk a wonderful and nourishing choice during this time.
In addition to its nutritional advantages, choosing to make oat milk at home offers several practical benefits. It’s incredibly cost-effective compared to regularly purchasing commercially produced plant milks, which can quickly add up. Moreover, making your own oat milk is significantly better for the environment. By reducing the demand for single-use cartons, you’re actively minimizing plastic and paper waste, contributing to a more sustainable lifestyle. It’s a win-win for your health, your wallet, and the planet!
Be Sure To Check Out These Other Delicious Dairy-Free Recipes!
- How to Make Almond Milk (In 5 Minutes)
- Easy Golden Milk
- Matcha Latte
- How to Make Vegan Overnight Oats
Have you made this incredibly simple and delicious homemade oat milk recipe? We’re eager to hear your thoughts and feedback! Please take a moment to leave a rating and comment below so we can connect and chat about your experience. Your insights are invaluable to our community!
Don’t forget to share your beautiful photos of your homemade oat milk creations on Instagramtoo! Tag us so we can see and celebrate your kitchen triumphs!
If you loved this recipe as much as we did, don’t forget to leave us a review below. ★ Follow Easy Healthy Recipes on Pinterest, Facebook, and Instagram, too!
For more delicious recipes, visit our sister sites, 40 Aprons and Easy Cheap Recipes.
How to Make Oat Milk: The Ultimate Easy Recipe
 Cheryl Malik
Print
SaveSaved!
Ingredients
- 2 cups rolled oats
- 8 cups filtered water plus more for soaking/rinsing
- 3 dates pitted, optional for sweetness
- 2 teaspoons vanilla extract optional
- 1 pinch salt
- 1 teaspoon cinnamon optional
Equipment
-
Blender (high-speed recommended)
-
Fine-mesh sieve or nut milk bag/cheesecloth
Instructions
-
Add oats to a medium sized bowl and cover with cold water. Let the oats soak for about 15 minutes.
-
Once oats are soaked, discard the water and rinse the oats very well under cold running water. This removes excess starch and helps prevent sliminess.
-
Put all rinsed oats and optional ingredients (dates, vanilla, cinnamon, salt) into the blender. Add four cups of the measured water. Blend until really smooth, about 30-60 seconds. Add the remaining four cups of water and blend again for another 15-30 seconds until super smooth and silky. This should yield about eight cups of milk.
-
Once the oat milk has been blended, simply strain the mixture through a fine-mesh sieve or a nut milk bag/cheesecloth. Place a bowl or large container underneath to catch the milk. Do not squeeze the pulp aggressively.
-
You may strain your milk more than once for a finer consistency. Store homemade oat milk in an airtight container in the refrigerator, where it will last for about a week. Shake well before serving as separation is natural.
Nutrition Information
Number of total servings shown is approximate. Actual number of servings will depend on your preferred portion sizes.
Nutritional values shown are general guidelines and reflect information for 1 serving using the ingredients listed, not including any optional ingredients. Actual macros may vary slightly depending on specific brands and types of ingredients used.
To determine the weight of one serving, prepare the recipe as instructed. Weigh the finished recipe, then divide the weight of the finished recipe (not including the weight of the container the food is in) by the desired number of servings. Result will be the weight of one serving.
