Irresistibly Fudgy Gluten-Free Coconut Brownies: Your Healthy Samoa Cookie Craving Solution
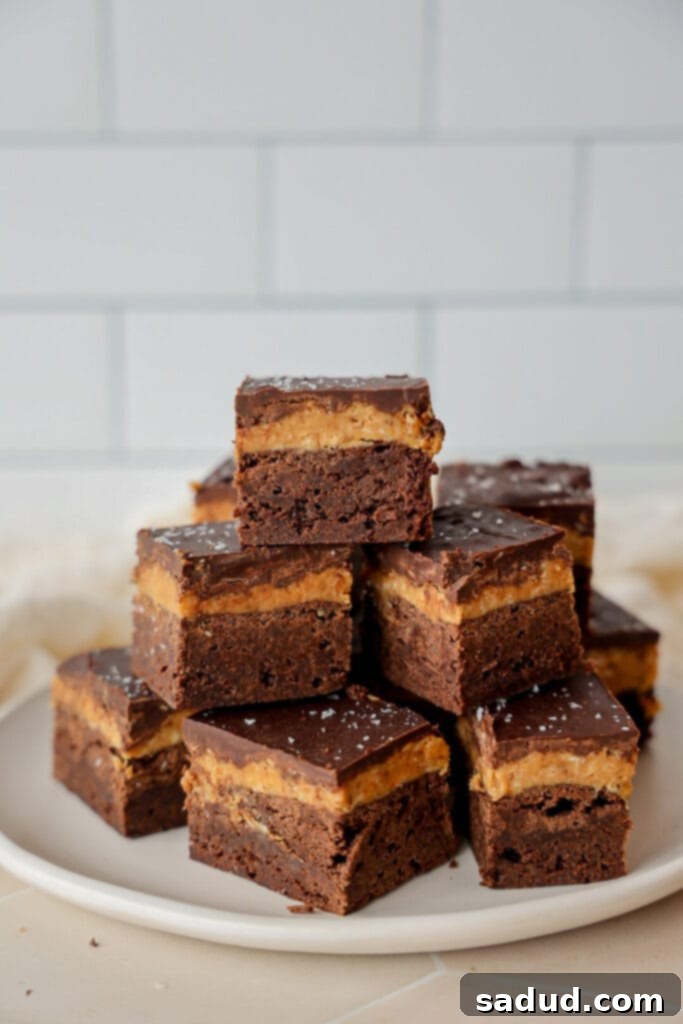
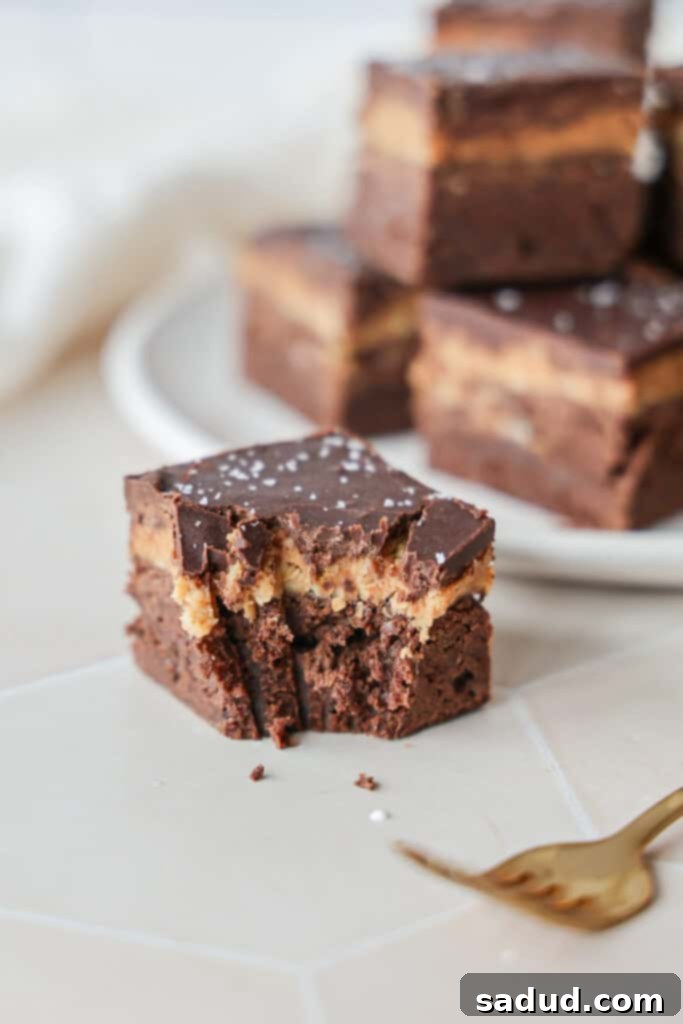
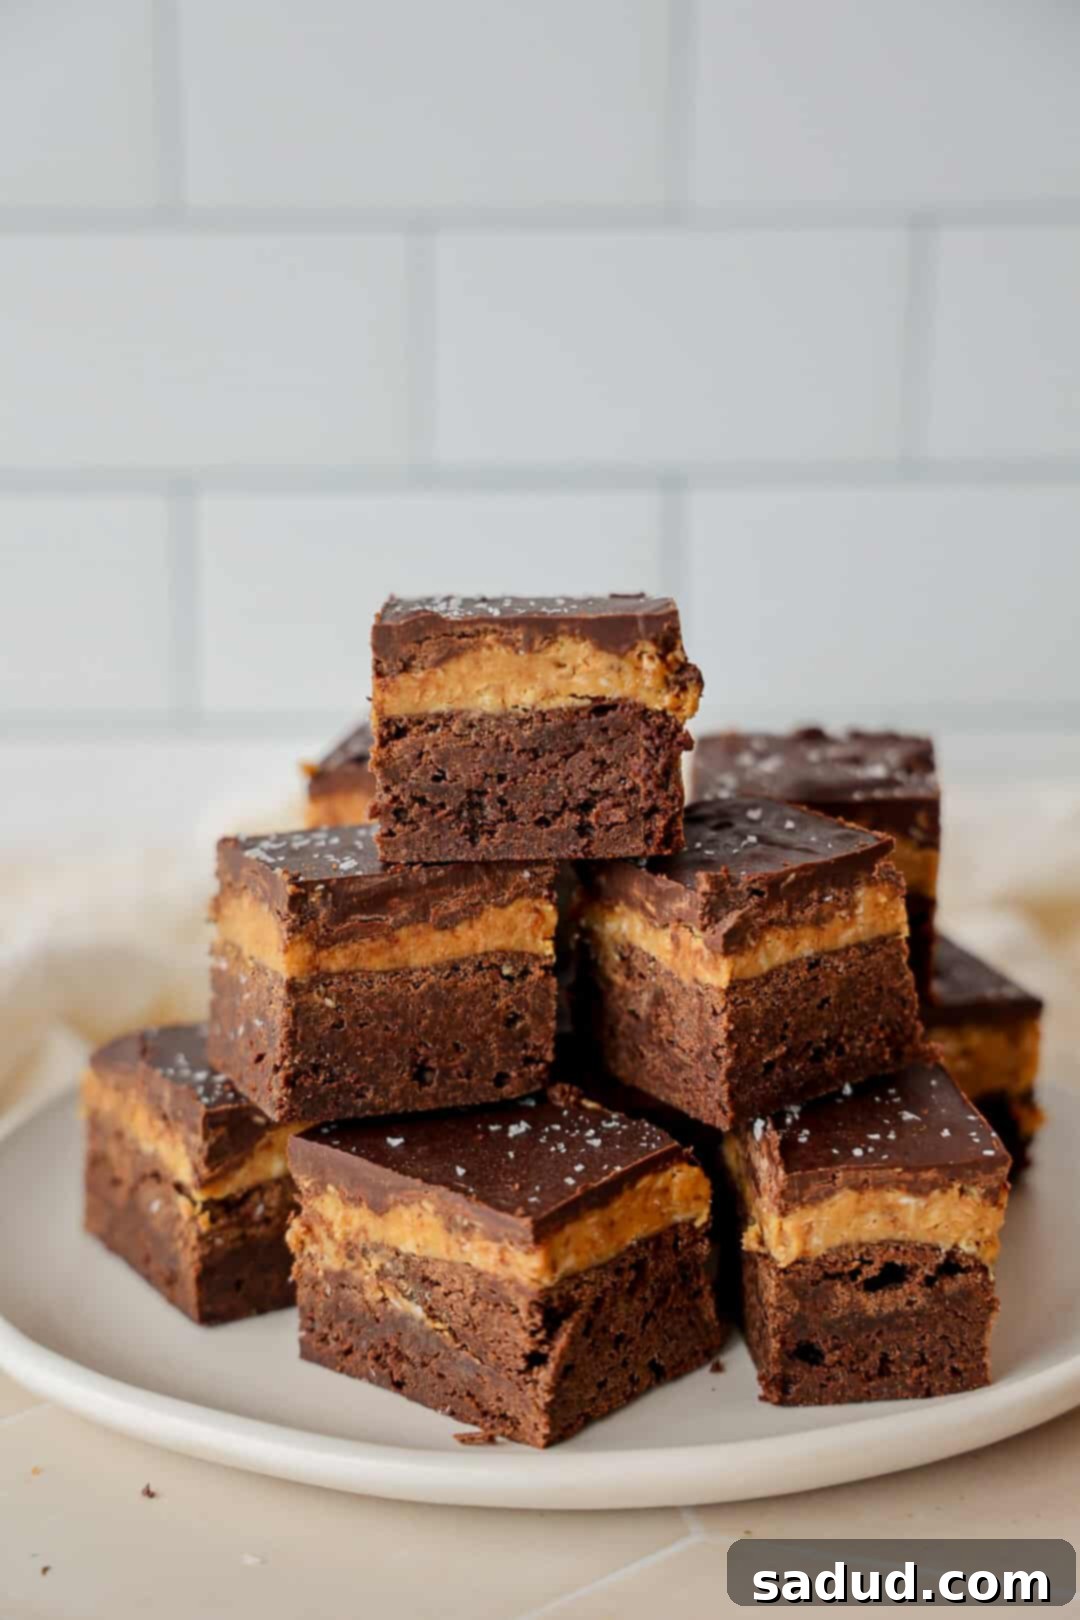
Prepare yourself for an extraordinary treat! These rich, chewy brownies are layered with a delectable toasted coconut caramel filling and crowned with a luscious chocolate topping. If you’ve been searching for the perfect brownie to satisfy your sweet tooth without the guilt, your quest ends here. You’d never believe these incredibly decadent brownies are also completely gluten-free, dairy-free, and refined sugar-free. They are a true game-changer in the world of healthy desserts, proving that wholesome ingredients can deliver astonishing flavor and texture!
*Disclosure: This post may contain affiliate links. I may earn a small commission for my endorsement, recommendation, testimonial, and/or link to any products or services from this website.

Beyond their incredible taste, these layered coconut brownies are absolute showstoppers! Their elegant layers give them a gourmet appearance, making them look far more complicated to prepare than they actually are – but that’s our little secret. 😉 The brownie base is crafted with a powerful duo of cacao powder and high-quality chocolate chips or chunks, delivering an intensely rich and deep chocolate flavor. Designed to be flourless (except for a touch of almond flour to ensure perfect structure), these brownies offer an unmatched fudgy texture without any gluten.
The subtle yet distinct coconut flavor comes from two sources: coconut oil in the brownie batter and toasted coconut in the luxurious filling. This combination creates a harmonious balance, ensuring the coconut notes are present and delightful, without being overpowering. It’s just enough to transport you to a tropical paradise with every bite!
The magic truly happens when creamy cashew butter and sweet maple syrup are combined for the filling. This blend naturally creates an irresistible, almost caramel-like flavor. When we incorporate the fragrant toasted coconut into this “caramel” mixture and spread it generously over the fudgy brownies, the result is strikingly similar to the beloved Samoa Girl Scout Cookies (also known as Caramel Delites). It’s a nostalgic taste experience reimagined with wholesome ingredients, making these brownies an instant classic!
Why You’ll Fall in Love with This Coconut Brownie Recipe
- Effortless Preparation: These brownies are incredibly simple to make, often requiring just one bowl for the batter. This means less cleanup and more time to enjoy your delicious creation!
- Dietary-Friendly & Wholesome: Perfect for those with dietary restrictions or anyone seeking healthier alternatives. These brownies are proudly gluten-free, dairy-free, refined sugar-free, and paleo-friendly, making them accessible and enjoyable for many.
- Unbeatable Chewy Texture: If you’re a fan of super chewy brownies, you’re in for a treat. This recipe delivers that coveted dense, fudgy, and delightfully chewy texture that brownie connoisseurs adore.
- Samoa Cookie Inspired Flavor: Experience the nostalgic taste of your favorite Girl Scout cookie! The combination of toasted coconut, caramel-like cashew butter, and rich chocolate creates a flavor profile strikingly similar to Samoa cookies.
- A Healthier Dessert Choice: Indulge without the guilt! Made with natural sweeteners and nutrient-dense ingredients, these brownies offer a wonderful, healthier option for satisfying your dessert cravings.
- Freezer-Friendly Convenience: These brownies freeze exceptionally well, making them perfect for meal prepping desserts or stashing away for future cravings. Pull one out, let it thaw slightly, and enjoy a perfectly fudgy treat anytime.
This recipe is also a fantastic way to elevate a basic box of brownie mix! Simply prepare the brownies according to the package instructions, then come back to this recipe to add our irresistible coconut filling and chocolate topping. It’s an easy hack for a gourmet dessert!
How to Make Decadent Coconut Brownies
The full, detailed recipe can be found in the recipe card at the bottom of this post. Here’s a brief overview of the simple steps involved:
Essential Equipment
- A large mixing bowl (or two, if you prefer to keep things separate)
- A sturdy spatula
- An 8×8 inch baking dish
- Parchment paper

Key Ingredients for Success
For the Fudgy Brownie Base:
- Almond Flour: This finely ground flour is the secret to our gluten-free brownies, providing a tender crumb without the gluten. The only 1:1 substitute recommended is cashew flour. While you *could* experiment with oat flour, be aware that the final texture might differ significantly from the intended fudginess.
- Chocolate Chips/Chunks: For a truly refined sugar-free experience, I highly recommend using Hu Kitchen chocolate. Their commitment to high-quality, better-for-you ingredients results in incredibly indulgent chocolate. They even offer amazing grass-fed milk chocolate options for those who prefer it! Don’t forget to use code “Danishealthyeats” for a discount on their site!
- Maple Syrup: A natural sweetener that contributes to the brownies’ moisture and subtle flavor. Honey or agave nectar can also be used as alternatives, though maple syrup offers the best flavor profile for this recipe, in my opinion.
- Coconut Sugar: Another natural, unrefined sweetener. To reduce the overall sugar content, you can substitute with golden monk fruit sweetener. If neither is available, brown sugar can be used, but note that this will no longer be refined sugar-free.
- Cashew Butter: Provides healthy fats and contributes to the brownies’ rich, fudgy texture. Almond butter is a great alternative. Peanut butter will also work, but be prepared for a distinct peanut butter flavor that will alter the overall taste of your brownies.
- Eggs: Essential for binding and structure. Ensure they are at room temperature for smooth incorporation into the batter.
- Cacao Powder: I prefer cacao powder for its superior antioxidant properties and intense chocolate flavor, but standard cocoa powder will also yield delicious results.
- Coconut Oil: Adds moisture and a hint of coconut flavor. You can substitute with vegan butter, ghee, grass-fed butter, or avocado oil, depending on your dietary preferences.
- Baking Essentials: Don’t forget baking soda for lift, vanilla extract for warmth, and a pinch of sea salt to enhance all the flavors.
For the Toasted Coconut Caramel-like Filling:
- Cashew Butter: Again, the creamy base for our “caramel” layer. Almond or peanut butter can be substituted, keeping in mind the flavor impact of peanut butter.
- Maple Syrup: Sweetens the filling and helps create that desirable caramel consistency.
- Coconut Flakes: Toasted to perfection, these provide the signature coconut flavor and a lovely textural contrast.
- Coconut Oil: Helps bind the filling and adds richness.
- Vanilla Extract & Sea Salt: Essential for depth of flavor and balancing the sweetness.
For the Decadent Chocolate Topping:
- Chocolate Chips or Chunks: Once more, I highly recommend Hu Kitchen’s no-sugar-added chocolate chips to maintain the refined sugar-free aspect of these brownies. Their chocolate is truly indulgent and made with simple, wholesome ingredients. Remember to use my code “Danishealthyeats” for a discount!
Step-by-Step Instructions for Your Best Brownies Yet
- Prepare the Brownie Batter: In a large bowl, you’ll melt the coconut oil and chocolate chips together until smooth. Then, whisk in your room-temperature wet ingredients, followed by the dry ingredients, mixing just until a smooth, uniform batter forms. Avoid overmixing! Spread this rich batter evenly into your prepared baking dish, ensuring a consistent layer for baking.
- Bake to Perfection: Bake your brownies until they are set in the center but still slightly fudgy. A toothpick inserted should come out with moist crumbs, not wet batter. Crucially, do not over-bake, as this can lead to dry, cakey brownies rather than the desired fudgy texture. Once baked, let them cool completely – patience is key here for the best results! Chilling them in the freezer for about 30 minutes or the fridge for an hour will enhance their fudginess.
- Craft the Toasted Coconut Filling: While the brownies cool, toast your coconut flakes until golden and fragrant. In a separate bowl, combine the cashew butter, maple syrup, melted coconut oil, vanilla extract, and sea salt. Stir until smooth and creamy. Once the toasted coconut has cooled slightly, fold it into the mixture. Spread this irresistible coconut filling evenly over the cooled brownie layer.
- Melt and Pour the Chocolate Topping: Melt your chocolate chips or chunks using either the double boiler method or by heating them in the microwave in short 30-second bursts, stirring diligently after each interval until completely smooth and glossy. Carefully pour this melted chocolate over the coconut filling layer, gently spreading it out to cover the entire surface. You can slightly tilt the pan to help the chocolate spread evenly.
- Chill to Set: To achieve perfectly firm layers and ensure clean cuts, it’s essential to place the brownies in the freezer for at least 1-2 hours until they are completely firm. Don’t worry; these brownies are designed to thrive in the freezer and will become even fudgier once they start to thaw slightly.
- Slice and Serve: Once thoroughly chilled and firm, remove the brownies from the freezer and use a warm knife to cut them into your desired bar sizes – whether you prefer small bites or generous middle-sized pieces. Now, they’re ready to be devoured!
Expert Tips & Tricks for the Best Coconut Brownies
- Achieving Clean Cuts: For beautifully neat brownie bars, a simple trick works wonders: run your sharp knife under very hot water for about a minute, then wipe it dry. The warm blade will slice through the chilled layers with ease, giving you perfectly clean edges every time. Repeat this process for each cut.
- Avoid Over-baking at All Costs! This is perhaps the most crucial tip for fudgy brownies. Over-baking will quickly transform your potential fudgy delights into dry, cake-like disappointments. Keep an eye on the oven, and remember that brownies continue to cook slightly from residual heat after being removed. When a toothpick comes out with moist crumbs (not wet batter), they’re done.
- Embrace the Freezer! Don’t hesitate to store these brownies in the freezer as instructed. Not only does it help them set perfectly for cutting, but it also enhances their fudgy texture once they begin to thaw. The fridge won’t firm them up enough for clean cuts and optimal texture, so the freezer is a non-negotiable step for this recipe!
Storing Your Delicious Coconut Brownies
These brownies are wonderfully versatile when it comes to storage, allowing you to enjoy them at your leisure. I personally love them straight out of the freezer (I know, I might be a little quirky, but trust me!).
For long-term storage, place your cut brownies in an airtight container in the freezer for up to two to three months. When a craving strikes, simply take one out and let it sit at room temperature for 5-10 minutes to soften slightly before enjoying its fudgy goodness. This method keeps them fresh and ready whenever you are.
Alternatively, you can store these brownies in an airtight container in the fridge for about a week. They will be firmer when chilled, offering a slightly different, yet equally delightful, texture. Let them sit out for a few minutes before eating for a softer chew.
Frequently Asked Questions (FAQ)
Q: Can I make these brownies completely vegan?
A: Yes! To make these brownies vegan, you would need to use flax eggs or another egg substitute for the eggs in the brownie batter. Additionally, ensure your chocolate chips are dairy-free and that any other optional substitutes (like vegan butter for coconut oil) are plant-based.
Q: What if I don’t have cashew butter?
A: As mentioned, almond butter is an excellent 1:1 substitute that will maintain a similar flavor profile. Peanut butter can also be used, but it will introduce a strong peanut flavor, making them “Peanut Butter Coconut Brownies” rather than purely coconut-focused.
Q: Why refined sugar-free? What are the benefits?
A: Choosing refined sugar-free means avoiding processed sugars like white granulated sugar, which can cause blood sugar spikes and offer little nutritional value. Natural sweeteners like maple syrup and coconut sugar provide some minerals and have a slightly lower glycemic index. This results in a dessert that’s less likely to cause a sugar crash and feels more nourishing.
Q: Can I use different flours for the brownies?
A: This recipe is specifically formulated for almond flour (and cashew flour as a direct substitute) to achieve its fudgy, gluten-free texture. Other flours like oat flour or all-purpose flour will significantly change the texture and likely require adjustments to liquid ratios, which are not tested with this recipe. For best results, stick to almond or cashew flour.
Q: How do I know when the brownies are perfectly baked?
A: Look for the edges to be set, and the center should still look slightly soft but not jiggly. A toothpick inserted into the center should come out with moist crumbs, not wet batter. It’s better to under-bake slightly for fudginess than to over-bake for dryness.
More Healthier Brownie Recipes You’ll Love
If you’ve enjoyed these incredible coconut brownies, you’re in for more treats! Explore these other fantastic healthier brownie recipes from Dani’s Healthy Eats:
- Brownies with Strawberries
- No Bake Superfood Brownies
- Snickers Protein Brownies
- Healthy Brownie Batter Dip
- Buckeye Brownie Crumbl Cookies
- Fudgy Mint Brownies
- Vegan Cosmic Brownies

Coconut Brownies
Pin Recipe
Ingredients
Brownies
- 1/2 cup almond flour
- 6 tbsp cacao powder
- 2 eggs *room temp
- 1/3 cup maple syrup
- 1/2 cup coconut sugar or monk fruit
- 3/4 cup chocolate chips or chunks
- 1/4 cup coconut oil
- 1/3 cup cashew butter or almond butter *You can also use peanuts but it’ll give them a strong peanut flavor.
- 1/2 tsp baking soda
- 1 tsp vanilla extract & pinch of sea salt
Coconut filling
- 3/4 cup cashew butter (or almond, peanut, etc)
- 3/4 cup coconut flakes
- 4-5 tbsp maple syrup
- 3 tbsp melted coconut oil
- 1 tsp vanilla extract & pinch of sea salt
Chocolate topping
- 1 1/4 cups Hu Kitchen no sugar added chocolate chips
Instructions
Brownies
-
Preheat oven to 350f. In a large bowl, add the coconut oil and chocolate chips. Heat in 30 second increments in the microwave, stirring between each, until completely smooth.
-
Add in the remaining wet ingredients, whisking well until completely smooth. It’s important that if you are using eggs, they are room-temp or else they will solidify the chocolate and oil.
-
Add the remaining ingredients into the bowl, mixing well until the brownie batter forms. Spread the batter into an 8×8 baking dish. Bake 20-25 minutes, until set in the center. You can use a toothpick to check or make sure it’s firm to touch. Don’t over-bake.
-
Let the brownies cool. I like to stick mine in the freezer until completely cooled (about 30 minutes) or in the fridge for an hour – they get even fudgier when chilled!
Coconut filling
-
While the brownies are cooling, toast the coconut. Lower the oven to 325F. Add the coconut to a parchment-lined baking sheet and place in the oven for 3 minutes. After 3 mins, stir the coconut and bake another 3-4 minutes until golden.
-
In a small bowl, mix together the filling ingredients, starting with 4 tbsp maple. Taste the mixture, if you want it sweeter you can add an extra tbsp. Spread over top of the brownies.
Chocolate topping
-
In the same bowl, melt the chocolate in the microwave, heating in 30 second increments, stirring well between each until smooth. Pour the chocolate over top of the filling, gently spreading it out. You can tilt the pan around to help.
-
Place in the freezer for an hour or two until completely firm, before cutting into pieces. Store in an air-tight container in the freezer or fridge. I like them out of the freezer but you can let them thaw a few mins before enjoying too!
