Healthy Homemade Vegan Snickers Ice Cream Bars: Your Dreamy Dairy-Free Treat
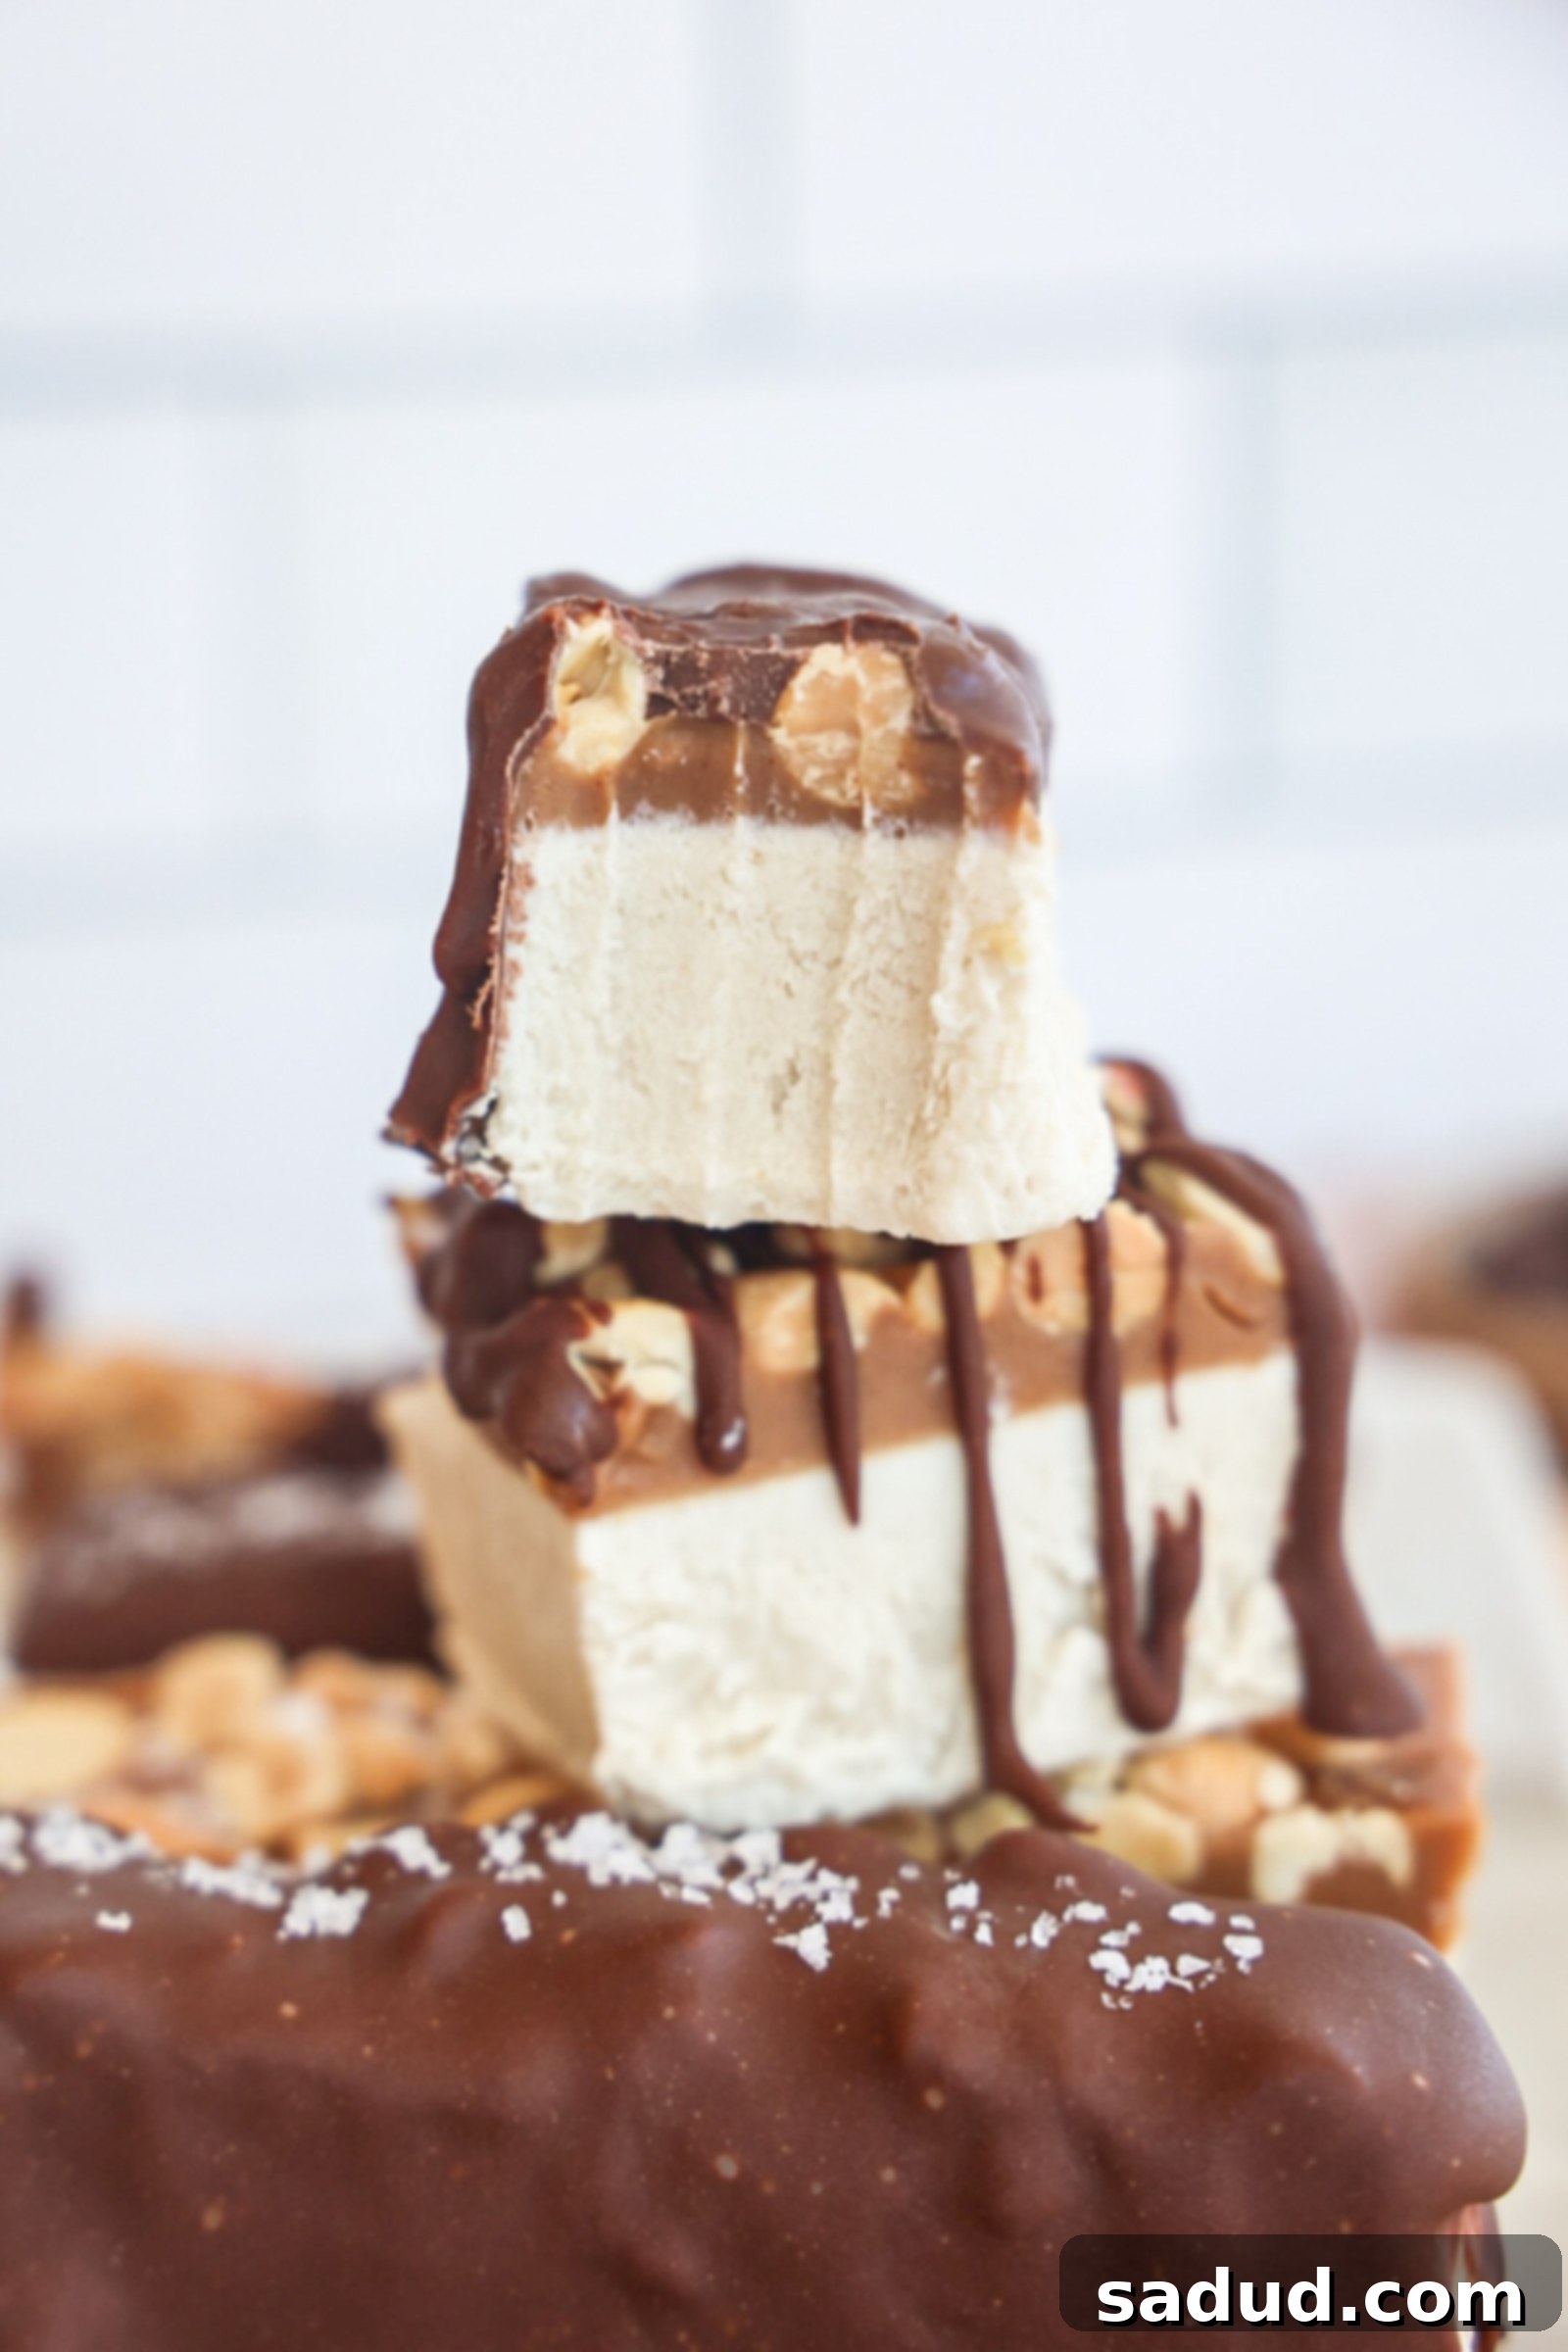
Satisfy your sweet tooth with these incredibly delicious and healthier vegan Snickers ice cream bars! Each bar features a dreamy, creamy plant-based ice cream base, topped with a rich and crunchy peanut caramel layer, all enrobed in a satisfyingly snappy chocolate shell. Best of all, they are gluten-free, refined sugar-free, and crafted with wholesome ingredients you can feel good about. Get ready for the ultimate frozen dessert – perfect for beating the summer heat or enjoying as a guilt-free indulgence any time of year!
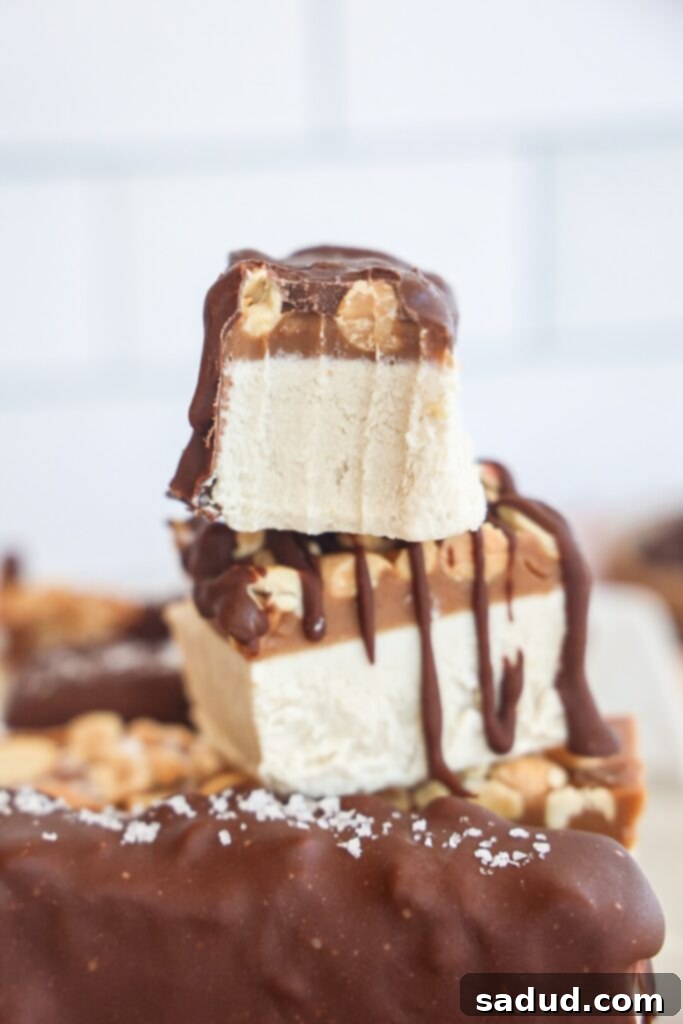
Crafting the Perfect Snickers Ice Cream Experience
Since the very beginning of my journey with Dani’s Healthy Eats, I’ve always been passionate about transforming nostalgic treats and classic candies into healthier, more wholesome versions. Snickers candy bars, with their irresistible combination of creamy peanut butter, rich chocolate, chewy nougat, and crunchy peanuts, were undeniably my biggest weakness growing up. Over the years, I’ve explored a multitude of Snickers-inspired recipes, but I can confidently say that these homemade ice cream bars have quickly become one of my absolute favorites!
If you’ve ever dreamt of enjoying your beloved candy bar in a healthier, frozen form, then your wish has come true! These Healthy Vegan Snickers Ice Cream Bars deliver every bit of the decadent flavor and satisfying texture of the original, but are lovingly crafted with nourishing, plant-based ingredients. You can truly indulge in these bars knowing they’re good for you. They are completely gluten-free, dairy-free, and free from refined sugars, making them an ideal treat for various dietary needs. For an added boost, I’ve included an optional protein powder to enhance the protein content and keep these treats feeling balanced and satisfying. Prepare to have your candy cravings not just satisfied, but completely delighted!
Are you a fan of Snickers-inspired desserts? Don’t stop here! You might also love my Snickers Cookies, the impressive Snickers Ice Cream Cake, and my convenient Snickers Protein Bites. And for another classic frozen treat reimagined, be sure to try my Copycat Klondike Bars!
Why You’ll Fall in Love with These Vegan Snickers Ice Cream Bars
- Completely Vegan & Dairy-Free: These bars are meticulously designed to be 100% plant-based, making them a fantastic choice for anyone following a vegan lifestyle or those with dairy sensitivities or lactose intolerance. Plus, by naturally being gluten-free, grain-free, and refined sugar-free, they also align perfectly with a paleo dessert philosophy.
- Naturally Sweetened Perfection: Say goodbye to artificial sweeteners and processed sugars! We harness the natural sweetness of pure maple syrup, which not only provides a delicious flavor profile but also allows for a more balanced and wholesome indulgence.
- Irresistibly Creamy & Crunchy Texture: Prepare for a delightful textural journey! Experience the silky smoothness of the vanilla ice cream base, the gooey decadence of the caramel layer, and the satisfying crunch of roasted peanuts, all harmoniously blended in every bite.
- Surprisingly Easy to Make: Don’t let the gourmet appearance fool you – these bars are incredibly simple to prepare. The steps are straightforward and quick to assemble. The most challenging part is simply having a little patience while they set perfectly in the freezer!
- The Ultimate Frozen Dessert for Summer: When temperatures rise, there’s nothing quite like a refreshing, satisfying frozen treat. These Snickers ice cream bars are not just delicious; they’re the ideal way to cool down and enjoy a sweet moment during the warmer months.
Homemade Snickers Ice Cream Bars: A Visual Guide
Step-by-Step: How to Make Homemade Snickers Ice Cream Bars
Making these delightful vegan Snickers ice cream bars is a rewarding process. While the full, detailed recipe card is provided at the bottom of this post, here’s a comprehensive overview of the steps to guide you through creating this incredible frozen treat.
Essential Tools You’ll Need
- Blender: A high-speed blender is crucial for achieving an ultra-smooth and creamy ice cream base, especially when working with cashews. My personal favorite is my Beast Blender!
- Loaf Pan or Silicone Mold: A standard loaf pan (lined with parchment paper for easy removal) or individual silicone bar molds will work perfectly for shaping your ice cream bars.
- Mixing Bowl: For combining the caramel ingredients and melting the chocolate.
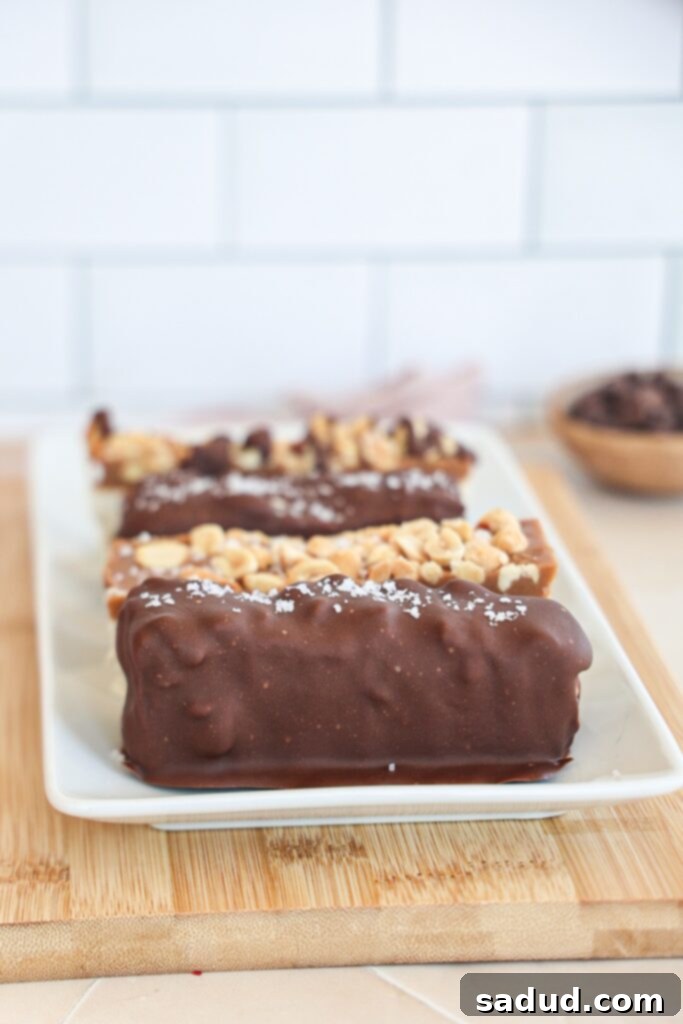
Key Ingredients for Your Vegan Snickers Bars
Ice Cream Base:
- Full-fat Canned Coconut Milk: This is the secret to an incredibly rich and creamy dairy-free ice cream base. Ensure you use full-fat for the best results, as lower-fat versions may result in a more icy texture. I haven’t tested substitutes extensively, but a full-fat non-dairy creamer like NutPods *might* work, though I can’t guarantee the same level of creaminess.
- Raw Cashews: Soaked raw cashews are absolutely essential for creating that luxurious, smooth, and neutral-flavored ice cream-like base. They blend beautifully, providing a wonderful texture without overpowering the other flavors. Cashews are also packed with nutrients, making them a fantastic addition to this healthy dessert.
- Maple Syrup: Our natural sweetener of choice! Maple syrup contributes a lovely depth of flavor and sweetness. While honey can be used, it will alter the overall flavor profile.
- Protein Powder (Optional): Adding vanilla protein powder, particularly a vanilla buttercream flavor like Macro Mike’s (my code “amb-dani” offers a discount at glnk.io/0z8w/danishealthyeats), significantly enhances the vanilla ice cream flavor, adds sweetness, and improves the texture, while also boosting the protein content. Feel free to omit it if you prefer.
- Vanilla Extract & Sea Salt: These classic additions elevate the flavors of the ice cream base, adding a touch of warmth and balance.
- Coconut Yogurt or Greek Yogurt: A small amount adds tanginess and further enhances the creamy texture of the ice cream base, contributing to a more authentic ice cream experience.
Peanut Butter Caramel Layer:
- Peanut Butter: Whether you prefer crunchy or creamy, peanut butter forms the heart of our caramel layer, delivering that quintessential Snickers flavor.
- Maple Syrup: Again, our preferred natural sweetener. Agave nectar can be a substitute, but please note that honey won’t provide the same “caramel” depth of flavor.
- Coconut Oil: This ingredient plays a dual role: it helps to thin out the caramel mixture, making it easy to spread, and then helps it firm up beautifully when frozen, ensuring it stays neatly within the bar.
- Vanilla Extract & Pinch of Sea Salt: These complement the peanut butter and maple, deepening the caramel flavor. If your chopped peanuts are already salted, you might want to reduce or omit the added sea salt.
- Chopped Peanuts: These are critical for the signature Snickers crunch! For a peanut-free variation, you could substitute with chopped salted cashews or roasted sunflower seeds.
- Collagen (Optional): Adding a scoop of collagen to the peanut butter layer is a great way to boost protein without altering the texture, as collagen dissolves seamlessly. *Do NOT use other types of protein powder here, as they can negatively affect the caramel’s texture.*
Crunchy Chocolate Coating:
- Chocolate Chips/Chopped Chocolate: Use your favorite chocolate – dairy-free if you need to keep the bars strictly vegan. Dark chocolate works wonderfully for a richer flavor.
- Coconut Oil: Just a touch of coconut oil is essential here. It thins out the melted chocolate, making it much easier to coat the bars evenly, and helps the chocolate set into a nice, crunchy shell when frozen.
Detailed Instructions: How to Make Vegan Snickers Ice Cream Bars
Preparation: Chill Coconut Milk and Soak Cashews
For the creamiest ice cream base, start by placing a can of full-fat coconut milk in the fridge for at least an hour or two (or even overnight). This allows the thick cream to separate and rise to the top. If your blender isn’t particularly high-powered, it’s also a good idea to soak your raw cashews. Simply bring a pot of water to a boil, remove it from the heat, add the cashews, and let them soak for 20 minutes. Drain them thoroughly before use. This step ensures an incredibly smooth consistency for your ice cream base.
Step 1: Blend the Creamy Ice Cream Layer
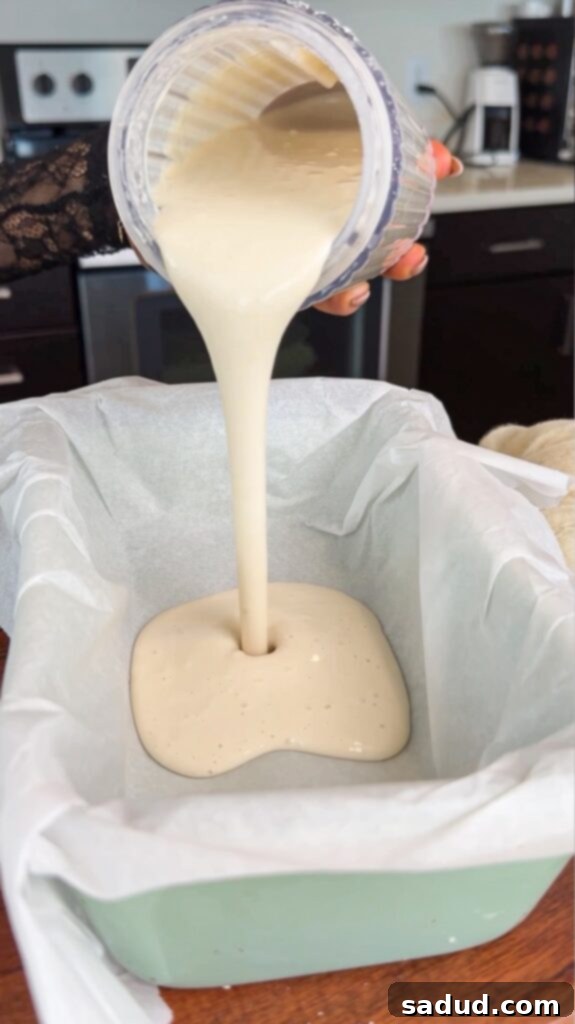
Once your coconut milk is chilled, carefully scoop out the thick cream from the top of the can and combine it in your high-speed blender with approximately 1/4 cup of the remaining liquid. Add the soaked (and drained) cashews, vanilla protein powder (if using), maple syrup, coconut/Greek yogurt, vanilla extract, and sea salt. Blend thoroughly until the mixture is completely smooth and free of any cashew grit. Taste and adjust the sweetness or vanilla as desired. This is your luscious ice cream base!
Step 2: Pour and Initial Freeze
Line a loaf pan with parchment paper, leaving an overhang on the sides for easy removal, or prepare your silicone bar molds. Pour the blended ice cream mixture evenly into the prepared pan or molds. Transfer to the freezer for 3-4 hours, or until the ice cream base is firm enough to support the caramel layer without it sinking or mixing.
Step 3: Make the Peanut Butter Caramel & Assemble
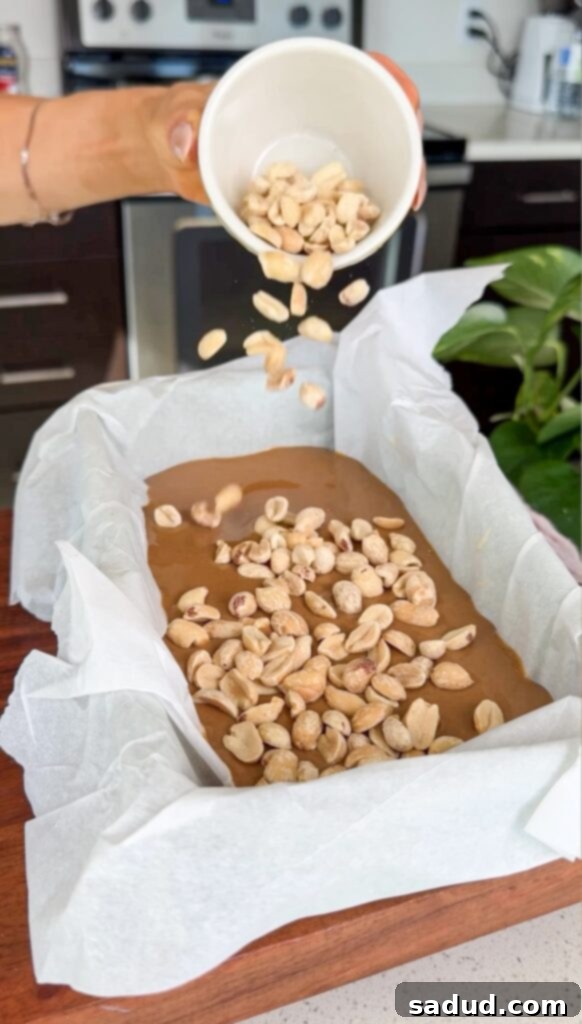
While the ice cream base is chilling, prepare your caramel. In a small mixing bowl, combine the peanut butter, maple syrup, melted coconut oil, vanilla extract, a pinch of sea salt (adjust if using salted peanuts), and the optional collagen. Stir vigorously until the mixture is smooth and well-combined. Once your ice cream base is firm, gently spread this peanut butter caramel evenly over the frozen layer. Immediately sprinkle the chopped peanuts over the caramel and lightly press them down to ensure they adhere.
Step 4: Freeze Again, Then Slice
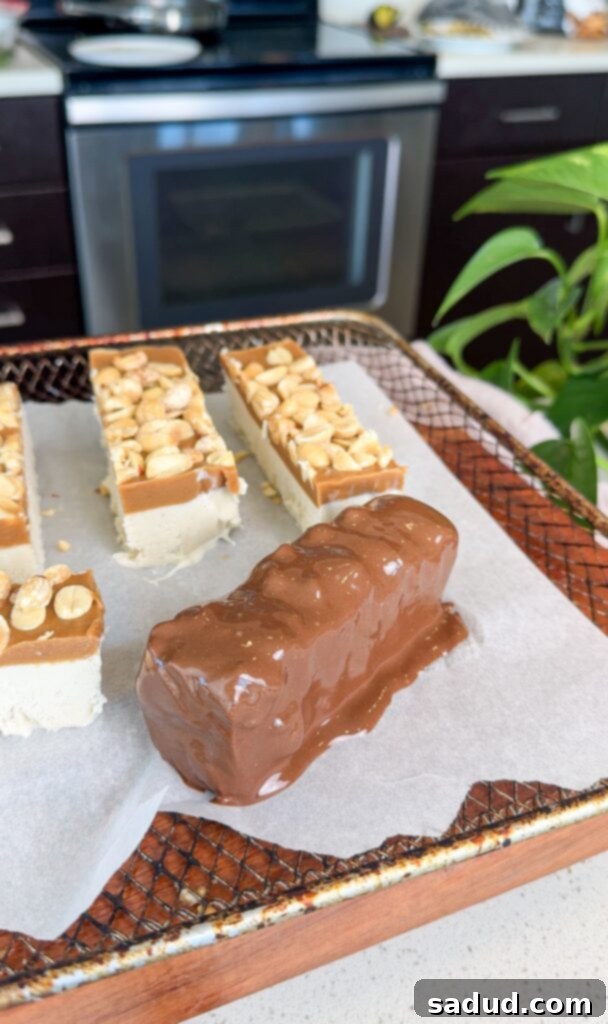
Return the layered dessert to the freezer for another 2-3 hours, or until it’s completely solid. This firmness is crucial for clean and easy slicing. Once solid, remove the block from the pan using the parchment paper overhang. Place it on a cutting board and use a sharp knife (warming it slightly with hot water can help) to cut the mixture into individual bars of your desired size. Arrange these bars on a parchment-lined baking sheet or large plate and place them back in the freezer while you prepare the chocolate coating.
Step 5: Dip in Crunchy Chocolate Coating
In a wide, shallow bowl that allows for easy dipping, combine your chocolate chips (or chopped chocolate) and 1 tablespoon of coconut oil. Melt them together in a microwave in 30-second intervals, stirring well after each interval, until the chocolate is completely smooth and liquid. Alternatively, use a double boiler. Take your frozen bars out of the freezer. Working quickly, dunk each bar into the melted chocolate, using a fork to lift it out and allow any excess chocolate to drip off. This rapid dip ensures a thin, crisp shell.
Step 6: Final Freeze & Storage
Place the chocolate-coated bars back onto the parchment-lined baking sheet. Return them to the freezer for about 30 minutes, or until the chocolate shell has fully set and hardened. Once firm, transfer your healthy vegan Snickers ice cream bars to an airtight container or a freezer-safe baggie. Store them in the freezer for optimal freshness and texture.
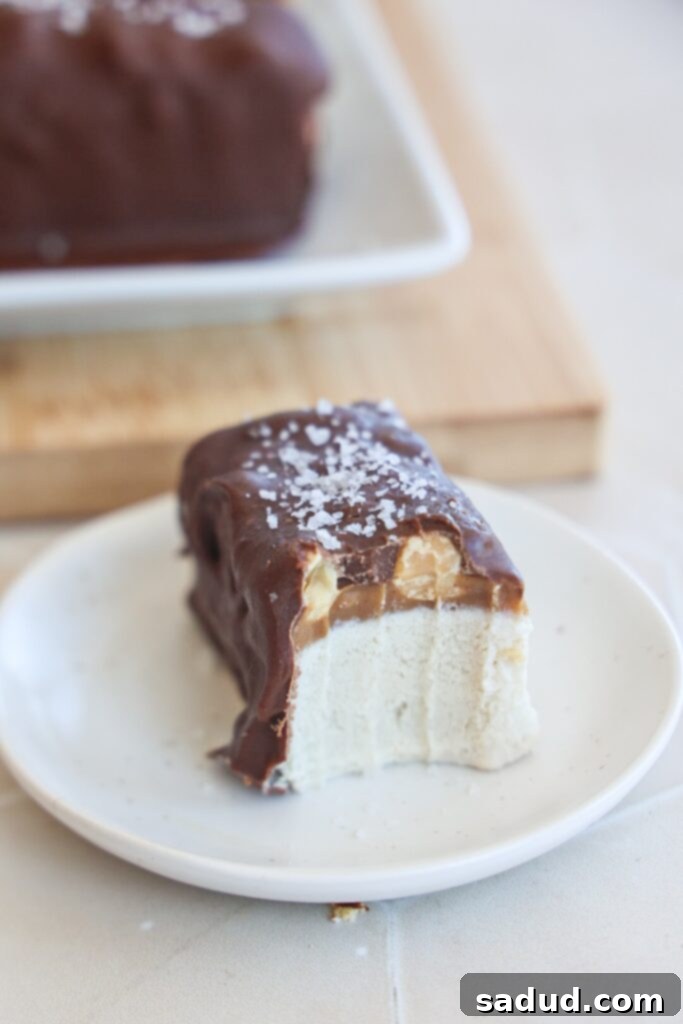
Storage Tips for Your Frozen Treats
These homemade vegan Snickers ice cream bars can be stored in an airtight container or freezer bag in the freezer for up to one month. For the absolute best texture and to allow the creamy ice cream and caramel to soften slightly, I recommend letting them sit at room temperature for about 5-10 minutes before you enjoy them. This brief thaw enhances their delightful melt-in-your-mouth quality!
Why These Are Truly the Best Healthy Snickers Bars
What sets these vegan Snickers ice cream bars apart from traditional candy bars? It’s all about our commitment to using whole food ingredients. Unlike conventional recipes that often rely on heavy cream, corn syrup, and highly processed sugars for their caramel, our version masterfully replicates the beloved flavors and textures in a significantly more nourishing way:
- Coconut milk and soaked cashews combine to create an unbelievably rich, smooth, and naturally sweet ice cream base that rivals any dairy version.
- Our “caramel” layer uses wholesome maple syrup and creamy peanut butter, providing that signature gooey sweetness without refined sugars or artificial additives. (Note: The original text mentioned dates, but the ingredient list uses maple syrup for caramel, so I’m aligning with the list. If dates were in the recipe, I would include them here.)
- A coating of high-quality dark chocolate and an abundance of chopped peanuts deliver that iconic Snickers crunch and deep, satisfying chocolatey flavor, completing the authentic experience.
Exciting Recipe Variations to Try
Feel free to get creative and adapt this recipe to suit your preferences or dietary needs:
- Nut-Free? No problem! For a completely nut-free version, swap the peanut butter with sunflower seed butter (like SunButter) and use roasted sunflower seeds or pumpkin seeds in place of peanuts. You could also experiment with granola butter and puffed rice cereal for a different kind of crunch!
- Craving Extra Protein? To boost the protein content without affecting the delightful texture of the ice cream base, consider adding a scoop of unflavored collagen powder. Collagen blends seamlessly into the mixture without altering its consistency, unlike many plant-based or whey protein powders which can make the ice cream gummy or icy. *Do not add additional plant-based or whey protein to the ice cream base as it can negatively impact the texture.*
- No Cashews on Hand? If cashews aren’t an option for your ice cream base, soaked macadamia nuts can make an excellent alternative. They also provide a rich, creamy texture and a subtle, pleasant flavor.
More Healthy Frozen Dessert Recipes to Explore
If you loved these healthy Snickers ice cream bars, you’re in for a treat with these other delicious frozen desserts from Dani’s Healthy Eats:
- Snickers Cookies
- Snickers Ice Cream Cake
- Healthier Copycat Klondike Bars
- Homemade Dilly Bars
- Cookie Dough Ice Cream Bars
- Strawberry Frozen S’mores
- 2-Ingredient Rolo’s
- Strawberry Shortcake Protein Ice Cream (Ninja Creami)
If you give this recipe a try and absolutely love it, please consider leaving a star rating and a review below! It means the world to me. And don’t forget to tag me in your delicious creations on Instagram @danishealthyeats!
Homemade Snickers Ice Cream Bars
These healthier vegan Snickers ice cream bars have a dreamy, creamy ice cream base, are topped with a crunchy peanut caramel, and then coated in a crunchy chocolate shell! They are gluten-free, refined sugar-free, and made with wholesome ingredients – the ultimate frozen dessert for summer!
Pin Recipe
Prep Time: 20 mins
Total Time: 20 mins (active, not including freeze time)
Course: Appetizer, Dessert, Snack
Cuisine: American
Servings: 12 bars/squares
Ingredients
Ice Cream Base
- 1 can full-fat coconut milk *read instructions for chilling*
- 1/4 cup coconut yogurt or Greek yogurt
- 3/4 cup raw cashews
- 2 scoops vanilla protein powder (optional, I use Vanilla Buttercream from Macro Mike)
- 4-5 tbsp maple syrup or honey
- 1 tbsp vanilla extract
- 1/2 tsp sea salt
Peanut Butter Layer
- 3/4 cup peanut butter
- 1/4 cup maple syrup
- 3 tbsp coconut oil
- 1 scoop collagen (optional, do NOT substitute with other protein powder)
- 1 tsp vanilla extract & good pinch of sea salt (omit salt if peanuts are salted)
- 1/2 cup chopped peanuts
Chocolate Coating
- 1 1/4 cups chocolate chips (dairy-free if needed)
- 1 tbsp coconut oil (to thin the chocolate)
Instructions
- Place the can of coconut milk in the fridge for an hour or two to allow the cream to separate.
- In a high-speed blender, combine the thick cream from the top of the chilled coconut milk can along with 1/4 cup of the liquid. Add the remaining ingredients for the ice cream base: cashews, protein powder (if using), maple syrup, coconut/Greek yogurt, vanilla extract, and sea salt. Blend until completely smooth. Taste and adjust sweetness as desired.
- Line a loaf pan with parchment paper or use a silicone bar mold. Pour the ice cream mixture into the prepared pan/molds. Freeze for 3-4 hours, or until completely firm enough to support the caramel layer.
- Once the ice cream base is firm, combine all the caramel ingredients (peanut butter, maple syrup, coconut oil, optional collagen, vanilla extract, and sea salt) in a small bowl and mix until smooth. Pour this caramel mixture over the frozen ice cream base, spreading it out evenly. Sprinkle the chopped peanuts over the top and press down lightly.
- Return to the freezer for another 2-3 hours, or until the entire block is very firm. Once firm, remove from the pan using the parchment paper overhang. Use a sharp knife to cut the mixture into individual bars. Place the cut bars on a parchment-lined baking sheet and put them back in the freezer while you melt your chocolate.
- In a wide bowl, combine the chocolate chips and 1 tbsp coconut oil. Heat in 30-second increments in the microwave, stirring well between each, until completely smooth.
- Take the bars out of the freezer. Quickly dunk each one into the melted chocolate, using a fork to lift it out and allow any excess chocolate to drip off.
- Place the chocolate-coated bars back on the parchment-lined baking sheet. Return to the freezer for about 30 minutes, or until the chocolate shell is firm. Once set, transfer them to an airtight container or freezer baggie and store in the freezer.
- For the creamiest texture, thaw the bars for 5 minutes or so prior to eating!
Video
Notes
*You’ll want to use a higher fat milk (like full-fat canned coconut milk) to create that dreamy, creamy ice cream texture and avoid any “icicle” or overly icy coating that can happen with lower fat options. Even using a full-fat dairy-free creamer like NutPods *should* work, but full-fat coconut milk is highly recommended for best results!
Keyword: 4th of july dessert, healthy vegan dessert, snickers bars
