Homemade Healthy Tagalong Cookies: Your Ultimate Gluten-Free & Vegan Girl Scout Copycat Recipe
Craving the irresistible combination of peanut butter and chocolate that only Girl Scouts Tagalong cookies deliver? Good news! You can now recreate these beloved treats right in your own kitchen with a healthier twist. Our homemade Tagalong cookies are not only incredibly easy to make but are crafted with a handful of **wholesome ingredients**, making them possibly even more delicious and definitely more nourishing than the classic store-bought version. Each cookie features a delightfully crunchy shortbread base, a rich and creamy peanut butter filling, all enrobed in a luscious layer of decadent chocolate. And for those with specific dietary needs, rejoice! This recipe is proudly **vegan, gluten-free, and refined sugar-free**, offering a guilt-free indulgence that doesn’t compromise on flavor or satisfaction.

There’s something truly magical about Girl Scout cookies, isn’t there? From the iconic Thin Mints to the coconut-caramel delight of Samoas, these seasonal treats hold a special place in many hearts. While Tagalongs (also known as Peanut Butter Patties in some regions) are undeniably a fan favorite, my personal top pick has always been the Samoa. If you share that love, you absolutely *must* try my easy no-bake Samoa cookies – they’re one of my most popular recipes for good reason! Or, if you’re seeking a lighter, more refreshing snack with a similar flavor profile, my Samoa apple slices have taken social media by storm, and I can attest, they are incredibly addictive!
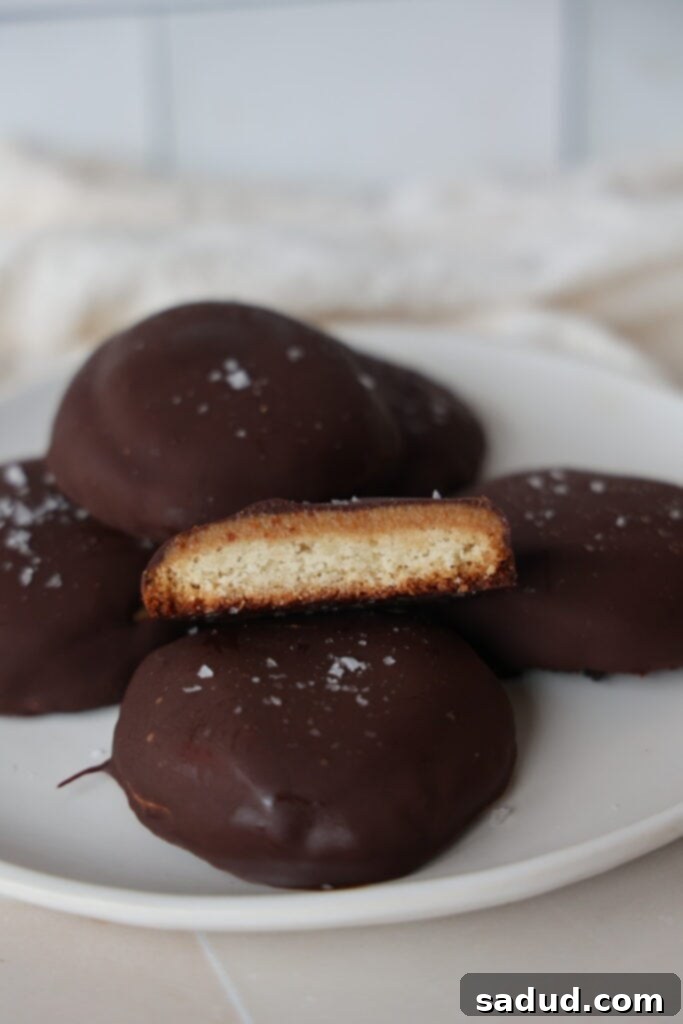
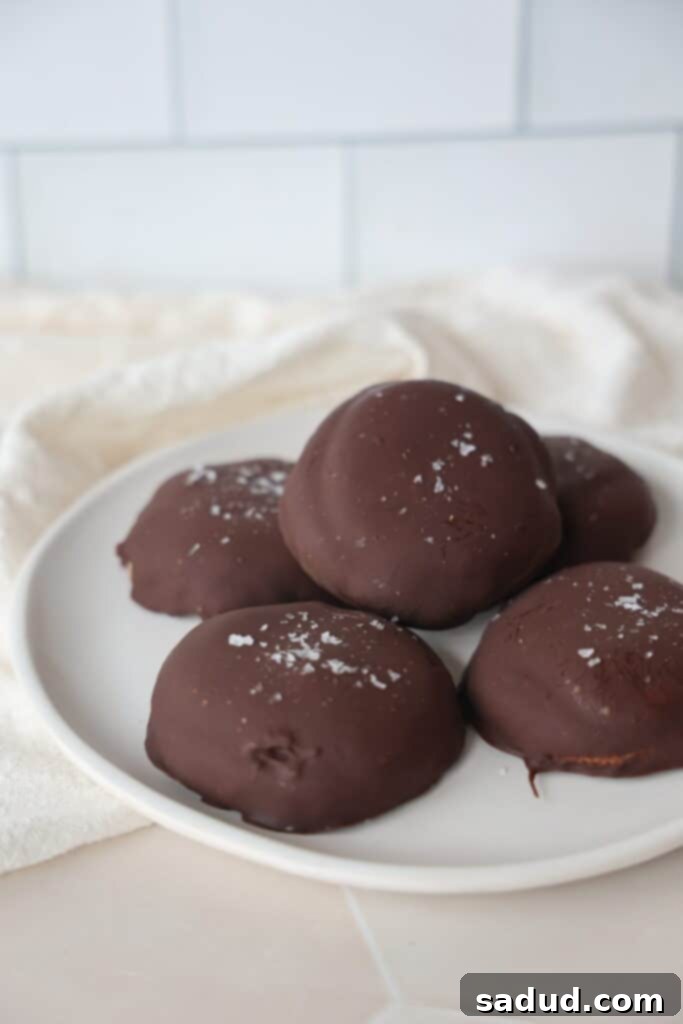
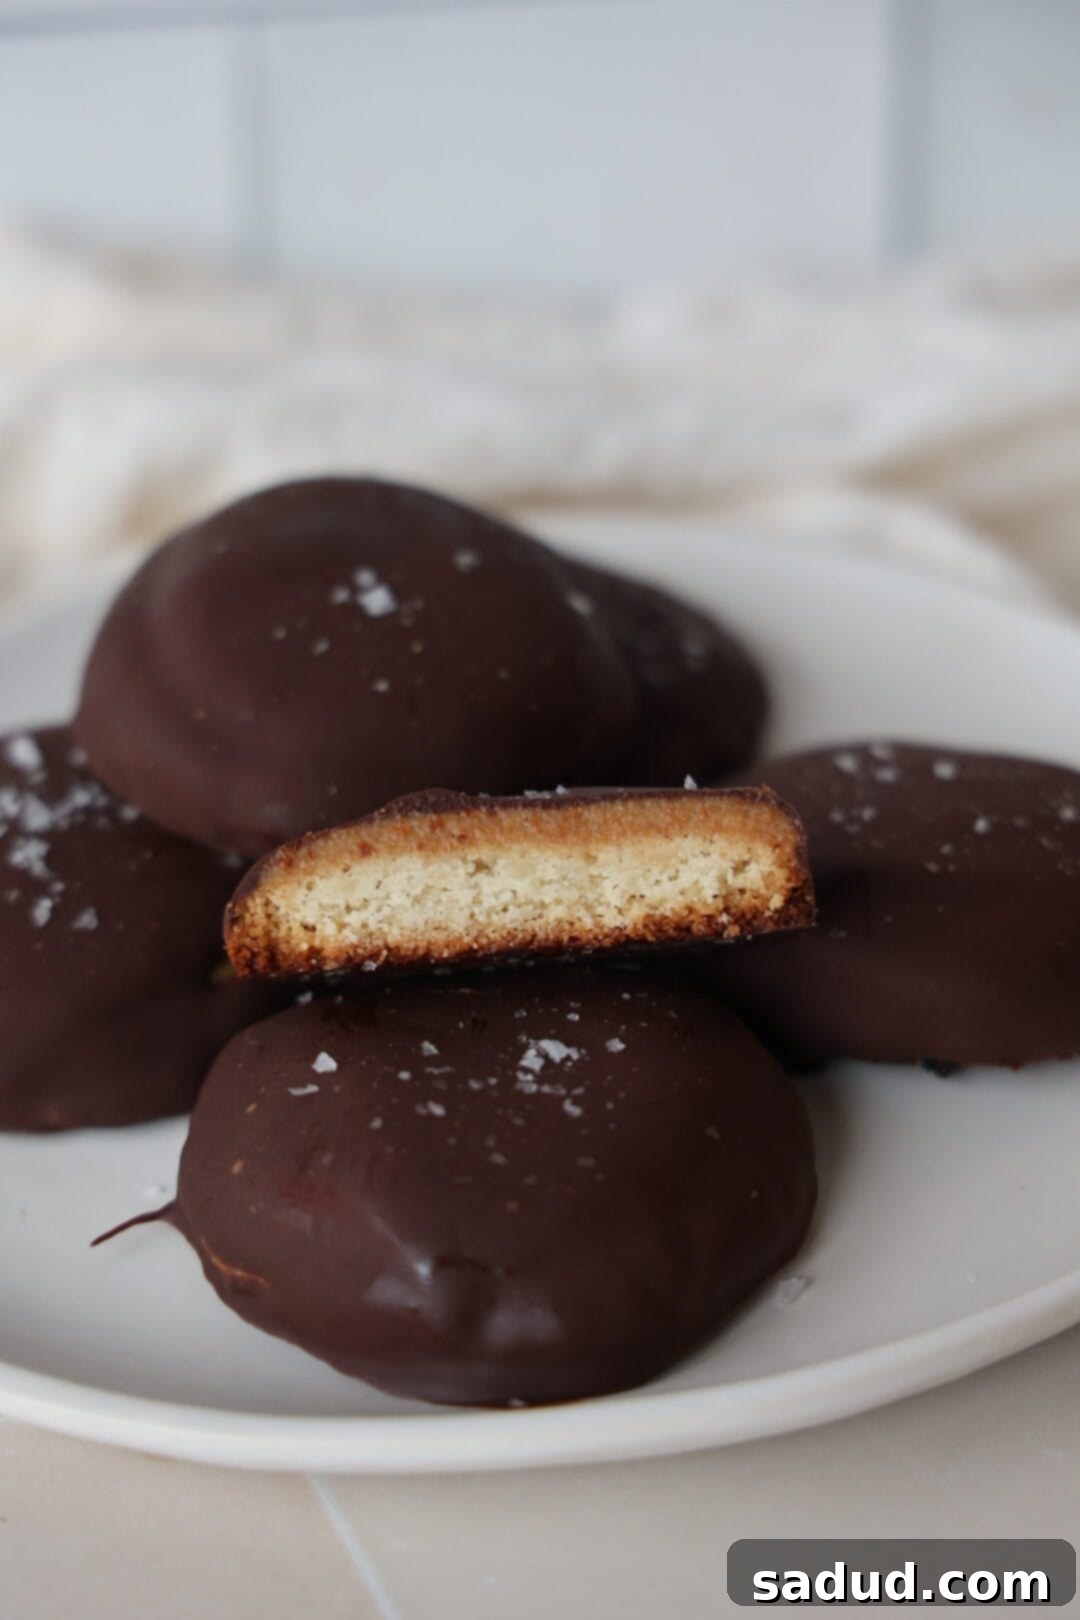
But let’s shift our focus back to these extraordinary homemade Tagalongs. What truly elevates these cookies, in my opinion, is their incredible texture. The base is a crunchy shortbread cookie that is truly “to die for.” Made with almond flour, it achieves that perfect crispness and delightful crumble with every bite. This sturdy yet tender foundation is then crowned with a rich, velvety peanut butter filling that melts in your mouth. Finally, each cookie is generously dipped in a smooth, dark chocolate coating, creating a harmonious symphony of flavors and textures. It’s a dream come true for any peanut butter and chocolate lover, offering that quintessential sweet and salty balance that makes Tagalongs so iconic. The inspiration for this perfect cookie base actually came from my popular banana caramel cookies. If you ever find yourself with a few spotty, overripe bananas, I wholeheartedly recommend giving those a try as well!

Why You’ll Adore These Healthy Homemade Tagalong Cookies
There are countless reasons why this recipe for homemade Tagalong cookies will quickly become a cherished favorite in your household:
- Effortlessly Easy to Make: Despite their impressive appearance, these Tagalong cookies are surprisingly simple to prepare. With straightforward steps and minimal fuss, you’ll be enjoying these gourmet treats in no time, even if you’re a novice baker.
- Perfect Chocolate to Peanut Butter Ratio: This recipe is meticulously crafted to ensure that every bite delivers the ideal balance of creamy peanut butter and rich chocolate. Neither flavor overpowers the other, resulting in a perfectly harmonious and utterly satisfying taste experience.
- Dietary Restriction Friendly: Catering to various dietary needs, these cookies are naturally gluten-free, dairy-free, vegan, paleo-friendly, and completely free of refined sugars. This makes them an excellent choice for anyone looking for a healthier dessert option without compromising on deliciousness.
- Made with Simple, Wholesome Ingredients: You won’t find any obscure or hard-to-find ingredients here. This recipe calls for just a few basic, healthy staples that you likely already have in your pantry, making it convenient and accessible.
- One-Bowl Wonder (Mostly!): The cookie dough comes together in a single bowl, minimizing cleanup and making the baking process even more enjoyable. This streamlined approach means less time washing dishes and more time savoring your delicious creations.
- Taste Even Better Than the Original Girl Scout Tagalongs: Prepare to be amazed! Many taste-testers have declared these homemade versions superior to the classic Girl Scout cookies. The fresh, natural ingredients truly shine through, delivering a depth of flavor that’s hard to beat.
- Nourishing and Guilt-Free: Enjoy your favorite cookie without the guilt! By using healthier alternatives like almond flour, natural peanut butter, and maple syrup, these cookies offer beneficial nutrients while satisfying your sweet tooth. It’s a dessert you can feel good about eating and sharing.
Crafting Your Homemade Tagalong Cookies: An Overview
The full, detailed ingredients and step-by-step instructions are provided in the comprehensive recipe card below. However, here’s a quick overview of what you’ll need and some helpful substitution tips to ensure your baking success:
Essential Ingredients for Your Healthy Tagalong Cookies:
While the occasional indulgence in the real deal Girl Scout Tagalongs is certainly a treat, it’s worth noting that the commercial versions often contain artificial flavors, various vegetable oils, and peanut butter made with hydrogenated oils. If you, like me, prefer to enjoy these delightful cookies more often than “once in a while,” making them at home is a fantastic way to ensure a healthier and equally (if not more) delicious option!
- Almond Flour: This is the star ingredient for our shortbread base, creating an incredibly perfect crunchy texture that mimics the classic Tagalong. For those unable to use almond flour, oat flour can be a viable alternative. Please be aware that while it should yield a good result, the final texture might be slightly different from the almond flour version. Ensure your oat flour is certified gluten-free if needed.
- Natural Peanut Butter: The heart of the Tagalong flavor! Opt for a natural, unsweetened peanut butter with minimal ingredients (just peanuts and salt is ideal). If you have a peanut allergy or simply prefer other options, almond butter or cashew butter can be excellent substitutes. However, be mindful that using a different nut butter will alter the classic Tagalong flavor profile, though it will still be delicious!
- Pure Maple Syrup: This natural sweetener contributes not only sweetness but also a wonderful depth of flavor to both the cookie base and the peanut butter filling. While honey can be used as a substitute, I highly recommend sticking to maple syrup for the most authentic and rich flavor. Ensure it’s 100% pure maple syrup, not pancake syrup.
- Coconut Oil: Used in its melted form, coconut oil helps bind the cookie dough and adds a subtle richness. It’s also crucial for thinning the chocolate coating to achieve that smooth, dippable consistency. Refined coconut oil is recommended if you don’t want any coconut flavor.
- Dairy-Free Chocolate Chips: To keep these cookies refined sugar-free and vegan, I highly recommend using high-quality dairy-free chocolate chips. My personal go-to is Hu Kitchen chocolate chips, and you can even use my exclusive code “danishealthyeats” for a special discount! Any good quality dark chocolate (70% or higher) will work, ensuring it’s free from dairy and refined sugars if that’s your preference.
- Baking Essentials: Don’t forget the flavorful staples! A touch of Vanilla Extract enhances all the sweet notes, and a good Pinch of Sea Salt is essential for balancing the sweetness and truly making the chocolate and peanut butter flavors pop.
Essential Equipment for Homemade Tagalong Success:
Gathering the right tools before you begin will make the baking process smooth and enjoyable:
- Mixing Bowl: You’ll need at least one large mixing bowl for the cookie dough and a smaller one for the peanut butter filling and chocolate coating.
- Spatula: Essential for mixing ingredients thoroughly and scraping down the sides of your bowls.
- Parchment Paper: Crucial for lining your baking sheets, preventing sticking, and ensuring easy transfer of cookies.
- Baking Sheet: A sturdy baking sheet is needed to bake your cookie bases and to chill the finished Tagalongs.
- Small Cookie Scoop: While optional, a small cookie scoop (about 1.5 tablespoons) helps create uniform cookies, ensuring even baking and a consistent look.
Step-by-Step Instructions to Create Perfect Tagalong Cookies:
- First, we’ll **prepare the delicious shortbread cookie base**. In a large mixing bowl, combine all the shortbread cookie ingredients (almond flour, maple syrup, melted coconut oil, vanilla extract, and sea salt). Mix them thoroughly using a spatula until a cohesive dough forms. The dough should be pliable but not sticky. Using a small cookie scoop, or simply rolling the dough between your palms, drop uniform balls of dough onto a parchment-lined baking sheet, spacing them a couple of inches apart. Gently flatten each cookie ball with the palm of your hand, and then carefully shape the edges to create perfectly smooth, round cookies.
- Next, **create the signature indentation** for the peanut butter filling. Using your thumb or the back of a small spoon, make a small but distinct indentation in the center of each flattened cookie, similar to how you would for thumbprint cookies. These little wells will hold our creamy peanut butter filling. Bake the cookies in a preheated oven until the edges are lightly golden and the cookies are set. Once baked, it’s crucial to let the cookies cool completely. To speed up this process and ensure a firm base, I highly recommend popping the baking sheet into the freezer for about 15-20 minutes.
- While your cookie bases are chilling, it’s time to **prepare the irresistible peanut butter filling**. In a small bowl, combine the peanut butter, maple syrup, melted coconut oil, vanilla extract, and a good pinch of sea salt. Stir everything together until the mixture is perfectly smooth and creamy. Once the cookie bases are completely cool and firm, carefully divide the peanut butter filling evenly among them, filling the indentations you created earlier. Ensure each cookie gets a generous dollop. Return the baking sheet with the filled cookies to the freezer for another 20 minutes or so. This step is vital to allow the peanut butter filling to firm up sufficiently, making the cookies easier to dip in chocolate without the filling oozing out.
- Finally, we’ll **enrobe our cookies in luscious chocolate**. In a small, microwave-safe bowl (or using a double boiler method), melt your dairy-free chocolate chips with a touch of coconut oil (if needed to thin the chocolate for easier dipping). Heat in short bursts (30 seconds at a time in the microwave), stirring well after each interval until the chocolate is smooth and glossy. Once the peanut butter filling has firmed up in the freezer, quickly and carefully dip each cookie into the melted chocolate. Use a fork to gently flip the cookie, ensuring it’s fully coated, then lightly tap the fork against the side of the bowl to let any excess chocolate drip off. Return each chocolate-dipped cookie to the parchment-lined baking sheet. For an extra touch of gourmet flair, sprinkle a little flakey sea salt on top of the wet chocolate, if desired. Place the baking sheet back into the freezer for at least 30 minutes to allow the chocolate coating to harden completely. Once firm, transfer your finished Tagalong cookies to an airtight container and store them in the freezer or refrigerator.
Storing Your Delicious Homemade Tagalong Cookies
These healthier homemade Tagalong cookies are designed to be stored in the refrigerator or freezer, which also helps maintain their fantastic texture. I personally love enjoying them straight from the freezer; this results in a firmer cookie base and a slightly chewier, more caramel-like peanut butter filling, which is absolutely divine. If you prefer a softer, creamier peanut butter filling, storing them in the fridge will achieve that consistency. When stored in an airtight container, they will last wonderfully in the refrigerator for about 2 weeks, or you can keep them frozen for an extended period, up to 3 months. Always ensure they are in an airtight container to prevent freezer burn and keep them tasting fresh.
Frequently Asked Questions About Homemade Tagalong Cookies
Here are some common questions you might have about making these delightful healthier Tagalong cookies:
- Are these cookies truly healthy? “Healthy” is subjective, but compared to traditional Girl Scout Tagalongs, yes! This recipe uses whole, minimally processed ingredients like almond flour, natural nut butter, and maple syrup instead of refined flours, hydrogenated oils, and refined sugars often found in store-bought versions. They offer more fiber and healthy fats, making them a more nutrient-dense treat.
- Can I use a different nut butter for the filling? Absolutely! While peanut butter gives the classic Tagalong flavor, you can certainly experiment. Almond butter, cashew butter, or even sunflower seed butter (for a nut-free option, ensure all other ingredients are also nut-free) would work. Just be aware that the flavor profile will change from a traditional Tagalong. Ensure your chosen nut butter is natural and unsweetened for the best results.
- Do I have to chill the cookies in the freezer? While not strictly mandatory, I highly recommend chilling the cookie bases and the filled cookies in the freezer. This step is crucial for achieving the perfect firm texture for both the shortbread and the peanut butter filling, which makes dipping them in chocolate much easier and prevents them from falling apart.
- My chocolate seized/is too thick. What can I do? If your melted chocolate becomes thick or seizes (turns grainy), it might be due to water contamination or overheating. Try adding a tiny bit more melted coconut oil (a half teaspoon at a time) and stirring vigorously until it smooths out. If it’s very thick, you can also add a small amount of neutral oil like avocado oil.
- How long do these cookies last? When stored properly in an airtight container, these cookies are quite shelf-stable due to their ingredients. They will last for up to 2 weeks in the refrigerator or up to 3 months in the freezer. Freezing them also helps them maintain their crispness and prevents the chocolate from melting at room temperature.
- Can I make these ahead of time for a party? Yes, these Tagalong cookies are perfect for making ahead! Their freezer-friendly nature means you can prepare them weeks in advance and simply pull them out of the freezer an hour or two before serving to let them slightly soften if desired.
More Healthy Treat Recipes You’ll Love
If you’re a fan of healthier versions of classic treats, be sure to explore these other fantastic recipes from my kitchen:
- No-Bake Samoa Cookies
- Healthy Samoa Apple Slices
- Samoa Brownies
- 3-Ingredient Fudge Stripe Cookies
- Vegan Twix Cookies
- Banana Caramel Cookies
- Vegan Sticky Bun Cookies
If you decide to make these incredible homemade Tagalong cookies, it would truly mean the world to me if you left a rating and review below to share your experience! And don’t forget to tag me @danishealthyeats on social media (like Instagram) so I can see your delicious creations! Happy baking! x

Homemade Healthy Tagalong Cookies
Pin Recipe
15 minutes
15 minutes
27 minutes
Appetizer, Dessert, Snack
American
9
cookies
Ingredients
Cookies
-
1
cup
almond flour -
3
tbsp
maple syrup -
2
tbsp
coconut oil, melted -
1
tsp
vanilla extract -
good
pinch
sea salt
Peanut butter filling
-
1/2
cup
peanut butter -
3
tbsp
maple syrup -
1 1/2
tbsp
melted coconut oil -
1/2
tsp
vanilla extract & good pinch sea salt
Chocolate coating
-
1
cup
chocolate chips -
2
tsp
melted coconut oil
*optional, if needed to thin chocolate -
Flakey sea salt
*Optional. I like maldon’s!
Instructions
Cookies
-
Preheat your oven to 350°F (175°C). In a large mixing bowl, combine all of the shortbread cookie ingredients: almond flour, maple syrup, melted coconut oil, vanilla extract, and a good pinch of sea salt. Mix thoroughly until a cohesive dough forms.
-
Using a small cookie scoop (approximately 1.5 tablespoons) or by hand-rolling the dough, drop evenly sized balls onto a parchment-lined baking sheet, ensuring adequate spacing between each cookie. Gently flatten each dough ball with the palm of your hand. To achieve smooth, neat edges, you can gently cup and shape the cookies around the perimeter (refer to the accompanying video for a visual guide). Then, create a small indentation in the center of each flattened cookie using your thumb or the back of a small spoon – this will be for the peanut butter filling.
-
Bake for 9-12 minutes, or until the edges of the cookies turn a beautiful golden brown. Carefully remove the baking sheet from the oven and allow the cookies to cool completely on the sheet. To accelerate the cooling process and ensure a firm cookie base, I recommend placing the baking sheet in the freezer for 15-20 minutes.
Peanut butter filling
-
While your cookie bases are chilling, prepare the creamy peanut butter filling. In a small bowl, combine the peanut butter, maple syrup, melted coconut oil, vanilla extract, and a good pinch of sea salt. Mix all ingredients thoroughly until the filling is smooth and well combined. Once the baked cookies are cool to the touch and firm, evenly divide the peanut butter mixture among them, carefully filling the indentations in the center of each cookie.
-
Return the baking sheet with the peanut butter-filled cookies to the freezer. Chill for approximately 20 minutes, or until the filling has firmed up enough to withstand dipping in chocolate without losing its shape. This step is essential for a clean chocolate coating.
Chocolate coating
-
Prepare your chocolate coating. You can melt the chocolate chips and coconut oil together using either the double boiler method on the stovetop or carefully in the microwave. If using the microwave, heat in 30-second increments, stirring thoroughly after each interval, until the chocolate is completely smooth and melted. The coconut oil will help create a thinner, dippable consistency.
-
Once the peanut butter filling is firm, quickly dip each cookie into the melted chocolate. Using a fork, gently flip the cookie to ensure it’s fully coated. Then, lightly tap the fork against the top edge of the bowl, allowing any excess chocolate to drip back into the bowl for a neater finish.
-
Place each chocolate-dipped cookie back onto the parchment-lined baking sheet. Once all cookies are dipped, if desired, sprinkle a little flakey sea salt over the still-wet chocolate for an extra touch of flavor and elegance. Immediately transfer the baking sheet to the freezer for at least 20-30 minutes, allowing the chocolate to fully harden and set.
-
Once the chocolate has hardened, your homemade healthy Tagalong cookies are ready to enjoy! Store them in an airtight container in the refrigerator for up to two weeks, or in the freezer for up to three months, depending on your preferred texture and storage duration.
Notes
These versatile cookies will last beautifully in an airtight container in the fridge for up to two weeks, or they can be stored in the freezer for up to three months, ready for whenever a craving strikes!
copycat girl scout cookies, gluten free cookies, gluten free girl scout cookies, healthy cookie recipe, healthy girl scout cookies, peanut butter cookies, peanut butter patties, tagalong’s, vegan tagalongs
