Deliciously Easy Homemade Built Puff Protein Bars: Your Ultimate Copycat Recipe
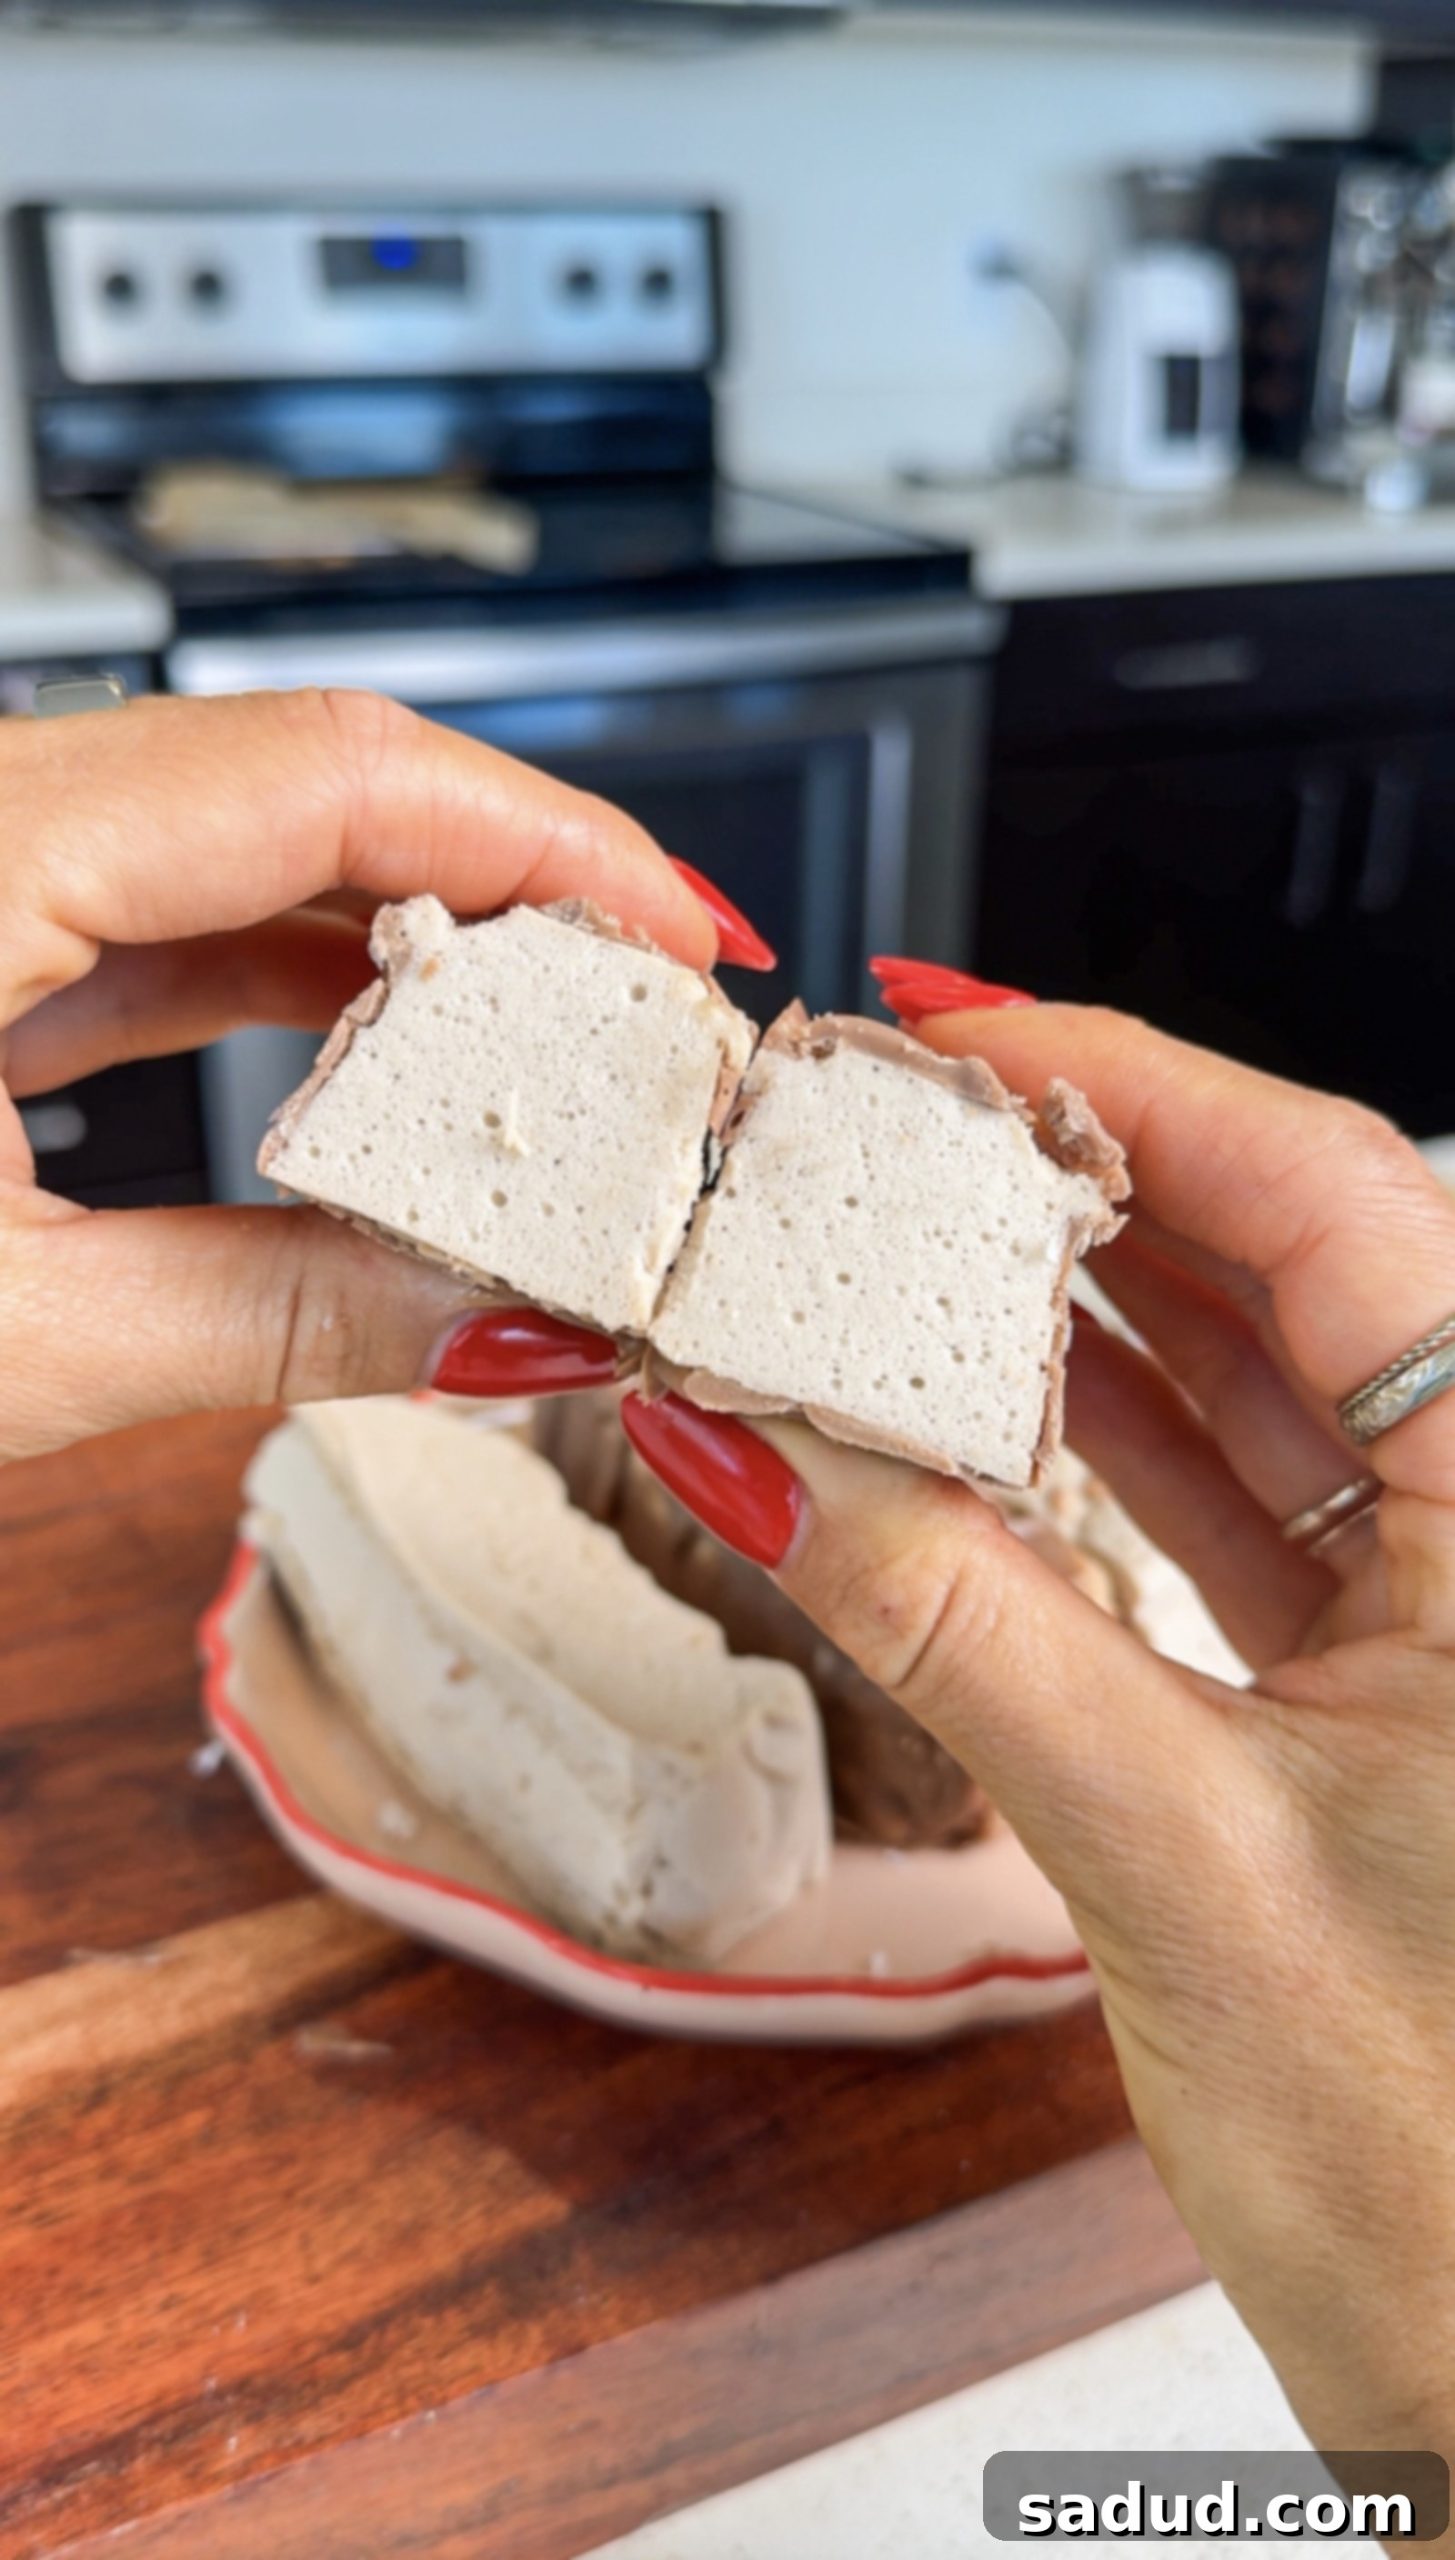
Imagine biting into a pillowy marshmallow cloud, perfectly coated in rich, decadent chocolate. Now, imagine it’s packed with protein and made right in your own kitchen! That’s exactly what you get with these incredible Homemade Built Puff Protein Bars. This recipe offers a delightful blend of taste and nutrition, proving that healthy snacking doesn’t have to be bland. What’s even better? They’re crafted from simple, wholesome ingredients and can be easily adapted to be dairy-free, gluten-free, or even refined sugar-free. Get ready to elevate your snack game with these irresistible, high-protein treats!
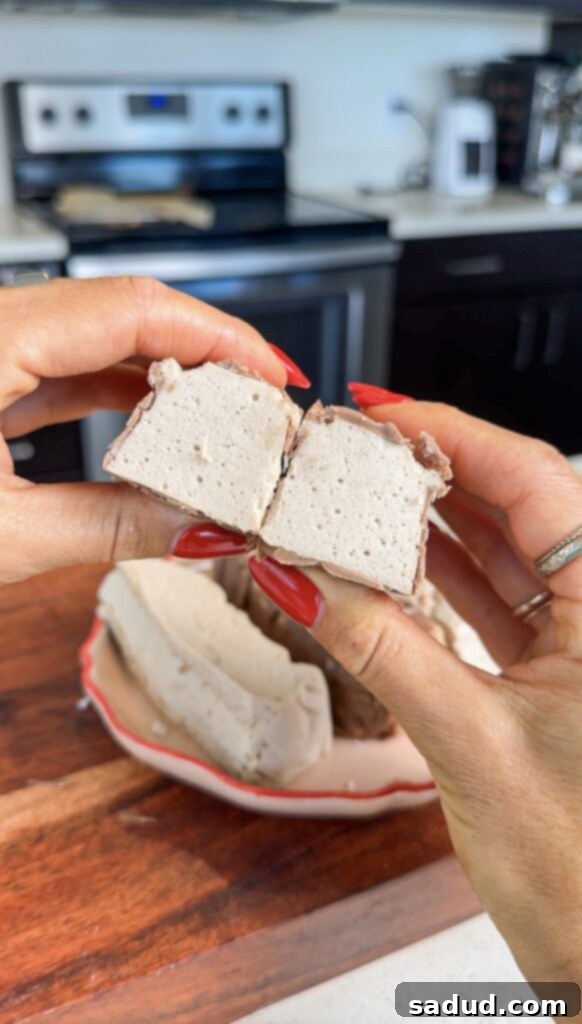
This copycat Built Puff protein bar recipe delivers the exact soft, marshmallowy texture and rich chocolate dip that you adore in the original, but with the added satisfaction of making it yourself. Whether you need a quick refuel after a strenuous workout, a satisfying afternoon pick-me-up to beat the 3 PM slump, or let’s be honest, a guilt-free late-night dessert, these bars are the perfect solution. They offer all the flavor and satisfaction of a candy bar, but with a significant protein boost to keep you feeling fuller and more energized.
If you’re a fan of recreating your favorite treats at home, you’ll also love my copycat KIND frozen treat bars – another fantastic way to enjoy a healthier version of a beloved snack!
Why You’ll Absolutely Love These Homemade Built Puff Protein Bars
- Unbelievably Customizable: Dietary restrictions or preferences? No problem! This recipe is incredibly adaptable. You can easily make these bars dairy-free by choosing a plant-based protein shake and dairy-free chocolate chips. For those avoiding gluten, simply ensure your protein shake and any additional protein powder are certified gluten-free. And if you’re looking to cut down on sugar, opt for a sugar-free protein shake, sugar-free honey/maple syrup alternatives, and sugar-free chocolate. The power is in your hands to create a bar that perfectly fits your needs.
- Incredibly Versatile Flavors: The base recipe is a canvas for your creativity! Experiment with different protein shake flavors – vanilla, chocolate, strawberry, coffee, or even cookies and cream – to create an endless array of unique bars. You can also switch up the chocolate coating: use dark, milk, or white chocolate, or even add mix-ins like crushed nuts or dried fruit before the chocolate sets.
- Minimal, Wholesome Ingredients: You’ll be amazed at how few ingredients are required to achieve such a luxurious taste and texture. This simplicity not only makes the recipe easy to follow but also ensures you know exactly what’s going into your body. Forget long lists of artificial additives and preservatives; these bars rely on natural components for their deliciousness.
- Taste That Rivals a Candy Bar: Let’s face it, many protein bars taste… well, like protein bars. But these homemade Built Puffs are different. The light, airy marshmallow interior, combined with the crisp, rich chocolate shell, truly mimics the experience of indulging in a gourmet candy bar. The best part? You get that satisfying sweetness and texture along with a significant protein boost, making it a truly guilt-free pleasure.
- Cost-Effective & Fresh: Making your own protein bars is often far more economical than buying pre-packaged ones. Plus, you get the unparalleled freshness and quality that only homemade treats can offer.
Watch the Magic Happen: Recipe Video
Visual learners, rejoice! This short video will guide you through each step of making these incredible protein bars, ensuring you achieve that perfect marshmallow fluff and chocolate coating every time. See just how simple and fun it is to create these delicious copycat treats.
How to Make Homemade Built Puff Protein Bars: A General Overview
While the full, detailed recipe card is conveniently located at the bottom of this post, here’s a general idea of the simple process involved in creating these marshmallowy, chocolate-covered delights. It’s much easier than you might think!
The core of these bars lies in transforming a simple protein shake and gelatin into a light, airy, and stable marshmallow fluff. This involves a bit of whisking and chilling. Once your protein fluff is perfectly set, it’s time for the decadent chocolate coating. Melting your favorite chocolate with a touch of coconut oil creates a smooth, glossy, and quick-setting shell. A final chill locks everything in place, ready for you to slice and enjoy. It’s a rewarding process that yields truly impressive results!
Essential Tools You’ll Need
Gathering the right equipment before you start will make the process incredibly smooth and enjoyable. Here are the key tools you’ll need to create your perfect Built Puff protein bars:
- Stand Mixer or Hand Mixer: This is crucial for achieving that signature fluffy, marshmallow texture. While a Kitchenaid stand mixer is highly recommended for its efficiency and ease, a powerful hand mixer with good reviews will also do the trick. The whipping process requires sustained effort, so a mixer is definitely preferred over manual whisking.
- Loaf Pan: A standard 9×5 inch loaf pan is ideal for shaping your protein marshmallow base. Lining it with parchment paper will make removal and slicing a breeze.
- Small Saucepan: For gently warming the protein shake and gelatin to help the gelatin bloom and dissolve.
- Parchment Paper: Essential for lining the loaf pan and the baking sheet where your chocolate-dipped bars will set. Prevents sticking and makes cleanup effortless.
- Measuring Cups and Spoons: For accurate ingredient measurements.
- Whisk or Spatula: For mixing and folding.
Key Ingredients for Your Built Puff Protein Bars (And Why They Work!)
The beauty of this recipe lies in its simplicity and the power of just a few core ingredients. Here’s a closer look at what you’ll need and why each component is vital for that authentic Built Puff experience:
- Protein Shake: This is the liquid base and a primary source of protein. Choose your favorite brand and flavor! For the best results, look for options that are low in added sugars and free from artificial flavors or unnecessary ingredients. Vanilla is a great starting point, but don’t hesitate to experiment with chocolate, strawberry, or coffee flavors to customize your bars. The protein content will vary depending on your chosen shake, so adjust other protein sources if desired.
- Grass-Fed Gelatin: This is the star ingredient that creates the magical, pillowy marshmallow texture! Gelatin, when properly bloomed and whipped, transforms the liquid protein shake into a light, airy, and stable fluff. Beyond texture, quality gelatin is incredibly beneficial, being rich in amino acids like glycine and proline, which support gut health, skin elasticity, and joint function. Quality is VERY important here for both texture and nutritional benefits. Always look for a high-quality grass-fed gelatin to ensure optimal results and maximum health benefits.
- Honey or Maple Syrup (Optional): This is your opportunity to adjust the sweetness of your bars. If your chosen protein shake is already quite sweet, you might omit this entirely. However, if you prefer a sweeter bar or are using an unsweetened protein shake, a few tablespoons of natural sweetener like honey or maple syrup will enhance the flavor beautifully without relying on refined sugars. For a truly refined sugar-free option, consider sugar-free alternatives if they suit your dietary needs.
- Vanilla Extract & Pinch of Sea Salt: These might seem like small additions, but they play a significant role in enhancing the overall flavor. Vanilla deepens the “dessert” quality of the marshmallow, while a tiny pinch of flaky sea salt (the chef’s kiss!) perfectly balances the sweetness and elevates the chocolate flavor.
- Your Favorite Protein Powder (Optional): If you want to significantly boost the protein content of your bars, adding 1-2 scoops of your preferred protein powder (whey, casein, or plant-based) is a great idea. Just be mindful that this can slightly alter the texture, potentially making it a bit denser. Add it towards the end of the whipping process.
- Chocolate Chips: The essential ingredient for creating that signature crunchy chocolate shell coating! You can use any type of chocolate you love – dark, milk, or semi-sweet. If you’re aiming for a sugar-free or lower-sugar option, I highly recommend high-quality brands like ChocZero or Lily’s. For a truly wholesome and rich flavor, Hu Kitchen chocolate is an excellent choice.
- Coconut Oil or Avocado Oil: A small amount of oil is added to the melted chocolate. This isn’t just for flavor; it helps the chocolate melt smoothly, become more fluid for dipping, and set into a beautifully glossy and perfectly crisp shell that snaps just like a real candy bar.
Optional but fun: a pinch of flaky sea salt sprinkled on top of the wet chocolate coating. It provides a delightful textural contrast and enhances the chocolate’s depth – truly a chef’s kiss moment!
Detailed Steps to Make Your Copycat Built Puff Protein Bars
Let’s get cooking! Follow these clear and concise steps to create your own batch of delicious protein bars.
- Prepare the Base & Bloom Gelatin: In a small saucepan, combine your protein shake, vanilla extract, and optional maple syrup or honey. Sprinkle the grass-fed gelatin evenly over the surface of the liquid. Allow it to “bloom” undisturbed for 5-10 minutes. This crucial step rehydrates the gelatin, ensuring a smooth texture. After blooming, place the saucepan over very low heat and whisk constantly until the gelatin is fully dissolved and the mixture slightly thickens – it should be warm, not hot.
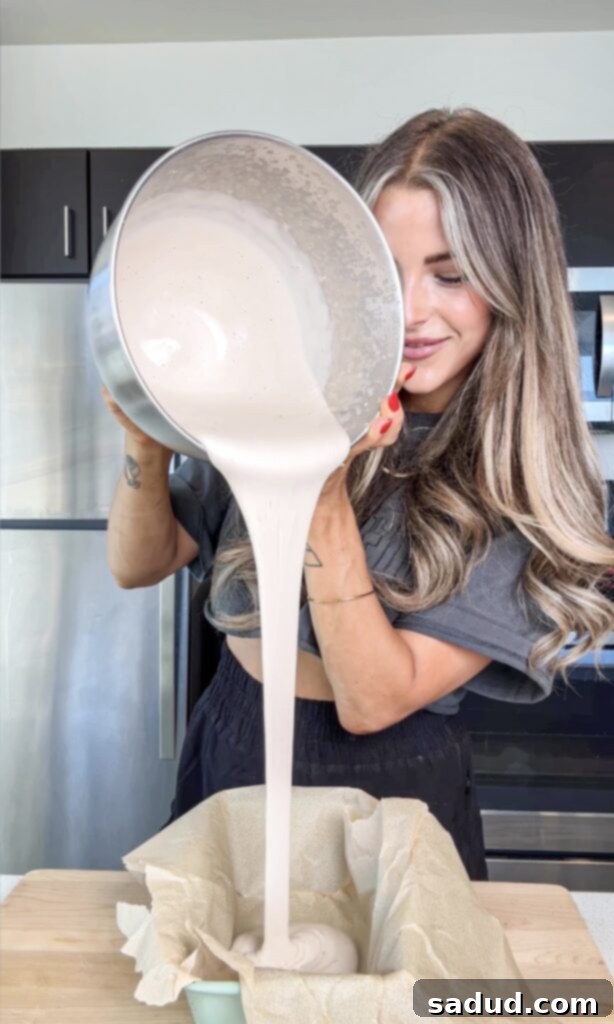
- Whip into Fluffy Perfection: Carefully pour the warm gelatin mixture into the bowl of your stand mixer (or a large bowl if using a hand mixer). Let it cool for 5-10 minutes until it’s just warm to the touch, not piping hot. Begin whipping on low speed, then gradually increase to high. Continue to whip for a good 10-20 minutes. During this time, the mixture will miraculously transform into a thick, airy, and luscious marshmallow fluff. If adding optional protein powder, gently fold it in during the last minute of whipping. Be careful not to over-whip, as it can become too stiff. The ideal consistency should be thick enough to hold its shape on the whisk, but still slightly drippy.
- Chill and Set: Once your marshmallow fluff is ready, gently pour or spoon it into your parchment-lined loaf pan. Use a spatula to spread it evenly. Transfer the pan to the refrigerator and let it chill and firm up for at least 1-2 hours. This patience is key for bars that hold their shape beautifully.
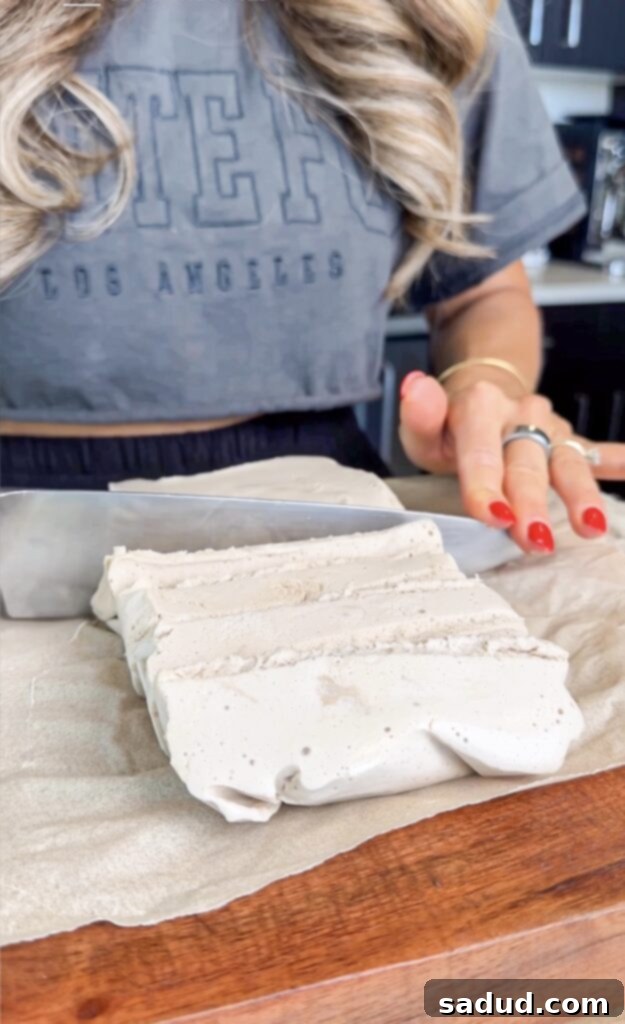
- Prepare for Chocolate Dipping: Once the marshmallow base is firm, carefully lift it out of the loaf pan using the parchment paper. Place it on a clean cutting board and, using a sharp knife, slice it into your desired bar size. While you’re doing this, melt your chocolate chips with the coconut oil in a small, microwave-safe bowl or a double boiler until smooth and glossy. The coconut oil helps create that perfect snap and shine.
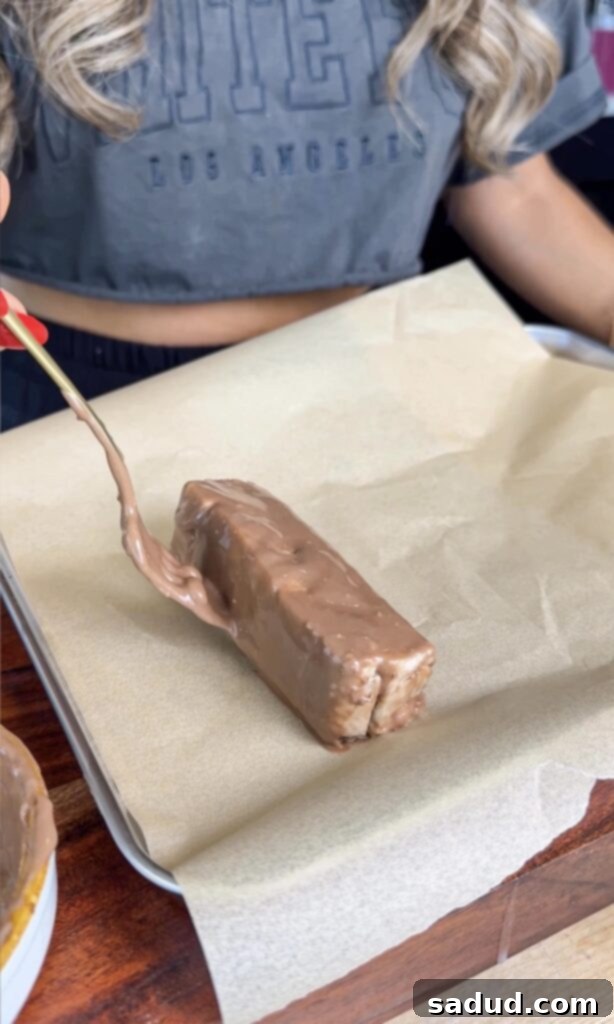
- The Decadent Chocolate Dip: Now for the fun part! One by one, dip each marshmallow bar into the melted chocolate, ensuring it’s fully coated. You can also drizzle the chocolate over the bars for a lighter coating. Use a fork or a dipping tool to carefully lift the bar out, allowing excess chocolate to drip off. Immediately transfer the chocolate-coated bars to a fresh sheet of parchment-lined baking sheet.
- Final Set & Enjoy: Place the baking sheet back into the refrigerator for another hour or so, or pop them into the freezer for about 30 minutes, until the chocolate coating is completely set and firm. Once hardened, transfer your beautiful homemade Built Puff protein bars to an airtight container. They’re now ready to be enjoyed! Remember to store them in the fridge to maintain their perfect texture.
Expert Tips for Crafting the Perfect Built Puff Dupe
Achieving that store-bought quality in your homemade protein bars is easier with a few insider tips:
- Don’t Rush the Chill Time: This is perhaps the most critical step. Adequate chilling allows the gelatin to fully set, ensuring your bars are firm enough to handle and dip without falling apart. Rushing this step will result in a messy, unset bar.
- Temperature Control for Chocolate: When melting chocolate, do so gently. Overheating can cause it to seize or burn. If using a microwave, heat in 30-second intervals, stirring well after each. For a double boiler, keep the water at a gentle simmer, not a rolling boil. The coconut oil helps, but gentle heat is key.
- For Extra “Candy Bar” Vibes: Before the chocolate coating fully sets, sprinkle your bars with fun toppings! Crushed peanuts, almonds, shredded coconut, or even a few colorful sprinkles can add an extra layer of texture and visual appeal, truly making them feel like a gourmet treat.
- Use Parchment Paper Generously: Line your loaf pan, and then line your baking sheet for dipping. This prevents sticking and makes cleanup a breeze, ensuring your bars look pristine.
- Even Slices Matter: For uniform bars that look professional and are easy to portion, use a sharp, warm knife to slice the chilled marshmallow slab. You can run your knife under hot water and wipe it dry between slices for cleaner cuts.
- High-Quality Ingredients Make a Difference: Especially for the protein shake, gelatin, and chocolate. Better quality ingredients will yield better taste, texture, and nutritional benefits.
Creative Recipe Variations to Explore
Once you’ve mastered the basic recipe, the possibilities for customization are endless. Here are a few ideas to spark your creativity:
- Decadent White Chocolate Coating: Instead of dark or milk chocolate, dip your bars in melted white chocolate. For an elegant twist, top with finely chopped pistachios or dried cranberries for a visually stunning and delicious combination.
- Experiment with Protein Shake Flavors: This is where you can truly make the recipe your own!
- Chocolate Lovers: Use a chocolate protein shake and coat in dark chocolate for a double chocolate fudge bar.
- Fruity & Fun: Try a strawberry or raspberry protein shake base, then dip in white chocolate.
- Morning Boost: A coffee-flavored protein shake paired with dark chocolate can create a fantastic energizing snack.
- Tropical Twist: Coconut or pineapple flavored protein shakes would be delicious, especially with a white chocolate or plain dark chocolate coating.
- Add Inclusions to the Marshmallow: Before chilling, gently fold in mini chocolate chips, chopped nuts, or even a swirl of nut butter into the marshmallow mixture for added texture and flavor directly into the bar.
- Nut Butter Swirl: Swirl a tablespoon of melted peanut butter or almond butter into the melted chocolate before dipping for a marbled effect and extra nutty flavor.
Storing Your Delicious Bars
To keep your homemade Built Puff protein bars fresh and maintain their delightful texture, proper storage is key:
Store your finished bars in an airtight container in the refrigerator for up to one week. The chocolate coating will stay firm, and the marshmallow interior will remain perfectly chewy. If you find they disappear faster than that (which is highly likely!), don’t worry – you can also freeze them for up to two months. This makes them perfect for meal prepping a healthy snack stash or having an emergency protein-packed treat readily available whenever a craving strikes. Just pop them out of the freezer a few minutes before you want to enjoy them, or eat them straight from frozen for a different texture experience!
More High Protein Recipes to Try
If you love these protein-packed treats, you’re sure to enjoy these other healthy and delicious high-protein recipes:
- Cookie Dough Ice Cream Sandwiches
- Frozen Protein S’mores
- No-Bake Cookie Dough Bars
- Healthy Snickers Bites
- Strawberry Frozen S’mores
- Healthy Strawberry Shortcake Cups
- Strawberry Shortcake Protein Ice Cream (Ninja Creami)
- Dilly Bars
Frequently Asked Questions About Homemade Built Puff Bars
Here are some common questions you might have when making these delicious protein bars:
- Can I use any type of protein powder instead of a protein shake?
While the recipe specifically calls for a liquid protein shake for the ideal consistency of the marshmallow base, you can add 1-2 scoops of your favorite protein powder (whey, casein, or plant-based) in addition to the shake, as mentioned in the ingredients. If you *only* have protein powder, you would need to mix it with a liquid (like milk or water) to create a “shake” consistency first, but results may vary as the protein type can affect the gelatin’s setting. Sticking to a pre-made protein shake for the base is recommended for consistency. - My marshmallow mixture isn’t getting fluffy. What went wrong?
The most common reasons for a lack of fluffiness are insufficient whipping time or the gelatin not blooming/dissolving properly. Ensure you’re whipping on high speed for the full 10-20 minutes until it reaches a thick, marshmallow fluff consistency. Also, make sure the gelatin completely dissolved in the warm protein shake before whipping. If the mixture was too hot when you started whipping, it might also hinder the process, so let it cool to just warm. - Can I make these bars vegan?
The primary challenge for a vegan version is the gelatin, which is an animal product. Unfortunately, there isn’t a direct 1:1 vegan substitute that creates the exact same marshmallow texture. Agar-agar flakes or powder can create a firm gel, but it won’t yield the airy, stretchy texture of gelatin-based marshmallow. If you’re looking for vegan protein bars, you might need to explore different base recipes. - How do I prevent the chocolate from cracking when I cut the bars?
To minimize cracking, ensure the chocolate coating isn’t too thick. The addition of coconut oil helps make the chocolate more pliable. Also, before slicing, let the bars sit at room temperature for 5-10 minutes after chilling to slightly soften the chocolate, which makes it less prone to cracking. Use a very sharp, thin knife and press down firmly rather than sawing. - Are these bars genuinely healthy?
These homemade Built Puff protein bars are a significantly healthier alternative to many store-bought options. They are made with simple, recognizable ingredients, offer a good protein boost, and allow you to control the sugar content and other allergens. When made with quality ingredients (grass-fed gelatin, low-sugar protein shake, and quality chocolate), they are an excellent choice for a nutritious and satisfying snack.
Homemade Built Puff Protein Bars
Pin Recipe
20 minutes
2 hours
2 hours
20 minutes
Dessert, Snack
American
Ingredients
-
2
cups
protein shake of choice -
4
tbsp
grass-fed gelatin -
2
tbsp
honey or maple syrup (optional) -
2
tsp
vanilla extract & pinch of sea salt -
1-2
scoops
of your favorite protein powder (optional) -
1
cup
chocolate chips -
1
tbsp
coconut oil or avocado oil
Instructions
-
Add the protein shake, vanilla, (and maple syrup if using) to a small saucepan and sprinkle the gelatin on top. Let bloom for 5-10 minutes. Then place on the oven on low and whisk the mixture periodically until it thickens a bit.
-
Pour this mixture into the bowl of your stand mixer and let cool for 5-10 minutes – it should be warm but not super hot.
-
Turn the mixer on low at first then turn to high after a minute or so, letting it whip for 10-20 minutes until it is thick enough to resemble marshmallow fluff. Add in the protein and whip a little longer. Careful not to over-whip or it’ll get too thick. When you remove the whisk from the bowl, it should stick to it but still be drippy.
-
Pour the mixture into a lined loaf pan. Place in the fridge to firm up for an hour or two.
-
Once firm, remove the parchment paper from the pan. Cut the marshmallow mixture into bars. Melt chocolate in a small bowl with the coconut oil until smooth.
-
Dip each bar and place on a parchment-lined baking sheet. Place back in the fridge for an hour or so or the freezer for 30 minutes before moving to an air-tight container. Store in the fridge.
Video
built protein bar, healthy protein bar, homemade protein bar, keto protein bar, marshmallow protein bar, paleo protein bar, protein bar, refined sugar free protein bar, copycat protein bar, high protein snack
We hope you thoroughly enjoy making and devouring these delightful Homemade Built Puff Protein Bars. They are a testament to how simple ingredients can create something truly extraordinary and satisfying. Whether you’re fueling your body after a workout or simply indulging in a sweet treat, these bars offer the perfect balance of health and deliciousness. Happy snacking!
