Crispy Oven-Baked Lollipop Chicken Legs with Tangy BBQ Glaze
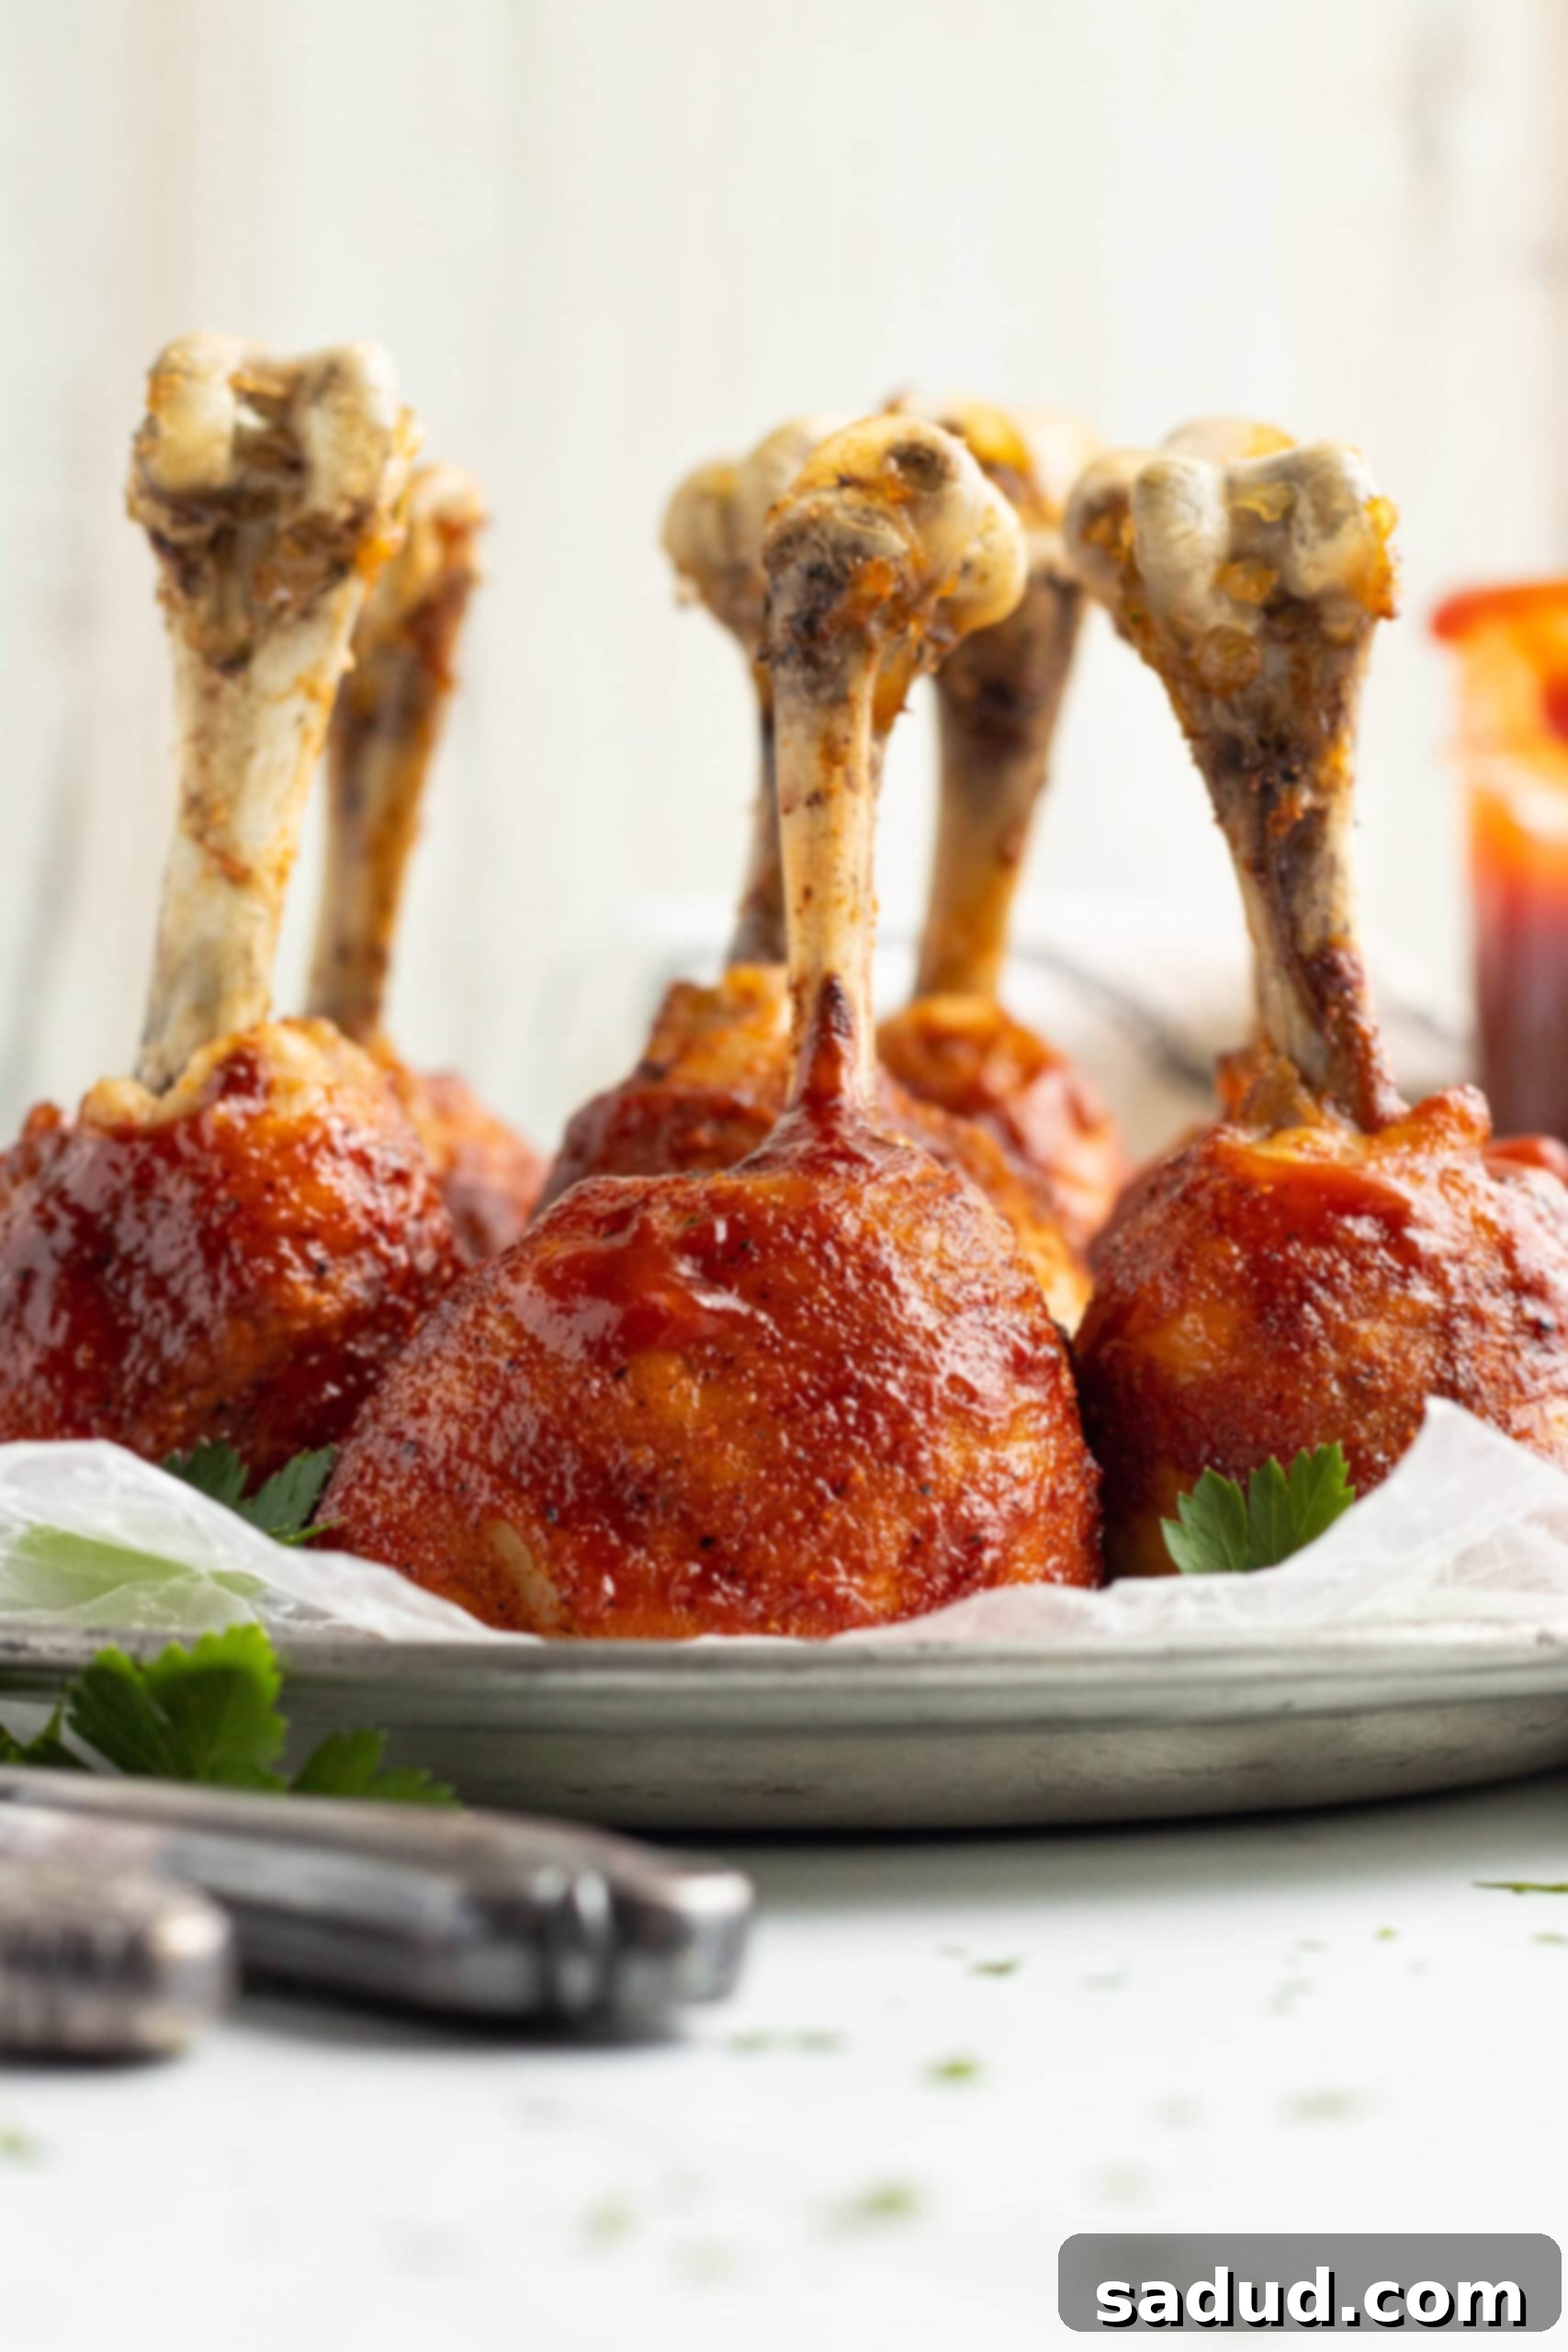
Prepare to elevate your dinner game with these incredibly fun and utterly delicious oven-baked lollipop chicken legs. This recipe transforms ordinary chicken drumsticks into a spectacular, finger-friendly feast that’s perfect for any occasion. Each drumstick is expertly frenched to create its distinctive “lollipop” shape, dry-rubbed with an irresistible blend of spices, baked to crispy perfection, and then generously coated in a homemade sweet and tangy BBQ glaze. Once you master the simple technique of how to lollipop chicken legs, you’ll discover a new favorite way to enjoy this classic poultry staple, leaving you and your guests craving more!
Why You’ll Love These Lollipop Chicken Legs
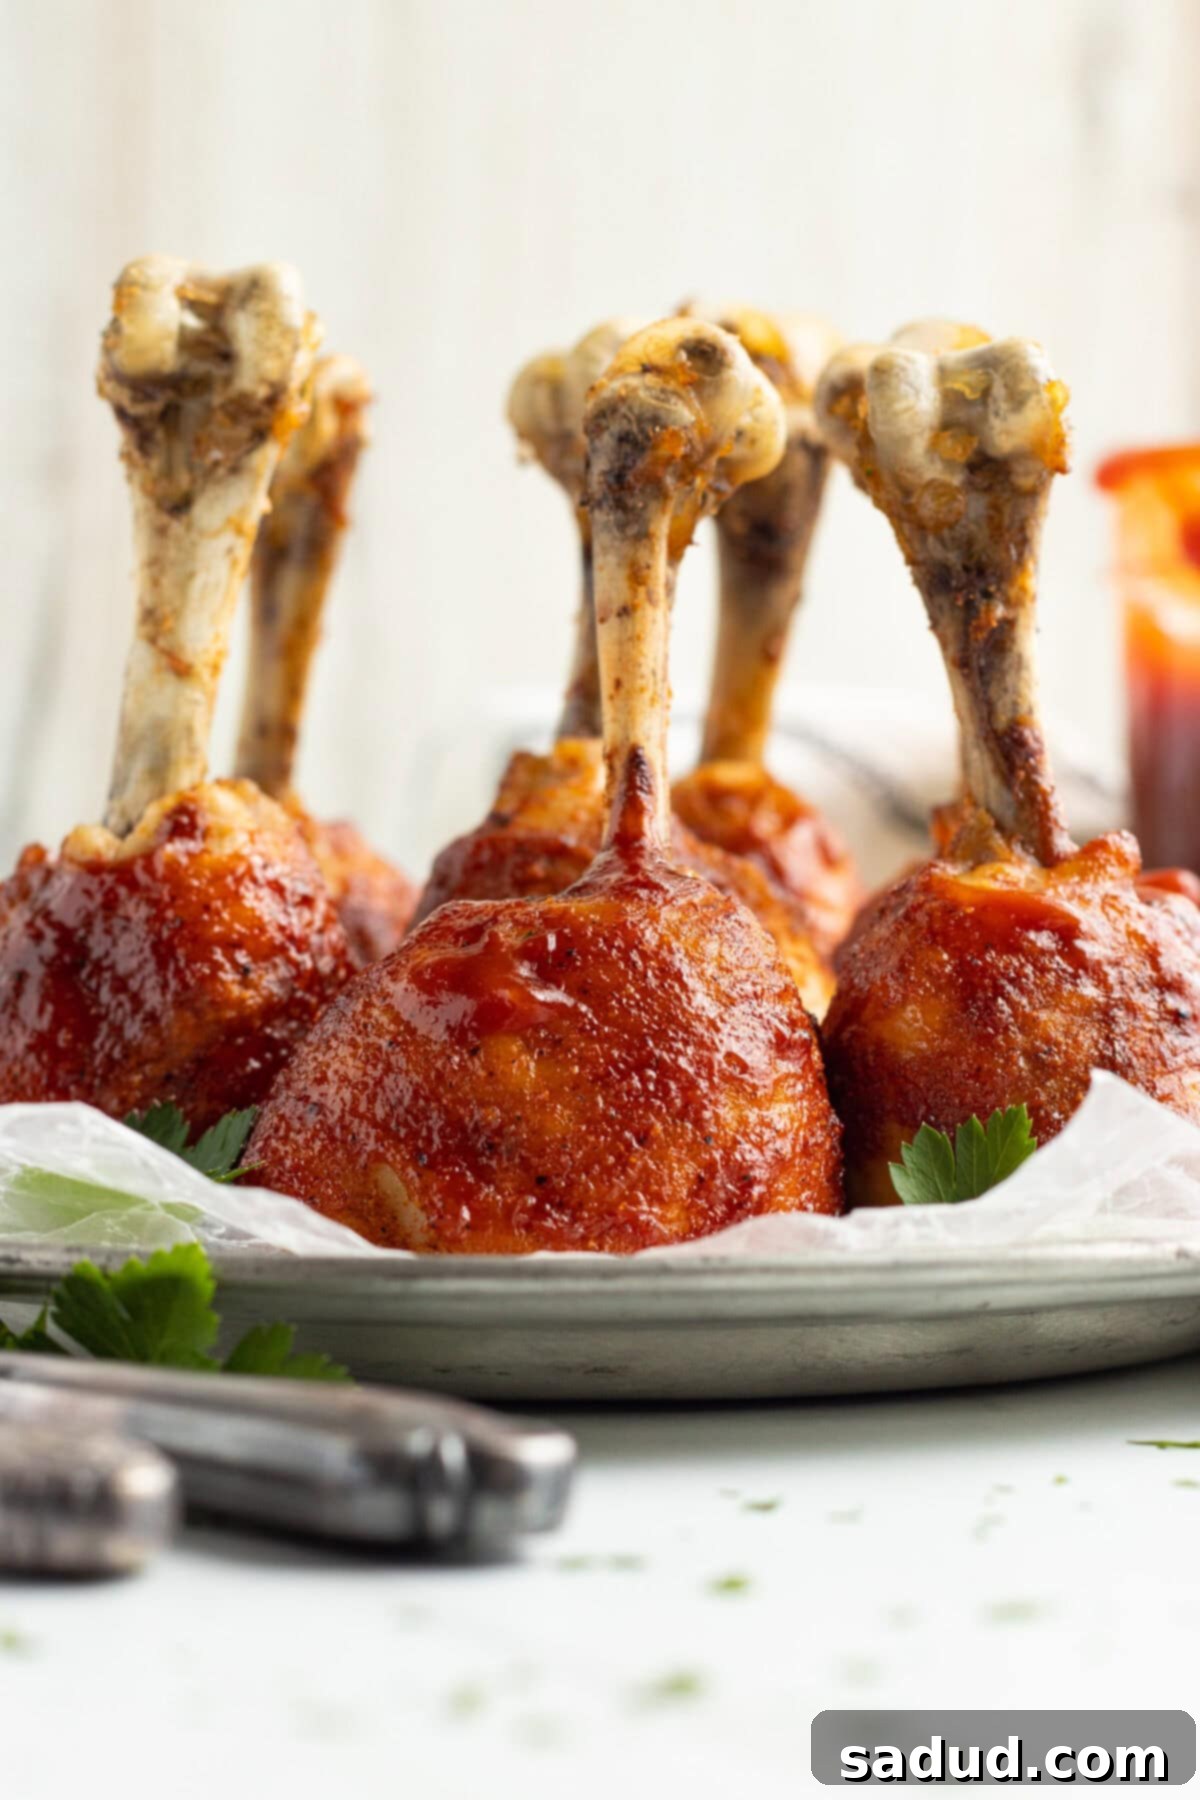
- Explosive Layers of Flavor: These lollipop chicken legs are a true symphony of taste. They begin with a rich, aromatic dry rub that penetrates the meat as it marinates, infusing every bite with savory depth. This is complemented by the bright, zesty notes of our easy homemade barbecue sauce, which caramelizes beautifully during the final baking stage. The result is a harmonious blend of smoky, sweet, and tangy flavors that will tantalize your taste buds. Baked in the oven, the chicken meat remains exceptionally tender and juicy, contrasting perfectly with the flavorful, crispy skin.
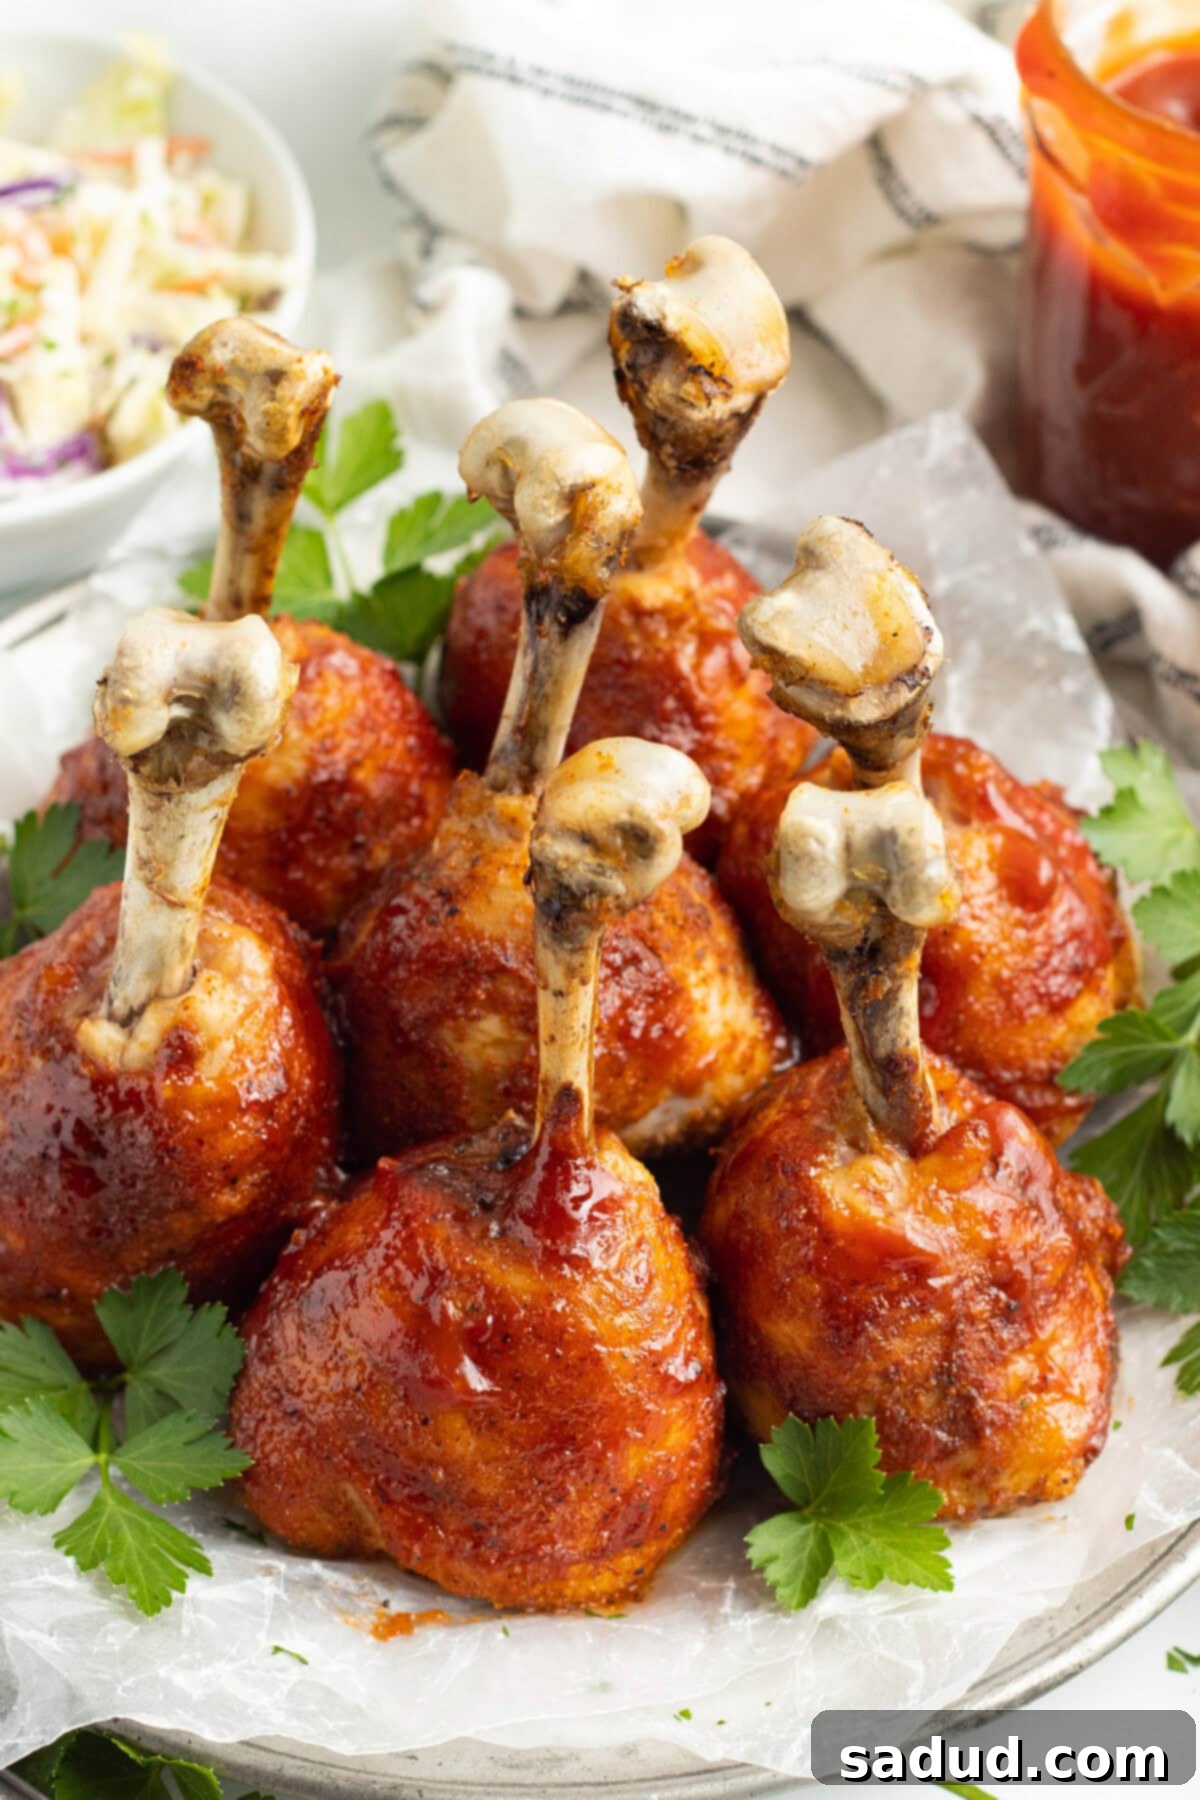
- A Show-Stopping Dish for Any Gathering: Looking for a unique dish that will impress your guests? These frenched chicken legs are an absolute game-changer! Their distinctive and playful “lollipop” shape makes them a conversation starter and incredibly appealing, especially for families with children. Whether presented as a sophisticated appetizer or served as the star protein for a main course, they’re guaranteed to be a hit. The recipe is also highly adaptable, allowing you to easily double or triple the ingredients to feed a large crowd without compromising on quality or taste. Pair them with classic comfort sides like creamy whipped potatoes, savory cheesy green beans, a refreshing coleslaw, or any of your favorite complementary dishes.
- Surprisingly Simple to Master: While the elegant presentation of lollipop chicken legs might suggest a complex cooking process, the technique is actually quite straightforward and incredibly rewarding. Don’t let the “frenched” term intimidate you! With a few simple tools and clear instructions, you’ll quickly get the hang of shaping these drumsticks. Once you’ve performed the lollipopping technique a couple of times, you’ll find it’s a quick and efficient step, making this impressive dish much easier to prepare than you might imagine. The minimal effort for maximum visual and taste appeal makes this recipe a fantastic addition to your culinary repertoire.
Essential Chef’s Tips for Perfect Lollipop Chicken
Achieving perfectly tender and flavorful lollipop chicken legs requires attention to detail. Here are some expert tips to ensure your dish turns out spectacular every time:
- Organize Your Workstation Meticulously: Before you even touch the raw chicken, ensure your entire workspace is prepped and organized. Working with poultry requires strict hygiene to prevent cross-contamination. Gather all necessary tools: a large, dedicated plastic cutting board (easier to clean and sanitize than wood), a very sharp chef’s knife, sharp kitchen shears, plenty of paper towels for patting dry and clean-up, and food-safe gloves if you prefer. Having everything within reach will make the lollipopping process smoother and safer. Immediately clean and sanitize all surfaces and tools that come into contact with raw chicken.
- Customize Your Chicken Skin Preference: The skin plays a crucial role in both flavor and texture. If you’re not a fan of chicken skin or prefer a leaner option, you can absolutely remove it before applying the dry rub. Simply peel it off gently after lollipopping the drumsticks. Be aware that chicken cooked without skin might cook slightly faster and won’t develop the same crispy exterior. Keep a close eye on the internal temperature, checking it about 5-10 minutes earlier than the recommended cooking time to prevent overcooking.
- Achieve Unrivaled Crispy Skin: For those who adore extra-crispy chicken skin, there’s a simple trick to enhance the texture. After the initial baking and BBQ sauce application, once the chicken is almost fully cooked and has been brushed with sauce, lay the chicken lollipops on their sides on the baking sheet. Broil on high for approximately 3 to 4 minutes. Carefully flip them halfway through the broiling time to ensure even crisping on all sides. Watch them closely, as broilers can be powerful and char the skin quickly. This step will create a beautifully browned, shatteringly crisp skin that adds an incredible textural contrast to the juicy meat.
- The Power of Marination: While the recipe calls for a minimum of 30 minutes of marination, allowing the dry-rubbed chicken legs to marinate for a longer period – ideally 1 to 4 hours, or even overnight (up to 12 hours) – will significantly deepen their flavor. The salt in the rub acts as a dry brine, helping the chicken retain moisture and ensuring it’s tender throughout. The spices will have more time to infuse into the meat, resulting in a more complex and satisfying taste.
- Accurate Temperature is Key: Always use an internal meat thermometer to ensure your chicken is cooked safely and perfectly. Insert the thermometer into the thickest part of the meat, avoiding the bone. Chicken is safely cooked when it reaches an internal temperature of 165°F (74°C). The initial bake cooks the chicken through, and the final bake with the BBQ sauce allows it to reach the desired temperature and develop that delicious caramelized crust.
- Don’t Skip the Rest: Once the chicken legs reach the target internal temperature, resist the urge to cut into them immediately. Allowing the chicken to rest for at least 5-10 minutes after removing it from the oven is crucial. This resting period allows the juices to redistribute throughout the meat, ensuring that every bite is incredibly moist and flavorful. The internal temperature will also continue to rise slightly during this time, often reaching the ideal 170°F (77°C) for maximum tenderness.
If You Crave More Chicken Delights, Explore These Recipes
- Chicken Spiedini: Skewered and grilled chicken packed with Italian flavors.
- Crispy Baked Hot Honey Chicken: A fantastic balance of sweet heat and satisfying crunch.
- Chicken Rollatini: Elegant chicken breasts rolled with a delicious stuffing.
- Chicken Etouffee: A rich and comforting Creole classic.
- Creamy Garlic Chicken: A simple yet indulgent weeknight favorite.
- Chicken Bacon Ranch Sliders: Perfect for parties and casual meals.
- Chicken Savoy: A New Jersey classic, intensely flavorful and addictive.
If you loved this recipe as much as we did, don’t forget to leave us a review below. ★ Follow Easy Healthy Recipes on Pinterest, Facebook, and Instagram, too!
For more delicious recipes, visit our sister sites, 40 Aprons and Easy Cheap Recipes.
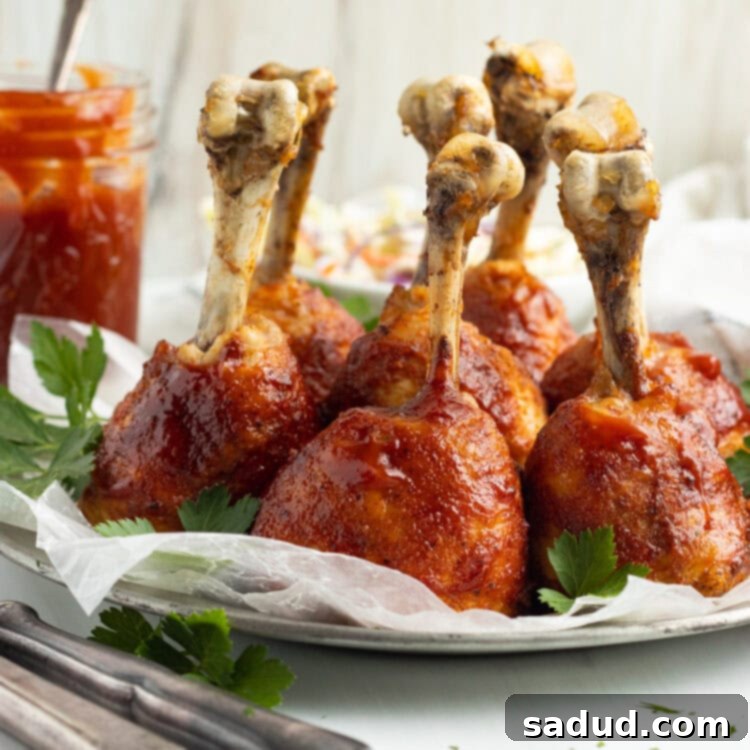
Oven-Baked Lollipop Chicken Legs with BBQ Glaze
45
minutes
45
minutes
30
minutes
2
hours

Cheryl Malik
Print
Save
Saved!
4
servings
Ingredients
For the Homemade BBQ Sauce
-
1
cup
ketchup -
¼
cup
white wine vinegar
or apple cider vinegar -
2
packed tablespoons
brown sugar -
1
teaspoon
Worcestershire sauce -
1
teaspoon
Dijon mustard -
1
clove
garlic
minced -
½
teaspoon
onion powder -
1
pinch
salt
more or less to taste -
1
pinch
freshly ground black pepper
more or less to taste
For the Chicken Legs
-
8
medium
bone-in, skin-on chicken drumsticks
approximately 4 to 6 ounces each
For the Dry Rub
-
½
tablespoon
garlic powder -
½
tablespoon
onion powder -
½
tablespoon
smoked paprika -
1
teaspoon
chili powder -
1
teaspoon
mustard powder -
½
teaspoon
salt
more or less to taste -
¼
teaspoon
freshly ground black pepper
more or less to taste
Equipment
-
Small saucepan
-
Silicone spatula or large wooden spoon, or whisk
-
Baking sheet
-
Parchment paper or aluminum foil
-
Large cutting board
-
Paper towels
-
Sharp kitchen shears
-
Sharp kitchen knife
-
Small bowl
-
Spoon
-
Cooking spray
-
Plastic wrap or aluminum foil
-
Refrigerator
-
Oven
-
Aluminum foil
-
Basting brush or pastry brush
-
Internal meat thermometer
Instructions
For the Homemade BBQ Sauce
-
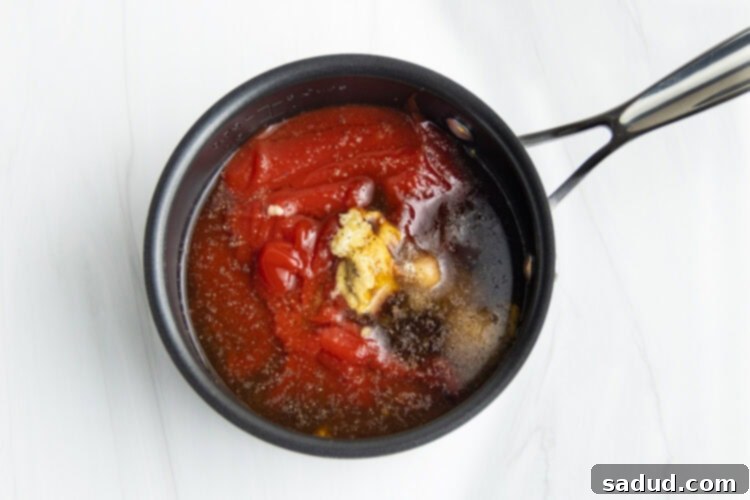
Combine ketchup, white wine vinegar (or apple cider vinegar), packed brown sugar, Worcestershire sauce, Dijon mustard, minced garlic, onion powder, salt, and black pepper in a small saucepan. Whisk thoroughly until all ingredients are fully incorporated and the mixture is smooth. Place the saucepan on the stovetop over medium-high heat.

-
Bring the sauce mixture to a low, gentle boil, ensuring it doesn’t scorch at the bottom. Once small bubbles begin to appear and the mixture starts to boil, immediately reduce the heat to low. Allow the sauce to simmer, stirring occasionally with a silicone spatula or whisk, for about 30 minutes, or until the sauce has significantly thickened to your desired consistency. It should coat the back of a spoon.
-
Once the BBQ sauce has reached its desired thickness, remove the saucepan from the heat and set it aside to cool completely. The sauce will thicken further as it cools. Once cooled, transfer the homemade BBQ sauce to an airtight container and store it in the refrigerator until you are ready to use it. This sauce can be made several days in advance.
How To Lollipop (French) the Chicken Legs
-
Prepare your baking area by lining a large baking sheet with parchment paper or aluminum foil. This will prevent sticking and make clean-up much easier. Set the prepared baking sheet aside for later use.
-
Place a single chicken drumstick on your clean cutting board. Using paper towels, thoroughly pat the drumstick completely dry. Removing excess moisture from the skin is crucial for achieving a crispy exterior.
-
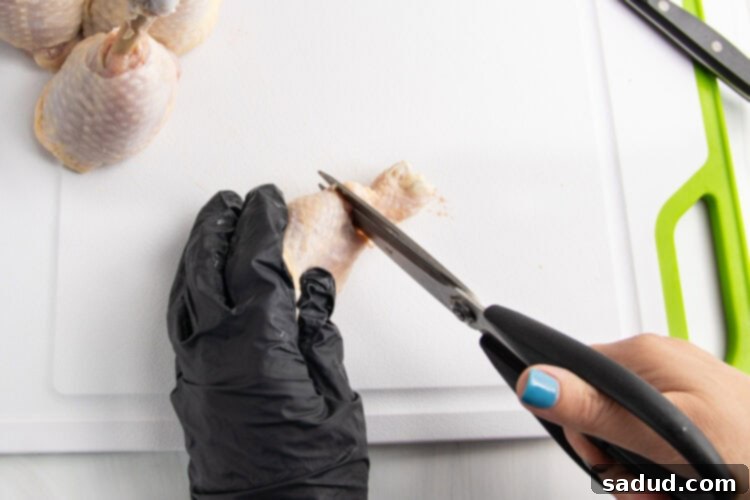
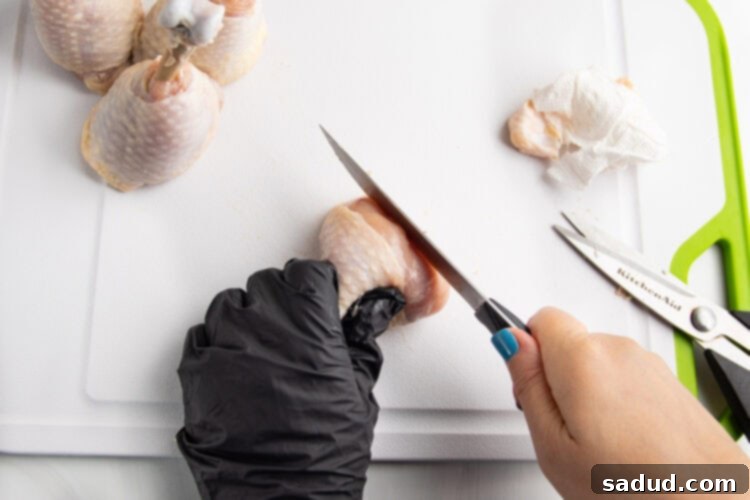
Locate the section of the drumstick where the thick area of chicken meat begins to taper towards the end of the bone. This is typically about 1 to 2 inches from the thinner, joint end of the drumstick. Using sharp kitchen shears or a very sharp knife, carefully cut through the chicken skin, meat, and tendons in this specific spot. Work your way circularly around the entire drumstick to completely separate all the skin, meat, and connective tissues from the bone, effectively creating a “cut line” around the bone. This separation is key to pushing the meat down later.

-
Once the initial cut is made, firmly hold the thick, meaty end of the drumstick in your non-dominant hand. This provides stability for the next step.
-
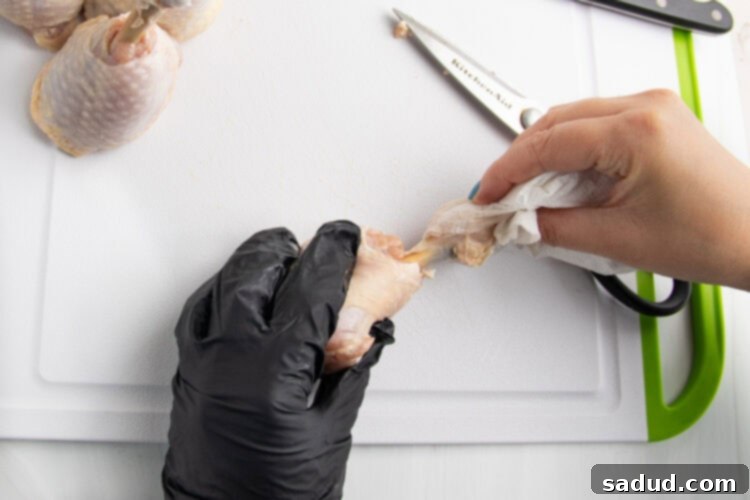
With your dominant hand, use a paper towel to grasp the loosened skin, meat, and tendons firmly. Starting from the incision line, pull and push all these components down towards the thickest part of the drumstick. The goal is to cleanly scrape and pull all the meat and skin off the bone, working towards the small, joint end. If any parts are stubborn, use your shears or knife to carefully cut any remaining attachments until the bone is completely uncovered and clean. Ensure the thick, rounded ball of meat at the end of the drumstick remains intact and compact. This forms the “lollipop” head.

-
Once the bone is fully exposed and clean, place the lollipopped drumstick back on the cutting board. Using a sharp knife, carefully cut a small, angled piece off the very top of the thick, meaty end of the drumstick. This creates a flat, straight edge on the chicken “ball,” which will allow the drumstick to stand upright on the baking sheet during cooking, enhancing its visual appeal and ensuring even cooking.

-
Lay the newly lollipopped drumstick horizontally on the previously prepared baking sheet. Repeat this entire lollipopping process with the remaining chicken drumsticks, arranging them in a single layer on the baking sheet.
To Season the Chicken Legs
-
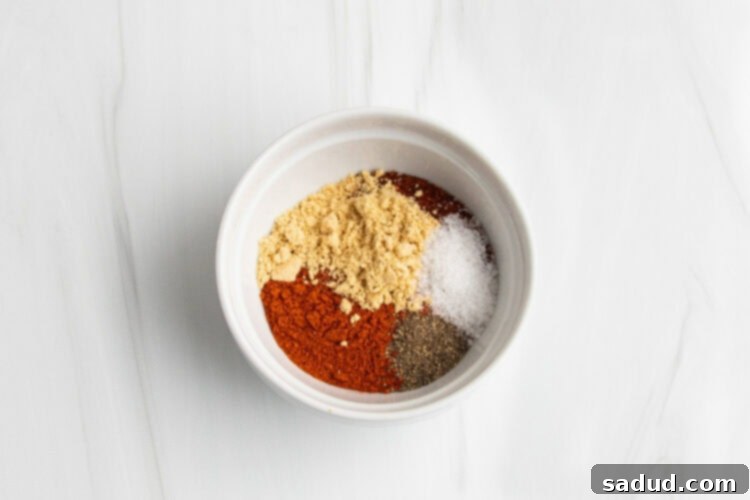
In a small bowl, combine all the dry rub ingredients: garlic powder, onion powder, smoked paprika, chili powder, mustard powder, salt, and freshly ground black pepper. Use a spoon or small whisk to mix the spices together thoroughly until they are well blended and uniformly distributed. This ensures a consistent flavor profile on your chicken.

-
Before seasoning, once again, completely pat each lollipopped drumstick dry with fresh paper towels. Then, lightly spray cooking oil (such as avocado oil or olive oil spray) evenly over the chicken skin, ensuring all sides of the drumsticks are coated. This helps the rub adhere and promotes crispy skin.
-
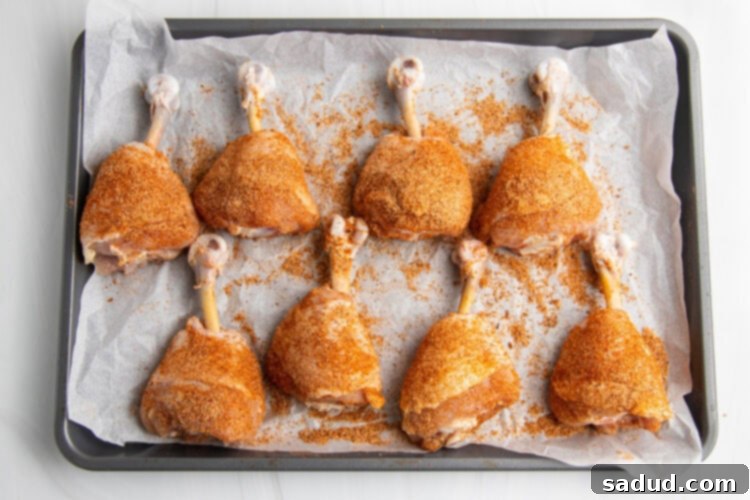
Generously and evenly sprinkle the prepared dry spice mixture over all sides of the chicken legs, making sure the skin is completely coated. Use your hands to gently work and massage the spice rub into the skin of the drumsticks. This ensures the flavors are well integrated and adhere to the chicken.

-
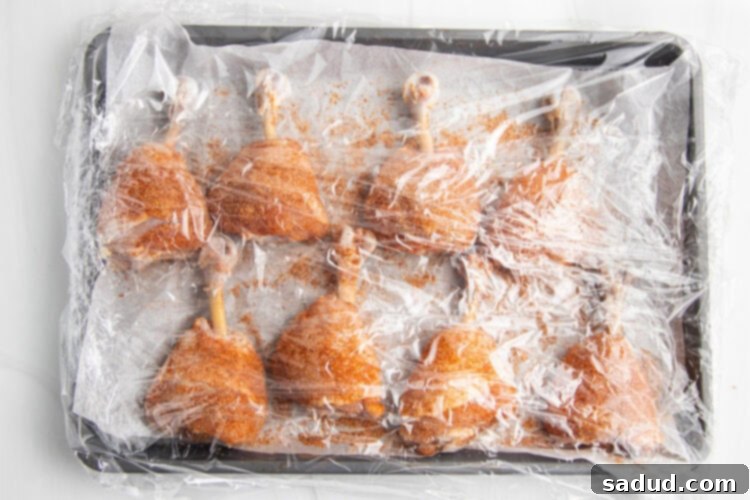
Cover the seasoned drumsticks on the baking sheet tightly with plastic wrap or aluminum foil. Place the baking sheet in the refrigerator and allow the drumsticks to chill and marinate for at least 30 minutes. For optimal flavor and tenderness, marinating for 1 to 4 hours is preferred. Do not exceed 12 hours of marination. This dry brining step helps tenderize the meat and infuse it with flavor.

To Bake the Chicken Legs
-
Before removing the baking sheet from the refrigerator, preheat your oven to 385° Fahrenheit (196°C). Adjust the oven racks as needed to ensure there’s enough vertical space for the drumsticks to stand upright comfortably in the center of the oven. Prepare small 2-inch squares of aluminum foil, one for each drumstick. These will protect the exposed bones from burning.
-
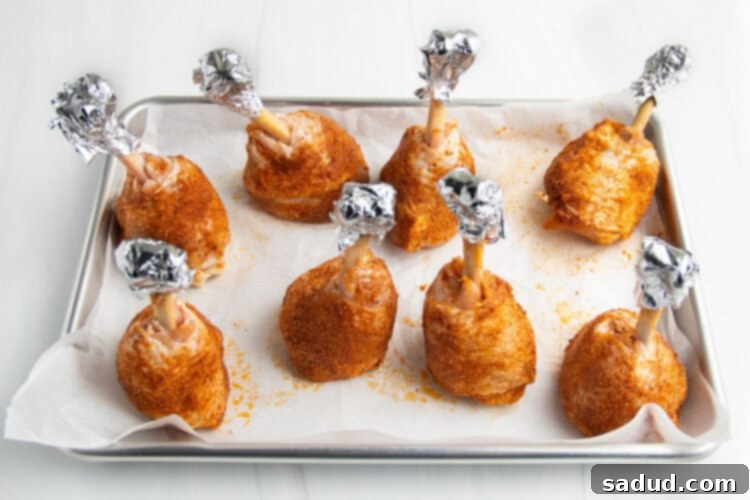
Remove the baking sheet containing the seasoned chicken legs from the refrigerator. Carefully remove and discard the plastic wrap or foil covering the drumsticks. Take each 2-inch square of aluminum foil and tightly wrap it around the exposed bone of each drumstick. This prevents the bone from charring and becoming brittle during the baking process.
-
Lightly spray each drumstick with cooking spray one more time, ensuring the skin is still moist for optimal crisping. Then, stand each lollipopped drumstick upright on the baking sheet, using the flat edge you created earlier for stability. Arrange them with enough space between each for even cooking. Carefully place the baking sheet into the preheated oven.

-
Bake the drumsticks for an initial 25 minutes. This stage allows the chicken to cook through and the skin to begin rendering fat and crisping up. After 25 minutes, carefully remove the baking sheet from the oven.
-
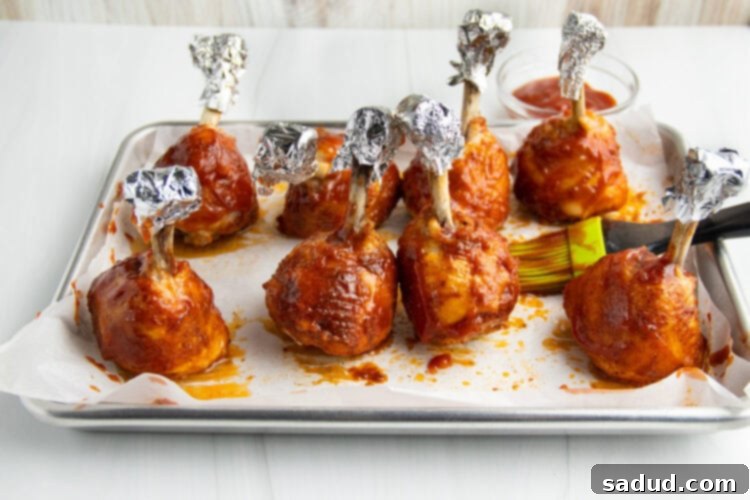
Using a basting brush or pastry brush, generously coat each chicken leg with your prepared BBQ sauce, ensuring all sides of each drumstick are completely covered. This layer of sauce will caramelize and create a sticky, flavorful glaze. Return the baking sheet to the oven.

-
Continue to bake the chicken legs for another 5 minutes. After this time, begin checking the internal temperature of the chicken by inserting an internal meat thermometer into the thickest part of the chicken meat, taking care to avoid hitting the bone. Continue baking the drumsticks, checking the temperature approximately every 5 minutes, until the internal temperature consistently reaches 165° Fahrenheit (74°C). The total baking time may vary based on your oven and the size of your drumsticks.
-
Once the chicken legs have reached the safe internal temperature of 165°F (74°C), carefully remove the baking sheet from the oven and set it aside on a wire rack. Allow the chicken legs to rest for at least 5 to 10 minutes. During this crucial resting period, the juices will redistribute, making the chicken even more tender and moist. The internal temperature will also continue to rise slightly, often reaching the ideal 170°F (77°C) for peak flavor and texture.
-
After the resting period, gently remove the aluminum foil caps from the bones. Serve the delicious lollipop drumsticks immediately with any remaining BBQ sauce on the side for dipping, and your desired side dishes. Enjoy this fun and flavorful meal!
Recipe Notes & Variations
- Adjusting Cook Time: The exact cooking time for your lollipop chicken legs can vary significantly based on the size and thickness of the drumsticks you use, as well as the calibration of your oven. Smaller chicken legs will naturally cook faster, potentially needing less time than specified, while larger, meatier legs may require additional baking time to reach a safe internal temperature. To ensure perfectly cooked, juicy chicken every time, always rely on an internal meat thermometer. Remove the drumsticks from the oven as soon as the thickest part of the meat reaches 165°F (74°C) to prevent overcooking and keep them wonderfully tender.
- BBQ Sauce Flexibility: While our homemade sweet and tangy BBQ sauce is highly recommended for its fresh flavor and perfect balance, it is entirely optional. Feel free to use your favorite store-bought barbecue sauce as a convenient alternative. If you choose to prepare the homemade recipe provided, you can expect to yield approximately 1 cup of delicious BBQ sauce, which is ample for coating 8 drumsticks and serving extra on the side. Experiment with different BBQ sauce styles – smoky, spicy, or a mustard-based sauce – to personalize this recipe.
- Marination for Maximum Flavor: While the recipe suggests a minimum of 30 minutes for marination, allowing the dry-rubbed chicken to chill for 1 to 4 hours or even overnight (up to 12 hours) will significantly enhance the depth of flavor and tenderness. The salt in the dry rub acts as a brine, helping the chicken retain moisture and ensuring it’s incredibly juicy.
- Grilling Option: If you prefer a smoky char, these lollipop chicken legs can also be cooked on the grill! Prepare them as instructed, then grill over medium-indirect heat until cooked through, basting with BBQ sauce during the last 10-15 minutes of grilling.
- Air Fryer Method: For a quicker cooking time and extra crispiness, try them in an air fryer. After applying the dry rub, air fry at 375°F (190°C) for 15-20 minutes, flipping halfway. Then brush with BBQ sauce and air fry for another 5-10 minutes until the sauce is caramelized and the internal temperature reaches 165°F (74°C).
- Storage and Reheating: Leftover lollipop chicken legs can be stored in an airtight container in the refrigerator for up to 3-4 days. To reheat, place them on a baking sheet and warm in a preheated oven at 350°F (175°C) for 10-15 minutes, or until heated through. For best results, avoid microwaving as it can make the skin soggy.
Nutrition Information
Serving:
1
serving (2 chicken legs)
|
Calories:
445
kcal
|
Protein:
41
g
|
Fat:
22
g
|
Saturated Fat:
6
g
|
Trans Fat:
0.1
g
|
Total Carbs:
20
g
|
Fiber:
1
g
|
Sugar:
14
g
|
Net Carbs:
19
g
|
Vitamin C:
3
mg
|
Cholesterol:
210
mg
|
Sodium:
1127
mg
|
Potassium:
759
mg
|
Calcium:
48
mg
|
Iron:
2
mg
Number of total servings shown is approximate. Actual number of servings will depend on your preferred portion sizes.
Nutritional values shown are general guidelines and reflect information for 1 serving using the ingredients listed, not including any optional ingredients. Actual macros may vary slightly depending on specific brands and types of ingredients used.
To determine the weight of one serving, prepare the recipe as instructed. Weigh the finished recipe, then divide the weight of the finished recipe (not including the weight of the container the food is in) by the desired number of servings. Result will be the weight of one serving.
Cheryl Malik
