Homemade Gluten-Free Frosted Blueberry Pop-Tarts: Your New Favorite Wholesome Treat
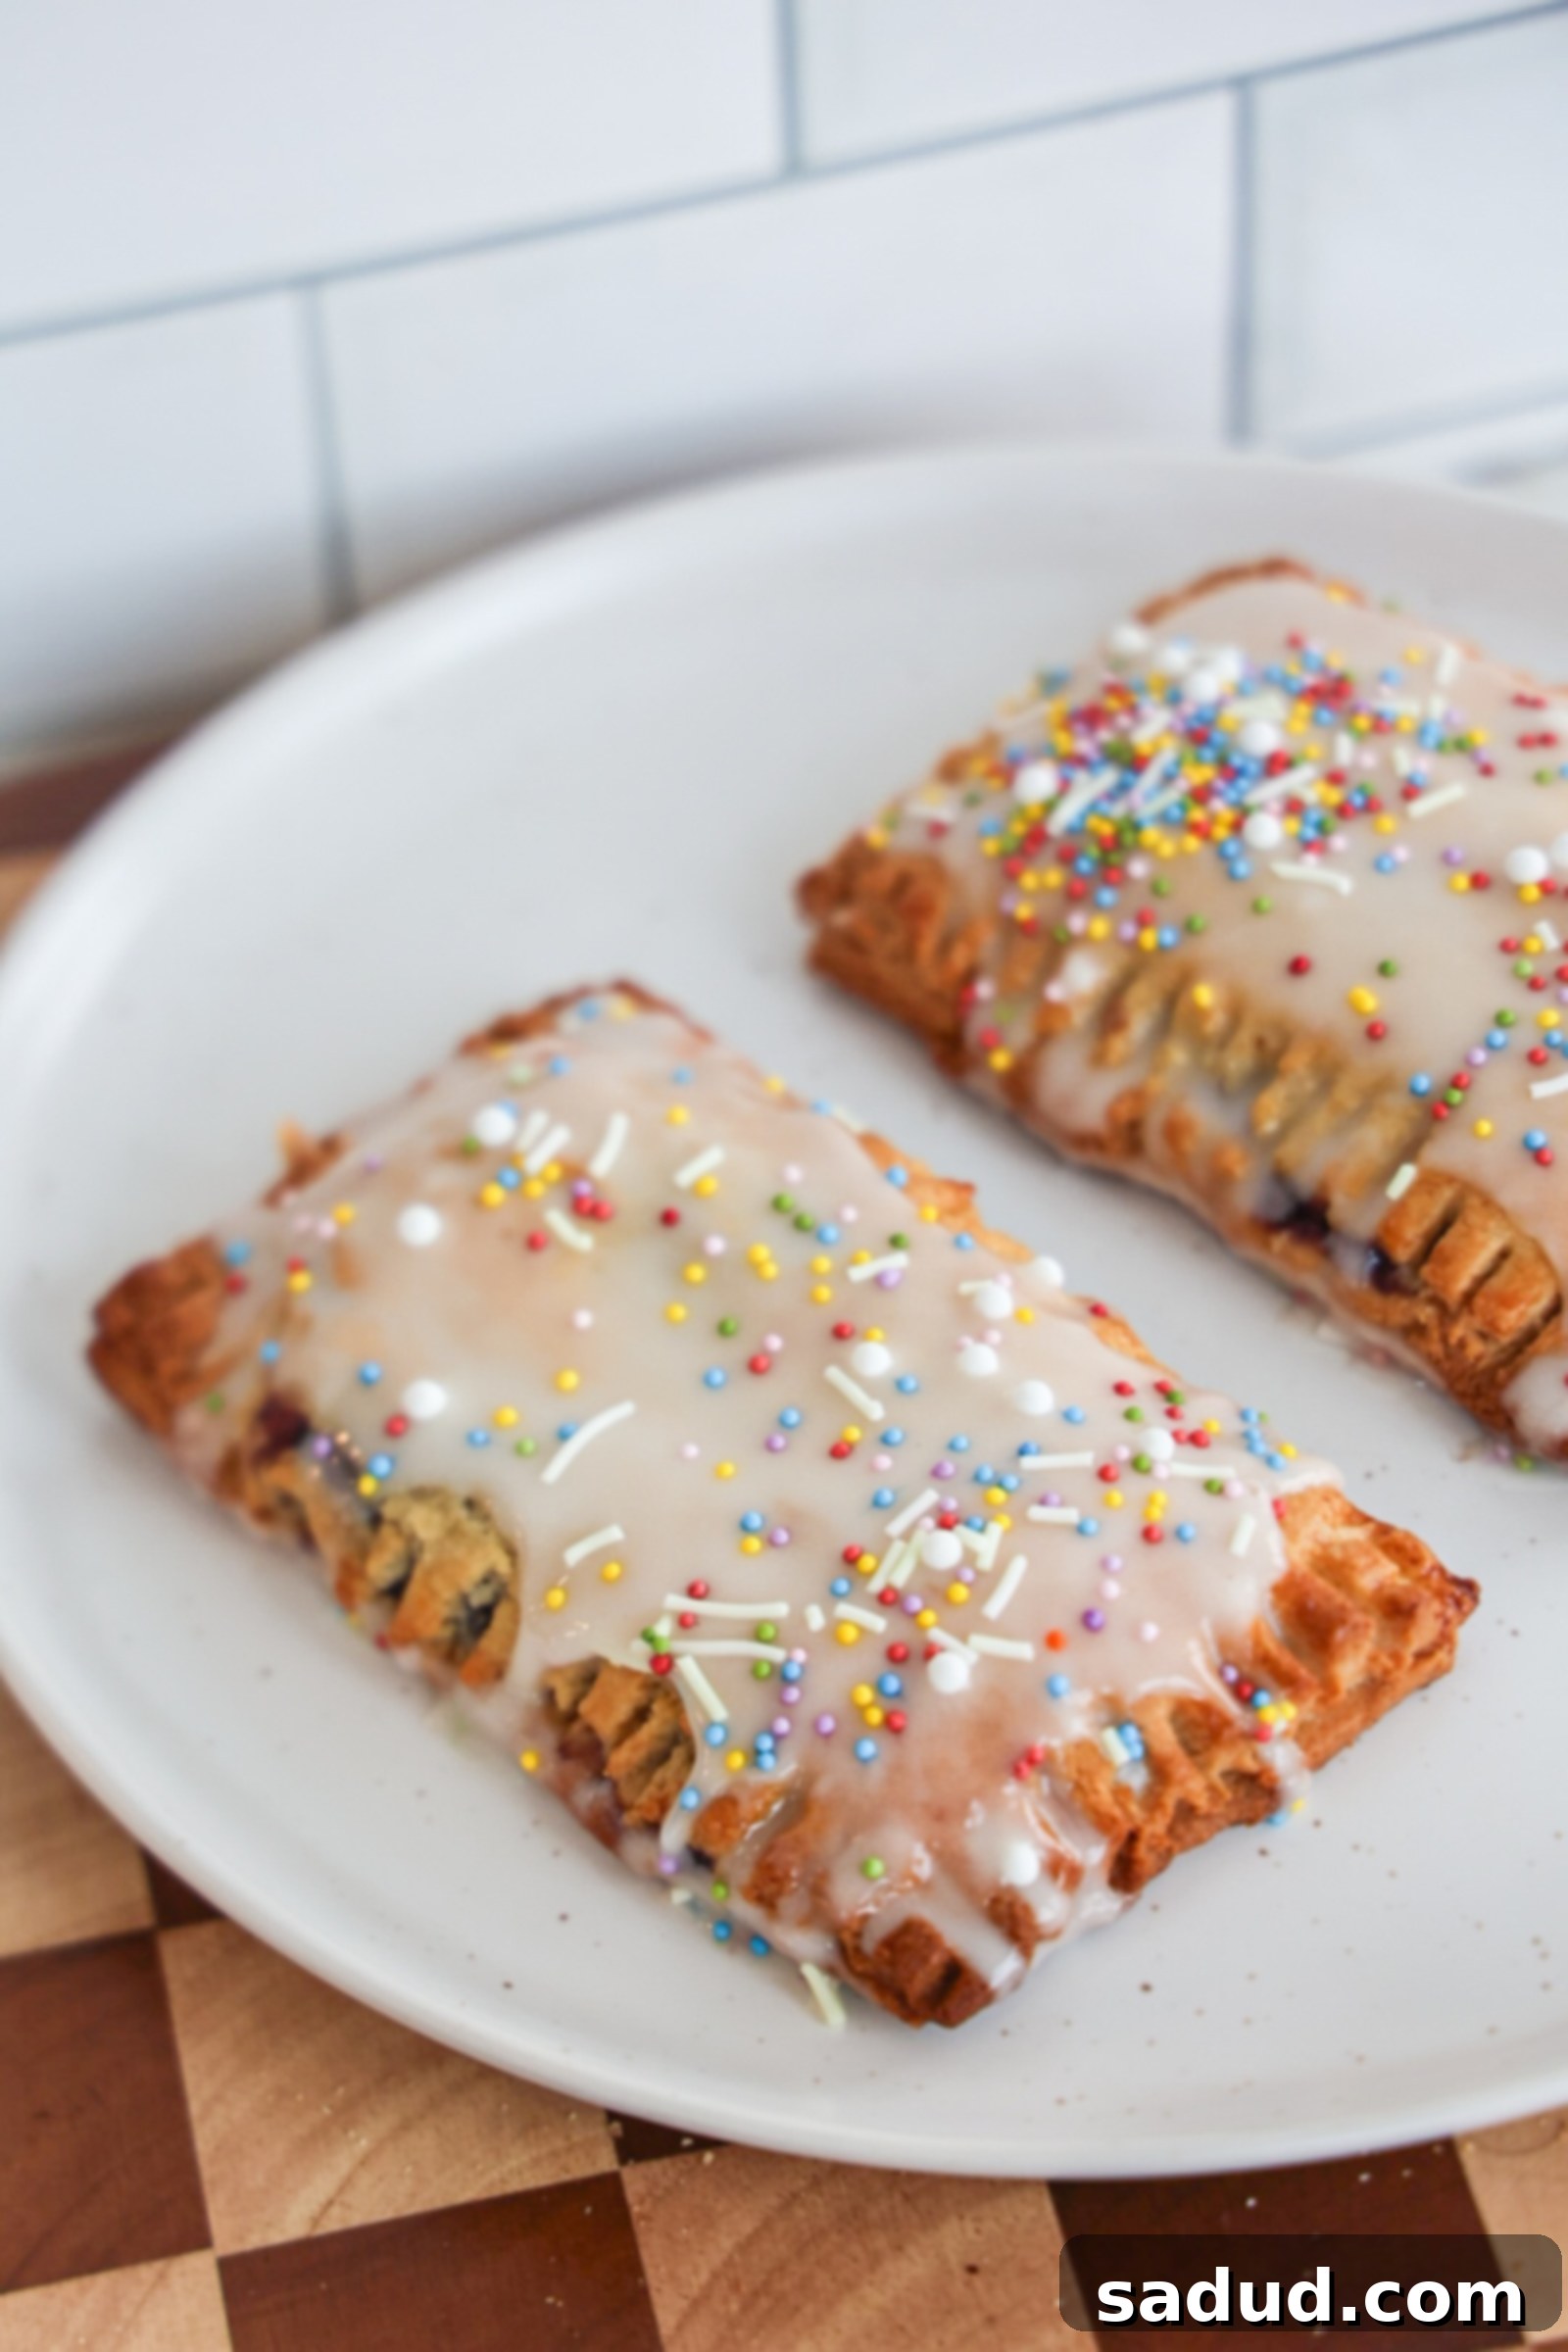
Say goodbye to processed breakfast pastries and hello to these incredible Gluten-Free Frosted Blueberry Pop-Tarts! Featuring a sweet, buttery crust, a luscious berry filling, and that iconic frosted top, these homemade delights are truly better than the nostalgic treats from your childhood. What makes them even more special? They’re completely dairy-free, refined sugar-free, and gluten-free, offering a much more wholesome option without compromising on that irresistible flavor you crave!
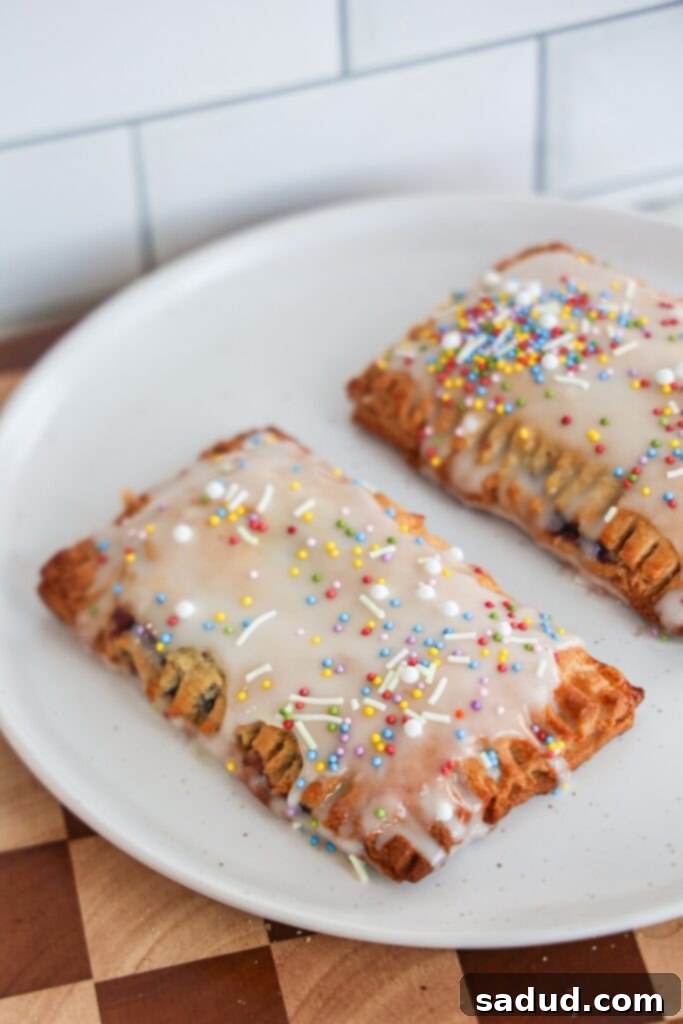
Ah, the classic Pop-Tart, also affectionately known as a toaster pastry – a quintessential breakfast treat that brings back a flood of childhood memories for many of us! These iconic pastries came in a delightful array of fun flavors, from S’mores and frosted strawberry to blueberry, cherry, rich brown sugar cinnamon, decadent chocolate fudge, and the exciting Wildlicious Wild Berry. Each bite was a burst of sweetness and a perfect way to start the day or enjoy an afternoon snack.
Today, we’re putting a healthier, homemade spin on this beloved classic. Our version stays true to the nostalgic taste and texture but is entirely free from dairy, gluten, and refined sugar. You’ll still get that perfectly flaky, buttery-tasting crust, a wonderfully sweet and tangy fruit filling, and a delightful frosted top. This recipe proves that you don’t need to sacrifice flavor or satisfaction when opting for a more wholesome lifestyle.
Once you’ve mastered these blueberry delights, be sure to try my homemade gluten-free brown sugar cinnamon Pop-Tarts for another delicious take on a classic!
Why You’ll Fall in Love with This Homemade Pop-Tart Recipe
These isn’t just another recipe; it’s an upgrade to a childhood favorite, designed with your health and taste buds in mind. Here’s why these homemade toaster pastries will quickly become a staple in your kitchen:
- Gluten-Free Goodness: Crafted with a thoughtful blend of wholesome, naturally gluten-free flours, this recipe ensures that everyone, including those with gluten sensitivities or celiac disease, can enjoy these delightful treats without any worries or discomfort. No compromise on texture here – you’ll still achieve that tender, flaky crust.
- Dairy-Free Delight: You won’t find any traditional butter or milk in this recipe, yet you’ll be amazed by the rich, buttery flavor and classic flaky pastry texture. We use plant-based alternatives that deliver the same comforting qualities without the dairy.
- Naturally Sweetened: Forget the refined sugars and high-fructose corn syrup often found in store-bought versions. Our Pop-Tarts are sweetened naturally with maple syrup and the inherent sweetness of fresh fruit, making them a much healthier choice for a sweet craving.
- Kid-Friendly & Fun: These aren’t just for adults! Kids will adore these fun, delicious pastries, and you’ll love knowing they’re enjoying a significantly healthier option than the overly processed boxed versions. They’re perfect for a quick breakfast, a lunchbox treat, or an after-school snack.
- Infinitely Customizable: While blueberries are fantastic, this recipe is incredibly versatile. Feel free to swap out the blueberry filling for other delicious berries like strawberry or raspberry. For a different twist, you could even try a homemade chocolate spread or an apple cinnamon filling. The possibilities are endless!
Watch Me Make Homemade Pop-Tarts!
Seeing the process in action can be incredibly helpful, especially when working with new baking techniques or gluten-free dough. Check out this video tutorial to guide you through each step, from mixing the perfect dough to sealing and baking your beautiful pastries. It’s like having a personal baking coach right in your kitchen!
Are These Homemade Gluten-Free Frosted Blueberry Pop-Tarts Truly Healthy?
It’s a fair question, especially when recreating a treat known for its less-than-stellar nutritional profile. The short answer is: yes, absolutely! These homemade Pop-Tarts are a far more wholesome, significantly lower-sugar option compared to the store-bought classics. Most importantly, they contain no artificial flavors, colors, or preservatives, giving you peace of mind with every delicious bite. Let’s take a closer look at the ingredient comparison:
Typical Store-Bought Pop-Tarts: Ingredients often include enriched flour (heavily processed wheat flour), corn syrup, high fructose corn syrup (a primary source of added sugar), dextrose, sugar, soybean and palm oil (often hydrogenated with TBHQ for freshness), bleached wheat flour. They also contain a myriad of other additives like wheat starch, salt, dried fruits (often in minimal amounts), leavening agents (baking soda, sodium acid pyrophosphate, monocalcium phosphate), citric acid, modified wheat starch, gelatin, yellow corn flour, natural and artificial flavor, xanthan gum, soy lecithin, caramel color, cornstarch, turmeric extract color, and various artificial dyes like Red 40, Blue 2, and Blue 1. This long list of highly processed ingredients, artificial colors, and excessive sugars contributes to a product that offers little nutritional value.
Our Homemade Gluten-Free Frosted Blueberry Pop-Tarts: In stark contrast, our recipe uses simple, recognizable, and wholesome ingredients:
- Almond flour: A nutrient-dense, low-carb, gluten-free flour rich in healthy fats, protein, and fiber.
- Tapioca flour: A light, starchy flour that helps create that desirable pastry-like texture and crispness.
- Palm shortening (or coconut oil): A stable, dairy-free fat that contributes to the buttery, flaky crust.
- Blueberries: Packed with antioxidants, vitamins, and natural sweetness.
- Maple syrup: A natural, unrefined sweetener with its own set of beneficial minerals.
- Natural sprinkles: For fun, without artificial dyes.
- Monk fruit powdered sugar (or regular powdered sugar for non-sugar-free): A natural, zero-calorie sweetener alternative, or a simple, easily digestible sugar if preferred.
This simple list highlights the focus on real, unprocessed foods that nourish your body while still delivering a satisfyingly sweet treat. You’re in control of what goes into your food, and the result is a product you can feel good about eating and sharing.
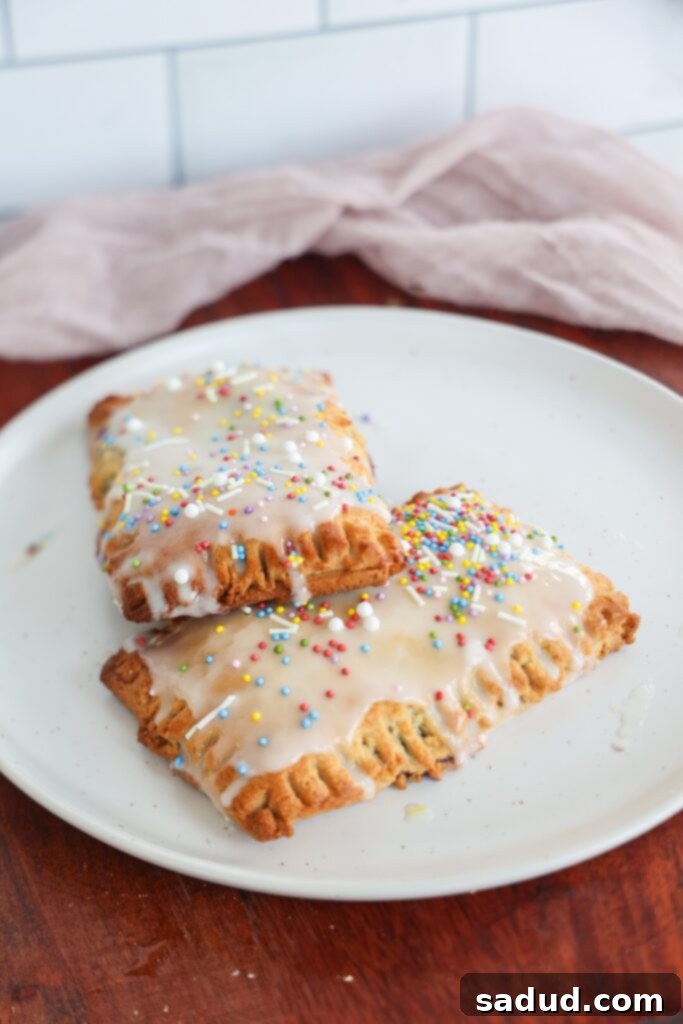
How to Make Gluten-Free Frosted Blueberry Pop-Tarts
Creating these delightful pastries from scratch is a rewarding process, and surprisingly simpler than you might think! The full, detailed recipe can be found in the recipe card at the bottom of this post, but let’s walk through the essential ingredients and steps to give you a clear overview.
Essential Ingredients for Your Homemade Pop-Tarts
Each ingredient plays a crucial role in achieving the perfect balance of flavor and texture:
- Almond flour: This is the backbone of our gluten-free crust, providing a rich flavor and tender crumb. If you have a nut allergy or prefer a nut-free option, I highly recommend using Tiger Nut flour, which yields a surprisingly similar texture. Please note, there isn’t a direct 1:1 substitute that will perfectly replicate the unique texture almond flour provides, so results may vary with other flours.
- Tapioca flour (or arrowroot flour): Essential for achieving that desirable pastry-like texture. It adds a slight chewiness and helps the crust crisp up beautifully. Either tapioca or arrowroot starch will work perfectly.
- Egg: Acts as a binder, helping to hold the dough together and providing structure. While I haven’t specifically tested egg substitutes in this recipe, it might affect the final texture and consistency of the dough.
- Coconut oil (solid): This is key for creating a flaky crust. It needs to be in a solid, chilled state, similar to how you would use cold butter in traditional pastry. If coconut oil isn’t your preference, cold dairy butter or a plant-based butter substitute (like vegan butter sticks) can be used as a 1:1 replacement.
- Pantry staples: Don’t forget a touch of vanilla extract for warmth and flavor, and a pinch of sea salt to balance the sweetness and enhance all the other flavors.
- Blueberries: Fresh or frozen blueberries both work wonderfully for the filling. If using frozen, there’s no need to thaw them beforehand.
- Lemon juice: Just a tad is used in the blueberry filling to brighten the flavors and add a slight tartness that perfectly complements the sweet berries.
- Monk fruit powdered sugar OR regular powdered sugar: For the classic frosted topping. Monk fruit provides a refined sugar-free alternative, while regular powdered sugar offers a traditional sweetness.
- Natural sprinkles: Totally optional, but highly recommended for that nostalgic, fun Pop-Tart look! Choose naturally colored sprinkles to keep it wholesome.
Step-by-Step Guide to Baking Your Pop-Tarts
For detailed, precise instructions and measurements, refer to the complete recipe card below. Here’s a quick overview of the exciting baking process:
- Craft the Berry Filling: In a small saucepan, gently cook down your blueberries with maple syrup and a splash of lemon juice until the mixture becomes bubbly and slightly softened. Stir in a teaspoon of tapioca flour or chia seeds to help thicken the filling, then set it aside to cool completely. A cooled filling prevents a soggy crust.
- Prepare the Dough Perfection: In a food processor or large mixing bowl, combine your gluten-free flour blend (almond and tapioca), solid coconut oil (or vegan butter), maple syrup, and a touch of almond milk. Pulse or mix until a cohesive, smooth dough forms. It’s crucial to chill this dough for 1-2 hours (preferably the full 2 hours!) – this step is vital for a manageable, flaky crust.
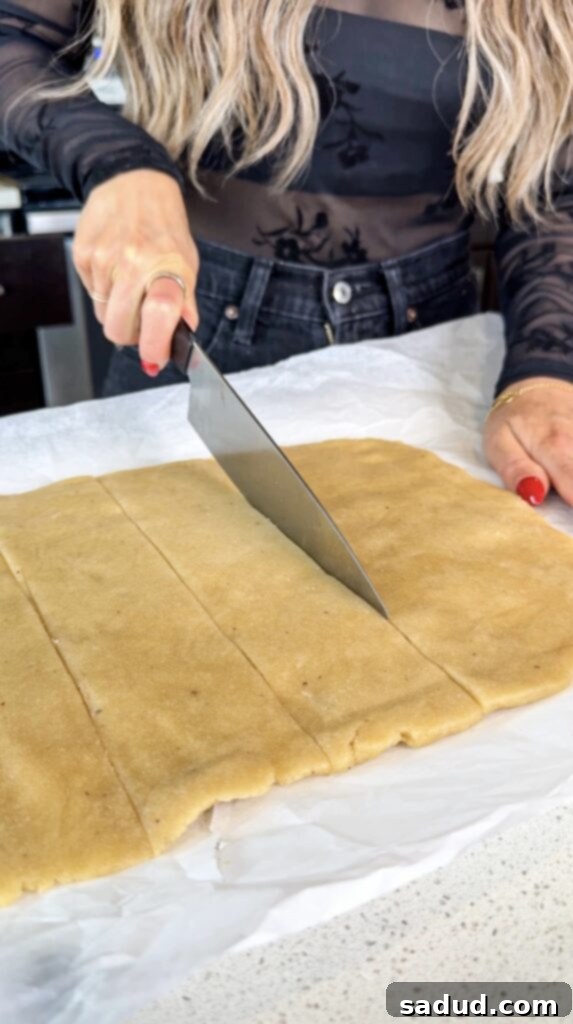
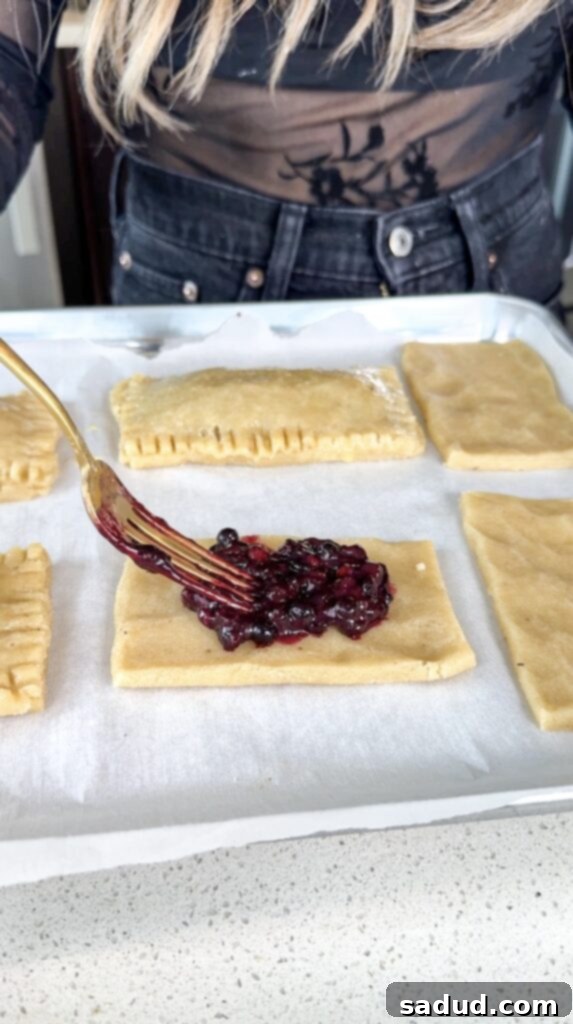
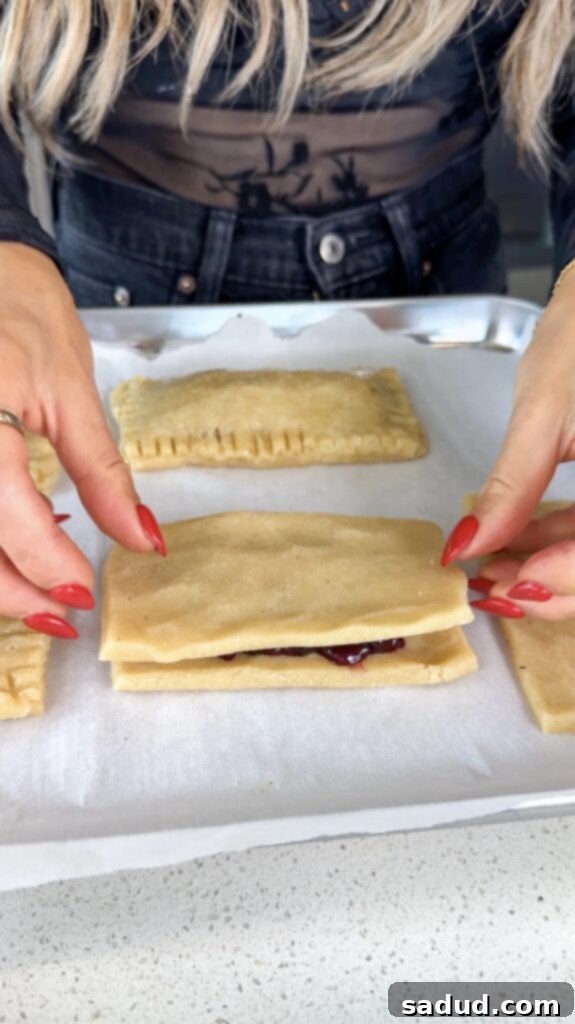
- Assemble Your Toaster Pastries: Once chilled, roll out the dough evenly between two sheets of parchment paper to about 1/8-inch thickness. This ensures a consistent crust. Carefully cut the dough into uniform rectangles. Spoon about two tablespoons of your cooled blueberry filling onto the center of half of the dough rectangles, making sure to leave a border for sealing. Top each with another dough rectangle and use a fork to firmly crimp and seal the edges all around. This not only looks classic but also helps prevent the filling from oozing out during baking.
- Bake to Golden Perfection: Gently transfer your assembled Pop-Tarts to a parchment-lined baking sheet. Bake in a preheated oven at 350°F (175°C) for 20–30 minutes, or until they achieve a beautiful golden-brown color and the crust looks firm and cooked through.
- Glaze and Garnish: Allow the Pop-Tarts to cool completely on a wire rack before frosting. Once cooled, prepare your simple glaze by mixing powdered monk fruit sugar (or regular) with a bit of milk until smooth and thick. Drizzle or spread the glaze generously over each pastry, then immediately adorn with your natural sprinkles for that authentic Pop-Tart charm! For best results, let the glaze set by chilling the frosted Pop-Tarts in the fridge for a bit.
Delicious Recipe Variations to Try
One of the best things about making Pop-Tarts from scratch is the freedom to get creative with flavors! Here are a few ideas to inspire your next batch:
- Switch Up the Berries: Instead of blueberries, try a vibrant raspberry filling for a tart and sweet contrast, a classic strawberry filling, or even a mixed berry medley with blackberries and cranberries.
- Chocolatey Indulgence: For a more decadent treat, replace the glaze with a melted white chocolate topping. You could also create a chocolate hazelnut spread filling using cocoa powder and hazelnut butter.
- Apple Cinnamon: Dice up some apples, cook them down with cinnamon and a touch of maple syrup, and you’ve got a cozy, fall-inspired Pop-Tart.
- Cherry Almond: Use pitted cherries for the filling and add a hint of almond extract to the dough or glaze for a sophisticated twist.
- Savory Surprise: Feeling adventurous? Try a savory Pop-Tart with a cheese and herb filling, or even a mini pizza Pop-Tart with marinara, mozzarella, and your favorite toppings! (Just skip the sweet glaze for these!)
Homemade Pop-Tarts: The Choice Between Scratch Dough and Shortcut Pie Crust
While this recipe guides you through making a homemade gluten-free dough, you might be wondering about shortcuts. Yes, you absolutely can use your favorite prepared gluten-free (or even regular, if not adhering to GF) pie crust or pastry dough for a quicker assembly. This can significantly cut down on prep time, making these a more accessible treat on busy days.
However, if you’re truly after that classic, tender, and uniquely “Pop-Tart” crust experience, I wholeheartedly recommend making the dough from scratch using this recipe. Our homemade crust is specifically designed to be delightfully flaky and buttery-tasting without puffing up excessively like some traditional puff pastries. Instead, it offers a sturdy yet delicate flakiness that holds its shape beautifully and isn’t as fragile as many store-bought pastry options. The texture difference is noticeable and worth the extra effort for an authentic homemade feel.
Top Tips for the Best Frosted Blueberry Pop-Tarts
Achieving Pop-Tart perfection is easy with a few insider tricks:
- Don’t Skip the Chill Time: Chilling your dough for the recommended 1-2 hours (preferably 2!) is non-negotiable. This firms up the fat, making the dough easier to roll and resulting in a much flakier, more tender crust. Rushing this step can lead to a sticky, unmanageable dough.
- Avoid Overfilling: It might be tempting to load up on the delicious berry filling, but resist! Just about two tablespoons of filling per pastry is the sweet spot. Overfilling can cause the Pop-Tarts to burst open during baking, creating a messy (albeit still tasty) situation.
- Seal the Edges Well: Use a fork to firmly press around all the edges of your assembled Pop-Tarts. This creates a good seal, preventing the filling from leaking out while also adding that signature crimped edge.
- Egg Wash for Golden Glow: Brushing the tops with an egg wash (one egg whisked with a teaspoon of water) before baking gives the pastries a beautiful, glossy, golden-brown finish and helps create a slightly crispier exterior.
- Cool Completely Before Glazing: Patience is a virtue here! Glazing warm Pop-Tarts will result in a runny, melted mess. Allow them to cool down entirely on a wire rack for the glaze to set properly and adhere beautifully.
- Store Smart: Keep any leftover Pop-Tarts in an airtight container. They’ll stay fresh in the fridge for up to 3 days, or you can freeze them for longer enjoyment.
- Reheat for Nostalgia: For that authentic, warm, gooey Pop-Tart experience, reheat your leftovers in a toaster oven for a few minutes. This brings back the slight crispness of the crust and warms the filling perfectly. Microwaving can make them a bit soft.
How to Store and Refresh These Gluten-Free Pop-Tarts
Proper storage is key to maintaining the deliciousness and texture of your homemade pastries. Once completely cooled, the finished Pop-Tarts can be stored in a sealed glass container at room temperature. They should maintain their wonderful texture and flavor for at least 3 days. I highly recommend using a glass container over plastic, as glass is much better at preventing moisture build-up, which can often cause crispy pastries to become soft or soggy over time. For longer storage, you can place them in an airtight freezer-safe bag or container for up to 1-2 months. When you’re ready to enjoy a frozen Pop-Tart, simply thaw it overnight in the fridge or pop it directly into a toaster oven on a low setting until warmed through.
More Healthy Desserts to Sweeten Your Day
If you loved these healthier Pop-Tarts, you’re in for a treat! Explore more delicious and wholesome dessert recipes:
- Brown Sugar Cinnamon Pop-Tarts (Gluten-Free)
- 2 Ingredient Rolo’s (Healthier Version)
- Healthy Twix Cups
- Homemade Almond Joys (Healthy)
- Pumpkin Streusel Bread
- Banana Nut Scones (Paleo, Gluten-Free)
- Cinnamon Swirl Banana Bread
- Gluten-Free Pumpkin Spice Scones
- Cinnamon Roll Energy Bites
If you give this recipe a try and absolutely love it, it would mean the world to me if you left a star rating and review below! Don’t forget to tag me in your delicious creations on Instagram @danishealthyeats!
Gluten-Free Frosted Blueberry Pop-Tarts
Pin Recipe
15
20
35
Breakfast, Dessert, Snack
American
Ingredients
Pop-Tarts Dough
- 2 1/2 cups almond flour
- 1 cup arrowroot or tapioca flour
- 1/4 cup coconut oil, solid (or cold plant-based butter)
- 1/4 cup maple syrup or honey
- 1 egg, room temp
- 1 tsp vanilla extract & pinch of sea salt
Berry Filling
- 1 1/2 cups blueberries (fresh or frozen)
- 3 tbsp maple syrup or honey
- juice of 1/2 lemon
- 1 tsp tapioca flour/starch (or arrowroot)
Glaze
- 1 cup monk fruit powdered sugar or regular powdered sugar
- 2 tbsp milk of choice, or as needed
- natural sprinkles – measure with your heart!
Instructions
-
Prepare the Dough: In a food processor, combine all of the dough ingredients. Pulse until just combined and a smooth dough forms. Avoid overmixing. Shape the dough into a ball, then cover with plastic wrap or similar and place in the fridge to chill for at least 2 hours. This step is crucial for a manageable dough and flaky crust.
-
Roll out the Dough: Once chilled, remove the dough from the fridge. Place it between two pieces of parchment paper. Roll it out into a rectangle, aiming for about 1/8″ thick. Carefully remove the top piece of parchment paper.
-
Cut and Chill Dough Squares: Using a knife or pastry wheel, cut the dough into 8 even squares. You can trim the edges for cleaner-looking squares if desired. Carefully transfer these squares to a parchment-lined baking sheet and place them back in the fridge while you prepare the filling. This keeps them cool and firm.
-
Make the Berry Filling: In a small pot or saucepan, combine the fresh or frozen blueberries, lemon juice, and maple syrup over medium heat. Cook for about 10 minutes, stirring occasionally and using a fork to gently mash some of the berries as they soften, until the mixture begins to boil and thickens slightly. Remove from heat and stir in the tapioca flour/arrowroot starch. Let the filling cool completely for about 20 minutes before using. A cooled filling is essential to prevent a soggy crust.
-
Preheat Oven: Preheat your oven to 350°F (175°C).
-
Assemble the Pop-Tarts: Take half of your chilled dough squares. Spoon about 2 tablespoons of the cooled berry filling into the center of each square, leaving a small border around the edges. Be careful not to overstuff them, as this can cause the filling to ooze out during baking. Place the remaining plain dough squares directly over the filling-topped squares. Use a fork to firmly press and crimp the edges of each pastry together, sealing them securely.
-
Apply Egg Wash: In a small bowl, whisk one egg with a teaspoon of water to create an egg wash. Lightly brush the tops of each assembled pastry with this egg wash. This helps create a beautiful golden-brown and slightly crisp crust.
-
Bake: Bake the Pop-Tarts in the preheated oven for 20-30 minutes, or until they are golden brown all over and the crust looks set. If any berry mixture has oozed out, it should appear thick and caramelized. Remove from the oven and let them cool completely on a wire rack before proceeding to glaze.
-
Prepare and Apply Glaze: For the glaze, add the powdered monk fruit sugar (or regular powdered sugar) to a bowl. Gradually add 2 tablespoons of your milk of choice, mixing until a thick, smooth glaze forms. Add more milk drop by drop if needed to reach desired consistency. Drizzle or spread the glaze over each cooled pastry, then immediately top with natural sprinkles. For the glaze to set firmly, I like to pop them in the fridge for about 15-20 minutes. Enjoy your homemade Pop-Tarts!
-
Storage: Store any leftover Pop-Tarts in an airtight container in the fridge. They are best enjoyed the day they are made for optimal freshness and crispness, but will remain delicious for 1-2 more days. Reheat in a toaster oven for that “freshly baked” experience.
Video Tutorial
Notes
How to Store and Refresh These Gluten-Free Pop-Tarts
The finished pastries can be stored in a sealed glass container at room temperature and should maintain their texture for at least 3 days. I recommend storing them in a glass container as it’ll help maintain their texture and prevent them from becoming soft or soggy, which can sometimes happen with plastic containers. For longer storage, freeze the unfrosted Pop-Tarts and glaze them after thawing and reheating.
blueberry pop-tarts, gluten-free pop tarts, healthy pop tarts, homemade pop-tarts, pop-tart recipe, dairy-free, refined sugar-free, toaster pastry
Frequently Asked Questions (FAQs)
Q: Can I make these Pop-Tarts ahead of time?
A: Yes, absolutely! You can prepare the dough up to 2 days in advance and keep it wrapped tightly in the fridge. The berry filling can also be made a day ahead and stored in an airtight container in the refrigerator. Assemble and bake when ready. For the best texture, I recommend baking them fresh, but once baked, they store well for a few days.
Q: What if my dough is too sticky or too dry?
A: Gluten-free doughs can sometimes be a bit finicky. If your dough is too sticky, try adding a tablespoon of almond flour at a time until it’s more manageable. If it’s too dry and crumbly, add a teaspoon of cold almond milk (or milk of choice) until it comes together. Remember that chilling the dough significantly improves its texture and workability.
Q: Can I use different fruits for the filling?
A: Yes, this recipe is very versatile! You can easily swap blueberries for other berries like strawberries, raspberries, or even a mixed berry blend. Just ensure that whatever fruit you choose is cooked down sufficiently and thickened, so the filling isn’t too watery, which could make the crust soggy.
Q: How do I get my Pop-Tarts to have a perfectly golden crust?
A: The egg wash applied before baking is your secret weapon for a beautiful golden crust. Ensure an even, thin layer is brushed over each pastry. Also, make sure your oven temperature is accurate and give them enough time to bake. Keep an eye on them during the last 5-10 minutes to prevent over-browning, but a good golden hue indicates a crispy, cooked-through crust.
Q: Are these suitable for freezing?
A: Yes, these Pop-Tarts freeze wonderfully! For best results, freeze them *before* applying the glaze. Once baked and completely cooled, arrange them in a single layer on a baking sheet and freeze until solid. Then transfer them to an airtight freezer-safe bag or container for up to 2 months. When ready to enjoy, you can reheat them directly from frozen in a toaster oven until warm and crisp, then apply the fresh glaze and sprinkles.
