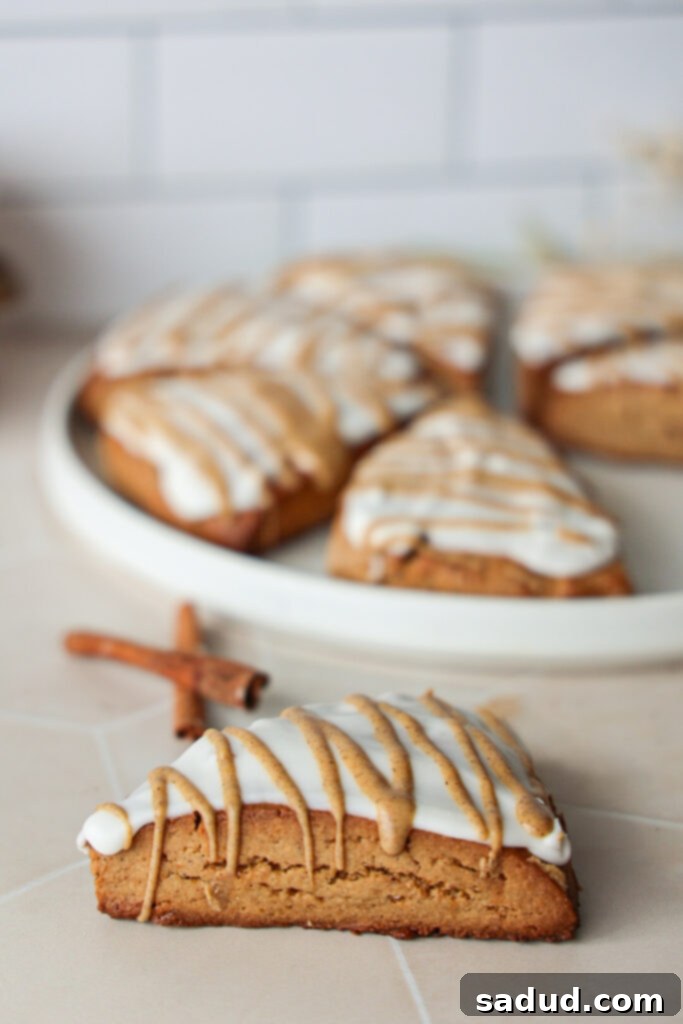
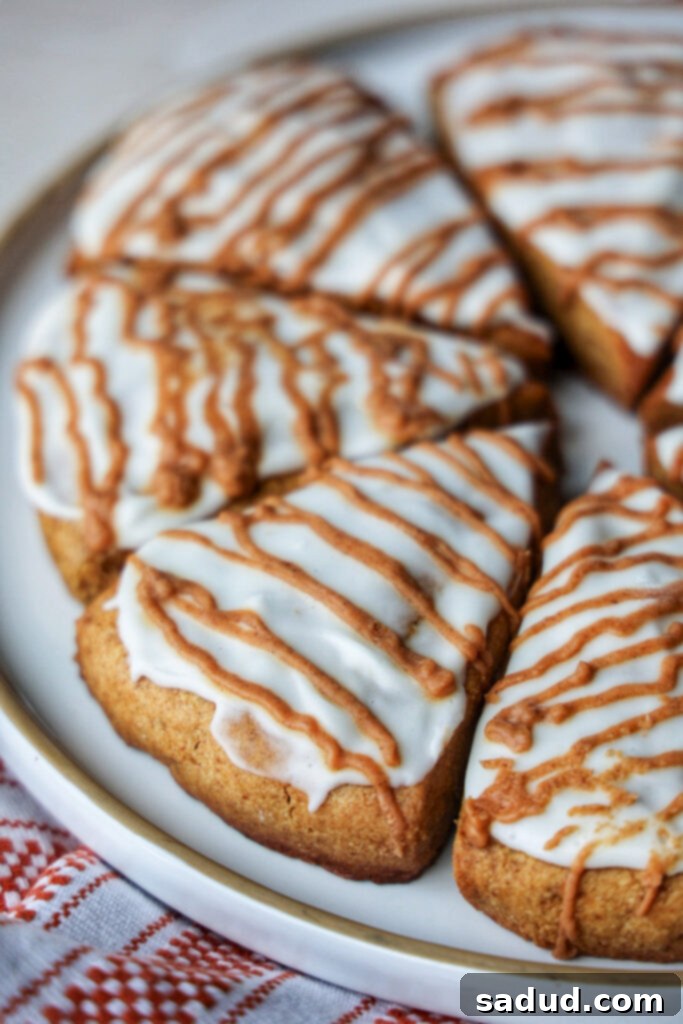
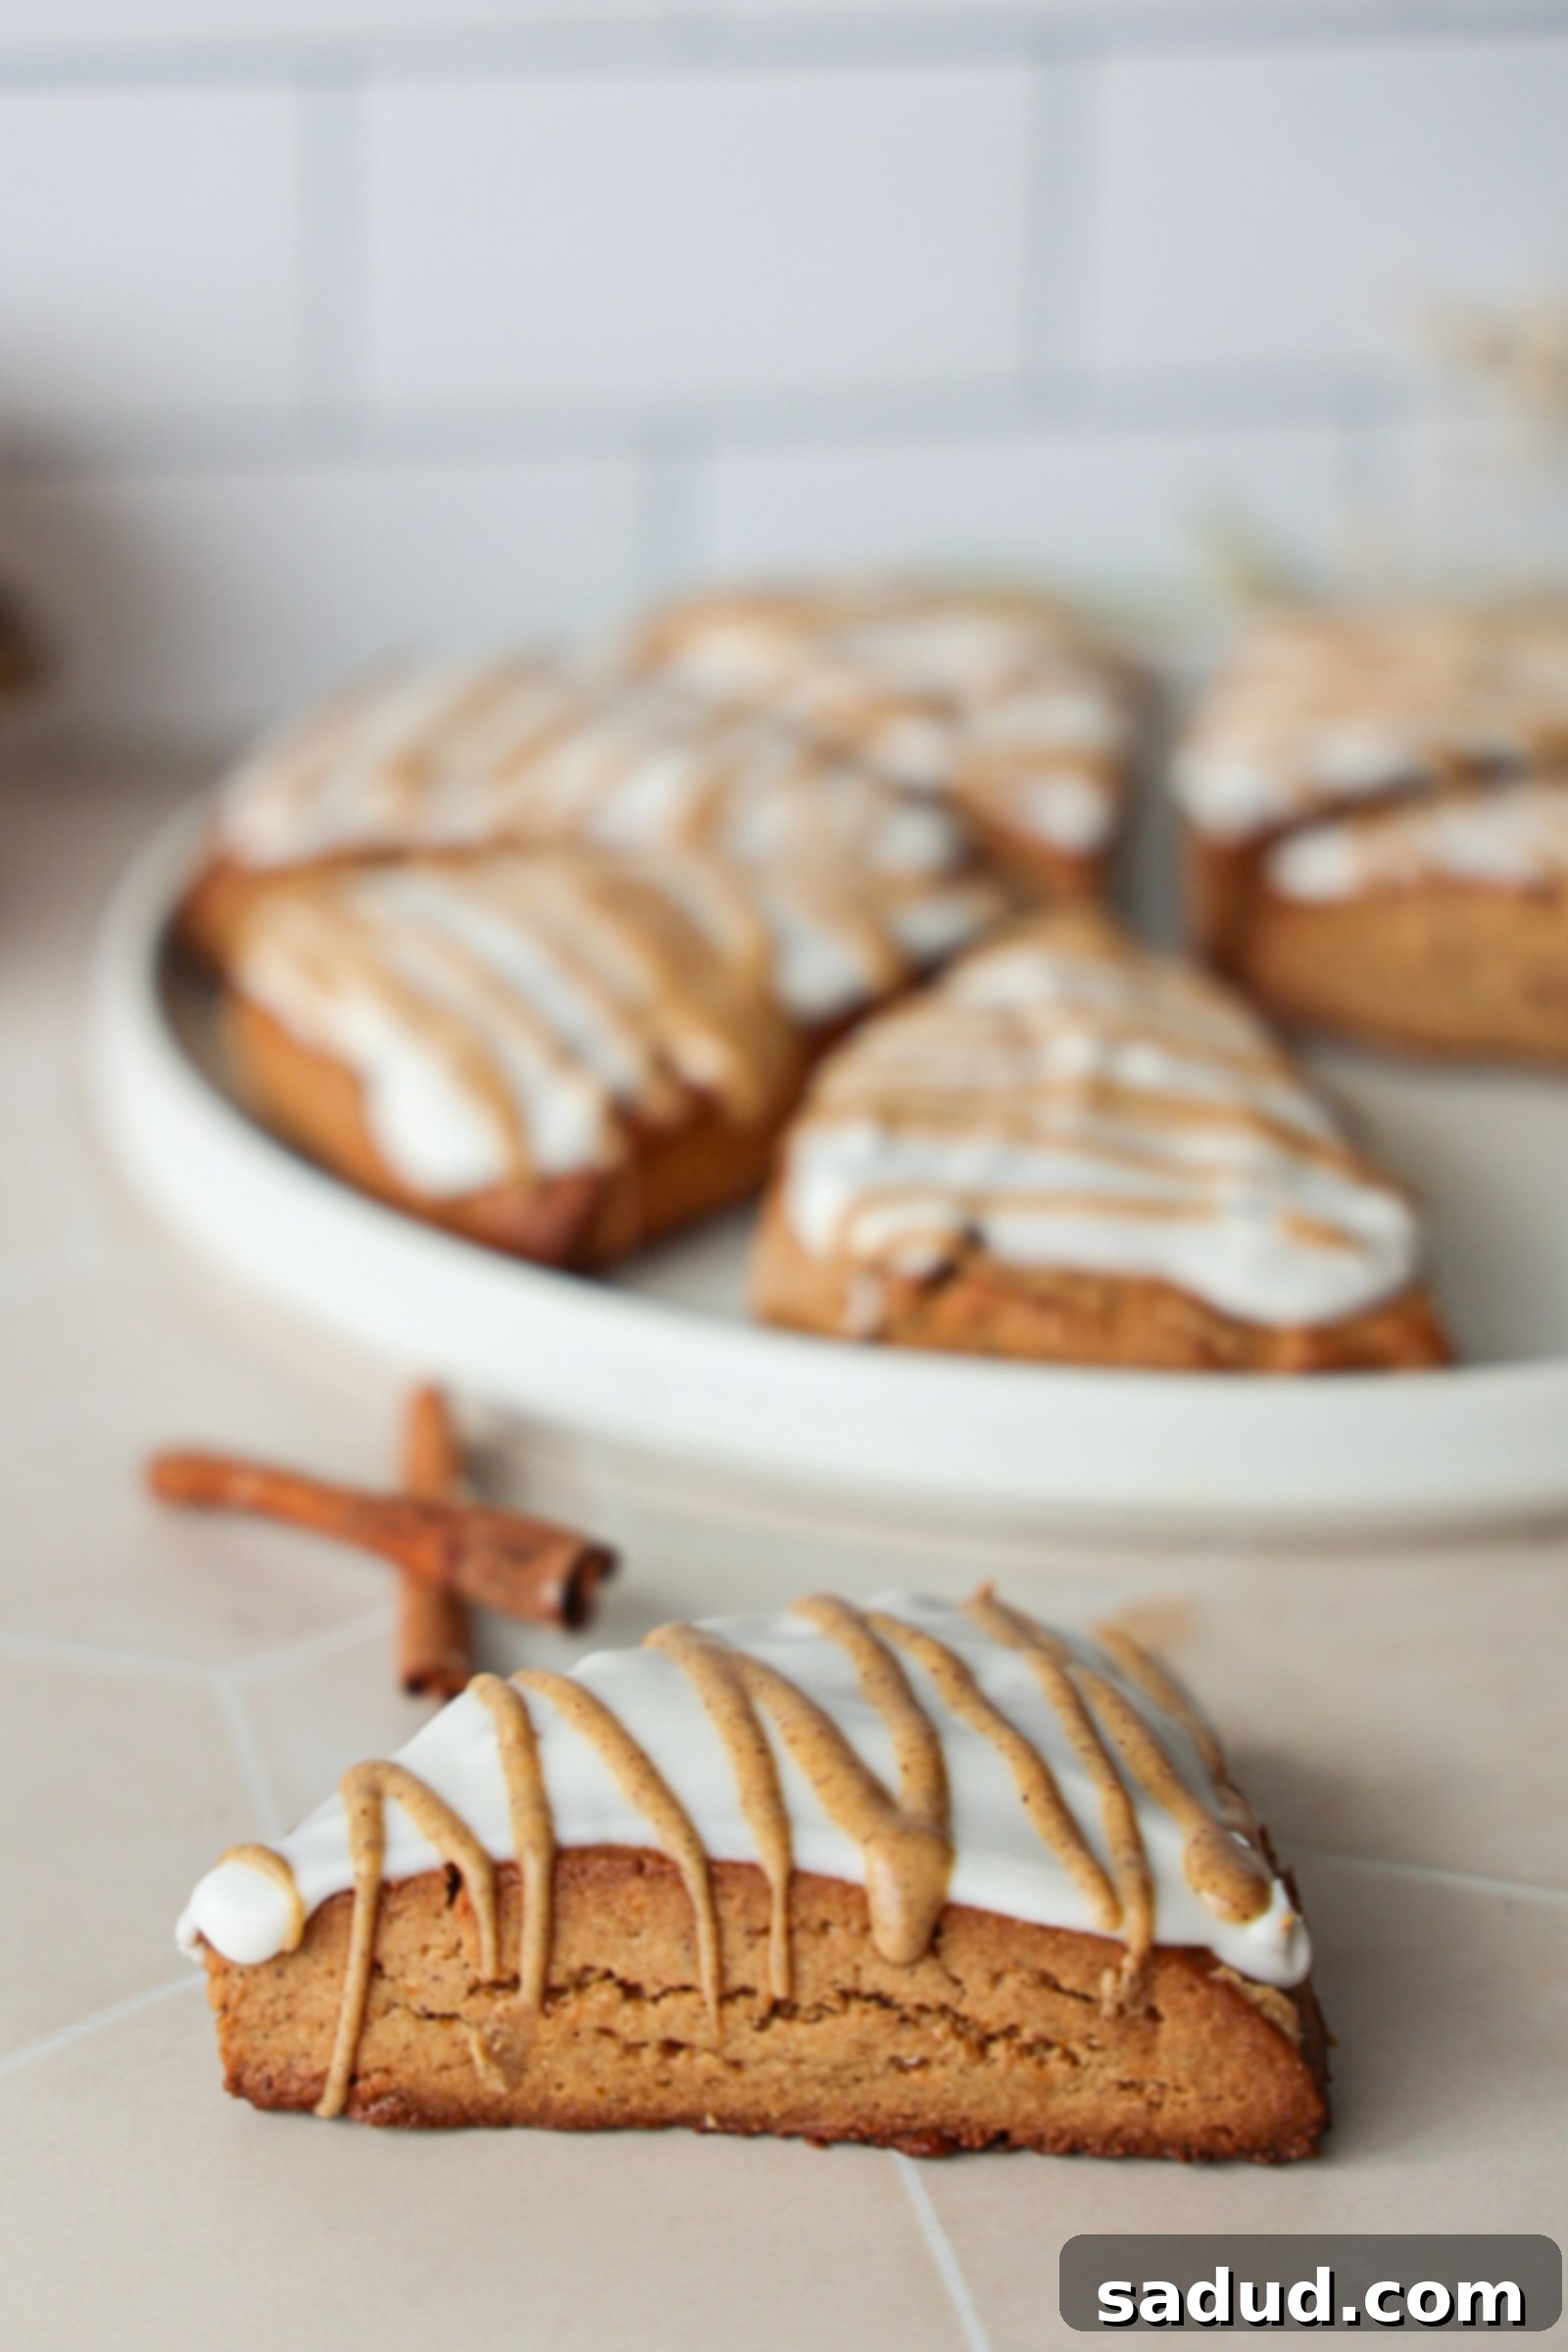
Irresistible Gluten-Free Pumpkin Spice Scones with Maple Glaze: Your Go-To Fall Recipe
Welcome to your new favorite fall tradition! These gluten-free pumpkin spice scones with maple glaze are truly a revelation – effortlessly delicious and surprisingly easy to make. Perfect for a cozy morning or an afternoon treat, they embody all the warmth and comfort of autumn in every single bite. Imagine a scone that’s perfectly tender, bursting with rich pumpkin flavor and aromatic spices, then crowned with a luscious, sweet maple glaze that simply melts in your mouth. And the best part? They come together in just one bowl, making cleanup a breeze!
Beyond their incredible taste, these pumpkin scones cater to various dietary needs without compromising on flavor or texture. They are not only gluten-free but also grain-free, dairy-free, and refined sugar-free, making them a fantastic paleo-friendly option. Whether you’re looking for a healthier alternative to store-bought treats or simply craving the ultimate autumn baked good, this recipe delivers on all fronts. Pair them with your favorite coffee or tea for a match made in heaven!

Why You’ll Fall in Love with This Gluten-Free Pumpkin Scone Recipe
There are countless reasons why these pumpkin spice scones are destined to become a beloved staple in your fall baking repertoire. Here’s a closer look at what makes them so special:
- Effortless One-Bowl Preparation: Say goodbye to stacks of dirty dishes! This recipe is designed for simplicity, requiring just one bowl for mixing the dough. This streamlined process means less time spent on cleanup and more time enjoying your delicious homemade treats. Even beginner bakers will find this recipe incredibly approachable and rewarding.
- Accommodates Most Dietary Needs: We understand the importance of delicious treats that everyone can enjoy. These scones are thoughtfully crafted to be gluten-free, dairy-free, grain-free, and refined sugar-free. This makes them an excellent choice for those with allergies, sensitivities, or simply those seeking a healthier, whole-food alternative to traditional baked goods. They are truly paleo-friendly!
- The Ultimate Healthier Fall Dessert: Indulge your sweet tooth guilt-free this autumn! These pumpkin spice scones offer all the satisfying sweetness and rich flavors you crave in a fall dessert, but with a significantly healthier profile. Made with wholesome ingredients and natural sweeteners, they provide a delightful treat without the usual sugar crash. Enjoy them as a breakfast pastry, a midday snack, or a light dessert.
- Explosion of Authentic Pumpkin Spice Flavor: From the first aroma that fills your kitchen to the last bite, these scones are packed with an incredible depth of pumpkin spice flavor. We use real pumpkin puree and a generous amount of classic pumpkin pie spice to ensure every scone delivers that quintessential taste of autumn that everyone loves. The blend of cinnamon, nutmeg, ginger, and cloves truly sings!
- Perfect Pairing for Your Favorite Hot Beverage: There’s nothing quite like a warm, freshly baked scone paired with a comforting drink. These pumpkin spice scones are an absolute dream alongside your morning coffee, a creamy latte, or a soothing cup of tea. They elevate any hot beverage experience into a luxurious moment of pure bliss.
Watch How to Make These Delicious Pumpkin Spice Scones!
Seeing is believing! If you’re a visual learner, or just want to get a sneak peek at how easy these scones really are to make, check out our step-by-step recipe video below. It walks you through each stage of the process, from mixing the ingredients to forming the perfect scone triangles and applying that irresistible maple glaze. You’ll gain confidence and get all the tips you need to bake these like a pro!
This video guide is designed to make the baking process even more straightforward, ensuring your gluten-free pumpkin scones turn out perfectly every time. Don’t forget to pause and rewind as needed!
Key Ingredients & Smart Substitutions for Your Pumpkin Scones
Crafting the perfect gluten-free, grain-free, and refined sugar-free scone means selecting the right ingredients. Here’s a detailed breakdown of what you’ll need and potential substitutions to fit your pantry and preferences:
- Almond Flour: This is the foundation of our gluten-free scones, providing a tender crumb and rich flavor. Unfortunately, for this specific recipe, almond flour is quite crucial for the texture. If you must substitute, cashew flour is the only viable alternative that will yield a similar result. Other flours like oat or all-purpose gluten-free flour blends will drastically alter the scone’s texture and moisture content, and are not recommended.
- Tapioca Flour: Also known as tapioca starch, this ingredient helps bind the dough and contributes to a slightly chewy, yet tender texture. It’s a key component in many gluten-free baked goods. While I haven’t personally tested it, you *might* be able to try substituting with arrowroot flour or starch, as they have similar properties. However, results may vary.
- Pumpkin Puree: This is where the magic happens! Be sure to use 100% pure pumpkin puree and NOT pumpkin pie filling. Pumpkin pie filling contains added sugars and spices, which will throw off the balance of the recipe. Look for cans that list only “pumpkin” as the ingredient.
- Pumpkin Spice: The heart of the autumn flavor! A good quality pumpkin spice blend is essential. You can find pre-made blends, or you can create your own by mixing cinnamon, nutmeg, ginger, cloves, and a pinch of allspice. Adjust the amount to your personal preference for spice intensity.
- Egg: The egg acts as a binder, providing structure and moisture. While I haven’t personally tested it for this particular recipe, I believe a reliable vegan egg substitute like Bob’s Red Mill Egg Replacer would likely work well. If using a flax egg (1 tbsp ground flaxseed + 3 tbsp water), allow it to sit for 5 minutes to thicken before adding to the wet ingredients.
- Coconut Oil: We use solid, room temperature coconut oil in this recipe. Its solid state is crucial for creating the desired crumbly scone texture when mixed with the dry ingredients. You can successfully substitute solid vegan butter or ghee if you prefer. However, liquid oils like olive oil or vegetable oil will not work as they will change the dough’s consistency too much.
- Coconut Sugar: A natural, unrefined sweetener that lends a lovely caramel-like note to the scones. For a lower sugar option, you can use golden monk fruit sweetener. If you’re not concerned about refined sugar, regular brown sugar is also a suitable substitute, offering a similar depth of flavor.
- Maple Syrup: This liquid sweetener adds a wonderful depth and unique flavor to the scones themselves, beyond just the glaze. For a different but equally delicious flavor profile, you can substitute honey. Be sure to use pure maple syrup, not pancake syrup.
- Pantry Staples: Don’t forget your everyday essentials like vanilla extract for warmth and depth, and baking powder to ensure your scones rise beautifully and have a light texture. A pinch of sea salt enhances all the flavors.
- Monk Fruit Powdered Sugar: For the luscious maple glaze, powdered monk fruit sweetener keeps the recipe refined sugar-free. If refined sugar isn’t a concern for you, regular powdered sugar (confectioners’ sugar) works perfectly and is a common substitution.
- Coconut Milk: Used for brushing the tops of the scones before baking, this helps achieve a beautiful golden-brown finish. Full-fat canned coconut milk is ideal for this, as it provides a richer color. You can also use other dairy-free milks like almond or oat milk.
Always measure your ingredients accurately, especially when working with gluten-free flours, as the ratios are often more sensitive than with traditional wheat flour recipes. Have everything ready before you start, and you’ll be well on your way to baking success!

Step-by-Step Guide: How to Make Easy Gluten-Free Pumpkin Spice Scones
Creating these delightful gluten-free pumpkin spice scones is simpler than you might think. Follow these straightforward steps for a perfect batch every time:
- Combine Dry Ingredients & Cut in Coconut Oil: Begin by adding all your dry ingredients (almond flour, tapioca flour, coconut flour, baking powder, pumpkin spice, coconut sugar, and sea salt) to a food processor. Pulse for a few seconds until they are well combined. Next, add the solid, room-temperature coconut oil (cut into small pieces for easier blending). Process again in short bursts until the mixture resembles a coarse, crumbly dough. It should have the texture of wet sand with pea-sized pieces of coconut oil throughout.
- Mix Wet Ingredients & Form the Dough: In a separate small bowl, whisk together the wet ingredients: the room-temperature egg, maple syrup, pumpkin puree, and vanilla extract. Once combined, pour this wet mixture into the food processor with the dry ingredients. Pulse gently until a cohesive dough forms. Be careful not to overmix; just combine until no dry streaks remain. If you don’t have a food processor, you can do this by hand – simply combine dry, cut in coconut oil with a pastry cutter or your fingertips, then mix in wet ingredients until just combined.
- Chill the Dough for Perfect Texture: Transfer the dough onto a piece of parchment paper. Gently form it into a disc, about 1 to 1.5 inches thick. This chilling step is vital for gluten-free scones, as it allows the flours to hydrate properly and helps the scones maintain their shape during baking. Wrap the dough in the parchment paper or plastic wrap and place it in the fridge for a minimum of 1-3 hours. You can even leave it longer, up to overnight, if that fits your schedule better. A well-chilled dough is key to flaky scones!
- Shape, Brush, and Bake Your Scones: Once the dough is thoroughly chilled, preheat your oven to 350°F (175°C). Lightly dust your parchment paper and your hands with a little extra tapioca flour if the dough feels sticky. Carefully reshape the chilled dough into an even 1.5-inch thick disc. Using a sharp knife or bench scraper, cut the disc into 8 equal triangles. Arrange these triangles on a baking sheet lined with fresh parchment paper. Before baking, gently brush the tops of each scone with a little full-fat canned coconut milk (you can save any leftover for smoothies or curries!). This step helps them achieve a beautiful golden-brown crust.
- Bake to Golden Perfection: Place the baking sheet in the preheated oven and bake for 20-22 minutes, or until the edges are golden brown and the scones feel set to the touch. The baking time might vary slightly depending on your oven, so keep an eye on them. Once baked, remove from the oven and transfer the scones to a wire rack to cool completely before glazing. Cooling is essential to prevent the glaze from melting.
Making the Maple Glaze and Pumpkin Drizzle
- Prepare the Maple Glaze: While the scones are cooling, whisk together the powdered monk fruit sweetener (or regular powdered sugar) and your milk of choice in a small bowl until a smooth, thick glaze forms. You want it thick enough to coat a spoon, but still pourable.
- Prepare the Pumpkin Drizzle: In a separate small bowl, combine the remaining monk fruit powdered sugar, pumpkin puree, pumpkin spice, and 1-2 tablespoons of milk. Mix until smooth. Add a tiny bit more milk if needed to reach a drizzling consistency, but be careful not to make it too thin.
- Glaze and Drizzle: Once the scones are completely cool, spread a generous layer of the plain maple glaze over the tops of each scone. For best results, place the glazed scones in the fridge for about 5-10 minutes to allow the glaze to set slightly. This prevents the pumpkin drizzle from fully melting into the base glaze. Finally, remove from the fridge and artfully drizzle the pumpkin glaze over the set maple glaze. Your beautiful, delicious gluten-free pumpkin spice scones are now ready to be enjoyed!
Storing Leftover Gluten-Free Pumpkin Scones
Like most baked goods, these gluten-free pumpkin spice scones taste absolutely divine on the day they are baked. The crumb is at its tenderest, and the flavors are at their peak. However, if you find yourself with leftovers (a rare occurrence!), they can be stored to enjoy later with just a little care.
To keep them fresh, place your cooled and glazed scones in an airtight container. They will keep well at room temperature for up to 3 days. To revive their deliciousness, I highly recommend warming them up before serving. A quick 30-45 seconds in the microwave or a few minutes in a toaster oven will bring back their soft texture and warm aroma, making them taste almost as good as fresh out of the oven.
Avoid storing them in the refrigerator unless absolutely necessary, as it can sometimes dry them out faster. If you do refrigerate them, ensure they are in a tightly sealed container to minimize moisture loss and always warm them before eating.
Can You Freeze Gluten-Free Pumpkin Scones? Absolutely!
Freezing is an excellent way to extend the life of your gluten-free pumpkin scones and ensure you always have a delicious treat on hand. You have two great options for freezing:
Freezing Baked Scones:
If you’ve already baked and cooled your scones, you can freeze them for up to 3 months. For best results, it’s often better to freeze them *before* glazing. If they are already glazed, ensure the glaze is completely set. Wrap each scone individually in plastic wrap, then place them in a freezer bag or an airtight freezer-safe container. This double-layer protection helps prevent freezer burn. When you’re ready to enjoy one, simply remove it from the freezer, allow it to thaw at room temperature for an hour or two, and then reheat gently in the microwave or a toaster oven until warmed through. This method is perfect for grab-and-go treats!
Freezing Scone Dough (Recommended!):
For the freshest possible taste, freezing the scone dough before baking is often the preferred method. Here’s how:
- After you’ve formed and cut the dough into triangles (before brushing with coconut milk or baking), arrange the raw scone triangles on a baking sheet lined with parchment paper. Make sure they aren’t touching each other.
- Place the baking sheet in the freezer and freeze until the scone dough pieces are solid (this usually takes about 1-2 hours).
- Once solid, transfer the frozen dough triangles to a large ziplock freezer bag or an airtight freezer-safe container. This prevents them from sticking together and allows you to bake just one or a few at a time. They can be stored in the freezer for up to 3 months.
- To Bake from Frozen: When you’re craving fresh scones, simply remove the desired number of frozen dough triangles from the freezer. You can either let them thaw partially at room temperature for about 30 minutes, or you can bake them directly from frozen. If baking from frozen, you may need to add an additional 5-10 minutes to the baking time specified in the recipe. Brush with coconut milk as usual and bake at 350°F (175°C) until golden brown and cooked through. This method yields wonderfully fresh, warm scones with minimal effort on demand!
Freezing dough is an excellent meal prep hack for busy mornings or unexpected guests!
Explore More Healthy Pumpkin Spice Recipes!
If you’ve fallen in love with the comforting flavors of pumpkin spice and are looking for more delicious, healthy ways to enjoy this autumn staple, you’ve come to the right place! Here are some other fantastic recipes from my kitchen that celebrate the magic of pumpkin:
- Energizing Pumpkin Spice Overnight Oats: A perfect make-ahead breakfast for busy fall mornings.
- Delicious & Healthy Pumpkin Streusel Muffins: Moist, spiced muffins with a delightful crunchy streusel topping.
- Warm & Hearty Healthy Pumpkin Baked Oatmeal: A comforting and nutritious breakfast that’s great for feeding a crowd.
- Indulgent Vegan Pumpkin Twix Bars: A decadent, plant-based twist on a classic candy bar, bursting with pumpkin flavor.
- Creamy Vegan Dairy Queen Pumpkin Pie Blizzard Copycat: Get your pumpkin pie fix in a frosty, dairy-free treat.
- Simple & Nutritious Pumpkin Spice Chia Pudding: An easy, no-cook option for a healthy breakfast or snack.
Each of these recipes brings its own unique spin to pumpkin spice, ensuring you can enjoy its delightful flavors in a variety of dishes throughout the season.

Gluten-Free Pumpkin Scones with Maple Glaze
Pin Recipe
Ingredients
For the Scones (Dry ingredients)
- 2 1/2 cups almond flour (blanched and finely ground for best texture)
- 1 cup tapioca flour (also known as tapioca starch)
- 2 tbsp coconut flour (helps absorb moisture and adds fiber)
- 1 1/4 tsp baking powder (ensure it’s fresh for optimal rise)
- 2 tsp pumpkin spice (or your homemade blend of cinnamon, nutmeg, ginger, cloves)
- 1/2 cup coconut sugar (can substitute golden monk fruit or brown sugar)
- pinch sea salt (enhances all flavors)
- 1/2 cup coconut oil (solid, room temp, cut into small pieces)
For the Scones (Wet ingredients)
- 1 egg (room temp; see notes for vegan egg substitute)
- 2 tbsp maple syrup (pure maple syrup, not pancake syrup)
- 1/3 cup pumpkin puree (100% pure pumpkin, NOT pie filling)
- 2 tsp vanilla extract (good quality for best flavor)
- coconut milk, for brushing the tops (full-fat canned coconut milk recommended for golden finish)
For the Maple Glaze
- 1 cup powdered monk fruit sweetener (*can sub regular powdered sugar if not refined sugar free)
- 2 tbsp milk, of choice (dairy or non-dairy, as preferred)
For the Pumpkin Drizzle
- 3/4 cup monk fruit powdered sugar (or regular powdered sugar)
- 1 tbsp pumpkin puree (100% pure pumpkin)
- 3/4 tsp pumpkin spice (for that extra layer of fall flavor)
- 1-2 tbsp milk, of choice (* more if needed, for drizzling consistency)
Instructions
Scone Preparation
-
To begin, add all your dry ingredients (almond flour, tapioca flour, coconut flour, baking powder, pumpkin spice, coconut sugar, and sea salt) into a food processor. Pulse for a few seconds until these ingredients are thoroughly combined. Next, add the solid, room-temperature coconut oil, which should be cut into small pieces. Process again in short bursts until a crumbly dough begins to form. The mixture should resemble coarse crumbs with small bits of coconut oil throughout.
-
In a separate small bowl, whisk together the wet ingredients: the egg (at room temperature), maple syrup, pumpkin puree, and vanilla extract until well blended. Add this wet mixture to the dry ingredients in the food processor. Pulse until everything is just combined and a cohesive dough forms. Be careful not to overmix. Alternatively, you can mix by hand. Once formed, transfer the dough onto a piece of parchment paper and gently shape it into a disc. Cover the dough tightly with the parchment paper or plastic wrap and refrigerate for 2-3 hours. This chilling period is crucial for the scone’s texture and stability, and you can even leave it in the fridge for longer if needed, up to overnight.
-
After chilling, lightly sprinkle a clean piece of parchment paper with a little tapioca flour. Place your chilled dough disc onto this prepared surface. If the dough still feels a bit too wet, you can gently knead in an additional tablespoon of almond flour. To make handling easier, you can also sprinkle a little tapioca flour on top of the dough or lightly moisten your hands. Carefully shape the dough into an even disc, approximately 1 1/2 inches thick.
-
When you are ready to bake, preheat your oven to 350°F (175°C). Using a sharp knife or a pastry cutter, carefully cut the dough disc into 8 uniform triangles. Arrange these triangles on a baking sheet that’s been lined with parchment paper, ensuring they are spaced evenly. Before placing them in the oven, lightly brush the tops of the scones with a bit of coconut milk (full-fat canned coconut milk works best for a rich golden color; any extra can be saved for other recipes).
-
Bake the scones for 20-22 minutes, or until their edges turn a beautiful golden brown and they feel firm to the touch. Once baked, remove the baking sheet from the oven and carefully transfer the scones to a wire rack. Allow them to cool completely before proceeding with the glazing step. This ensures the glaze sets properly and doesn’t melt into the warm scones.
Maple Glaze Instructions
-
In a small bowl, whisk together the powdered monk fruit sweetener (or regular powdered sugar) and the milk of your choice. Continue whisking until you achieve a smooth, thick glaze consistency. It should be thick enough to cling to a spoon but still pourable.
Pumpkin Drizzle Instructions
-
In a separate small bowl, combine the additional monk fruit powdered sugar, pumpkin puree, and pumpkin spice. Mix these ingredients thoroughly. If the mixture is too thick to drizzle, add a tiny bit more milk, one teaspoon at a time, until it reaches a thin, drizzling consistency. Be careful not to make it too runny; you want it to hold its shape when drizzled.
-
Once the scones are completely cooled, generously spread the plain maple glaze over the tops of each scone. For the best presentation and to prevent the pumpkin drizzle from mixing in, place the glazed scones in the fridge for a few minutes (about 5-10) to allow this initial glaze layer to set.
-
After the first glaze layer has set slightly, remove the scones from the fridge. Drizzle the prepared pumpkin glaze artistically over the tops of the scones. Your homemade Gluten-Free Pumpkin Spice Scones with Maple Glaze are now ready to be served and savored! Enjoy every delicious bite with your favorite warm beverage.
Video Tutorial
Final Thoughts: Enjoying Your Homemade Fall Masterpiece
There you have it – a comprehensive guide to baking the most delightful gluten-free pumpkin spice scones with an exquisite maple glaze. This recipe is more than just a sweet treat; it’s an experience, bringing the cozy aromas and flavors of autumn right into your home. Whether you’re sharing them with loved ones or savoring a moment of quiet indulgence, these scones are sure to impress.
Don’t be intimidated by gluten-free baking; with these clear steps and helpful tips, you’ll achieve perfect results. The satisfaction of creating something so delicious and wholesome from scratch is truly unmatched. So, gather your ingredients, turn on your favorite fall playlist, and get ready to bake some magic. Happy baking, and enjoy your wonderful, healthy fall treats!
If you try this recipe, please let me know how it turns out in the comments below! I love hearing from you.
