The Ultimate Guide to Healthy No-Bake S’mores Cookie Bars (Gluten-Free & Paleo)
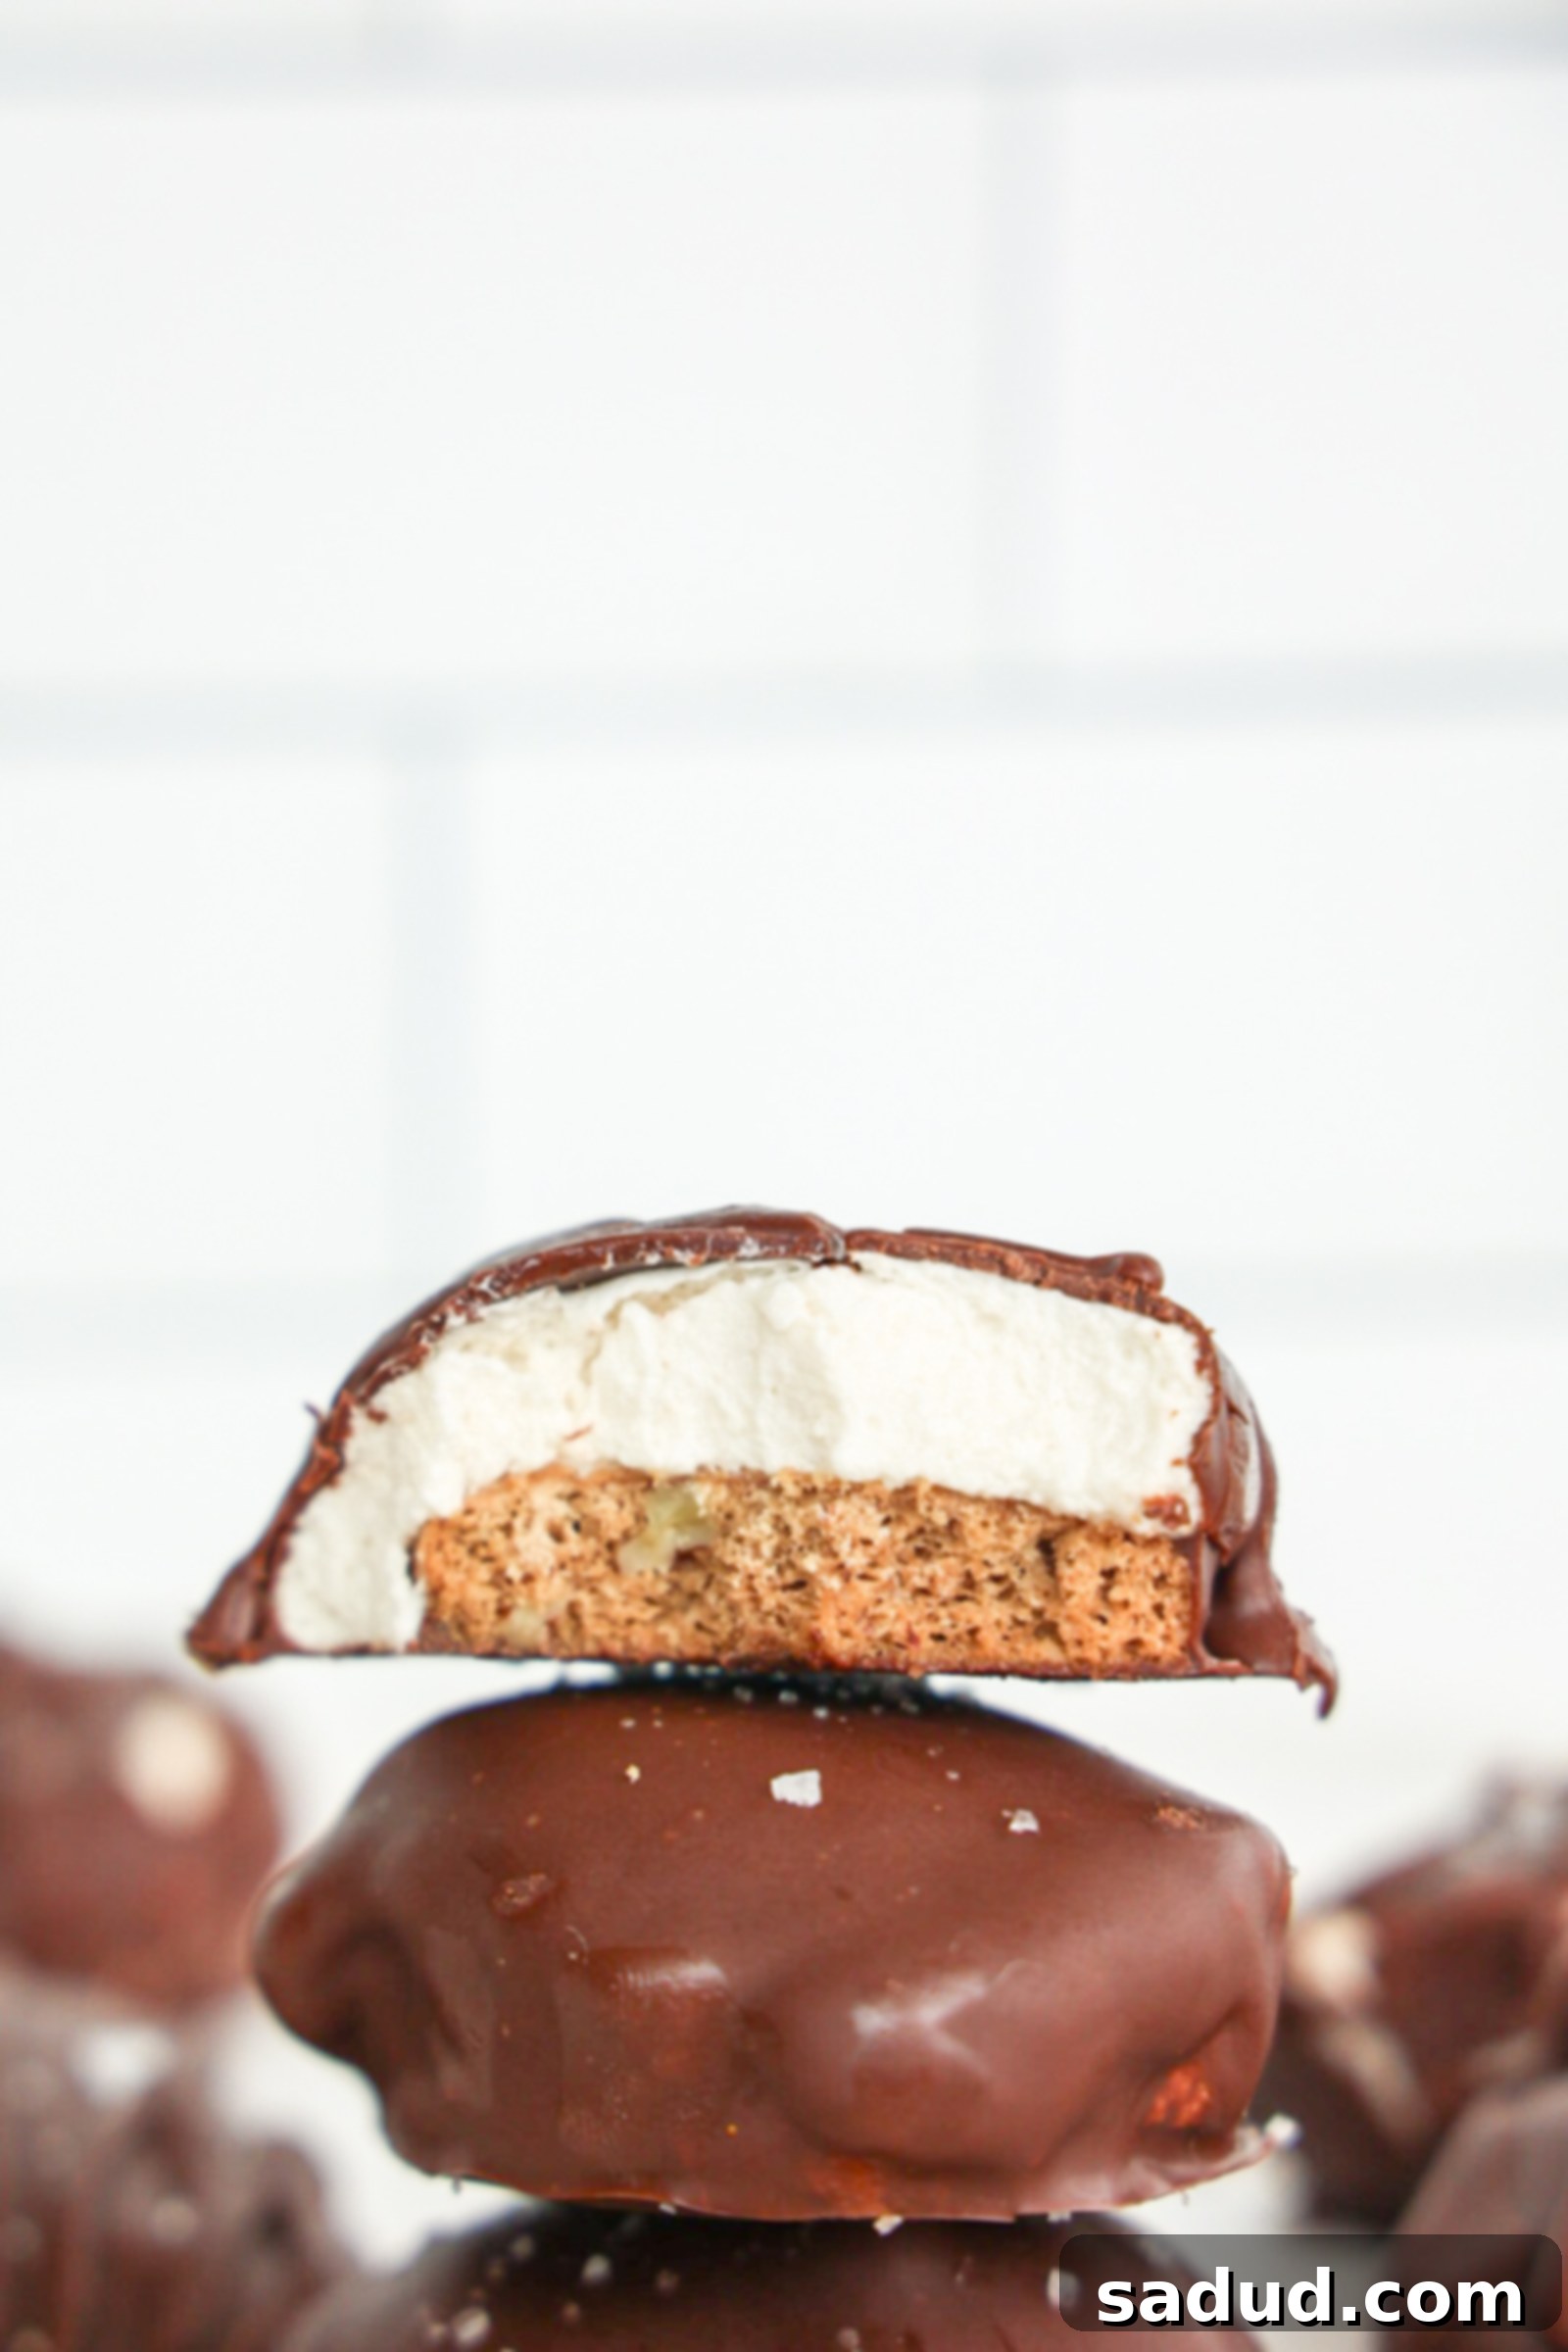
Prepare to meet your new favorite dessert: these incredible Healthy S’mores Cookie Bars! Imagine all the nostalgic, ooey-gooey goodness of a classic campfire s’more – rich chocolate, fluffy marshmallow, and a delightful graham cracker crunch – all perfectly encapsulated in a convenient, chewy cookie bar. But here’s the best part: this version is crafted with wholesome, purposeful ingredients, making it naturally sweetened, gluten-free, grain-free, and paleo-friendly. Forget the artificial flavors and refined sugars; these bars deliver pure, unadulterated s’mores magic without the guilt. Whether you’re hosting a summer party, looking for a satisfying snack, or simply craving a taste of childhood comfort, these no-bake s’mores bars are an absolute dream come true.
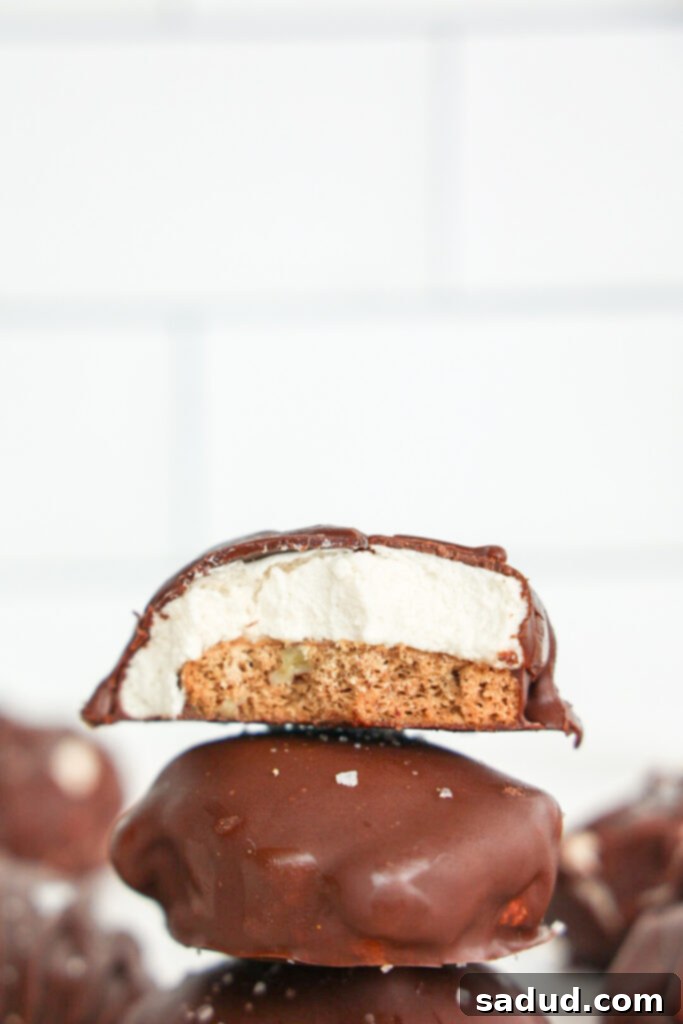
Irresistible S’mores Bars for Any Occasion
There’s something universally appealing about the classic combination of toasted marshmallows, melted chocolate, and crisp graham crackers. This timeless trio captures the essence of summer evenings and cozy gatherings. These S’mores Cookie Bars bring that cherished experience right into your kitchen, making them accessible any time of year, no campfire required! They consistently win over crowds and are an ideal choice for get-togethers, vibrant summer parties, and backyard BBQs, primarily because they are an excellent make-ahead dessert. Prepare them in advance, store them in your freezer, and simply pull them out when you’re ready to impress your guests with a wholesome, delicious treat.
The inspiration for these delectable bars actually stemmed from a common grocery store sighting. I frequently noticed Whole Foods S’mores Bites, which feature a graham cracker base, a marshmallow filling, and a chocolate coating. While the concept was tempting, I wasn’t thrilled with the ingredients list. This sparked my desire to create a homemade version that aligned with my focus on natural, healthier components. After some experimentation, the verdict in our household was unanimous: these might just be one of the best treats I’ve ever made. They capture the essence of store-bought favorites but with a homemade, healthful twist that makes them truly special.
Making and enjoying s’mores is undeniably a summer classic, deeply tied to the ritual of a crackling fire pit. But what if you don’t have access to one? Or perhaps you prefer a dessert that doesn’t involve the smoky aroma of a bonfire? That’s where these no-bake s’mores bars shine! You won’t need an oven, microwave, or fire to bring these s’mores bites to life – just a trusty hand mixer or stand mixer, and the magic of your freezer. This simplicity makes them a perfect last-minute dessert or a fun project to make with kids without the heat of an oven.
If you’re a devoted s’mores enthusiast, you’ll love exploring other creative and healthy variations. Be sure to try my Snickers Frozen Protein S’mores for a protein-packed twist, the refreshing Strawberry Frozen S’mores, my seasonal Pumpkin S’mores Bars, or the incredibly creamy Vegan S’mores Dip! Each recipe offers a unique way to enjoy those beloved s’mores flavors.
Why These Healthy S’mores Cookie Bars Are a Must-Make
These aren’t just any s’mores; they’re an elevated, health-conscious take on a beloved classic. Here’s why these bars are destined to become a staple in your dessert repertoire:
- Wholesome & Nutrient-Dense: Crafted with only purposeful, high-quality ingredients, these bars are naturally gluten-free, grain-free, paleo-friendly, and completely refined sugar-free. You can indulge without any guilt, knowing you’re nourishing your body with every bite.
- Authentic S’mores Flavor, Healthier Twist: We’ve captured the iconic s’mores taste profile – the sweetness of marshmallow, the richness of chocolate, and the satisfying crunch of a “graham cracker” base – all minus the artificial flavors, preservatives, and processed sugars often found in traditional versions.
- Perfect for Parties & Gatherings: Their crowd-pleasing appeal and make-ahead nature make them an ideal dessert to serve at any party, picnic, or summer BBQ. They’re easy to transport and always a hit!
- A Unique Take on a Classic: While honoring the original, these bars offer a delightful twist on bonfire s’mores. They provide the same beloved flavors in a more structured, convenient bar format, making them less messy and easier to enjoy.
- Less Mess, More Enjoyment: Let’s be honest, classic s’mores can be wonderfully messy! These bars, with their firm cookie base and set marshmallow layer, offer a significantly less messy experience, making them perfect for kids and adults alike.
Watch How to Make These No-Bake S’mores Bars
Sometimes, seeing is believing! To help you visualize each step and ensure your no-bake s’mores bars turn out perfectly, we’ve included a comprehensive recipe video. Watch as we transform simple ingredients into these delightful treats:
This video will guide you through the process of making the homemade marshmallow fluff, assembling the bars, and coating them in chocolate, ensuring you achieve that perfect s’mores texture and flavor every time.
The Surprising Health Benefits of Grass-Fed Gelatin
One of the key innovations in this recipe is skipping the high-fructose corn syrup-laden marshmallows found in stores and instead making our own marshmallow fluff from scratch. This homemade fluff is incredibly simple to prepare, requiring just two primary ingredients: maple syrup (or honey) and grass-fed gelatin. Beyond its ability to create that perfect fluffy texture, high-quality gelatin offers a range of impressive health benefits that elevate this dessert beyond just a sweet treat:
- Natural Collagen Boost: Grass-fed gelatin is an excellent natural source of collagen, the most abundant protein in our bodies. Collagen is crucial for supporting skin elasticity, hydration, and strength. Regular consumption can significantly help improve skin texture, reduce the appearance of fine lines and wrinkles, and promote stronger nails and healthier, more lustrous hair. It’s like a beauty supplement hidden in your dessert!
- Supports Gut Health and Digestion: Gelatin plays a vital role in strengthening the gut lining and supporting overall digestive function. It’s rich in amino acids like glycine and glutamine, which are known to help repair and maintain the integrity of the intestinal wall. It’s often incorporated into healing protocols such as GAPS or Paleo diets to manage conditions like leaky gut, IBS, or other digestive issues by fostering a healthy mucosal lining.
- Promotes Joint and Bone Health: The amino acids found in gelatin, particularly glycine and proline, are essential building blocks for maintaining healthy joint cartilage and bone strength. Including gelatin in your diet may help reduce joint pain, stiffness, and inflammation, making it particularly beneficial for active individuals, athletes, or those managing conditions like arthritis.
- Aids Muscle Recovery: With approximately 6 grams of protein per tablespoon, grass-fed gelatin can be a valuable addition for supporting muscle recovery post-workout. Its high glycine content is especially beneficial for tissue repair and overall recovery, helping your body rebuild and strengthen after physical exertion.
By incorporating grass-fed gelatin, these s’mores bars become not just a delicious dessert but a functional food that contributes positively to your well-being.
How to Make Your Healthy S’mores Bites
While the full, detailed recipe can be found in the recipe card at the bottom of this post, let’s walk through the key components and considerations for crafting these delightful no-bake s’mores bars.
Essential Ingredients for Perfect S’mores Bars
Selecting the right ingredients is crucial for achieving both the authentic s’mores taste and the desired healthy profile. Here’s a closer look at what you’ll need:
- Simple Mills Crunchy Pecan Cookies: These cookies are a game-changer for the “graham cracker” base. They have an amazing texture and flavor that closely mimics traditional graham crackers, while also being vegan, gluten-free, and paleo-friendly. You can certainly use any similar crunchy cookie that fits into a standard cupcake tin, but ensure they are indeed crunchy to provide that essential textural contrast. For best results, choose cookies that are small enough to form the base without crumbling excessively.
- Grass-Fed Gelatin: Quality truly is key when it comes to gelatin, especially since it’s the star of our homemade marshmallow fluff. I highly recommend Further Foods gelatin; it’s grass-fed, consistently high quality, and, importantly, doesn’t have the off-putting “funky” smell that some lower-quality gelatins can have. This ensures your marshmallow fluff tastes clean and pure.
- Honey or Maple Syrup: Both natural sweeteners work beautifully in the marshmallow fluff. I personally find the flavor of the marshmallow fluff made with pure maple syrup to be slightly preferable, offering a subtle, rich sweetness. However, high-quality honey provides a wonderful alternative with its distinct floral notes. Choose whichever you prefer or have on hand.
- Vanilla Extract: A touch of pure vanilla extract enhances the overall flavor profile of the marshmallow fluff, adding warmth and depth that complements the other ingredients perfectly.
- Chocolate Chips: For the coating, opt for high-quality dark chocolate chips that are free from dairy and refined sugars if adhering to a paleo diet. Look for brands that offer at least 70% cacao for a rich, intense chocolate flavor that balances the sweetness of the marshmallow.
-

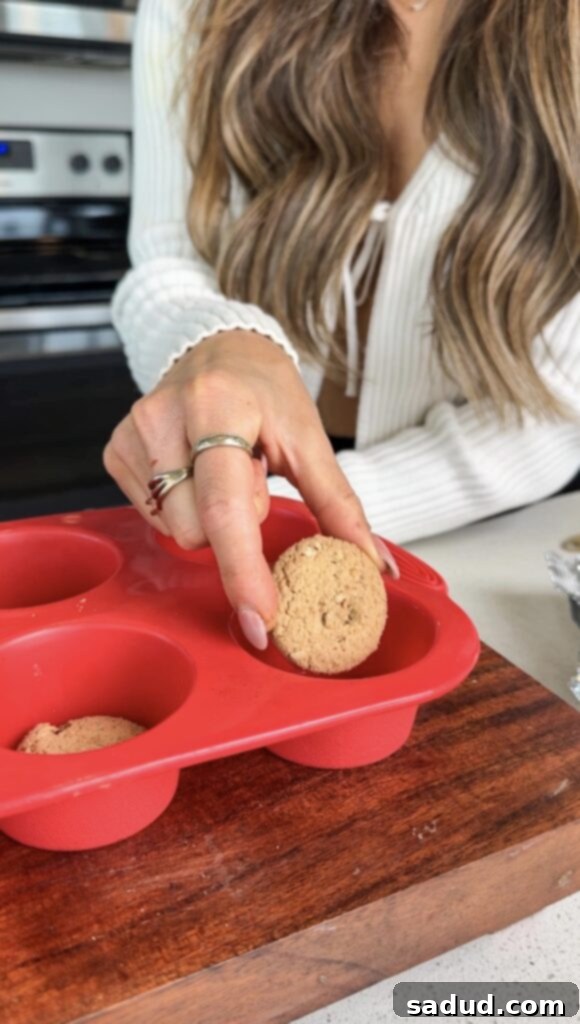
The initial cookie base. -

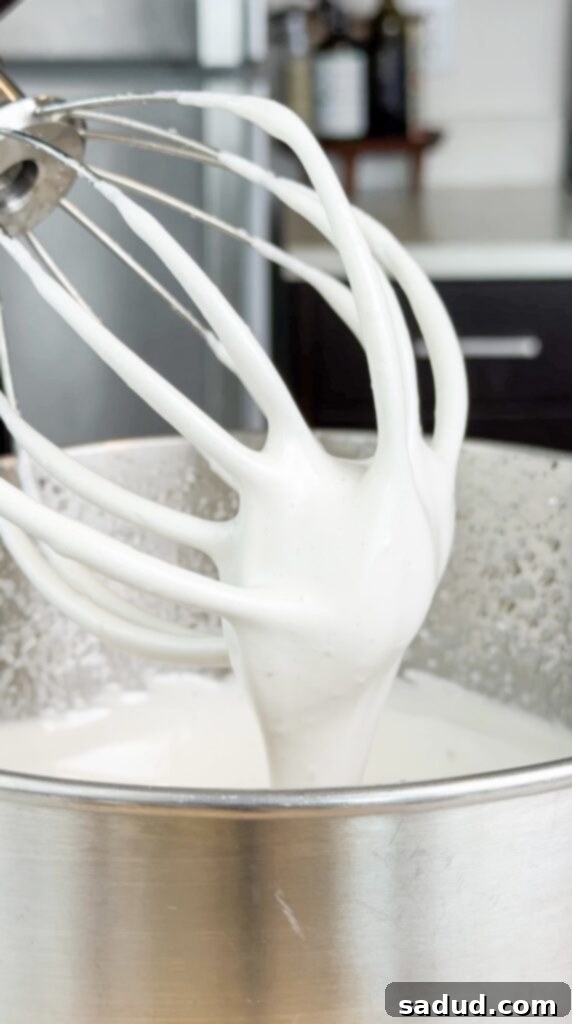
Preparing the fluffy homemade marshmallow. -

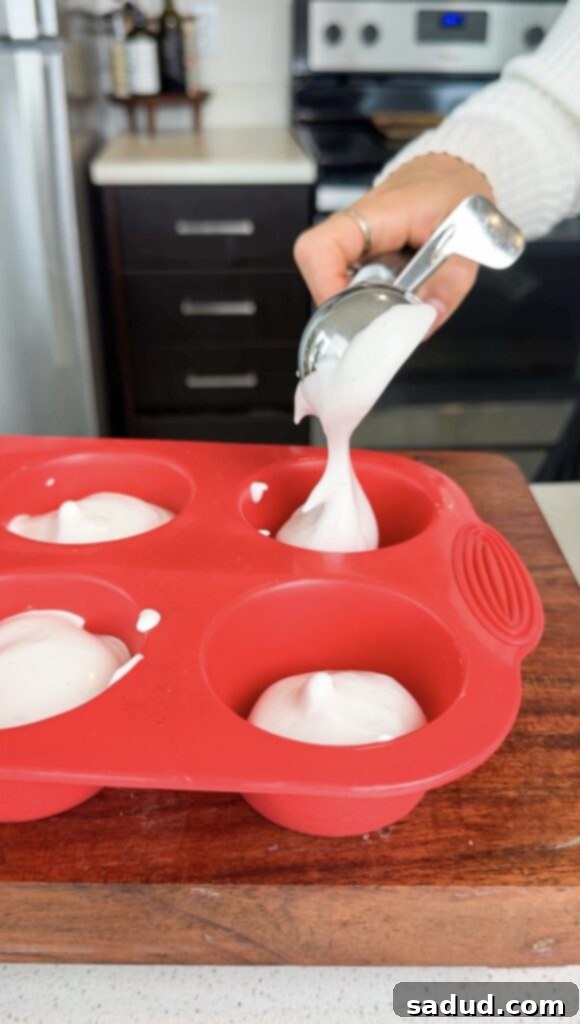
Assembling the s’mores bars with marshmallow fluff.
Crafting Your Healthy S’mores Cookie Bars: A Step-by-Step Guide
Making these no-bake s’mores bars is a fun and straightforward process. Follow these steps for perfect results:
- Prepare the Marshmallow Fluff:
- In the bowl of a stand mixer fitted with the whisk attachment, add 1/4 cup of cold water. Evenly sprinkle the grass-fed gelatin over the water. Allow it to “bloom” for 5-10 minutes. This process allows the gelatin granules to absorb the liquid and soften, which is crucial for achieving a smooth, lump-free fluff.
- While the gelatin is blooming, prepare your syrup. In a small, heavy-bottomed pot, combine the remaining water (2 tablespoons), vanilla extract, and your chosen sweetener (honey or maple syrup). Bring this mixture to a rolling boil over medium-high heat. Continue to cook, stirring frequently to prevent scorching, until it reaches a temperature of 240°F (115°C). I highly recommend using a candy thermometer for accuracy, as precise temperature is key here. If you don’t have one, it typically takes about 10 minutes of active boiling to reach this temperature, but visual cues like thick, syrupy bubbles can also help.
- Once the syrup reaches 240°F, immediately remove it from the heat. With the stand mixer running on low speed, slowly and carefully pour the hot syrup mixture into the bowl with the bloomed gelatin. Once all the syrup is added, gradually increase the whisking speed to high. Allow the mixture to beat continuously for about 5 to 7 minutes. You’ll observe it transforming into a thick, glossy, white fluff that forms stiff peaks and clings to the whisk when lifted from the bowl. Work quickly from this point, as the fluff will start to firm up as it cools.
- Assemble the Cookie Bites:
- Grab a silicone muffin tin for the easiest removal, or use a metal muffin tin lined with paper liners. Place one crunchy cookie at the bottom of each muffin cup, pressing down gently to create a firm base.
- Using a cookie scoop or two spoons, generously scoop the freshly made marshmallow fluff on top of each cookie. The amount can vary based on your preference for marshmallowiness! Once all cups are filled, gently smooth the tops if desired.
- Carefully transfer the muffin pan to the freezer. Allow the marshmallow fluff to firm up completely, which usually takes about 2 to 3 hours. This step is crucial for ensuring the bars hold their shape during the chocolate-dipping process.
- Coat with Chocolate:
- Once the marshmallow cookies are firm, prepare your chocolate coating. Line a baking sheet with parchment paper to prevent sticking.
- In a small, microwave-safe bowl, combine the chocolate chips and 1/2 tablespoon of coconut oil (the coconut oil helps thin the chocolate for a smoother coating). Microwave in 30-second intervals, stirring thoroughly after each, until the chocolate is completely melted and smooth. Be careful not to overheat the chocolate, as this can cause it to seize.
- Remove the firm marshmallow cookies from the muffin tin. Quickly dip each one into the melted chocolate, ensuring it’s fully coated. Let any excess chocolate drip off, then place the dipped bar onto the prepared baking sheet.
- Return the baking sheet with the chocolate-coated s’mores bars to the freezer for another hour or so, allowing the chocolate layer to firm up and set completely.
- Final Storage: Once the chocolate is firm, transfer the bars to an airtight container. Store them in the freezer to maintain their perfect texture and freshness.
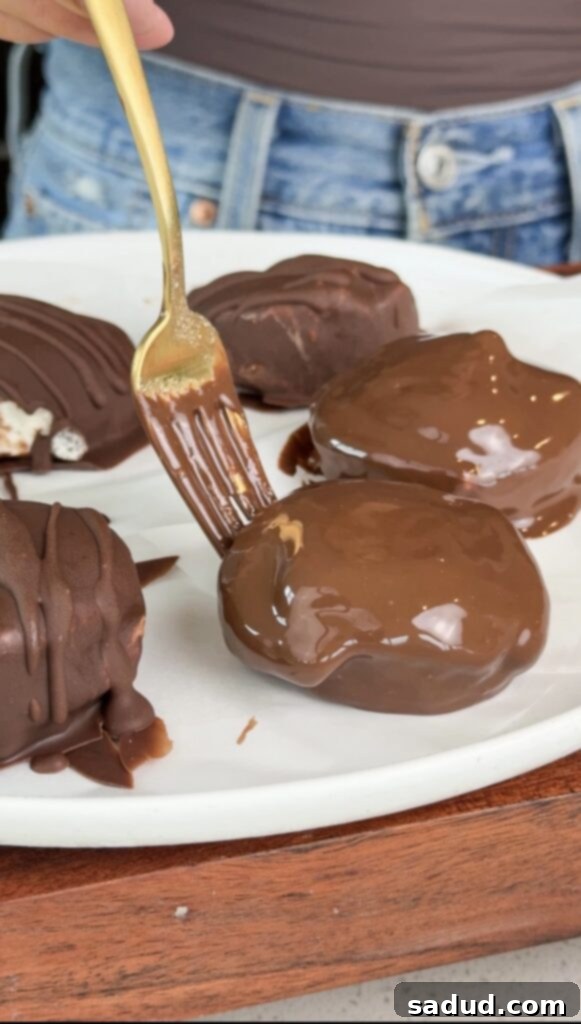
Storing Your S’mores Cookie Bars for Optimal Freshness
One of the best features of these no-bake s’mores bars is how wonderfully they store. To keep them at their peak freshness and ensure that delightful texture, always store them in an airtight container in the freezer. There’s no need to worry about the marshmallow section becoming rock-hard or unpleasantly frozen; thanks to the gelatin and sweeteners, it maintains a perfectly soft, chewy, and slightly pliable consistency even straight from the freezer. This means you can always have a batch on hand for unexpected cravings or last-minute entertaining, knowing they’ll be ready to enjoy with a texture that is simply perfect—never too stiff, always delightfully soft.
Frequently Asked Questions About S’mores Cookie Bars
Here are answers to some common questions you might have when making these healthy s’mores cookie bars:
- Do I have to make homemade marshmallow fluff? While you technically don’t “have” to, I highly recommend it for this recipe. Not only is our homemade marshmallow fluff incredibly easy to whip up with just a few simple ingredients, but it’s also vastly superior to anything you’ll find pre-made at the store. It allows you to control the quality of ingredients, ensuring it’s free from high-fructose corn syrup, artificial flavors, and preservatives, aligning perfectly with the healthy and paleo ethos of this recipe. The taste and texture are also significantly better!
- Can I make marshmallow fluff without a stand mixer? Yes, you can, but be prepared for a more intense arm workout! While I haven’t personally attempted it using just a hand mixer, it’s certainly possible. A hand mixer will require more time and continuous attention to achieve the desired stiff peaks. If you have a Kitchenaid stand mixer, I highly recommend using it as it makes the process effortless. However, there are many more affordable stand mixer options available that would also work well.
- Do I need a candy thermometer? While a candy thermometer is always a valuable tool to have on hand for precise cooking and baking, it’s not strictly essential for this recipe. If you don’t own one, you can approximate the syrup temperature by ensuring the mixture boils for a full 10 minutes. This duration is generally sufficient to reach the desired 240°F, ensuring your marshmallow fluff sets correctly. Just keep an eye on it to prevent over-boiling.
- Can I use different types of cookies for the base? Absolutely! While Simple Mills Crunchy Pecan Cookies are an excellent paleo and gluten-free choice, you can experiment with other crunchy cookies. Just ensure they are small enough to fit into your muffin tin and provide a firm, stable base. Options could include other gluten-free shortbread-style cookies or even homemade paleo “graham crackers” if you’re feeling ambitious.
- How can I prevent the chocolate from seizing when melting? The key to smooth melted chocolate is low, slow heat and avoiding any contact with water. When microwaving, use short 30-second bursts and stir thoroughly between each. If using a double boiler, ensure the bowl doesn’t touch the simmering water, and no steam escapes into the chocolate. Adding a touch of coconut oil, as suggested in the recipe, also helps create a fluid consistency and prevents seizing.
Exciting S’mores Bars Recipe Variations
While the classic s’mores combination is divine, these bars are incredibly versatile and lend themselves beautifully to creative variations. Feel free to experiment and make them your own!
- White Chocolate S’mores: For a sweeter, creamier twist, coat your s’mores bites in melted white chocolate instead of dark chocolate. Ensure you choose a high-quality, dairy-free white chocolate if maintaining a paleo or vegan diet.
- Chocolate Chip Cookie S’mores: Elevate the base by using crunchy chocolate chip cookies instead of pecan cookies. The double chocolate effect adds an extra layer of indulgence.
- Peanut Butter Swirl S’mores: After dipping in chocolate, drizzle a thin layer of melted peanut butter (or almond butter for paleo) over the top while the chocolate is still wet. Use a toothpick to create a beautiful swirl.
- Spiced S’mores: Add a pinch of cinnamon or a dash of pumpkin pie spice to your marshmallow fluff for a warm, cozy flavor profile, especially perfect for fall.
- Toasted Coconut S’mores: Sprinkle some toasted unsweetened coconut flakes over the wet chocolate coating for an added layer of texture and tropical flavor.
- Dark Chocolate Sea Salt S’mores: Enhance the richness of the dark chocolate by sprinkling a tiny pinch of flaky sea salt on top of the wet chocolate coating before freezing. The salt perfectly balances the sweetness.
Explore More Healthy Dessert Recipes to Try
If you’re a fan of these wholesome s’mores bars and are looking for more delicious, health-conscious treats, you’re in luck! Here are some other favorite healthy dessert recipes from my kitchen that you absolutely must try:
- Strawberry Frozen S’mores: A fruity and refreshing take on frozen s’mores, perfect for summer.
- Snickers Frozen Protein S’mores: Indulge in a healthier version of your favorite candy bar, packed with protein and s’mores flavor.
- S’mores Cheesecake Cups: All the creamy, dreamy goodness of cheesecake with a s’mores twist, in convenient individual portions.
- Vegan S’mores Dip: A warm, bubbly, and incredibly satisfying dip that’s entirely plant-based.
- Cookie Tiramisu Cheesecake: A sophisticated yet easy-to-make dessert that’s vegan and gluten-free.
- Healthy No-Bake Cookie Dough Bars: Enjoy the irresistible taste of cookie dough in a guilt-free, no-bake bar format.
- Healthy Rice Krispie Treats: A classic childhood favorite, made healthier with a delightful peanut butter twist.
If you give this Healthy S’mores Cookie Bars recipe a try and fall in love with them as much as we have, it would mean the world to me if you left a star rating & review below! Don’t forget to tag me in your delicious creations on Instagram @danishealthyeats – I absolutely love seeing what you make!
S’mores Cookie Bars
Ingredients
Marshmallow fluff
- 1/2 tbsp grass-fed gelatin
- 1/2 cup honey or maple syrup
- 6 tbsp water, divided
- 1 1/2 tsp vanilla extract
Assembling the bars
- 1 package Simple Mills Toasted Pecan Cookies *or other similar cookies
- 1 cup chocolate chips
- 1/2 tbsp coconut oil, melted *to help thin the chocolate for coating
Instructions
Marshmallow fluff
- In the bowl of a stand mixer with the whisk attachment, add 2 tbsp of water to the base, and then sprinkle over 1/2 tbsp of gelatin. Set aside to allow to harden.
- In a small pot, combine 1/4 cup of water with 1/2 cup of maple syrup or honey. Set the pot over medium-high heat and heat until it reaches 240 F – I recommend using a candy thermometer to check the temperature. If you don’t have one, the mixture typically takes about 10 minutes to reach 240F.
- Once it’s reached temp, remove from heat. Turn the stand mixer on low, and slowly pour the syrup mixture into the stand mixer as you increase the speed to high speed. Whip the mixture for 7-8 minutes until light, fluffy, and tripled in size.
- While the fluff is beating, grab your muffin tin. I like to use a silicone muffin tin for easy removal, but you can use a metal tin with muffin liners. Add a cookie to the bottom of each one.
- Using a cookie scoop, scoop some of the. marshmallow fluff on top of each cookie. Then place the tray in the freezer for 2-3 hours to allow the marshmallow fluff to firm up a bit.
- Once firm, line a baking sheet with parchment paper. Add the chocolate and coconut oil to a bowl. Heat in the microwave in 30 second increments, stirring between each, until smooth. Quickly dip each cookie bite into the chocolate and place on the baking sheet.
- Return to the freezer for an hour or so until firm, before moving to an air-tight container. Store in the freezer – they stay nice and soft and never get fully frozen and stay fresher this way!
Video
Notes
-
-
- Simple mills crunchy pecan cookies: You can use any similar cookie! It’s best if they’re small enough to fit in a cupcake tin! Be sure to use crunchy cookies! The Simple Mills cookies are amazing, taste like graham crackers, and are vegan, gluten-free, and paleo.
- Grass-fed gelatin: Quality is key here Further Foods is my favorite as it’s grass-fed, high quality, and doesn’t have the funky gelatin smell that some have.
- Do I have to make homemade marshmallow fluff? No, but I highly recommend it! Not only is it INCREDIBLY easy, but it’s much better for you than anything store-bought!
- Can I make marshmallow fluff without a stand mixer? Yes, but it’ll be a lot more hands-on work! i haven’t attempted it, but you can try to use a hand mixer, it’ll probably just take more time than using a stand mixer. I use a Kitchenaid and love it so much, but there are much more affordable options as well!
- Do I need a candy thermometer? No, but they’re always nice to have on hand. If you don’t have a thermometer, just be sure to allow the syrup mixture to boil for 10 minutes! This should be sufficient time!
-
