Decadent Dairy-Free Snickers Ice Cream Cake: The Ultimate Healthy No-Bake Treat
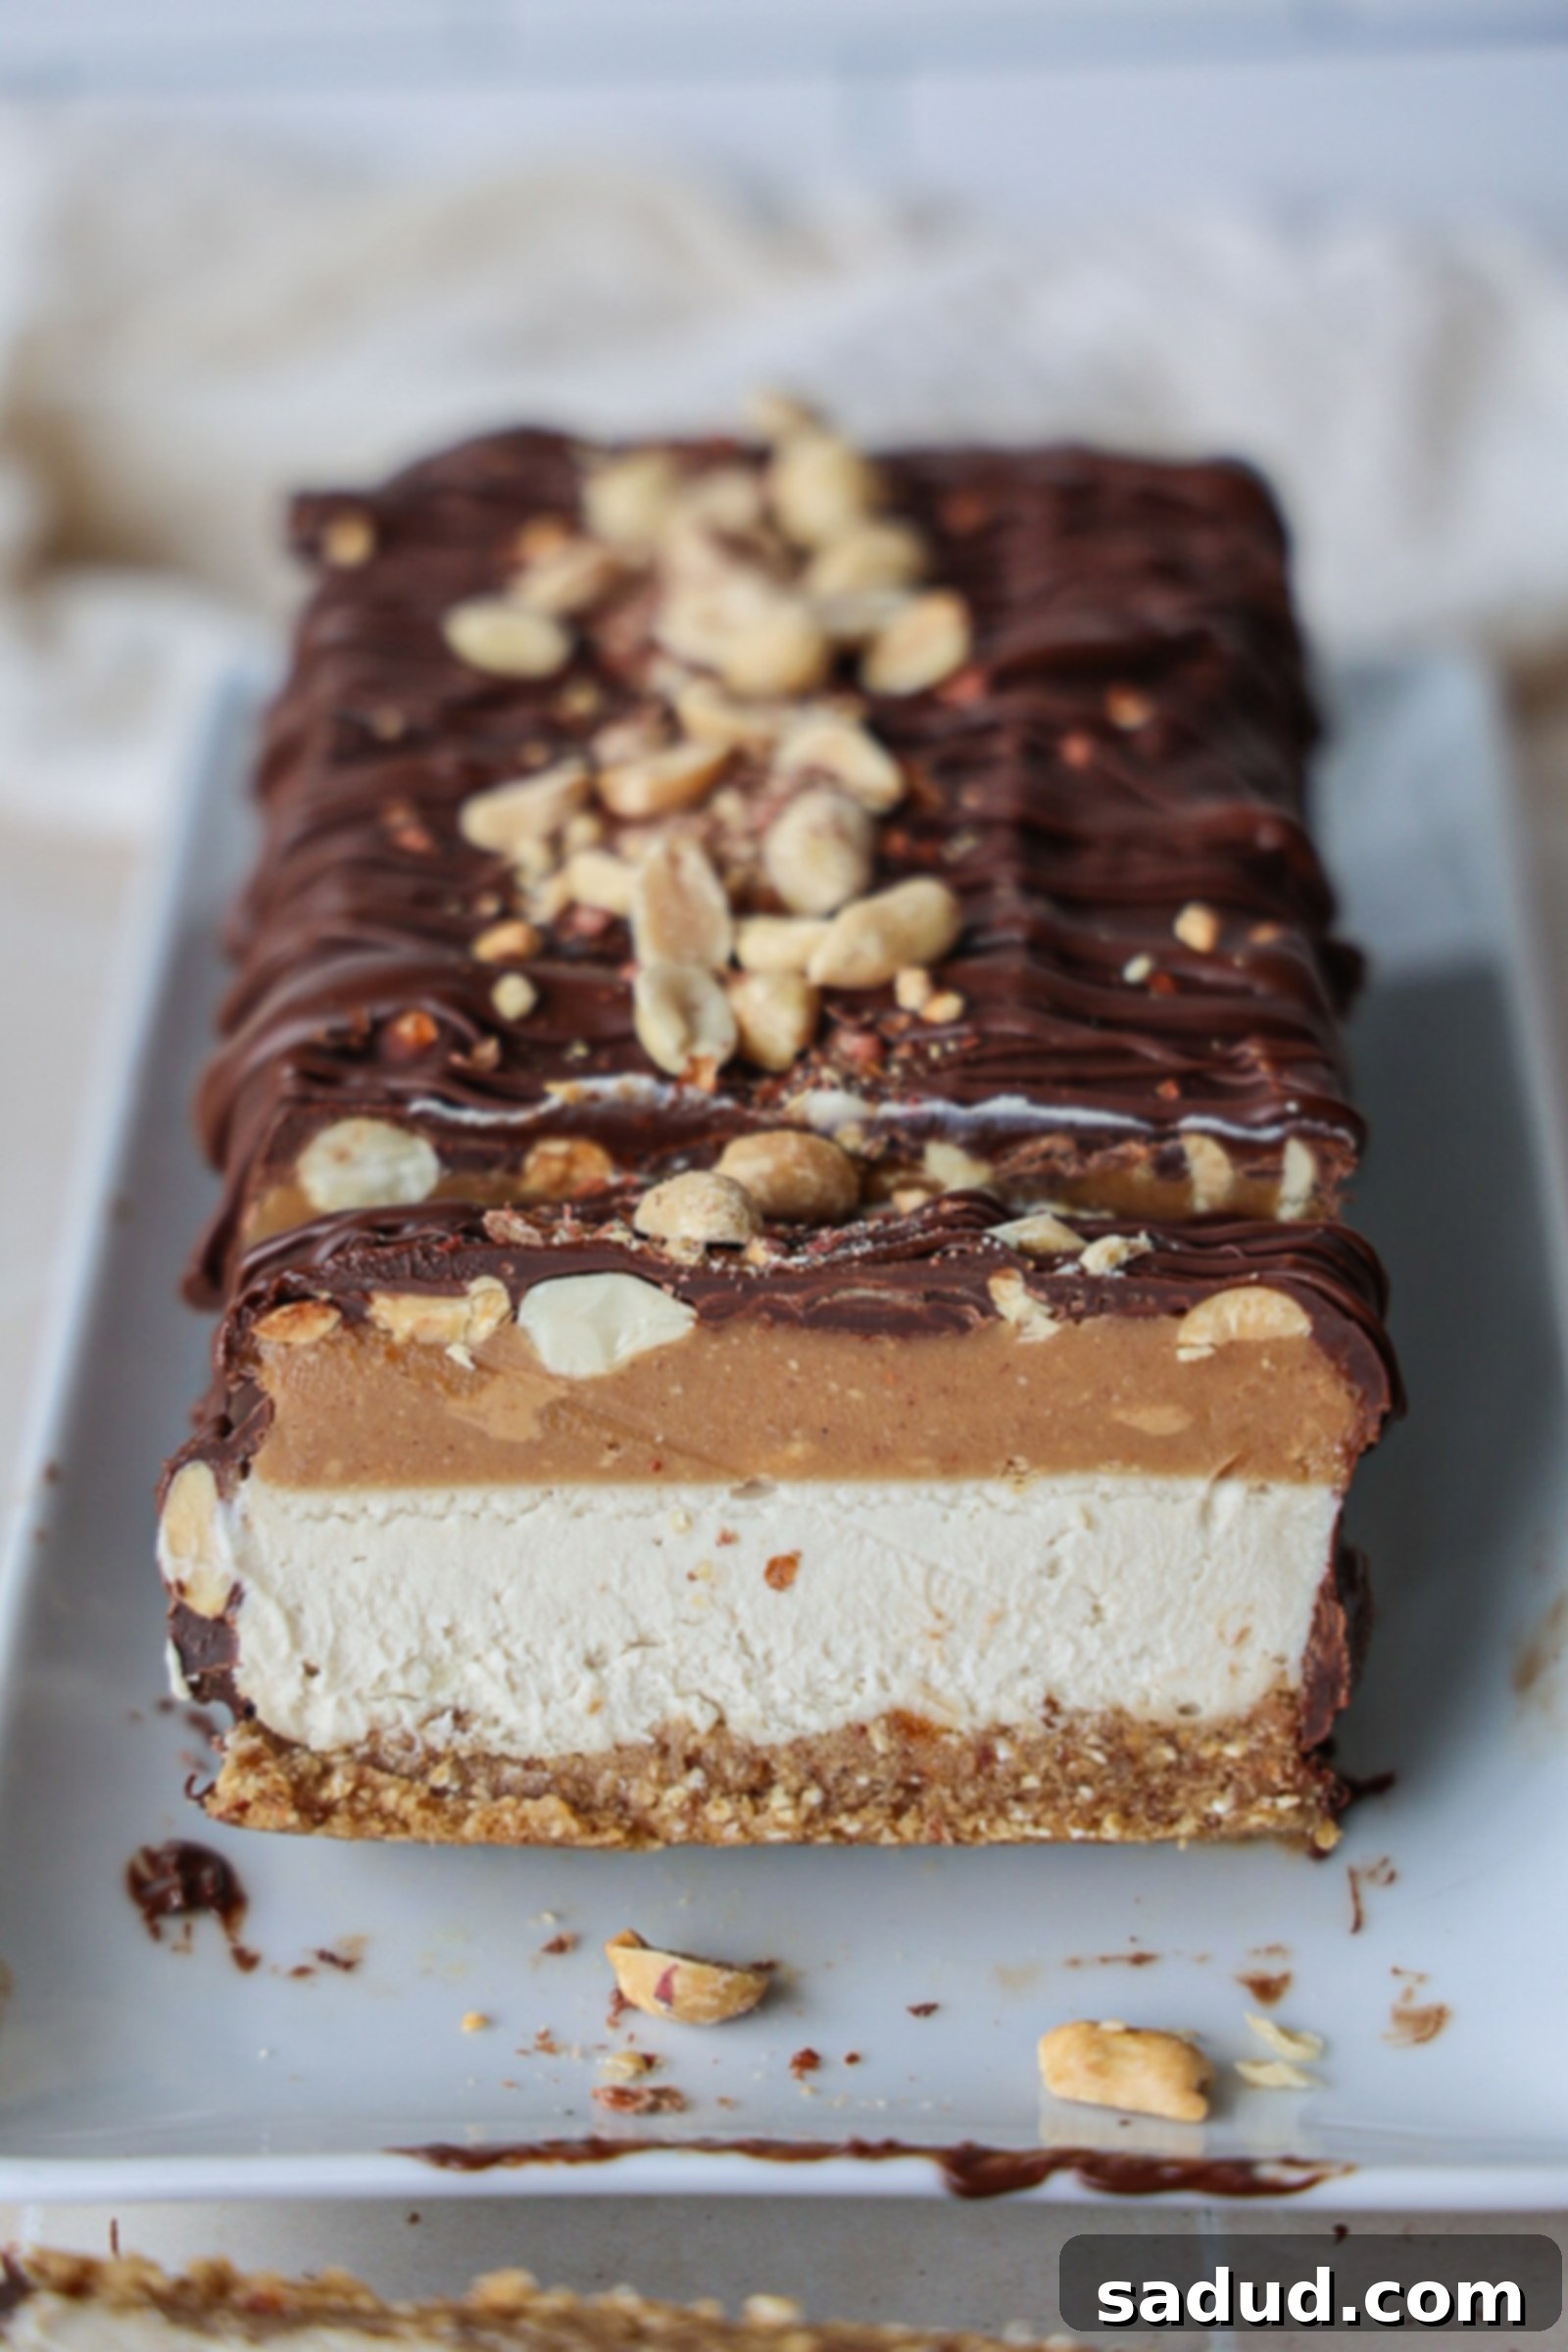
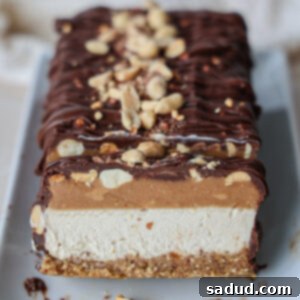
Prepare to be amazed by this healthier Snickers Ice Cream Cake, the ultimate no-bake dessert that redefines indulgence. It’s wonderfully decadent, incredibly creamy, and bursting with classic Snickers flavors, yet you’d never guess it’s completely gluten-free, dairy-free, and refined sugar-free! Imagine a chewy, nougat-like base made from dates, layered with a rich, cashew-based ice cream, generously topped with a silky peanut butter caramel, sprinkled with crunchy peanuts, and enveloped in a crisp chocolate shell. This isn’t just a dessert; it’s a celebration in every bite, making it the perfect showstopper for any occasion, especially those warm summer days.
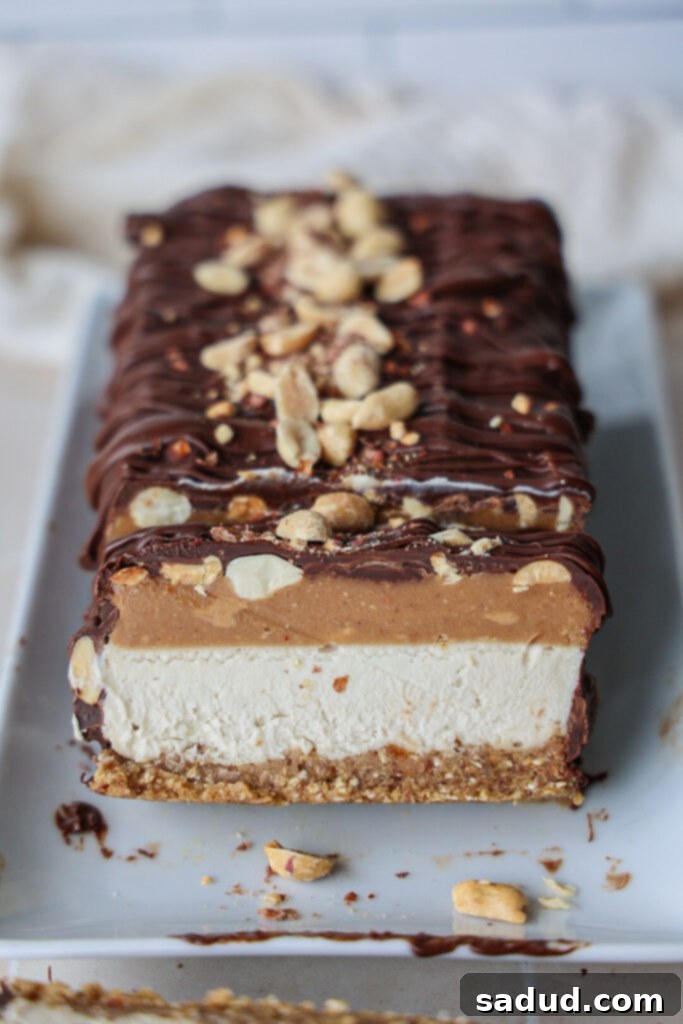
As someone who adheres to specific dietary preferences, I often find myself crafting my own birthday treats. It’s a delightful challenge to create something truly spectacular that aligns with a dairy-free and gluten-free lifestyle. This year, the craving for an ice cream cake was undeniable, and what better inspiration than the beloved Snickers bar? The combination of rich chocolate, creamy caramel, and salty peanuts is simply irresistible. Marrying these two dessert dreams resulted in this absolute heaven of a cake!
Every spoonful of this Snickers-inspired ice cream cake delivers a truly decadent experience. Its texture is rich, smooth, and exquisitely creamy, offering a symphony of flavors that will delight your palate. The timeless pairing of peanut butter and chocolate creates a harmonious balance that is truly a match made in heaven. Serve this impressive dessert to your family and friends, and I promise you, they will absolutely never suspect that this luxurious ice cream cake is made entirely without dairy, eggs, traditional custard, or refined sugar. It’s a proudly vegan, dairy-free, gluten-free, and refined sugar-free creation that looks incredibly fancy and complex, but is surprisingly easy to make with no obscure or hard-to-find ingredients required.
The magic begins with a perfectly chewy, nougat-like base, naturally sweetened with nutrient-rich Medjool dates. This provides a delightful contrast to the smooth layers that follow. Next, a thick layer of homemade, exquisitely creamy cashew-based ice cream is spread over the base, offering a refreshing and rich body to the cake. This is then generously topped with a luscious, smooth peanut butter caramel, adding that signature salty-sweet gooeyness. Finally, a crisp, dreamy chocolate shell encases the entire cake, holding all the irresistible layers together. And we absolutely cannot forget the finishing touch: a sprinkle of flaky sea salt, which is an absolute must for enhancing all the sweet and nutty flavors!
Why You’ll Fall in Love with This Healthy Snickers Ice Cream Cake Recipe:
- It’s a truly inclusive dessert: This recipe is meticulously crafted to be **vegan, gluten-free, dairy-free, and refined sugar-free**, making it suitable for a wide range of dietary needs and allergies. You can share this incredible treat with almost anyone, knowing they’ll enjoy it without compromise.
- **Significantly lower in sugar**: Compared to traditional ice cream cakes that are often loaded with refined sugars, our version relies on natural sweeteners like dates and maple syrup, offering a delicious indulgence with a much lower glycemic impact. Enjoy the sweetness without the sugar crash!
- **Unbelievably creamy and packed with flavor**: Thanks to the magic of soaked cashews and full-fat coconut milk, the homemade ice cream layer achieves an unparalleled creaminess. Each bite delivers an explosion of classic Snickers flavors – nutty, chocolatey, and perfectly sweet and salty.
- **Effortless & no-bake**: Say goodbye to ovens and complicated baking steps! This dessert comes together beautifully with simple blending and freezing, making it a fantastic option for summer when you want to keep your kitchen cool, or anytime you need a show-stopping treat without the fuss.
- **Highly versatile and customizable**: Dealing with a peanut allergy? No problem at all! This recipe is incredibly adaptable. You can easily swap peanut butter for cashew butter or almond butter, and replace peanuts with chopped almonds, cashews, or walnuts. It’s designed to cater to your preferences.
- **Perfect for any occasion**: Whether it’s a birthday celebration, a summer barbecue, a holiday gathering, or just a casual weeknight treat, this Snickers Ice Cream Cake is guaranteed to impress. Its elegant appearance and unforgettable taste make it a go-to dessert for any event.
Watch How to Make This Snickers Ice Cream Cake!
Essential Ingredients for Your Healthy Snickers Ice Cream Cake
For detailed measurements and step-by-step instructions, please refer to the comprehensive recipe card located further down below!
For the Chewy Base:
- Oats: I typically opt for quick oats as they blend seamlessly into a dough-like consistency, creating a smoother base. However, traditional rolled oats will also work beautifully, offering a slightly heartier texture. For those with oat sensitivities or who prefer to omit them, you can substitute with an equal amount of ground nuts, such as almonds or pecans, to maintain the structure and richness. Ensure certified gluten-free oats are used if required.
- Almond Flour: This adds a delicate texture and helps bind the base ingredients. If you don’t have almond flour on hand, you can experiment with using additional oats (ensure they are finely processed) or other finely ground nuts. If your mixture becomes too dense or dry, simply add a tablespoon of water at a time until a workable dough forms that holds together when pressed.
- Medjool Dates: These natural powerhouses provide the primary sweetness and the signature sticky, chewy, nougat-like texture for our base. For optimal blending and a super-smooth dough, if your dates aren’t exceptionally soft, I highly recommend soaking them in hot water for about 15 minutes before draining thoroughly and using them. This simple step makes all the difference!
- Maple Syrup: Just a touch of pure maple syrup is included to enhance the overall flavor profile and add a subtle extra layer of natural sweetness to the base, perfectly complementing the dates.
- Vanilla Extract & Sea Salt: These pantry staples are crucial for rounding out the flavors. Vanilla adds warmth and depth, while a good pinch of sea salt balances the sweetness and brings out the nutty notes.
For the Creamy Homemade Dairy-Free Ice Cream:
- Raw Cashews: Soaked cashews are the secret ingredient for the incredibly creamy, thick, and luscious texture of our ice cream layer. They magically transform into a rich, dairy-free base that rivals traditional ice cream. If you have a cashew allergy or prefer a shortcut, you can entirely skip making this layer from scratch and use your favorite store-bought dairy-free ice cream instead. Just allow it to thaw slightly for easier spreading over the base.
- Full-Fat Canned Coconut Milk: For this recipe, we will specifically be using the thick, creamy part that rises to the top of a chilled can of full-fat coconut milk (often referred to as coconut cream), along with a small amount of the liquid from the can. Chilling the can overnight helps the cream separate and solidify.
- Lemon Juice: Don’t be alarmed by the inclusion of lemon juice! We use just a tiny amount to introduce a subtle tang that helps to brighten and balance the overall sweetness and richness of the ice cream. I promise it won’t taste like lemon; its role is purely for flavor balance.
- Maple Syrup or Honey: A touch of natural sweetener is added to ensure our ice cream layer is perfectly sweet. Maple syrup keeps it vegan, but honey can also be used if preferred.
- Refined Coconut Oil: This ingredient is essential for several reasons. It helps the ice cream layer firm up beautifully in the freezer, ensuring it holds its shape when sliced. It also contributes to the remarkably creamy and smooth consistency, preventing it from becoming too icy. *For a neutral taste, always opt for refined coconut oil, as unrefined (virgin) coconut oil can impart a strong coconut flavor.*
- Baking Staples: Vanilla Extract & Sea Salt: As with the base, vanilla extract adds a lovely aromatic depth, and a dash of sea salt enhances all the flavors, making the ice cream truly shine.
For the Irresistible Peanut Butter Caramel:
- Peanut Butter: The star of this caramel! For the best, smoothest caramel consistency, it’s crucial to use a creamy, runny-style natural peanut butter. If your peanut butter is too thick or stiff, it won’t emulsify as well and might result in a less smooth caramel. If you have a peanut allergy, feel completely free to substitute with a creamy cashew butter or almond butter for equally delicious results.
- Maple Syrup: This is our natural sweetener for the caramel. While honey could also be used, I personally adore the rich, earthy flavor that maple syrup imparts to the caramel, making it truly special.
- Vanilla Extract & Sea Salt: These elevate the caramel’s flavor, adding complexity and balancing the sweetness. The sea salt is particularly important here, enhancing the “Snickers” experience.
- Refined Coconut Oil: Much like in the ice cream layer, coconut oil plays a vital role in the caramel. It helps to firm up the caramel layer once chilled, preventing it from oozing out of the cake when sliced and ensuring clean, beautiful layers. Again, use refined coconut oil to avoid any strong coconut taste.
- Chopped Peanuts: These are essential for that signature Snickers crunch and nutty flavor, sprinkled generously over the caramel.
For the Perfect Chocolate Coating:
- Chocolate Chips or Chopped Chocolate: Choose your favorite high-quality chocolate! I’m a big fan of Hu Kitchen chocolate; they offer fantastic dairy-free and no-sugar-added options, as well as vegan chocolate bars that are perfect for this recipe. You can use my code “danishealthyeats” for a discount on any order. Look for dark chocolate that is at least 70% cacao for a richer flavor, or a vegan “milk” chocolate for a sweeter profile.
- Refined Coconut Oil: This is an optional but highly recommended ingredient. If your chosen chocolate melts to a very thin, pourable consistency on its own, you might not need it. However, most chocolates, once melted, tend to be quite thick and difficult to spread evenly over a cold cake. Adding a tablespoon of coconut oil helps to thin out the melted chocolate, creating a smooth, glossy, and easily spreadable coating that snaps beautifully when chilled.
How to Master This Healthy Snickers Ice Cream Cake
Essential Equipment:
- High-Powered Blender: A high-quality blender, such as a Vitamix, is highly recommended for achieving the incredibly smooth and creamy consistency needed for the cashew-based ice cream filling. It’s truly a worthwhile investment for many healthy recipes!
- Food Processor: This is indispensable for quickly and efficiently blending the base ingredients into a uniform dough. The model I’ve used for years consistently delivers excellent results.
- Loaf Tin or Springform Pan: The choice of pan dictates the final shape of your cake. A standard loaf pan is perfect for creating that classic Snickers bar shape. Alternatively, a round springform pan will yield a beautiful, traditional round cake, ideal for slicing into wedges. You can also get creative and use a silicone muffin tin to craft adorable individual mini ice cream cakes!
- Parchment Paper: Crucial for lining your pan, making it easy to remove the frozen cake without any sticking.
Step-by-Step Instructions:
- 1. Craft the Perfect Base: Begin by combining all your base ingredients – oats, almond flour, Medjool dates, maple syrup, vanilla extract, and sea salt – in your food processor. Process for several minutes until a cohesive, slightly sticky dough forms. The texture should not be overly wet or crumbly; it should hold together firmly when pressed between your fingers. If it appears too dry, add a tablespoon of water at a time until the desired consistency is achieved. Firmly press this dough evenly into the bottom of your chosen pan (loaf tin, springform pan, or muffin tin) lined with parchment paper. This layer forms the essential foundation of your cake.
- 2. Prepare the Creamy Filling: In your high-powered blender, combine all the ice cream filling ingredients: pre-soaked cashews, coconut cream, maple syrup (or honey), lemon juice, melted refined coconut oil, vanilla extract, and a pinch of sea salt. Blend thoroughly for several minutes until the mixture is exceptionally smooth and velvety, with no visible cashew pieces. Taste and adjust sweetness if desired. If the mixture is too thick, a splash of liquid from the coconut milk can help. Carefully pour this luscious filling over the prepared base in the pan, spreading it out evenly with a spatula to create a smooth layer.
- 3. Layer on the Peanut Butter Caramel: In a separate bowl, whisk together the peanut butter caramel ingredients: creamy peanut butter, maple syrup, melted refined coconut oil, vanilla extract, and a good pinch of sea salt. Mix until the caramel is completely smooth and uniform in texture. Gently pour this irresistible caramel layer over the cashew ice cream filling, carefully spreading it out to cover the surface. Immediately sprinkle your chopped peanuts generously over the caramel layer, pressing them lightly to ensure they adhere.
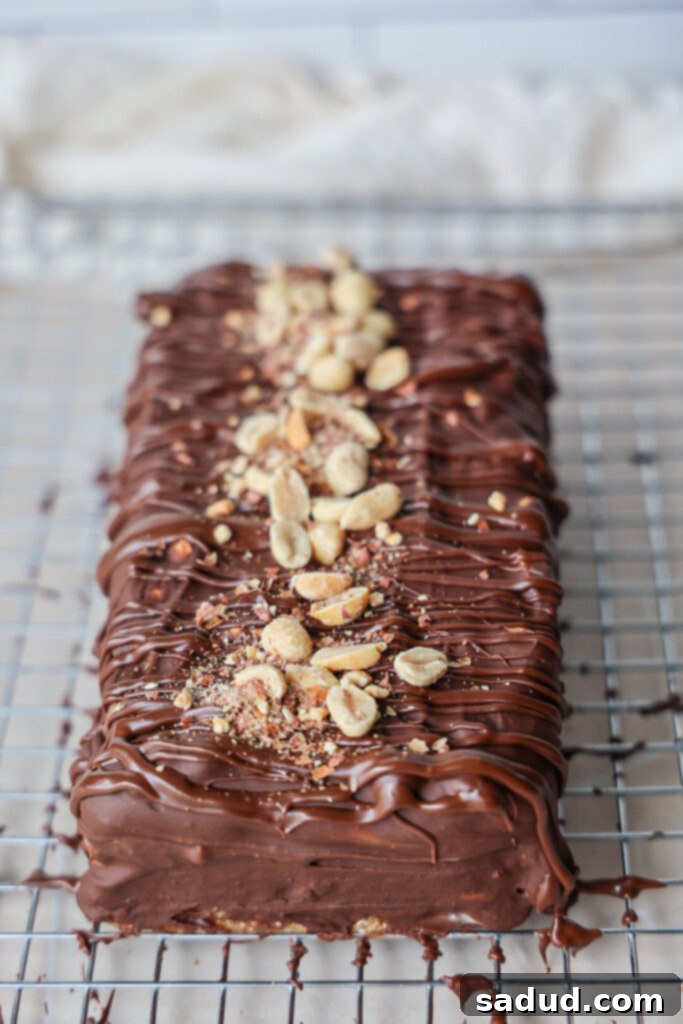
- 4. Freeze and Finish with Chocolate: Place the entire pan into the freezer for a minimum of 2-3 hours, or until all layers are completely firm and frozen solid. Once firm, carefully remove the cake from the pan by lifting it with the parchment paper. In a small, microwave-safe bowl or over a double boiler, melt your chocolate chips or chopped chocolate with the tablespoon of coconut oil (if using) until smooth and glossy. For easier coating and to catch any drips, I recommend placing your frozen cake on a wire cooling rack positioned over a plate or baking sheet. Using a spatula, evenly spread the melted chocolate over the top and sides of the cake, ensuring all layers are beautifully covered. Return the cake to the freezer for another 30 minutes to allow the chocolate coating to firm up and set completely.
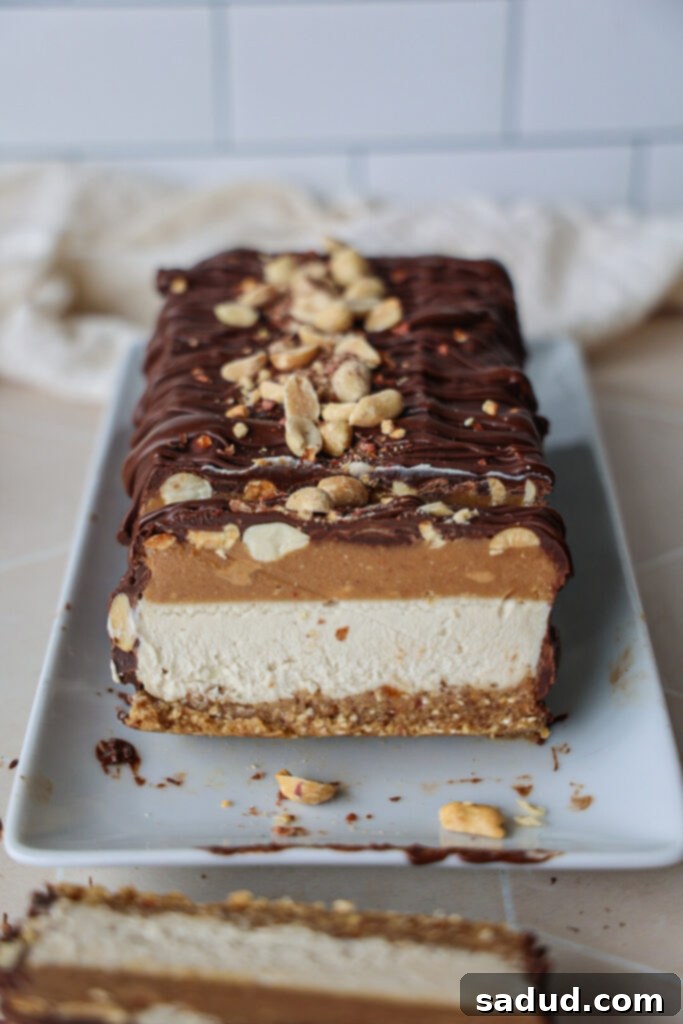
- 5. Slice and Savor: Once the chocolate shell is firm, remove the cake from the freezer. For perfectly clean slices, run a sharp knife under very hot water for a minute before each cut. This will help the knife glide through the frozen layers and chocolate coating. Slice into your desired portions and serve immediately. Enjoy every glorious bite of your homemade, healthy Snickers Ice Cream Cake!
Frequently Asked Questions, Expert Tips, & Smart Tricks
- Do I really need to soak the cashews before blending? Yes, absolutely! I highly recommend soaking your raw cashews, especially if you don’t own a high-powered blender. Soaking softens them significantly, ensuring an incredibly smooth, lump-free, and creamy ice cream consistency. The quickest method is to bring a small pot of water to a boil, add the cashews, turn off the heat, and let them soak for 10-15 minutes. Drain thoroughly before using. For optimal results, you can even soak them overnight in cold water.
- What’s the best way to store leftover ice cream cake? To maintain its freshness and delightful texture, store any leftover slices of this Snickers Ice Cream Cake in an airtight container in the freezer. It will remain delicious for up to one month. When you’re ready to enjoy a slice, simply remove it from the freezer and allow it to thaw at room temperature for 10-15 minutes. This brief thawing period will bring it back to that perfectly creamy, scoopable ice cream consistency.
- Can I use store-bought dairy-free ice cream for the filling? Absolutely! This is a fantastic shortcut if you’re short on time or prefer not to make the cashew ice cream from scratch. Simply let your favorite store-bought dairy-free ice cream soften slightly (thaw for about 15-20 minutes at room temperature) so it’s easily spreadable. Spread it evenly over the prepared base, then proceed directly to the peanut butter caramel layer.
- Can I make this cake ahead of time for an event? Yes, this cake is an ideal make-ahead dessert! Once the entire cake is assembled and fully set with the chocolate coating, cover it tightly with plastic wrap and store it whole in the freezer. It can be made several days or even a week in advance. When you’re ready to serve, transfer the cake from the freezer to the refrigerator about 20-30 minutes before slicing to allow it to soften just enough for perfect cutting and enjoyment.
- What if someone has a peanut allergy? This recipe is wonderfully adaptable for nut allergies! You can easily swap the peanut butter in both the base and caramel layers for an equal amount of almond butter or cashew butter. For the crunchy element, instead of chopped peanuts, use chopped walnuts, cashews, or almonds sprinkled over the caramel layer.
- How do I achieve perfectly clean slices? The key to neat, clean slices is heat! Before each cut, run your sharp knife under very hot water for about a minute. Dry it quickly, then make your slice. The warm knife will effortlessly glide through the frozen layers and chocolate shell, preventing cracking and smudging. Repeat this process for every slice.
- Any tips for creating a perfect rectangle shape (for the Snickers bar look)? If you’re using a loaf pan and aiming for a super polished, bar-like appearance, here’s a pro tip: once the cake is fully set and firm, but *before* you pour the chocolate coating, you can very carefully trim a tiny sliver off each long side and the ends of the cake. This will create perfectly straight, clean edges, enhancing that classic candy bar aesthetic. Then proceed with the chocolate coating.
More Healthy & Delicious Dessert Recipes to Try
If you loved this healthy Snickers Ice Cream Cake, you’re in for a treat! Explore more of our delectable and wholesome dessert creations:
- Healthy Cookie Dough Ice Cream/Frozen Yogurt – A guilt-free indulgence for cookie dough lovers.
- Irresistible Chocolate Covered Yogurt Clusters – Simple, refreshing, and satisfying.
- Creamy Vegan Cherry Pie Ice Cream – A summery delight without the dairy.
- Easy & Refreshing Frozen Yogurt Bites – Quick snacks perfect for cooling down.
- Homemade Healthy Dilly Bars – A nostalgic treat made healthier.
- 2-Ingredient Zesty Orange Sorbet – Surprisingly simple and vibrant.
- The Best Easy Vegan Frozen Yogurt – A versatile base for endless flavors.
If you give this incredible recipe a try, it would truly mean the world to me if you left a rating below and tagged your delicious creations @danishealthyeats on Instagram! Happy creating! x
Healthy Snickers Ice Cream Cake (Vegan & No-Bake)
Pin Recipe
Ingredients
For the Chewy Base
- 1 cup almond flour *can probably sub more nuts or oats
- 1/2 cup raw or salted peanuts
- 1 1/4 cups Quick oats *ensure certified GF if needed, or sub with ground nuts
- 3/4 cup Medjool dates *pitted, soak in hot water if not soft
- 2 tbsp maple syrup
- 1 tsp vanilla extract & good pinch of sea salt
For the Creamy Ice Cream Filling
- 2 cups raw cashews *soaked in hot water for 15-20 minutes, then drained
- 1/2 cup coconut cream from the top of a can of full-fat coconut milk *chilled overnight. If you can’t get 1/2 cup cream, fill the rest with liquid from the can.
- 1/2 cup maple syrup *or honey, if not strictly vegan
- 1 1/2 tbsp lemon juice *balances sweetness, won’t taste lemony
- 1/4 cup refined coconut oil, melted *use refined for no coconut taste
- 2 tsp vanilla extract & hefty pinch of sea salt
For the Peanut Butter Caramel
- 3/4 cup creamy peanut butter *runny style for best results; can sub cashew or almond butter
- 1/4 cup maple syrup
- 3 tbsp refined coconut oil, melted
- 1 tsp vanilla extract & good pinch of sea salt
- 3/4 – 1 cup raw or salted peanuts *chopped, to sprinkle over top of the caramel
For the Chocolate Topping
- 1 3/4 cups dairy-free chocolate chips or chopped chocolate bars
- 1 tbsp refined coconut oil *optional, helps thin chocolate for easier spreading
Instructions
-
1. Prepare the Base: In a food processor, combine all of the base ingredients (oats, almond flour, Medjool dates, maple syrup, vanilla, sea salt). Process for a few minutes until a sticky, uniform dough forms. It should hold together well when pressed and not be overly wet. If it’s too dry, add water 1 tbsp at a time.
-
2. Press the Base: Firmly press the prepared base dough into the bottom of your chosen pan (a parchment-lined loaf pan for a Snickers bar shape, a springform pan for a round cake, or a mini muffin tin for individual treats). Ensure an even layer.
-
3. Create the Ice Cream Filling: In a high-powered blender, add all of the ice cream filling ingredients (soaked cashews, coconut cream, maple syrup, lemon juice, melted refined coconut oil, vanilla, sea salt). Blend until completely smooth and creamy – this may take a few minutes. Scrape the solid coconut cream from the top of your chilled can. Taste and adjust sweetness as desired. If the mixture is too thick, add a splash of the liquid from the coconut milk can. Pour this smooth filling evenly over the base in the pan.
-
4. Layer the Peanut Butter Caramel: In a bowl, combine the caramel ingredients (peanut butter, maple syrup, melted refined coconut oil, vanilla, sea salt). Mix thoroughly until the caramel is completely smooth. Gently pour this luscious caramel over the ice cream filling layer, carefully spreading it out with a spatula. Immediately sprinkle the chopped peanuts evenly over the caramel.
-
5. Freeze & Add Chocolate Coating: Place the pan into the freezer for 2-3 hours, or until the cake is completely firm. Once firm, carefully remove the cake from the pan (it should lift easily with the parchment paper). In a small bowl, melt the chocolate chips (or chopped chocolate) with the optional coconut oil until smooth. For easy coating, place the frozen cake on a cooling rack positioned over a plate or baking sheet to catch any drips. Use a spatula to spread the melted chocolate evenly over the entire cake. Return it to the freezer for an additional 30 minutes to allow the chocolate coating to firm up completely.
-
6. Slice and Enjoy: For perfectly clean slices, run a sharp knife under hot water before each cut. Slice the cake into your desired portions and serve immediately. Enjoy your incredible healthy Snickers Ice Cream Cake!
Notes
Do you have to soak the cashews prior to blending? Yes, it is highly recommended to soak the cashews. This step is crucial for achieving an ultra-smooth and creamy ice cream texture, especially if you don’t have a high-powered blender. The quickest way to do this is to bring a small pot of water with the cashews to a boil. Once boiling, turn the heat off and let the cashews soak for 10-15 minutes. Drain them thoroughly before adding to the blender.
How to store leftover ice cream cake: Store any leftover cake in an air-tight container in the freezer. When ready to eat, allow individual slices to thaw at room temperature for 10-15 minutes to reach a creamy ice cream consistency. This cake will last well in the freezer for up to one month.
