Indulge Guilt-Free: Healthy Homemade Pumpkin Marshmallows (Refined Sugar-Free & Paleo)
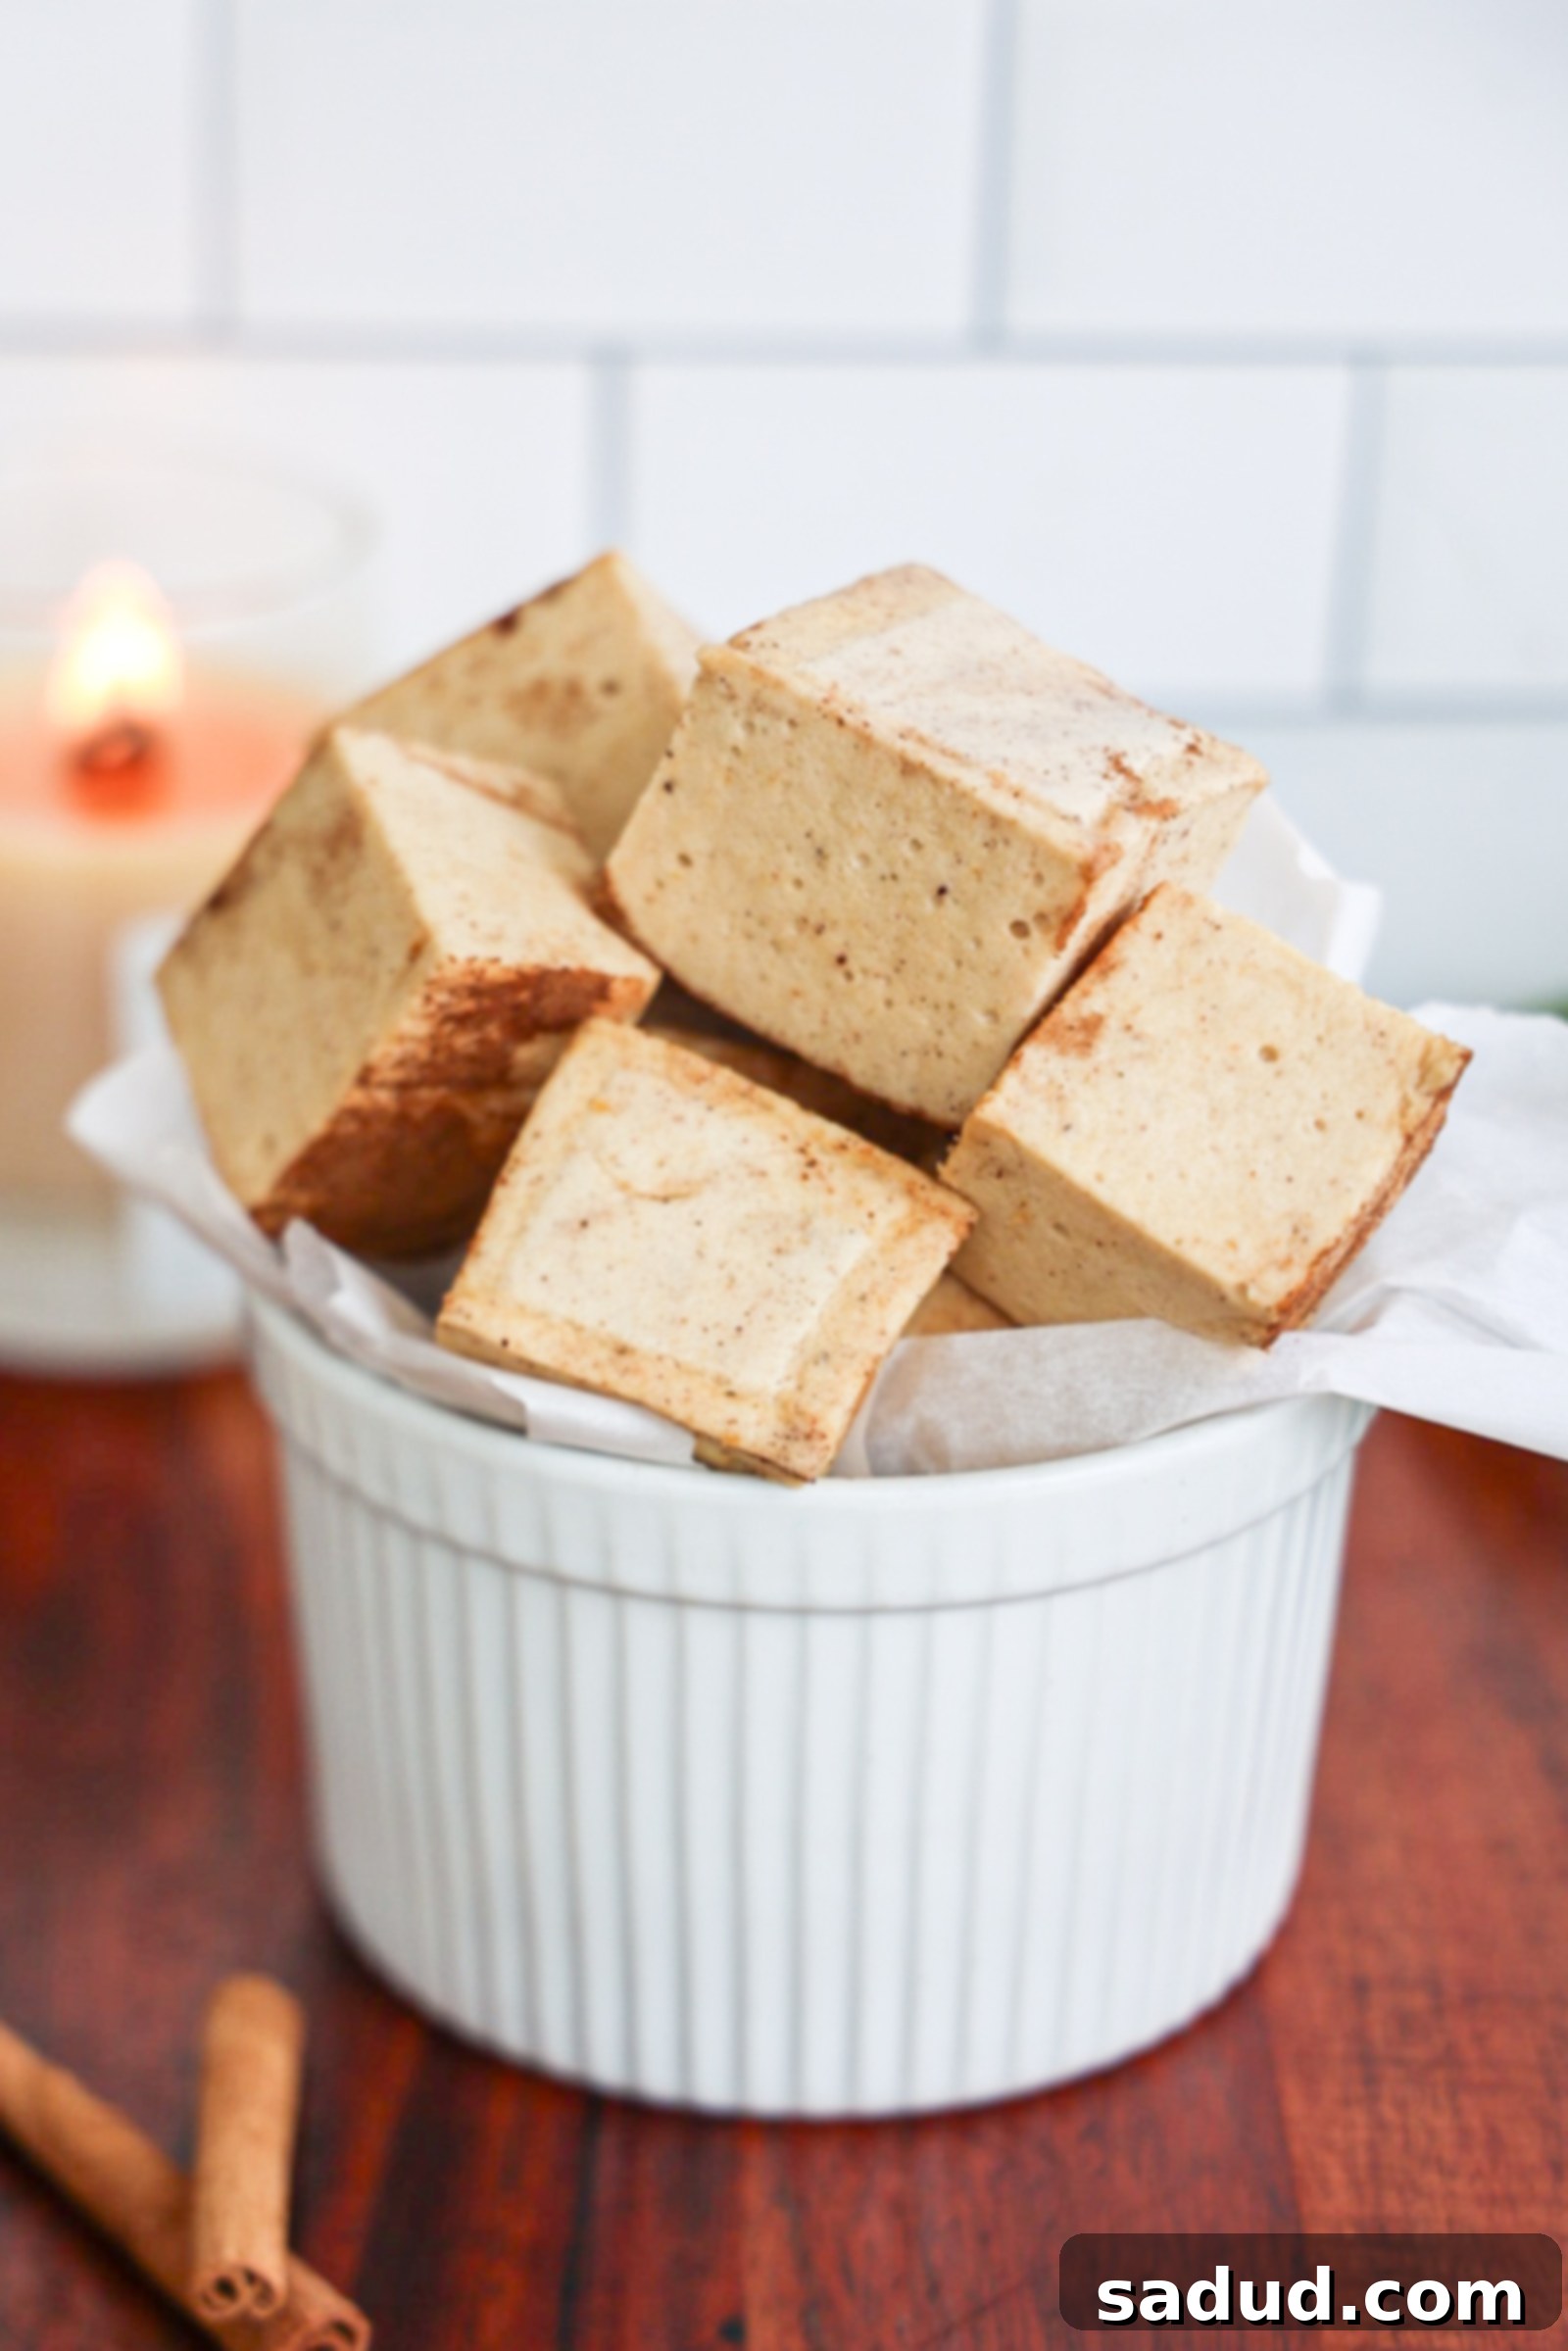
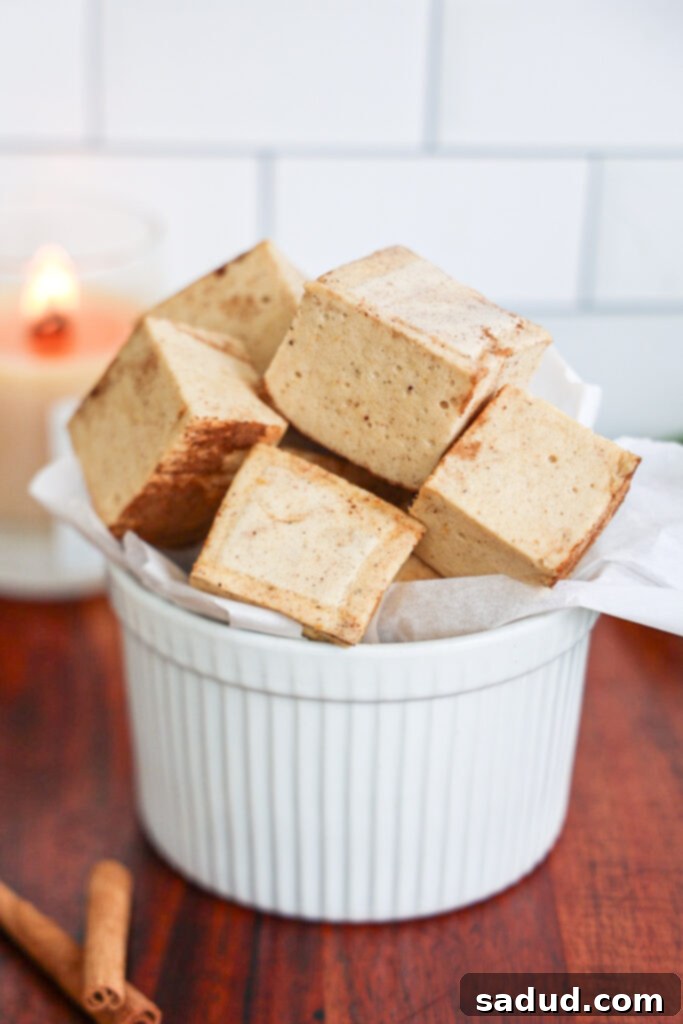
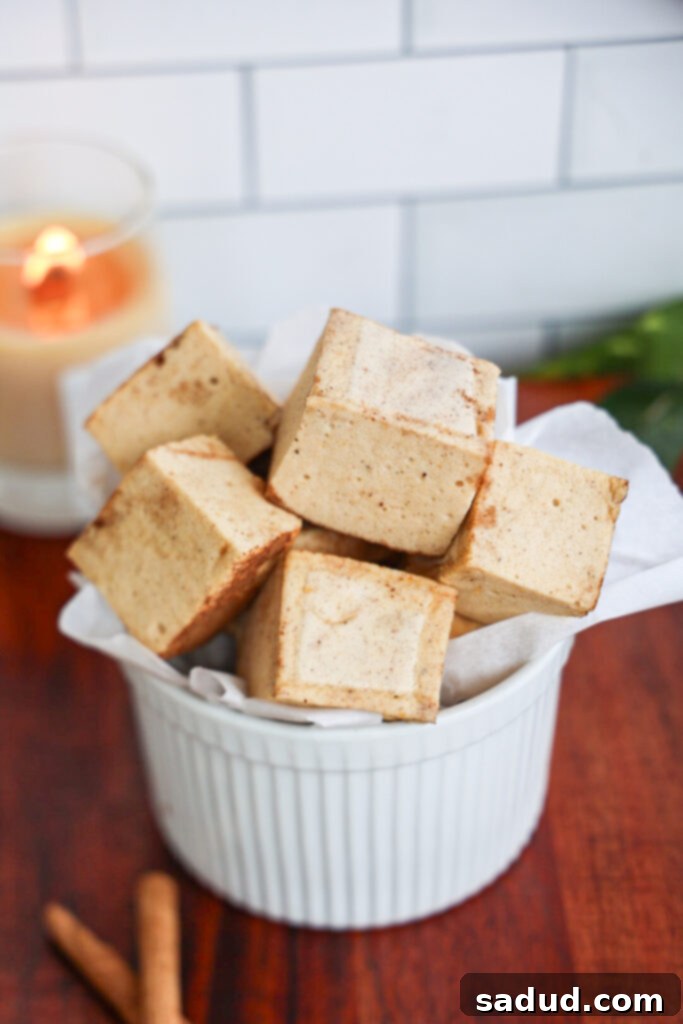
Prepare to fall in love with these unbelievably fluffy, pillowy healthy homemade Pumpkin Marshmallows! Imagine biting into little clouds of heaven, crafted meticulously without corn syrup and naturally sweetened with wholesome maple syrup or honey. These delightful treats are the perfect addition to your favorite warm fall beverage, elevating a simple mug of hot cocoa or chai into an extraordinary experience. And yes, they’re so good, you’ll find yourself snacking on them straight up! The best part? You’ll seriously have a hard time believing these are refined sugar-free, paleo, and made with all-natural ingredients. This comprehensive guide will arm you with tons of practical tips on how to make homemade marshmallows, including crucial advice on preparing them with or without a candy or sugar thermometer!
Embrace the Flavors of Fall with Homemade Pumpkin Marshmallows
Hello there! If you’re new to my little corner of the internet (first of all, Hi! So happy to have you here), I’m Dani, and I confess: I have an undeniable obsession with making homemade marshmallows. Many people mistakenly believe that crafting marshmallows from scratch is a difficult or time-consuming endeavor, but I’m here to tell you that they couldn’t be easier and are genuinely so much fun to create! Having already shared a few delightful marshmallow flavors on my blog, I embarked on a mission to develop a signature fall version – one that would perfectly complement your coziest autumnal drinks or serve as a delectable snack all on its own. (No judgment here; we all do it! 😉)
The truth is, the texture of homemade marshmallows far surpasses anything you’ll find in a store. These Pumpkin Marshmallows are a testament to that; they are bursting with authentic pumpkin spice flavor, wonderfully fluffy, delightfully pillowy, and boast a perfectly balanced sweetness. They are truly an ideal companion to your favorite hot chocolate, a spicy chai latte, a calming matcha, or any warm beverage that calls for a touch of sweetness and comfort. But their versatility doesn’t stop there! They are equally fantastic for snacking on as-is, lightly dipped in melted white chocolate for an extra treat, or even incorporated into your cherished holiday desserts. The possibilities for enjoying these fall-inspired delights are truly endless!
If you’re eager to explore more exciting flavors, be sure to try my strawberry marshmallows, matcha marshmallows, or snickerdoodle marshmallows for year-round marshmallow bliss!
Homemade Pumpkin Marshmallow Recipe Video Guide
Why You’ll Adore These Healthy Pumpkin Marshmallows
These aren’t just any marshmallows; they are a delightful blend of indulgence and wellness. Here’s why they’re bound to become your new favorite fall treat:
- Gut-Healthy Goodness: Unlike conventional marshmallows loaded with artificial ingredients, these are made with high-quality grass-fed gelatin. This isn’t just any gelatin; it’s a fantastic source of collagen, known for supporting a healthy gut lining, aiding digestion, and contributing to the strength and luster of your hair, skin, and nails. Enjoy a sweet treat that truly benefits your body!
- Naturally Sweetened & Dietary Friendly: Say goodbye to refined sugars! Our pumpkin marshmallows are sweetened exclusively with natural alternatives like maple syrup or honey, making them refined sugar-free and perfectly suitable for a paleo lifestyle. They offer a pure, wholesome sweetness without the guilt.
- Perfect for Fall & Holiday Celebrations: The warm, inviting flavors of pumpkin and spice make these marshmallows an essential part of your autumn and holiday festivities. They’re ideal for Halloween parties, Thanksgiving desserts, or cozy Christmas gatherings.
- Melt Just Like Store-Bought: Don’t compromise on functionality! These homemade marshmallows melt beautifully, making them perfect for s’mores, hot beverages, or any recipe where a gooey, melted marshmallow is desired.
- Thoughtful DIY Gift Idea: Packaged in cute treat boxes or cellophane bags, these homemade pumpkin marshmallows make incredibly thoughtful and unique DIY gifts for birthdays, holidays, or as charming party favors. Share the love (and the healthy deliciousness)!
- Versatile Pairing Partner: Beyond hot chocolate, these marshmallows are divine in matcha lattes (the subtle earthiness of matcha pairs surprisingly well with pumpkin!), or dipped into a rich white or dark chocolate.
- Elevate Your S’mores Game: Take your s’mores to an entirely new level with the seasonal twist of pumpkin spice. The fluffy texture and unique flavor create an unforgettable campfire treat.
- A Lower Sugar Indulgence: Compared to their traditional counterparts, these marshmallows offer a significantly lower sugar option without sacrificing any of the sweet enjoyment. It’s a win-win for your taste buds and your health goals.
Crafting Your Own Pumpkin Spice Marshmallows
Making homemade marshmallows might seem intimidating, but with the right guidance, it’s a straightforward and rewarding process. Below, we’ll walk through the essential equipment and ingredients, followed by step-by-step instructions. You’ll find the full recipe and precise measurements in the recipe card at the bottom of this post!
Essential Equipment
Having the right tools can make all the difference in achieving perfect, fluffy marshmallows:
- Stand Mixer or Hand Mixer: For the best and easiest results, a stand mixer is highly recommended. Its consistent, powerful whipping action is ideal for achieving the desired fluffy texture. My KitchenAid stand mixer is a workhorse, but a more affordable option will also work wonderfully. If you only have a hand-held electric mixer, that will work too, though it might take a bit more patience and muscle.
- Spatula: Essential for scraping down the bowl and transferring the sticky marshmallow mixture into the pan.
- Square Baking Dish: A 9×9 inch pan is perfect for creating thicker, substantial marshmallows. If you prefer smaller, mini marshmallows, a larger rectangle pan will allow you to spread the mixture thinner for easy cutting.
- Small Saucepan: For boiling your sugar syrup mixture. Choose one with a heavy bottom to ensure even heating.
- Candy Thermometer (Optional but Recommended): While not strictly necessary (I’ve made them plenty of times without one!), a candy thermometer takes the guesswork out of the syrup boiling process. You’ll want the sugar mixture to reach at least 220°F (104°C) for optimal results. Don’t worry if you don’t have one; I’ll provide clear notes in the recipe card on how to achieve the right consistency by timing.
Key Ingredients & Thoughtful Substitutions
Each ingredient plays a vital role in the flavor and texture of these healthy treats:
- Grass-Fed Gelatin: This is the star ingredient for both structure and health benefits. It’s crucial to understand that not all gelatin is created equal. To truly reap the gut-healthy and beauty-boosting benefits (think improved digestion, stronger hair, skin, and nails), always opt for a high-quality, grass-fed gelatin. I personally love Further Foods due to its pasture-raised, grass-fed, non-GMO, and gluten-free credentials. It’s an easy way to elevate your snack from delicious to nutritious!
- Sweetener: We use either honey or maple syrup to naturally sweeten these marshmallows. Both provide a rich, complex sweetness without the need for refined sugars. Maple syrup will lend a slightly deeper, more robust fall flavor, while honey offers a delicate, floral note. Choose your favorite or use a combination!
- Pumpkin Pie Spice: This essential spice blend brings all the cozy fall vibes. It typically includes cinnamon, nutmeg, ginger, and cloves, all contributing to that quintessential pumpkin pie aroma and taste. Feel free to adjust the amount to your preference for a bolder or subtler spice profile.
- Pumpkin Puree: Just 2 tablespoons per batch gives these marshmallows their beautiful color and subtle pumpkin flavor. It’s vital to use canned pumpkin puree, NOT pumpkin pie filling, which contains added sugars and spices. Pumpkin is an amazing source of beta-carotene (a powerful antioxidant), fiber for digestive health, and potassium. Don’t let leftover puree go to waste – save it for future batches, or freeze it into cubes to easily add to smoothies like my pumpkin pie protein shakes!
- Baking Staples:
- Vanilla Extract: Enhances all the other flavors, adding a warm, aromatic depth.
- Sea Salt: A pinch of salt perfectly balances the sweetness and brings out the pumpkin spice flavors.
- Cinnamon: While already in pumpkin pie spice, an extra dash of cinnamon can amplify the warm, comforting notes.
Step-by-Step Guide to Making Homemade Pumpkin Marshmallows
Follow these detailed steps to create your own batch of delightful pumpkin marshmallows. Remember, full, precise instructions are included in the recipe card below, but here’s an easy-to-follow overview:
- Step 1: Prepare Your Pan & Bloom Gelatin. First, line a 9×9 inch baking pan with parchment paper, ensuring it overhangs the sides for easy removal later. Lightly spray the parchment paper with a neutral spray oil, then generously sprinkle tapioca flour (or cornstarch if not strictly paleo) all over it. This critical step prevents the marshmallows from sticking, so don’t skip it! For an extra touch of flavor, you can also sprinkle a little pumpkin pie spice on the parchment. In the bowl of your stand mixer (or a large mixing bowl if using a hand mixer), combine 1/2 cup of water and the grass-fed gelatin. Give it a quick mix to combine, then let it sit and “bloom” while you prepare the syrup. This allows the gelatin to fully dissolve and become active.
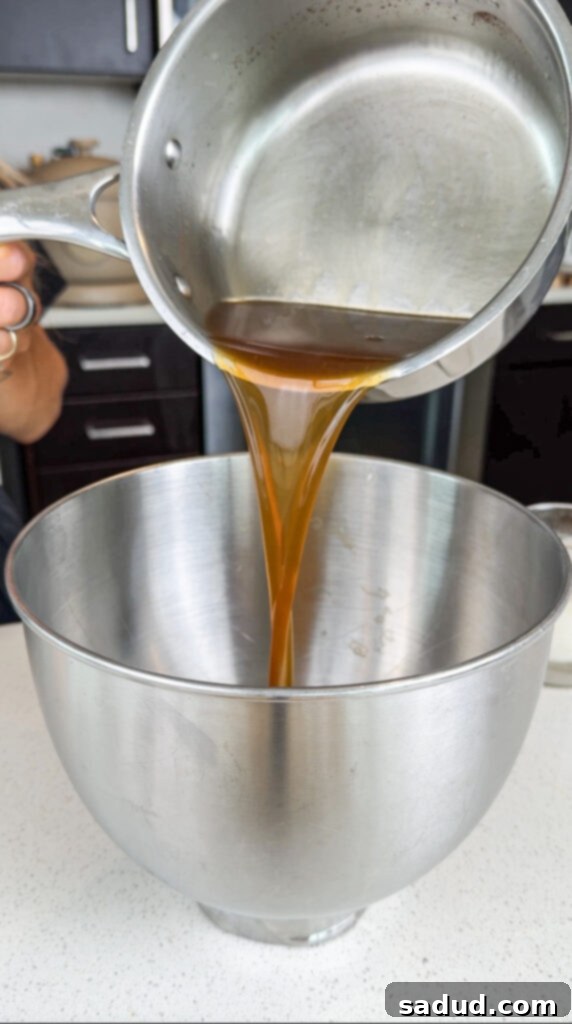
- Step 2: Prepare the Sweet Syrup. In a small, heavy-bottomed saucepan, combine the remaining water with your choice of honey or maple syrup. Bring this mixture to a rolling boil over medium-high heat. Let it continue to boil vigorously for approximately 10 minutes. If you are using a candy thermometer, aim for the syrup to reach between 220-240°F (104-116°C). For those without a thermometer, don’t fret! A consistent boil for 10 minutes at high heat is typically sufficient to reach the correct temperature and consistency, ensuring your marshmallows set properly. You’ll notice the syrup might thicken slightly and the bubbles will become smaller and more uniform.
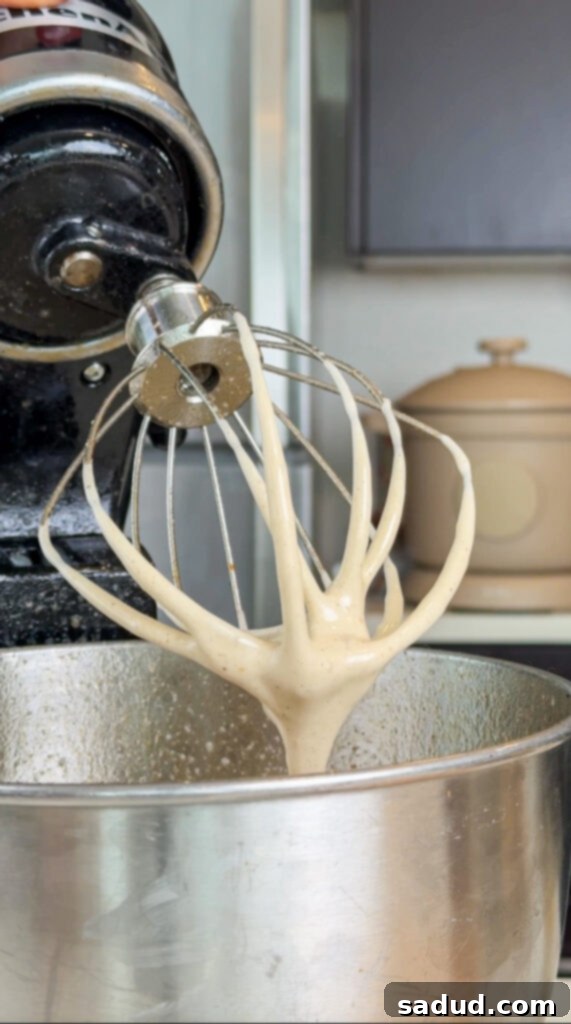
- Step 3: Whip Up the Magic! Carefully remove the hot syrup from the heat. With your stand mixer running on low speed (or using a hand mixer), add in the pumpkin puree, pumpkin pie spice, and vanilla extract to the bloomed gelatin mixture. Then, slowly and carefully drizzle the hot syrup mixture into the bowl in a steady stream. Once all the syrup is added, increase the mixer speed to high. Allow the mixture to whip continuously until it triples in size, becoming incredibly light, fluffy, and opaque. This usually takes about 3-5 minutes with a stand mixer. The ideal consistency is still somewhat drippy but thick enough to coat the whisk when lifted from the bowl. Be careful not to over-beat, or the mixture can thicken too much and develop an undesirable, lumpy texture – what some affectionately call marshmallow “brains” (Lol!).
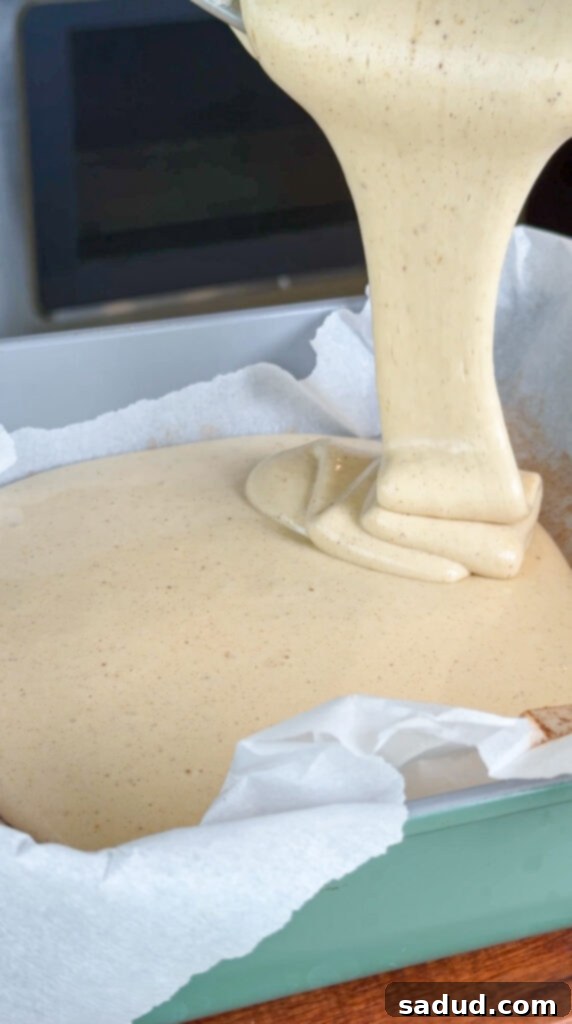
- Step 4: Pour & Smooth. As soon as the mixture reaches the perfect consistency, immediately use a rubber spatula to pour the marshmallow mixture into your prepared pan. It will be very sticky! You can use the spatula to gently press and smooth the top, but I’ve found that wetting my hands with a little water makes it even easier to gently spread and level the mixture without it sticking to everything.
- Step 5: Set & Cut. Once the mixture is in the pan, cover it lightly (you can use another piece of parchment paper or plastic wrap) and let it sit at room temperature for 30-60 minutes, or until it feels firm and springy to the touch. For a quicker set, you can place it in the fridge for about an hour. Once firm, it’s time to cut! I highly recommend using clean kitchen scissors for this step, as they glide through the sticky marshmallows much more easily than a knife. Store them in an airtight container at room temperature once cut.
-

The marshmallow mixture whipping up in the stand mixer. -

Pouring the fluffy marshmallow mixture into the prepared pan. -

Perfectly cut homemade pumpkin marshmallows.
Creative Serving Suggestions for Your Pumpkin Marshmallows
These versatile pumpkin marshmallows can be enjoyed in so many delicious ways beyond just snacking!
- Elevated S’mores: Take your classic s’mores experience up a notch! Pair these pumpkin marshmallows with graham crackers and chocolate, or get creative by using a peanut butter cup instead of a plain chocolate bar for an extra indulgent treat.
- Warm Beverage Bliss: Drop a few into your favorite cozy drink. They are absolutely divine floating atop a mug of hot cocoa, adding a delightful pumpkin spice twist to chai lattes, or even a warm, frothy matcha.
- Chocolate-Dipped Delights: Melt some dark, milk, or white chocolate and dip your marshmallows. For an extra special touch, sprinkle with a dash of sea salt, chopped nuts, or more pumpkin pie spice before the chocolate sets. Store these in the freezer for a wonderfully cool and sweet treat.
- Charming DIY Gifts: Package your homemade marshmallows in pretty treat boxes, clear cellophane bags, or mason jars tied with a festive ribbon. They make incredibly thoughtful and personalized DIY birthday or Christmas gifts, or even unique party favors that your guests will adore.
- Sweet Marshmallow Pops: Carefully insert lollipop or cake-pop sticks into the firm marshmallows before serving. You can then decorate them with sprinkles, chocolate drizzles, or edible glitter for a fun and festive dessert on a stick!
- Baked Goods Booster: Get creative in the kitchen! Toss chopped pumpkin marshmallows into your favorite chocolate chip cookie dough before baking for a chewy, pumpkin-infused surprise. You can also make “S’mores cookies” by pressing them onto cookies during the last few minutes of baking.
- Dessert Topping: Use them as a topping for hot fudge sundaes, fruit crisps, or even a healthier yogurt parfait for a little seasonal flair.
Expert Tips, Tricks, & Frequently Asked Questions (FAQs)
Here are some additional insights to help you perfect your pumpkin marshmallow making process and answer common questions:
- Tips for Effortless Marshmallow Cutting: I’ve found that the absolute easiest way to cut the firm marshmallow slab into individual pieces is by using clean kitchen scissors. Simply oil the blades slightly, and they will glide through the sticky mixture much better than a knife, which can often drag and tear. If using a knife, oil it frequently.
- How to Make Marshmallows Without a Candy Thermometer: While a thermometer provides precision, you can definitely make these without one! The key is to boil the sugar mixture vigorously for at least 10 minutes over medium-high heat. During this time, the syrup will thicken, and the bubbles will become smaller and more consistent, indicating it has reached the appropriate temperature (around 220-240°F). Trust your timing and visual cues!
- Can You Make Marshmallows Vegan? Yes, you can! To make vegan marshmallows, you would typically substitute the gelatin with agar-agar powder, a plant-based gelling agent. The quantities and process might differ slightly. Here is a fantastic vegan marshmallow recipe that uses agar-agar!
- Can You Roast Paleo Marshmallows? Absolutely! These healthy pumpkin marshmallows will roast beautifully, just like traditional store-bought marshmallows. Their natural ingredients hold up well to heat, achieving that delightfully toasted, gooey exterior and warm, soft interior. Perfect for s’mores around a campfire!
- Troubleshooting Sticky Marshmallows: If your marshmallows feel too sticky, it usually means you need more tapioca flour (or cornstarch) coating. You can lightly dust them again after cutting, or even store them between layers of parchment paper dusted with flour. Humidity can also contribute to stickiness, so ensure they are stored in an airtight container.
- Why did my marshmallows not get fluffy or set properly? This is often due to the syrup not reaching the correct temperature, or the mixture not being whipped long enough. Ensure your syrup boils vigorously for the full 10 minutes (or to 220-240°F with a thermometer) and that your mixer whips the mixture until it triples in volume and is light and airy.
How to Store Your Homemade Pumpkin Marshmallows
Proper storage is key to keeping your delicious pumpkin marshmallows fresh and fluffy. Store them in an airtight container at room temperature for up to two weeks. For longer storage, you can also freeze them in a freezer-safe bag or container for up to 3 months. Just thaw them at room temperature when you’re ready to enjoy!
More Healthy Pumpkin Recipes to Try This Season
If you’re loving the pumpkin vibe, here are more delicious and healthy pumpkin recipes to add to your fall cooking repertoire:
- Better than Starbucks Gluten-Free Pumpkin Spice Scones
- Creamy Pumpkin Spice Overnight Oats
- Healthy Pumpkin Streusel Muffins
- Nourishing Healthy Pumpkin Baked Oatmeal
- Decadent Vegan Pumpkin Twix Bars
- Vegan Dairy Queen Pumpkin Pie Blizzard Copycat
- Simple Pumpkin Spice Chia Pudding
If you try this healthy pumpkin marshmallow recipe and absolutely love it, it would mean the world to me if you left a star rating & review below and tagged me in your delicious creations on Instagram @danishealthyeats!
Homemade Healthy Pumpkin Marshmallows
Pin Recipe
25 minutes
25 minutes
Dessert, Snack
American
Ingredients
- 3 tbsp grass-fed gelatin
- 1 cup water (divided)
- 1 cup honey or maple syrup
- 2 tbsp pumpkin puree (NOT pumpkin pie filling)
- 1 tsp pumpkin pie spice
- 1 tsp Vanilla extract
- ¼ tsp sea salt
- 2 tbsp tapioca flour (for dusting, or cornstarch for non-paleo)
Instructions
-
Line a 9×9 inch pan with parchment paper, ensuring an overhang for easy removal. Spray the parchment paper with spray oil and generously sprinkle tapioca flour all over it. This ensures the marshmallows won’t stick – don’t skip this step! For an extra touch of spice, sprinkle a little pumpkin pie spice over the parchment paper.
-
Attach the bowl to your stand mixer (fitted with the whisk attachment). In the bowl, add ½ cup of water and the grass-fed gelatin. Give it a quick mix with a spoon or whisk and let it sit for 5-10 minutes to bloom while you prepare the syrup.
-
In a small, heavy-bottomed pot, add the remaining ½ cup water, honey or maple syrup, and sea salt. Bring the mixture to a rolling boil over medium-high heat and let it boil vigorously for about 10 minutes. If you have a candy thermometer, you want it to reach between 220-240°F (104-116°C). If you don’t have a thermometer, no stress – letting it boil for 10 minutes at high heat is usually enough to reach the correct temperature.
-
Remove the pot from the heat. With the stand mixer going on low speed, add in the pumpkin puree, pumpkin pie spice, and vanilla extract to the gelatin mixture. Then, carefully and slowly drizzle in the hot syrup mixture. Once all the syrup is added, increase the mixer to high speed and allow it to whip until the mixture triples in size and gets light & fluffy. This usually takes 3-5 minutes. You’ll want it to still be somewhat drippy but it should thickly coat the whisk when you lift it from the bowl – don’t over-beat or it’ll thicken too much and turn into what some readers call marshmallow “brains” Lol.
-
If using a hand mixer, follow the same steps, but be aware that the whipping process may take considerably longer than with a stand mixer to achieve the desired fluffiness.
-
Once it’s done, immediately use a spatula (lightly oiled if needed) to pour the marshmallow mixture into the prepared pan. You can use the spatula to press it in firmly and smooth them out, but I’ve found that wetting my hands with some water and gently pressing is a bit easier to achieve a smooth, even surface.
-
Cover the pan lightly (with parchment paper or plastic wrap) and let it sit at room temperature for 30-60 minutes until firm. For a faster set, place it in the fridge for about an hour. Then, carefully lift the parchment paper out of the pan and cut into marshmallows (I like to use lightly oiled kitchen scissors for the easiest cuts!). Dust with more tapioca flour as needed to prevent sticking. Store in an airtight container at room temperature.
Video

Click to watch the full recipe video!
fall marshmallows, gut health desserts, gut-healthy marshmallows, homemade marshmallows, paleo marshmallows, pumpkin spice marshmallows, refined sugar free, no corn syrup
