Grilled Spatchcock Turkey: The Ultimate Guide to a Perfectly Juicy & Crispy Holiday Bird
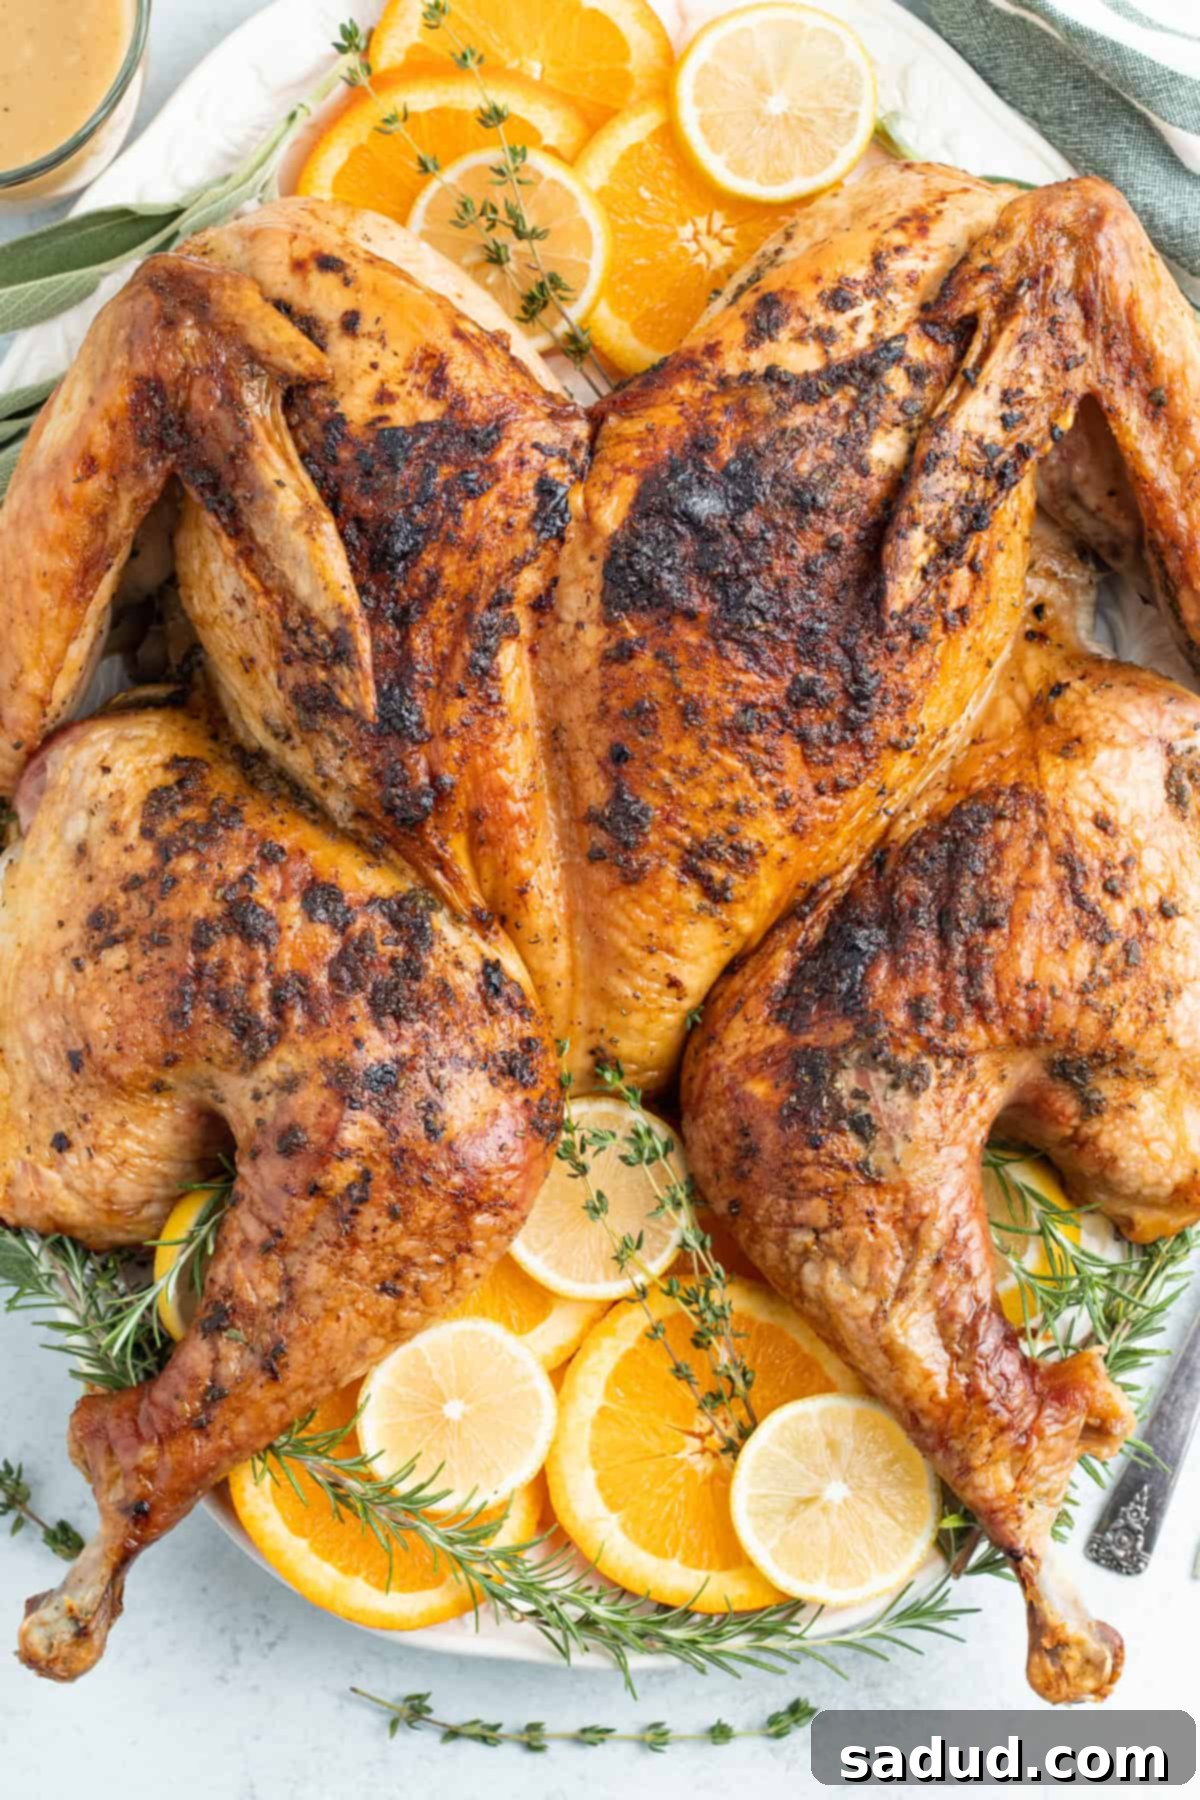
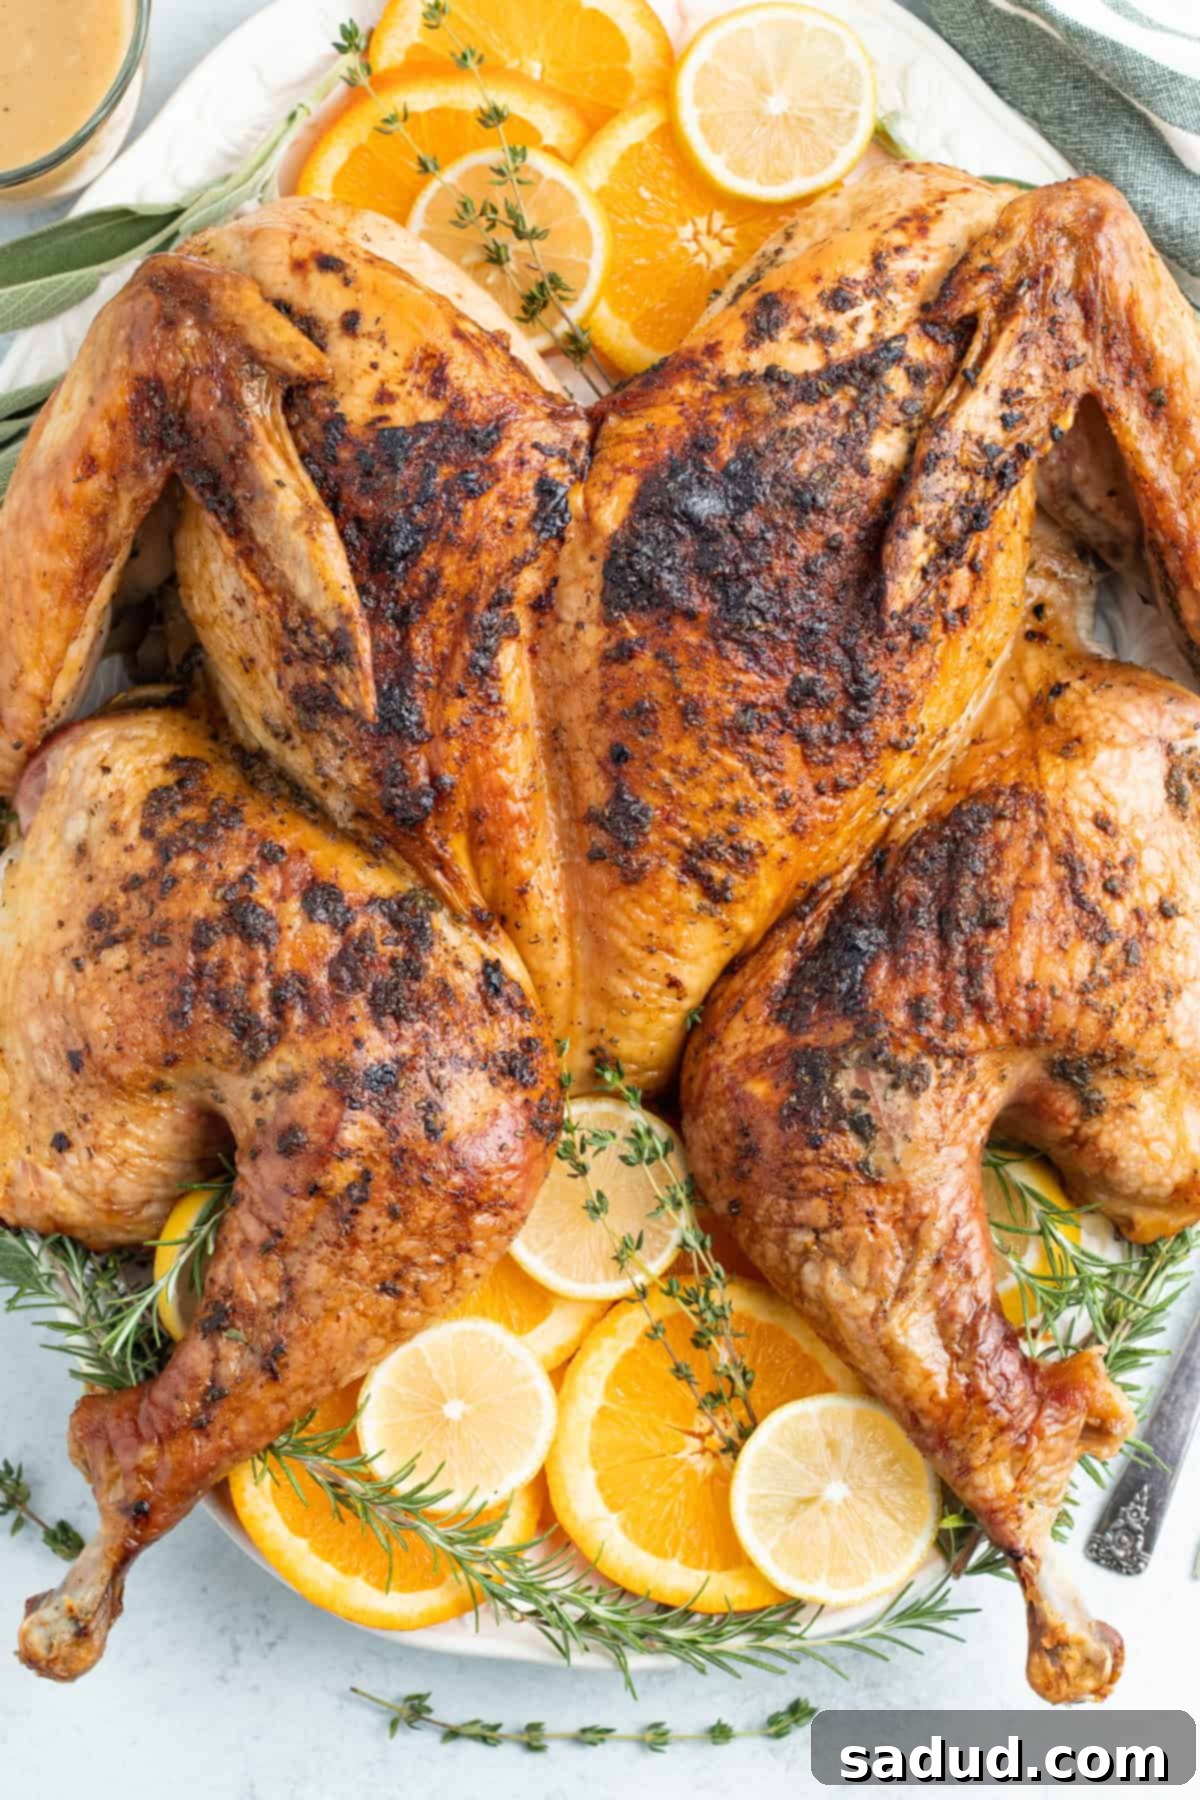
Elevate your next holiday feast with a show-stopping grilled spatchcock turkey! This innovative method transforms a classic Thanksgiving tradition into an extraordinary culinary experience, guaranteeing a bird that is incredibly tender and juicy on the inside with a gloriously crispy skin, all infused with a delightful smoky flavor. Say goodbye to dry, unevenly cooked turkey and impress your friends and family with this surprisingly simple yet impressive preparation. We’ll guide you through every step, from butterflying the turkey to achieving that perfect grilled finish, ensuring your holiday dinner is unforgettable.
Why You Need to Try This Grilled Spatchcock Turkey Recipe
If you’ve ever struggled with a Thanksgiving turkey that takes too long to cook, ends up dry in some spots and undercooked in others, or simply lacks that irresistible crispy skin, then spatchcocking is your game-changer. This method, also known as butterflying, involves removing the turkey’s backbone and flattening the bird. This seemingly small alteration yields massive benefits, making it an ideal choice for a stress-free holiday meal:
- Faster Cooking Time: By flattening the turkey, you expose more surface area to the heat, significantly reducing the overall cooking time. This means less waiting and more enjoying your holiday festivities.
- Remarkably Even Cooking: A traditional whole turkey, with its uneven thickness, often cooks inconsistently. Spatchcocking ensures that the breast and thigh meat cook at a more similar rate, resulting in uniformly tender and juicy meat throughout the entire bird. No more overcooked breasts or undercooked dark meat!
- Incredibly Crispy Skin: With the turkey flattened, the skin is fully exposed to the heat, allowing it to crisp up beautifully and evenly. The rich, golden-brown, and crispy skin is arguably one of the best parts of any roasted or grilled turkey, and spatchcocking maximizes this delicious outcome.
- Enhanced Flavor Profile: While oven roasting is a popular method, grilling a spatchcocked turkey introduces a fantastic smoky depth of flavor that traditional methods can’t replicate. Coupled with a savory compound butter rub, the grilled turkey offers a complex and truly delicious taste experience that will make your holiday dinner stand out.
- Frees Up Oven Space: The holidays often mean a crowded oven juggling multiple dishes. By grilling your turkey, you free up valuable oven real estate for all those essential side dishes and desserts, making your meal preparation much smoother and less stressful.
Prefer to grill a turkey breast instead of a whole turkey, or in addition to it? Explore our delicious recipe for Grilled Turkey Breast for another fantastic option!
Essential Chef’s Tips for Grilling a Spatchcock Turkey
Achieving a perfect grilled spatchcock turkey is straightforward with a few key considerations. These chef-approved tips will help you navigate the process like a pro, ensuring your holiday turkey is a resounding success:
- Selecting the Right Turkey Size and Pan: When choosing your turkey, remember that a spatchcocked bird lies flat, making it significantly wider than a whole, un-butterflied turkey. We highly recommend a whole turkey between 12 and 18 pounds. Turkeys larger than 18 pounds may be too wide to fit even extra-large disposable roasting pans or some grill surfaces. If you anticipate needing a larger bird to feed a big gathering, don’t worry! You can use a sturdy, non-stick *baking sheet* (not a disposable foil pan) as long as it’s fully wrapped in two layers of heavy-duty aluminum foil. This protects the baking sheet on the grill and allows you to easily collect those precious turkey drippings for your homemade gravy. Remember, non-stick coatings are generally not safe for high heat on a grill, so foil protection is crucial if you’re not using a disposable pan.
- To Brine or Not to Brine? One of the many advantages of spatchcocking is that it inherently helps the turkey retain moisture and cook evenly, often negating the absolute *necessity* of brining. This means you can still achieve a wonderfully moist and juicy turkey even without this extra step. However, if you’re a fan of brining and the added flavor and succulence it provides, you are absolutely welcome to brine your turkey first. For maximum convenience, you can even purchase a turkey that is already pre-brined. If you’re eager to try your hand at brining from scratch, check out this recipe for a traditional overnight turkey brine or this recipe for a faster 4-hour turkey brine. Brining can impart additional flavor and moisture, especially to lean breast meat, making it an excellent optional step for a truly exceptional turkey.
- Mastering Indirect Heat on Your Grill: The specific process for grilling your spatchcock turkey may vary slightly depending on your grill type. This recipe was perfected on a 4-burner gas grill, where the middle burners could be turned off to create an indirect cooking zone. Regardless of whether you have a 3, 4, 5, or 6-burner gas grill, or even a charcoal grill, the fundamental principle remains the same: you must cook the turkey over indirect heat. Direct, high heat will quickly burn the exterior of the turkey long before the interior is fully cooked, especially with a large bird.
* For Gas Grills: If you have an even number of burners, turn off the middle burners and place the turkey pan over them. Use the side burners to maintain a consistent temperature of 275°F to 300°F. If you have an odd number of burners, you might need to turn off one or two burners on one side and place the turkey over the unlit area, using the lit burners on the opposite side to control the temperature.
* For Charcoal Grills: Arrange your hot coals to one side of the grill or in two piles on opposite sides, leaving the center empty. Place a drip pan (like your foil-wrapped baking sheet with the turkey) in the empty space over indirect heat. Use vents to control air flow and temperature, aiming for the same temperature range.
The key is to position the turkey such that it is not directly over a flame or hot coals. This gentle, indirect cooking allows the turkey to cook through slowly and evenly, absorbing wonderful smoky flavors without scorching. Always aim to place the turkey as much as possible on the unlit or less hot side of the grill.
Perfect Pairings: Don’t Forget the Side Dishes!
No holiday turkey is complete without an array of delicious side dishes! These recipes are perfect complements to your grilled spatchcock turkey, rounding out a truly magnificent meal:
- Creamy Whipped Sweet Potatoes
- Homemade Keto Cranberry Sauce
- Luxurious Potato Mousseline
- Savory Texas Roadhouse Green Beans
- Hearty Southern Cornbread Stuffing
- Rich & Creamy Scalloped Sweet Potatoes
If you loved this recipe as much as we did, don’t forget to leave us a review below. ★ Follow Easy Healthy Recipes on Pinterest, Facebook, and Instagram, too!
For more delicious recipes, visit our sister sites, 40 Aprons and Easy Cheap Recipes.
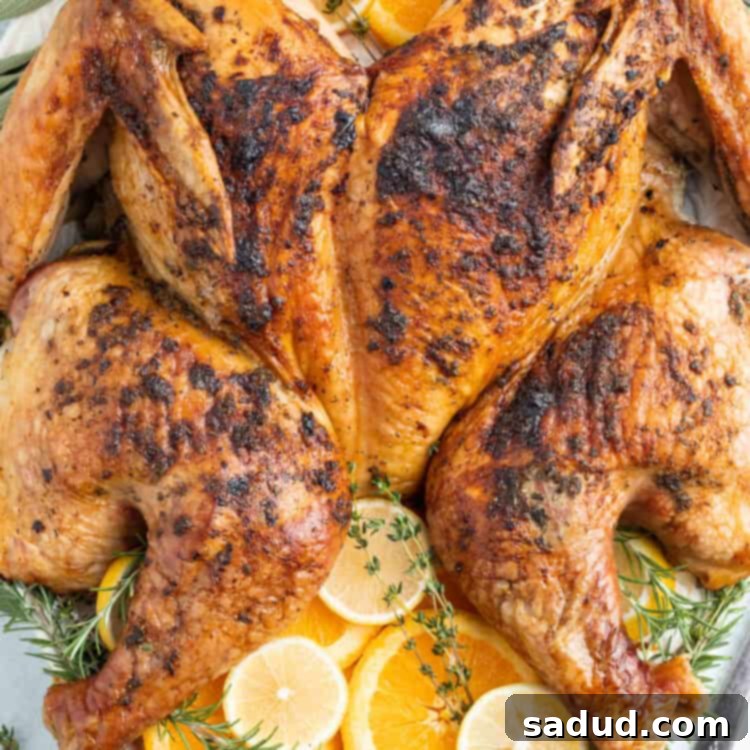
Grilled Spatchcock Turkey with Gravy
 Cheryl Malik
Print
SaveSaved!
Ingredients
For the Perfectly Grilled Turkey
- 1 medium to large whole turkey 12 to 18 pounds, fully thawed if frozen
- 1 medium onion roughly chopped, to add flavor and moisture to the pan drippings
- 16 lemon wedges from 2 lemons, for aromatic flavor and moisture
- 1 stick unsalted butter softened, for the compound butter
- 2 tablespoons finely chopped poultry herb blend store-bought or create your own with fresh rosemary, sage, and thyme (see Notes)
- 1 teaspoon garlic powder
- 1 teaspoon onion powder
- 1 teaspoon freshly cracked black pepper
For the Rich Homemade Gravy (Optional)
- 1 cup reserved turkey drippings divided, from the grilled turkey
- ½ cup all-purpose flour
- 2 cups low-sodium chicken stock or turkey stock for richer flavor
- ½ teaspoon salt more or less to taste, adjust based on brined turkey (see Notes)
- ½ teaspoon freshly cracked black pepper more or less to taste
Equipment You’ll Need
-
Food-safe gloves optional, but recommended for handling raw poultry
-
Large disposable aluminum pan essential for catching drippings and containing the turkey on the grill, or a large metal baking sheet wrapped in foil (see Notes)
-
Heavy-duty aluminum foil for wrapping baking sheet or covering turkey while resting
-
Large cutting board for spatchcocking and carving the turkey
-
Heavy-duty kitchen shears crucial for easily removing the turkey’s backbone
-
Paper towels for thoroughly drying the turkey skin
-
Small bowl for mixing the compound butter
-
Whisk or fork, for preparing the compound butter and gravy
-
Gas grill or charcoal grill (see Notes for indirect heat setup)
-
Turkey baster or large spoon, for basting the turkey with drippings
-
Internal meat thermometer absolutely essential for ensuring the turkey is cooked to a safe temperature
-
Small saucepan optional, for making the gravy
-
Large sharp knife for carving the turkey
Step-by-Step Instructions
To Spatchcock (Butterfly) the Turkey
-
Begin by removing the neck and giblets from the turkey cavity. You can discard them or save them to make a flavorful turkey stock. Also, remove and discard any pop-up turkey timer. Prepare your large baking sheet or disposable pan by completely wrapping it in two layers of heavy-duty aluminum foil, ensuring all sides are covered. This protects the pan and makes cleanup easier. Set the pan aside if you are using a separate cutting board for spatchcocking.
-
Place the whole turkey, breast-side down, on your prepared cutting board or foil-wrapped pan. Identify the backbone, which runs down the center of the turkey’s back.
-
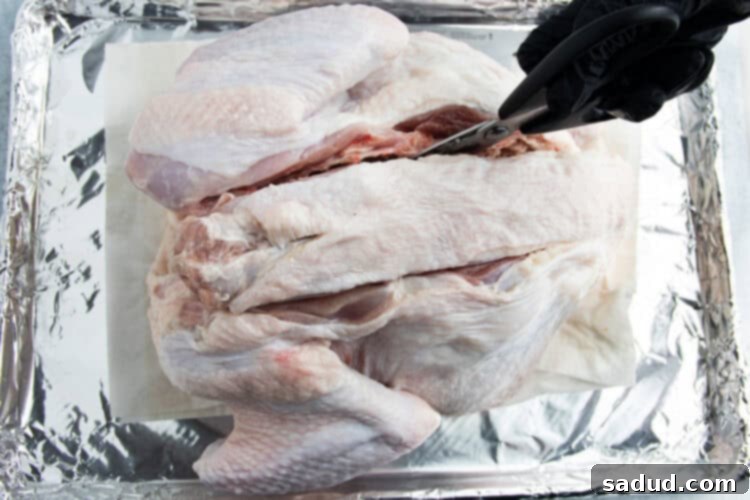
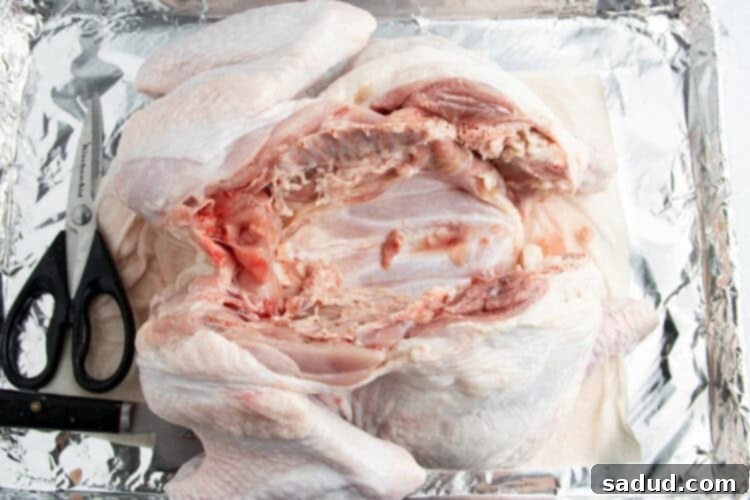
Using sturdy, heavy-duty kitchen shears, carefully cut along one side of the backbone, starting from the turkey tail and cutting all the way up to the neck. You’ll be cutting through rib bones and skin. Repeat this process on the other side of the backbone. Once both cuts are made, the backbone should be fully detached. Remove the backbone and either discard it or save it for turkey stock. This is the main step for butterflying the turkey, opening it up.

-
Next, locate the breast bone (keel bone) on the inside of the turkey. Carefully make shallow cuts on either side of the breast bone, partially cutting through the wishbone area. This helps to loosen the breastbone for easier flattening.

-
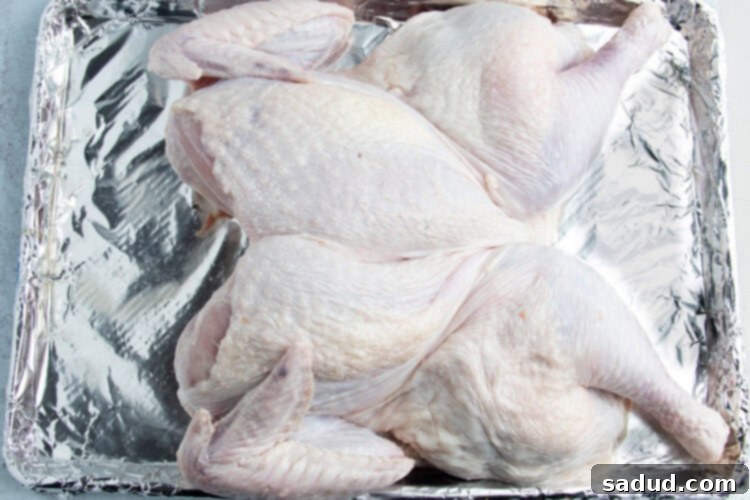
Flip the turkey over so the open, cut side rests on the cutting board and the breast-side faces up. Place both hands firmly on the turkey breast. Apply steady, strong pressure downwards on the breastbone until you hear a pop or crack. This indicates that the breastbone has broken or flattened, allowing the turkey to lay completely flat. This ensures even cooking.
-
If you used a cutting board, carefully transfer the spatchcocked turkey to your foil-wrapped baking pan, ensuring it lies flat with the breast-side facing up. To prevent the delicate wing tips from burning during grilling, tuck them neatly underneath the turkey breast. Rotate the drumsticks so that the knees of the bird face inwards and the drumstick bones point outwards. This creates a more compact shape and promotes better cooking.

To Grill the Spatchcock Turkey to Perfection
-
With the grill lid closed, preheat your grill to a medium-high temperature, aiming for approximately 375°F to 400°F (190°C to 200°C). This initial heat is important for quickly establishing the cooking environment.
-
Thoroughly pat the entire turkey, inside and out, completely dry with paper towels. A dry skin is essential for achieving that sought-after crispy texture. Arrange the chopped onion and lemon wedges around the turkey in the pan. These aromatics will infuse the turkey drippings with delicious flavor, perfect for gravy.
-
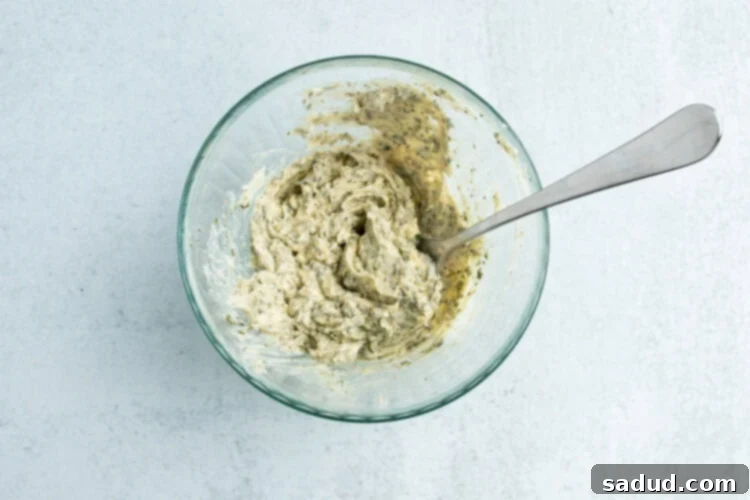
In a small bowl, combine the softened unsalted butter, finely chopped poultry herb blend, garlic powder, onion powder, and freshly cracked black pepper. Whisk these ingredients together until they are fully incorporated and form a fragrant compound butter. This butter will be the key to a flavorful, moist turkey with golden skin.

-
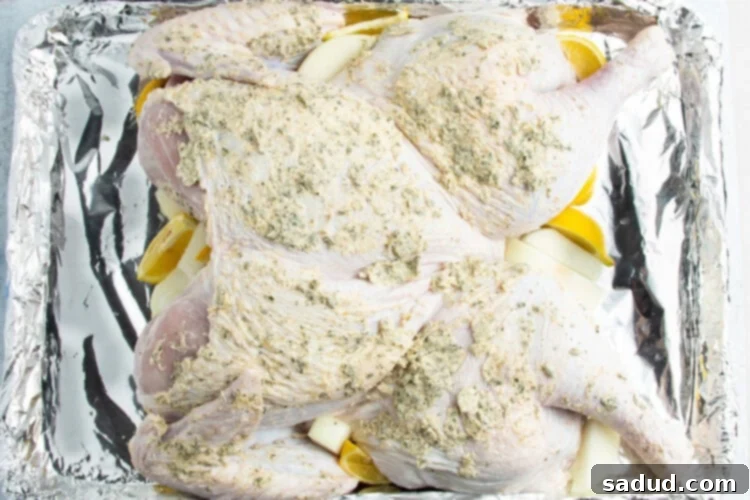
Using your hands (food-safe gloves are helpful here), generously coat all sides of the turkey with the herb-butter mixture. Gently massage the butter into the skin and, crucially, carefully work your fingers under the turkey skin to create small pockets. Push a good amount of the compound butter into these pockets, especially over the breast meat. This direct application under the skin ensures maximum flavor and moisture retention, contributing to a truly juicy bird.

-
Once your grill is preheated to the initial temperature, turn off the middle burners (for a 4-burner grill) or adjust your charcoal setup to create an indirect heat zone. Reduce the lit side burners to a medium-low setting, aiming for a consistent indirect temperature of approximately 275°F to 300°F (135°C to 150°C). Refer to the Chef’s Tips section above for guidance on setting up indirect heat on different grill types.
-
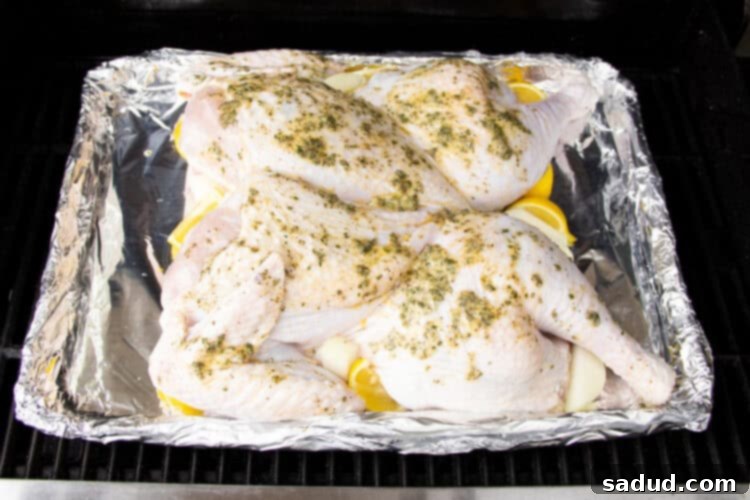
Carefully place the pan containing the prepared turkey over the unlit or indirect heat section of the grill. Close the grill lid immediately to trap the heat and smoke. Cook the turkey for an initial 35 minutes.

-
After 35 minutes, carefully lift the grill lid. Using a turkey baster or a large spoon, transfer the accumulated turkey drippings from the pan over the entire surface of the turkey. This basting helps keep the skin moist and promotes beautiful browning. Close the lid and continue cooking for an additional 15 minutes.
-
Following this, continue to cook the turkey in 15-minute increments. After each 15-minute period, carefully open the lid, thoroughly baste the turkey with its drippings, and then close the lid again. This consistent basting ensures a flavorful and crispy skin while keeping the meat juicy.
-
When the turkey has cooked for a total of 90 minutes (1 hour and 30 minutes), begin checking its internal temperature. Insert an internal meat thermometer into the thickest part of the turkey breast, avoiding bones. The target temperature for the turkey breast is 160°F (71°C). If it hasn’t reached this temperature, continue cooking, checking the internal temperature every 5 minutes, until it registers 160°F. Note: The total cook time can range anywhere from 1 ½ hours to 2 ½ hours, depending on the turkey’s size and your grill’s precise temperature control. Remember, the turkey’s temperature will rise a few degrees during resting.
-
Once the internal temperature of the breast reaches 160°F, carefully remove the pan with the turkey from the grill. Immediately reserve all the flavorful turkey drippings from the pan; these are essential for making your optional gravy. Transfer the turkey to a clean cutting board, immediately cover it tightly with aluminum foil, and let it rest for a crucial 20 minutes. This resting period allows the juices to redistribute throughout the meat, ensuring a tender and moist turkey. While the turkey rests, you can prepare the gravy if desired.
To Make the Velvety Gravy (Optional)
-
Heat a small saucepan over medium heat. Once the pan is warm, add ½ cup of the reserved turkey drippings. Stir occasionally until the drippings are thoroughly warmed through and bubbling gently.
-
Evenly sprinkle the all-purpose flour over the warmed turkey drippings in the saucepan. Whisk vigorously for approximately 1 minute until the ingredients combine to form a thick, smooth paste (a roux). Reduce the heat to medium-low to prevent burning.
-
Gradually and slowly pour in 2 cups of low-sodium chicken stock (or turkey stock for enhanced flavor), whisking continuously to ensure a smooth, lump-free mixture. Continue whisking until the mixture is heated through and begins to thicken.
-
Stir in the remaining ½ cup of turkey drippings, whisking until fully combined. Allow the gravy to simmer uncovered for 3 to 5 minutes, or until it has reached your desired thickness. Taste the gravy and season with salt and freshly cracked black pepper as needed. Remember to consider if your turkey was brined, as it may already contribute a good amount of salt.
To Carve and Serve Your Holiday Masterpiece
-
After the turkey has rested for the full 20 minutes, it’s time to carve and serve your magnificent bird! (Refer to the detailed carving instructions in the Notes section below). Serve immediately with your freshly prepared gravy and all your favorite holiday side dishes.
Important Notes and Tips
- Baking Sheet Selection: If you choose to use a reusable baking sheet instead of a disposable aluminum pan, it is absolutely crucial that it is NOT non-stick. Non-stick coatings can release harmful fumes and break down under the high, direct heat of a grill. Always opt for a standard metal baking sheet and ensure it is completely wrapped in at least two layers of heavy-duty aluminum foil to protect it and collect drippings safely.
- Grill Type and Indirect Heat: This recipe was developed and perfected on a 4-burner gas grill. However, the technique of cooking over indirect heat is universally applicable to any type of grill, including charcoal or other gas grill configurations. The key is to create a cooking zone where the turkey is not directly over the heat source. For charcoal grills, bank coals to the sides and place the turkey in the center. For gas grills with varying burner counts, turn off central burners or burners opposite the lit ones to achieve this indirect heat. The goal is a consistent, gentle temperature for even cooking.
- Homemade Herb Blend: If a pre-packaged poultry herb blend isn’t available, you can easily create your own. Purchase fresh sprigs of rosemary, sage, and thyme. Finely chop them all together until you have approximately 2 tablespoons of the blend. This fresh blend will infuse your compound butter with vibrant, aromatic flavors.
- Adjusting Salt for Gravy: When seasoning your gravy, remember to taste it first! If your turkey was brined before being spatchcocked and grilled, it will likely impart a significant amount of salt into the drippings. You may find that little to no additional salt is needed for the gravy, so adjust carefully to your preference.
Detailed Turkey Carving Instructions
Carving a whole turkey, especially after it’s been spatchcocked, can cause the meat to cool down relatively quickly. To ensure maximum warmth and juiciness for your guests, we recommend only carving half of the bird at first, unless you are certain that your entire group will be ready to eat the whole turkey immediately. Have all your delicious side dishes ready to go so you can serve dinner as soon as the turkey is carved.
- Separate Leg from Body: Using a large, sharp knife, carefully locate the joint where the leg (thigh and drumstick) connects to the main body of the turkey. Cut through the skin and joint, detaching the entire leg.
- Separate Drumstick from Thigh: Place the detached leg on the cutting board. Find the joint connecting the drumstick and thigh. Cut through this joint to separate them. Set the drumstick aside.
- Separate Wing and Breast: From the same side of the turkey where you removed the leg, carefully cut along the joint to remove the wing. Then, position your knife next to the breastbone. Make a careful, vertical cut downwards, following the bone structure to separate the breast meat from the breastbone. Repeat this process until the meat from that entire turkey breast half has been removed from the bones. Set the wing aside.
- Repeat for Other Side (Optional): If you are carving the entire bird at once, repeat the above steps (1-3) for the other side of the turkey.
- Slice the Breast Meat: Place the removed turkey breast(s) skin-side up on the cutting board. Position your knife perpendicular to the breast, at a slight angle. Carve the turkey breast(s) into quarter-inch or half-inch thick slices, according to your preference.
- Slice the Thigh Meat: For the thighs, you may need to twist the bone to separate it from the meat. Then, slice the thigh meat into desired portions.
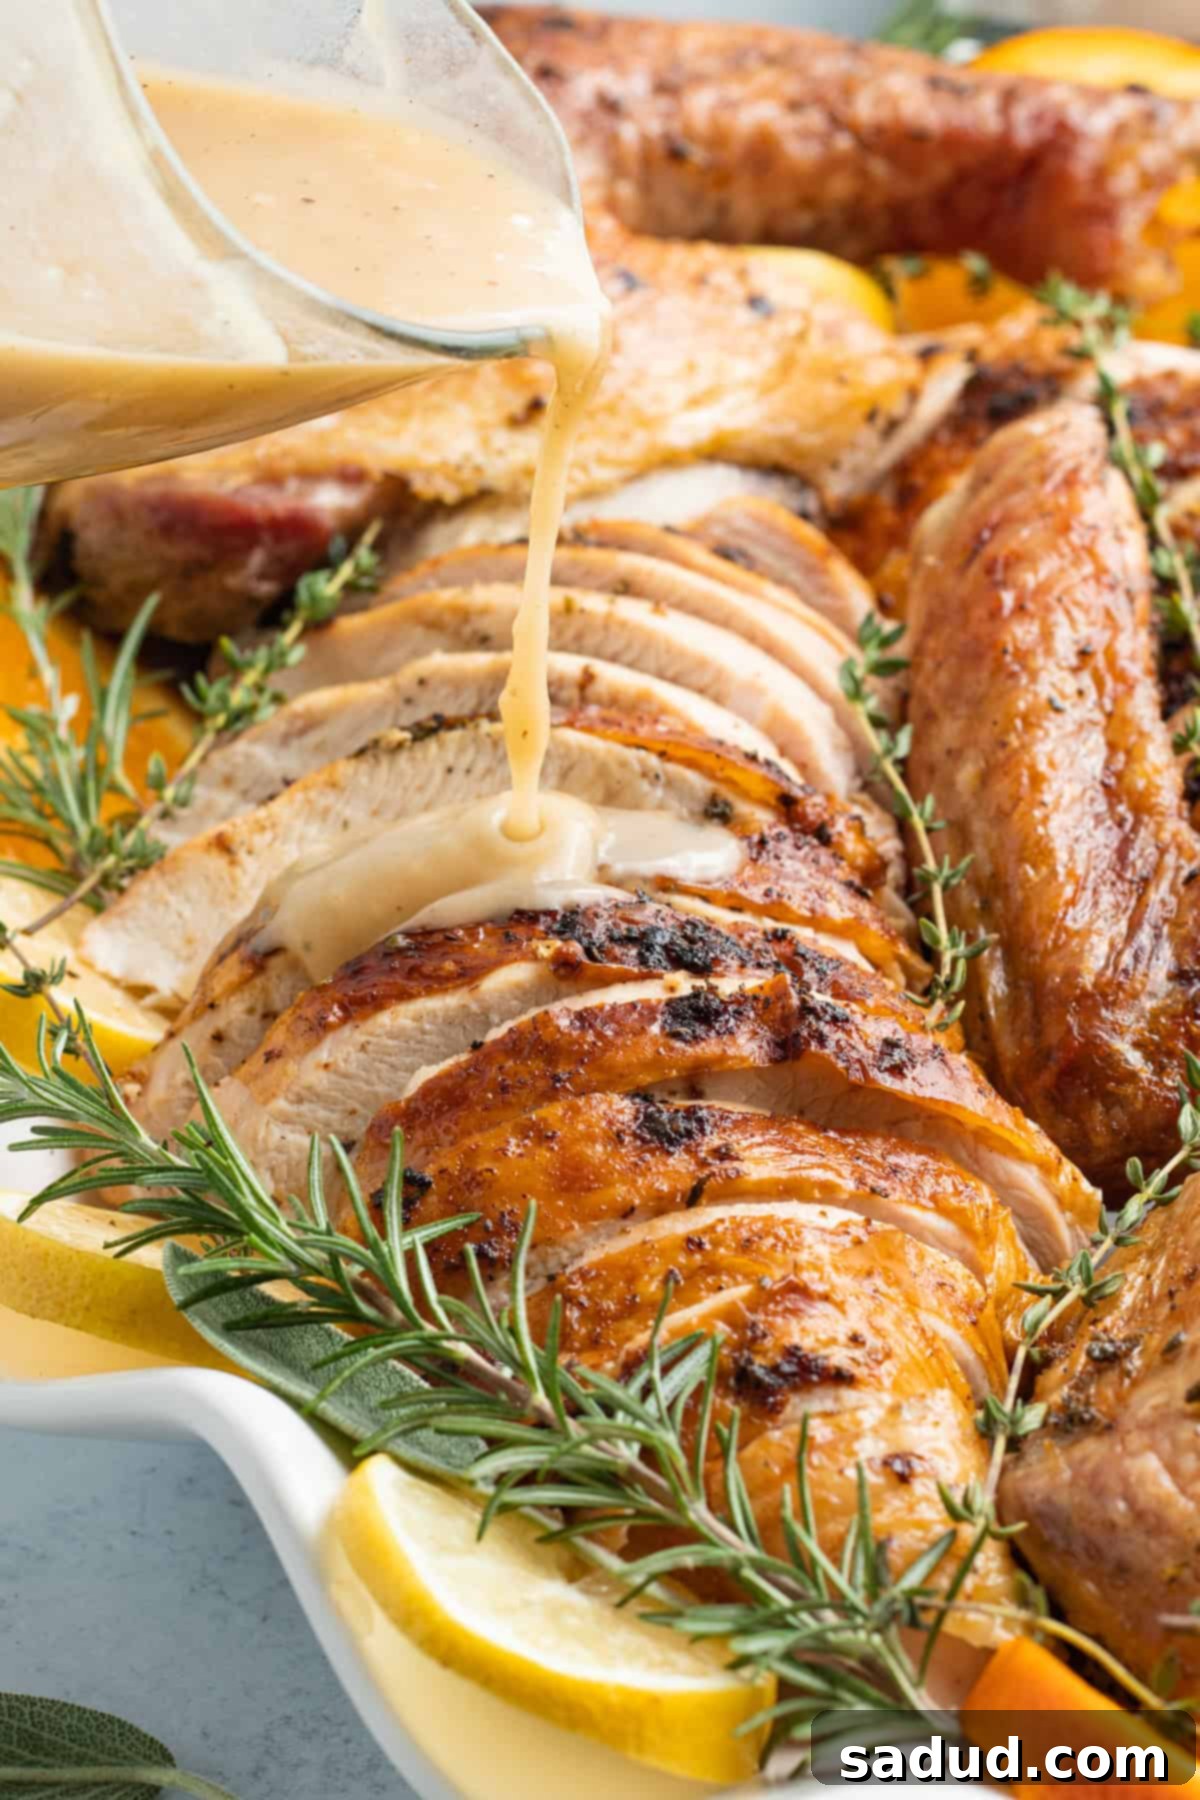
- Serve Immediately: Arrange the carved turkey slices and pieces on a warm platter and serve immediately with your delicious gravy and side dishes.
Nutrition Information
Number of total servings shown is approximate. Actual number of servings will depend on your preferred portion sizes.
Nutritional values shown are general guidelines and reflect information for 1 serving using the ingredients listed, not including any optional ingredients. Actual macros may vary slightly depending on specific brands and types of ingredients used.
To determine the weight of one serving, prepare the recipe as instructed. Weigh the finished recipe, then divide the weight of the finished recipe (not including the weight of the container the food is in) by the desired number of servings. Result will be the weight of one serving.
