The Ultimate Crispy & Melty Turkey Melt Sandwich: A Recipe for Comfort
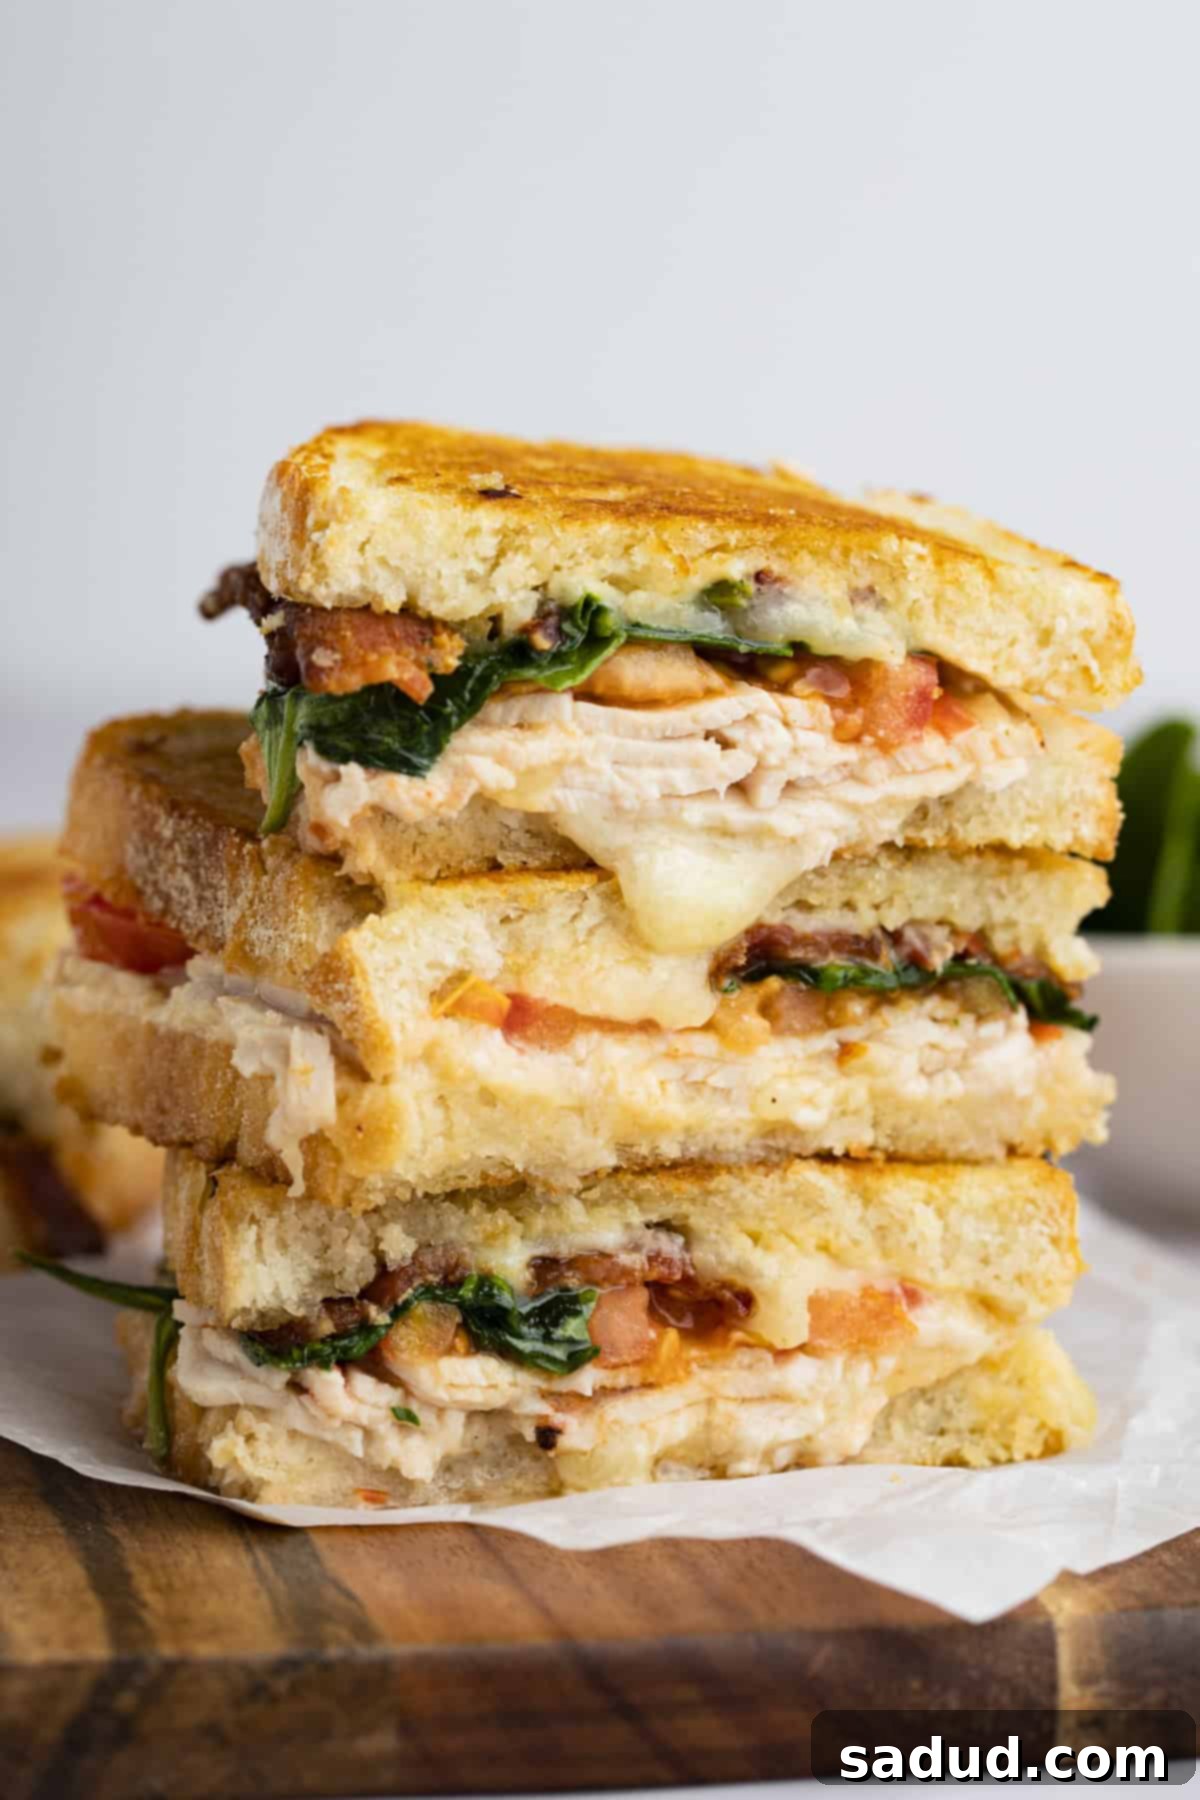
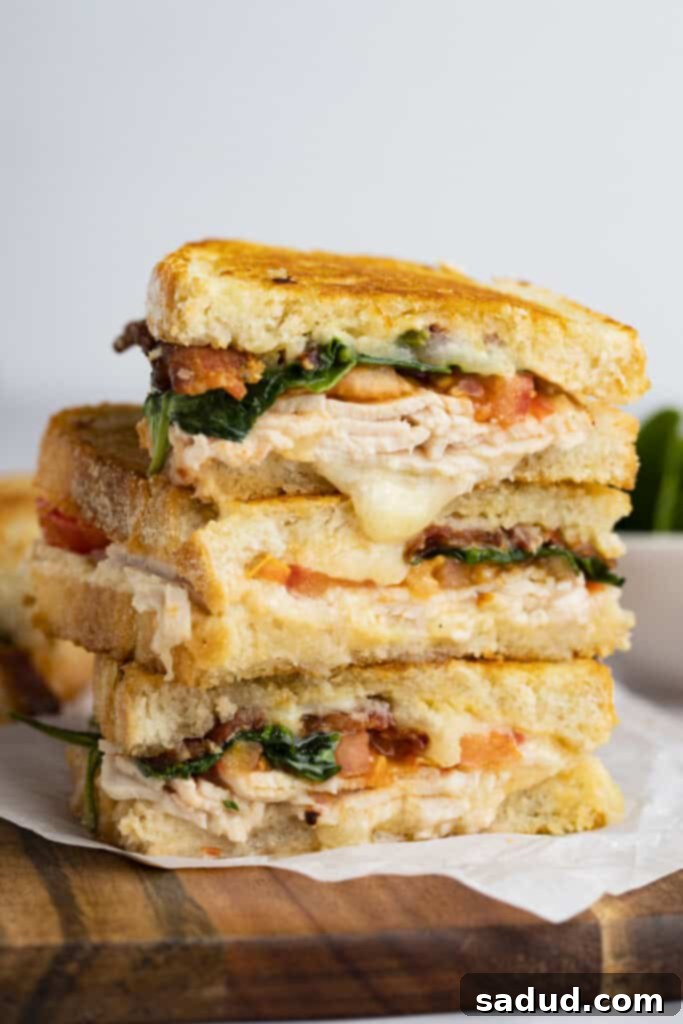
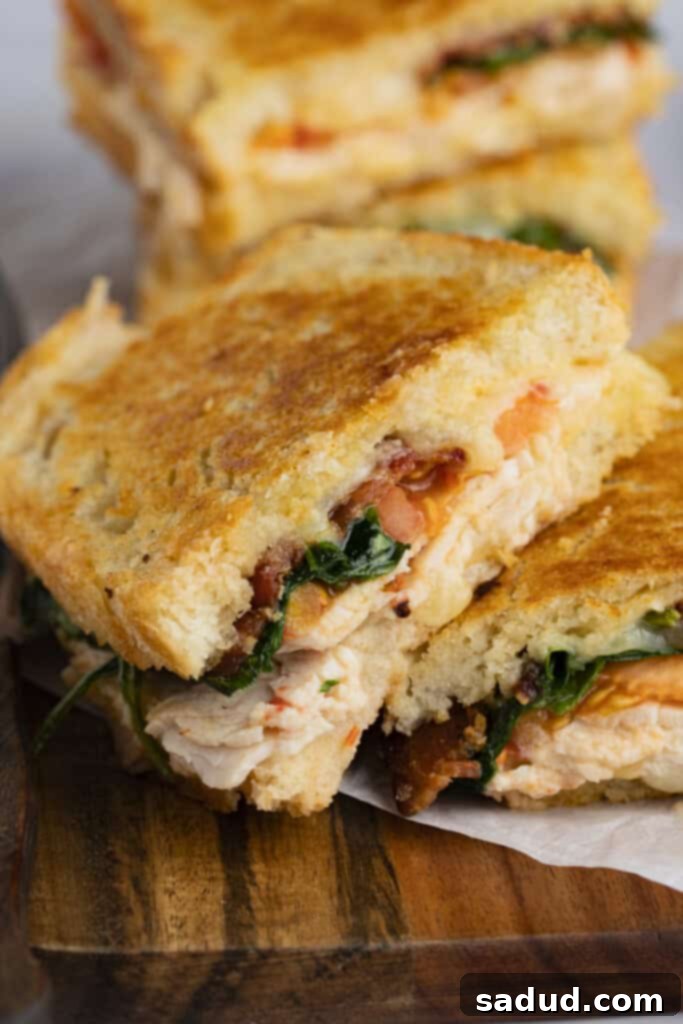
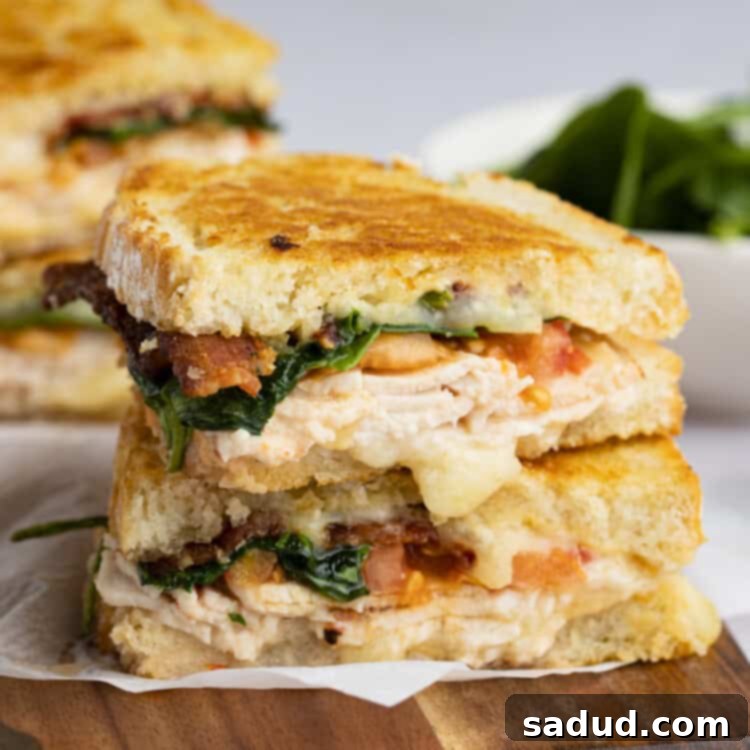
Prepare to elevate your sandwich game with this incredible turkey melt recipe, perfectly crafted for cooler weather or anytime you crave ultimate comfort food. This isn’t just any sandwich; it’s a symphony of textures and flavors – toasty, gloriously melty, and utterly mouth-watering. Imagine succulent slices of turkey, vibrant fresh tomatoes, crisp green spinach, savory bacon, and rich, sharp cheddar cheese, all nestled between buttery, golden-grilled sourdough bread. This gourmet grilled cheese is substantial enough to enjoy as a standalone meal, but it truly shines when paired with a steaming cup of hot, creamy soup, making for a truly satisfying dining experience.
Why You’ll Fall in Love with This Turkey Melt Recipe
This turkey melt isn’t just a meal; it’s an experience. Here’s what makes it an absolute must-try:
- A Gourmet Twist on Classic Grilled Cheese: If the humble grilled cheese holds a special place in your heart, prepare to be amazed by its sophisticated cousin – the turkey melt. It takes the comforting warmth and gooey cheese of a classic grilled cheese and elevates it with layers of flavorful ingredients. Each bite offers a delightful combination of savory turkey, crispy bacon, fresh veggies, and perfectly melted cheese, all encased in a beautifully toasted exterior. It’s a hearty, satisfying sandwich that feels indulgent yet is surprisingly easy to create.
- Effortlessly Customizable and Quick to Prepare: One of the standout features of this recipe is its incredible versatility and speed. Not only can you whip up these delicious sandwiches in under 30 minutes, but you also have the freedom to tailor them exactly to your taste. Don’t limit yourself to sourdough; any sturdy, crusty bread like ciabatta, rye, or even a hearty whole wheat loaf will work wonderfully. Experiment with different types of turkey – from thinly sliced deli turkey for convenience to rich smoked turkey or even leftover roasted turkey for an extra depth of flavor. The cheese options are endless: try sharp provolone, nutty Swiss, creamy Havarti, or a spicy pepper jack for a kick. Feel free to add thinly sliced red onion for a zesty bite, peppery arugula, or delicate alfalfa sprouts for added texture and freshness. And when it comes to spreads, the possibilities are vast: alongside or instead of honey mustard, consider a tangy pesto, a creamy mayo, or even a cranberry sauce for a touch of sweetness, especially if using leftover holiday turkey. This recipe is your canvas!
- Perfect for Utilizing Leftover Holiday Turkey: While fresh deli turkey is a convenient choice for this melt, it truly shines as a fantastic way to repurpose leftover holiday turkey. If you find yourself with extra roasted turkey from Thanksgiving or Christmas, this recipe transforms it into a brand new, exciting meal. When using thicker slices of leftover turkey, you might need to adjust your cooking slightly. Toast the sandwiches a little longer on a slightly lower heat to ensure the turkey warms all the way through without burning the bread. This thoughtful approach minimizes waste and maximizes flavor, extending the joy of your holiday feast.
Chef’s Expert Tips for the Perfect Turkey Melt
Achieving the perfect turkey melt is an art, but with these chef’s tips, you’ll master it in no time, ensuring every sandwich is a masterpiece of golden-brown perfection and gooey, melted goodness.
- Master the Heat, Don’t Rush the Toasting: We understand the anticipation! The aroma of a turkey melt in the making is enough to make anyone impatient, but resisting the urge to crank up the heat is crucial. The key to a truly great grilled sandwich lies in patience and medium heat. If your skillet and butter are too hot, the bread will inevitably toast (or worse, burn) before the cheese has a chance to fully melt and the turkey warms through. Conversely, if the pan isn’t hot enough, the bread will absorb too much butter and become soggy rather than developing that desirable crisp, golden crust. Aim for a consistent medium heat that allows the butter to sizzle gently, gradually crisping the bread while the interior components reach their optimal temperature and melty state. This balance ensures a perfectly toasted exterior and a warm, gooey interior.
- Prioritize Quality Cheese for Superior Melt and Flavor: This tip cannot be stressed enough: **avoid prepackaged, processed cheese slices!** Do yourself a huge favor and opt for a block of fresh cheddar cheese that you can slice yourself, or visit your local deli counter and have them slice some fresh cheese for you. The difference in quality, flavor, and especially texture is profound. Fresh cheese contains fewer additives and has a higher moisture content, which allows it to melt smoothly and evenly, creating that irresistible, stringy pull. While your turkey melt will still be enjoyable with prepackaged cheese, it will be absolutely *incredible* and truly transformative with fresh, high-quality cheese. The richer flavor and superior melt will take your sandwich from good to gourmet.
- Even Butter Distribution is Key: For that uniform golden crust, ensure your butter is softened to room temperature. This makes it much easier to spread evenly across each slice of bread. An even layer of butter means even browning and crispness, preventing burnt spots or soggy patches.
- Don’t Forget to Press: Gently pressing down on your sandwich with a spatula while it’s toasting helps ensure maximum contact with the hot skillet, promoting better browning and faster, more even melting of the cheese. Just a light press is all you need.
- The Right Pan Makes a Difference: A heavy-bottomed skillet, such as a cast iron pan, is ideal for making grilled sandwiches. It distributes heat very evenly and retains heat well, which is essential for consistent toasting and melting.
More Delicious Sandwiches You’ll Enjoy
If you love the satisfying experience of a perfectly crafted sandwich, be sure to explore these other fantastic recipes:
- Chicken Parm Sandwich
- Keto Grilled Cheese
- Caprese Sandwich
- Chickpea Salad Sandwich
- Whole30 Breakfast Sandwiches (Whole30 McGriddles)
- Chicken Pesto Sandwich
If you loved this recipe as much as we did, don’t forget to leave us a review below. ★ Follow Easy Healthy Recipes on Pinterest, Facebook, and Instagram, too!
For more delicious recipes, visit our sister sites, 40 Aprons and Easy Cheap Recipes.
Turkey Melt with Cheddar, Spinach, and Bacon
 Cheryl Malik
Print
SaveSaved!
Ingredients
- 4 slices sourdough or thick, crusty bread of choice
- 2 tablespoons honey mustard
- 2 slices white cheddar cheese
- 4 slices deli turkey
- thin tomato slices from 1 medium red tomato
- ½ cup fresh baby spinach
- 4 strips cooked bacon
- 2 tablespoons butter softened
Equipment
-
Plate or cutting board
-
butter knife
-
Large skillet
-
Spatula
Instructions
To Assemble the Sandwiches
-
To begin, lay out 4 slices of sourdough or your chosen thick, crusty bread on a clean cutting board or plate. This provides a stable surface for building your delicious melts.
-
Divide 2 tablespoons of honey mustard into four equal ½-tablespoon portions. Carefully spread each ½ tablespoon of honey mustard evenly across the top side of each individual slice of sourdough. This will be your flavorful base, adding a delightful tang.
-
Take 2 slices of white cheddar cheese and carefully divide each slice in half, creating a total of 4 smaller slices of cheese. Place one of these cheese “halves” on each piece of bread, ensuring it completely covers the honey mustard layer.
-
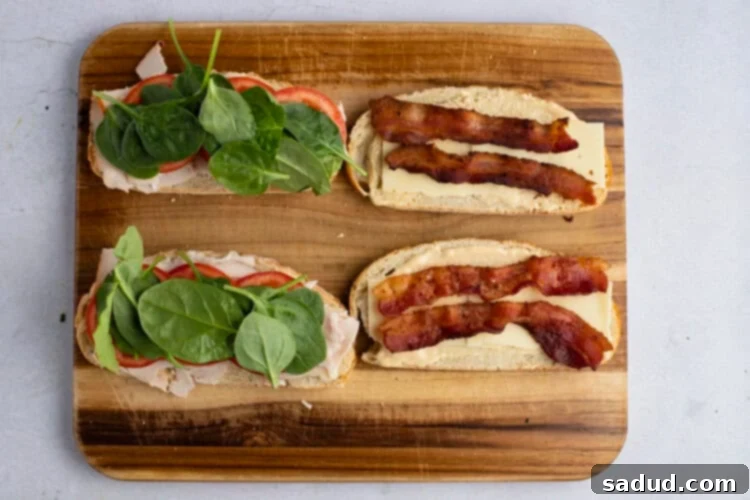
Next, distribute the 4 slices of deli turkey, placing 2 slices of turkey onto two of the cheese-topped bread slices. These will form the base of your turkey melt.
-
Now, divide the ½ cup of fresh baby spinach into two ¼-cup portions, one for each sandwich. Layer your preferred amount of thin tomato slices and ¼ cup of baby spinach on top of each layer of turkey. The vibrant colors and fresh flavors will brighten your melt.
-
For that irresistible crunch and savory depth, divide the 4 strips of cooked bacon into 2 slices per sandwich. Place each portion of bacon onto the remaining two slices of cheese-topped bread.

-
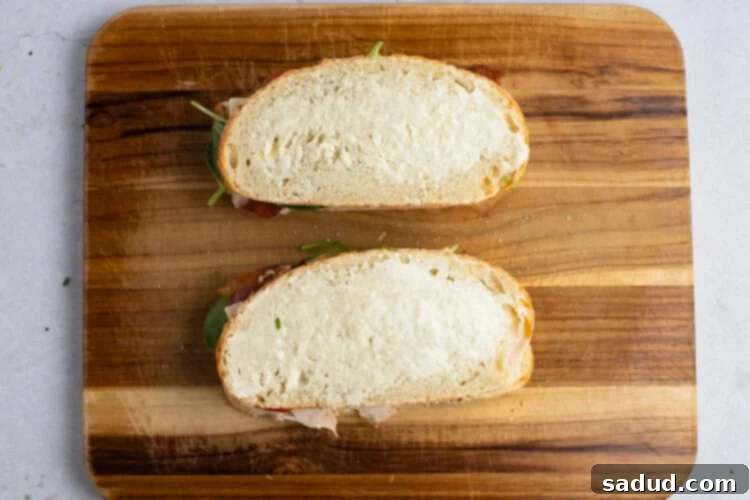
Carefully close each sandwich. Take the bread slices topped with bacon and gently place them face-down on top of the sandwich halves containing the turkey, tomatoes, and spinach. Once assembled, each complete sandwich should boast a delicious layering: 1 slice of sourdough, a hint of honey mustard, one half-slice of cheese, 2 slices of deli turkey, thin tomato slices, ¼ cup of fresh baby spinach, 2 strips of crispy bacon, another half-slice of cheese, the remaining ½ tablespoon of honey mustard, and finally, 1 more slice of sourdough. This thoughtful construction ensures a balanced bite.
To Warm Sandwich
-
Now it’s time to prepare for toasting. Divide 2 tablespoons of softened butter into four equal ½-tablespoon portions. Spread ½ tablespoon of butter evenly and generously on the outside of each slice of bread, ensuring all four outer sides of your two assembled sandwiches are coated. This buttery exterior is key to achieving that perfect golden, crispy crust.

-
Place a large skillet (a cast iron skillet works beautifully for even heat) on your stovetop over medium heat. Allow the pan to warm up for a few minutes until it’s adequately hot but not smoking. Once the pan is warm, carefully place your assembled, buttered sandwiches flat in the skillet. Avoid overcrowding the pan; cook one or two at a time if necessary.
-
Toast the bottom slice of bread for approximately 3 to 4 minutes, or until it achieves a beautiful golden-brown color and a satisfying crispness. Then, using a sturdy spatula, carefully flip each sandwich over. Continue toasting the now-bottom slice of bread for another 3 to 4 minutes. The goal is a perfectly golden crust on both sides, with the cheese inside thoroughly melted and the internal ingredients warmed through. Look for gentle bubbling of the cheese.
-
Once toasted to perfection, with the bread golden and crisp and the cheese delightfully gooey, carefully transfer the hot sandwiches to serving plates. Serve them immediately while still warm, perhaps with your favorite side dishes. Enjoy every glorious, melty bite!

Notes
- For an unparalleled taste and texture experience, I cannot recommend this enough: purchase a block of quality cheddar cheese and slice it yourself, or, even better, buy freshly sliced cheese from the deli counter at your grocery store. This is a significant step up from prepackaged cheese slices, as fresh cheese melts much more smoothly and has a superior flavor profile due to fewer stabilizers and additives.
- Make it Dairy Free: To accommodate dietary restrictions without sacrificing flavor, simply substitute dairy-free cheese slices and a good quality dairy-free butter. Many excellent options are available that melt beautifully and provide a rich taste.
- Pre-Cook Your Bacon: For efficiency and a crispier result, pre-cook your bacon before assembling the sandwiches. This ensures it’s perfectly crisp when the melt is finished.
- Slice Tomatoes Thinly: To prevent your sandwich from becoming soggy and to ensure even cooking, slice your tomatoes as thinly as possible.
Nutrition Information
Number of total servings shown is approximate. Actual number of servings will depend on your preferred portion sizes.
Nutritional values shown are general guidelines and reflect information for 1 serving using the ingredients listed, not including any optional ingredients. Actual macros may vary slightly depending on specific brands and types of ingredients used.
To determine the weight of one serving, prepare the recipe as instructed. Weigh the finished recipe, then divide the weight of the finished recipe (not including the weight of the container the food is in) by the desired number of servings. Result will be the weight of one serving.
Serving Suggestions & Perfect Pairings
While this turkey melt is a glorious meal all on its own, it truly shines when complemented by the right accompaniments. For a classic pairing, a creamy tomato soup or a hearty lentil soup makes for an unbeatable combination, especially on a chilly day. You can also serve it with a crisp green salad, a side of crunchy potato chips, or a tangy dill pickle spear to cut through the richness. For a more substantial meal, consider oven-baked potato wedges or sweet potato fries. The versatility of this sandwich allows it to fit seamlessly into any lunch or dinner menu.
Storage and Reheating Tips
Though turkey melts are best enjoyed fresh off the skillet, sometimes you might have leftovers or want to prep ahead. If you have leftover turkey melt, allow it to cool completely before wrapping it tightly in plastic wrap or aluminum foil. Store it in the refrigerator for up to 2-3 days. To reheat, the best method is to use a toaster oven or a dry skillet over medium-low heat. This helps to crisp up the bread again and prevent sogginess. You can also use an air fryer for a few minutes. Avoid the microwave, as it will make the bread soft and chewy rather than crispy. Reheating gently ensures your melt regains much of its original deliciousness.
There you have it – a detailed guide to crafting the ultimate turkey melt sandwich. With its harmonious blend of flavors and textures, customizable ingredients, and simple cooking process, this recipe is sure to become a cherished favorite in your kitchen. Whether you’re using fresh deli slices or making the most of holiday leftovers, prepare for a satisfying and incredibly tasty experience. Don’t hesitate to experiment with your favorite additions and make this recipe truly your own!
