Healthier Little Debbie’s Christmas Tree Cakes: Wholesome Holiday Nostalgia Made Easy
Rediscover the magic of childhood holidays with these healthier homemade Little Debbie’s Christmas Tree Cakes. This recipe brings all the nostalgic charm of the classic treat, crafted with better-for-you ingredients that you can feel good about. Whether you opt for a wholesome store-bought mix or your favorite scratch-made cake, these festive delights are incredibly easy to prepare and guaranteed to be the star of any holiday dessert table. Get ready to bake, decorate, and enjoy a beloved seasonal favorite, reimagined for a healthier lifestyle!

Why You’ll Adore These Healthier Christmas Tree Cakes
There’s something uniquely special about the iconic Little Debbie’s Christmas Tree Cakes that instantly transports us back to simpler times. This recipe captures that exact feeling, but with a modern, health-conscious twist. Here’s why these festive treats are a must-make this holiday season:
- Effortlessly Easy to Make: Don’t let their elaborate appearance fool you! This recipe is designed for simplicity, offering options for both from-scratch bakers and those who prefer a convenient, wholesome mix. You’ll be surprised how quickly these delightful cakes come together.
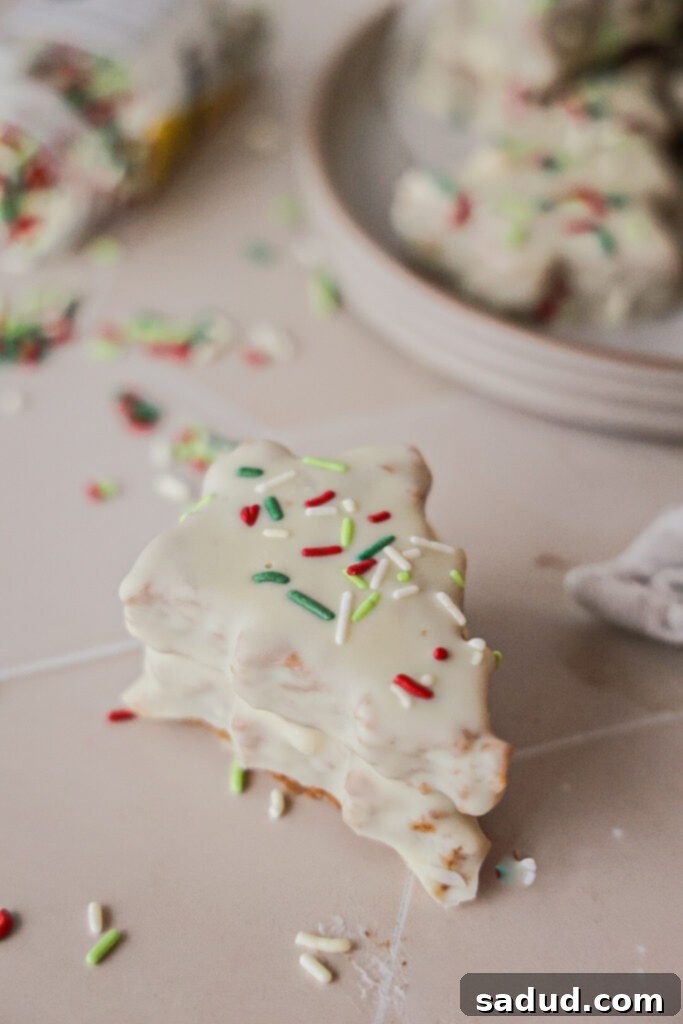
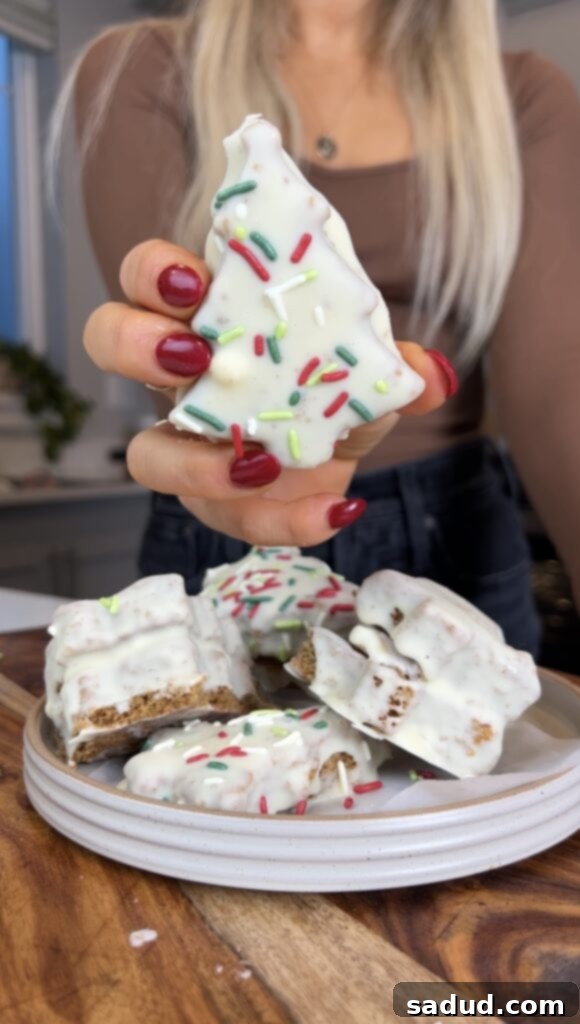
- Irresistibly Cute for the Holidays: With their classic Christmas tree shape and vibrant sprinkles, these cakes are a visual celebration! They’re perfect for holiday parties, cookie exchanges, or simply adding a festive touch to your everyday dessert.
- Made with Better-for-You Ingredients: We’ve carefully selected ingredients that are kinder to your body without compromising on flavor. Enjoy the classic taste you remember, knowing that each bite is packed with quality, thoughtful components.
- Customizable for Dietary Needs: This recipe is incredibly versatile! With simple substitutions, these cakes can easily be made vegan, gluten-free, and refined sugar-free, making them accessible for a wider range of dietary preferences and ensuring everyone can enjoy a taste of holiday magic.
Wholesome Ingredients & Smart Substitutions
Creating these healthier Little Debbie’s Christmas Tree cakes offers fantastic flexibility when it comes to ingredients. The goal is to maximize flavor and nostalgia while optimizing for better nutritional value. You have the freedom to craft your favorite cake and frosting from scratch using wholesome components, or you can leverage the convenience of high-quality, store-bought options that align with a healthier lifestyle. I’m thrilled to share some of my top recommendations to help you make the best choices for your holiday baking!
-
Cake: The foundation of any great cake.
- Store-Bought Mix Option: My absolute favorite is the Simple Mills Vanilla Cake Mix. What sets Simple Mills apart is their commitment to quality; their mixes are typically made with almond flour, coconut sugar, and other real ingredients, making them gluten-free, refined sugar-free, and easily adaptable for vegan diets (check specific package instructions for egg/dairy substitutes). Using a mix like this significantly cuts down on prep time without sacrificing a wholesome profile.
- Homemade from Scratch: If you prefer baking from scratch, use your go-to vanilla cake recipe. To make it healthier, consider substituting all-purpose flour with a whole wheat pastry flour or a gluten-free blend, and opting for natural sweeteners like maple syrup, coconut sugar, or erythritol-based sweeteners in place of refined white sugar. Ensure your chosen recipe yields a sturdy cake that can be easily cut into shapes.
-
Frosting: The creamy center and delicious coating.
- Store-Bought Option: For convenience, I highly recommend Miss Jones Organic Vanilla Frosting. It’s a fantastic choice because it’s organic and typically made with just five simple, recognizable ingredients, avoiding artificial flavors, colors, and high-fructose corn syrup often found in conventional frostings.
- Homemade Frosting: Whipping up your own healthy frosting is always a rewarding option. You can use powdered monk fruit sweetener or erythritol for a refined sugar-free version, combined with softened vegan butter or grass-fed butter. A touch of vanilla extract and a splash of your favorite milk (cashew, almond, or dairy) will create a smooth, pipeable consistency. (Full homemade frosting recipe provided in the recipe card below!)
-
White Chocolate Coating: The signature outer layer.
- Vegan Options: If you’re avoiding dairy, brands like Pascha and Evolved offer delicious dairy-free white chocolate chips made with wholesome ingredients. These melt beautifully and provide that iconic white coating.
- Lower Sugar Options: For those not dairy-free but looking to reduce sugar intake, Lily’s and Bake Believe are excellent choices. They use stevia or erythritol to sweeten their chocolate chips, delivering great taste with significantly less sugar.
- Thinning Agent: A small amount of coconut oil (2-3 teaspoons) is essential to help thin the melted white chocolate, ensuring a smooth, even, and easy-to-dip coating for your cakes.
-
Sprinkles! The finishing festive touch.
- Natural Sprinkles: To keep these cakes as wholesome as possible, I used all-natural sprinkles. These are typically colored with fruit and vegetable extracts, avoiding artificial dyes that can be a concern for many. There’s a wide variety of natural sprinkles available now, so pick your favorites to make your Christmas trees shine!
Step-by-Step Guide: How to Make Healthier Christmas Tree Cakes
Crafting these adorable and delicious Christmas Tree Cakes is a fun and straightforward process. Follow these simple steps for a perfect batch that will impress everyone:
- Prepare the Cake Base: Begin by preheating your oven to the temperature specified on your chosen cake mix box or in your homemade cake recipe. Prepare the cake batter according to the instructions. Instead of a traditional cake pan, spread the batter evenly onto a small to medium-sized sheet pan (lined with parchment paper for easy removal). This thinner layer will bake faster and be easier to cut. Keep a close eye on it, as it might be done a few minutes sooner than a thicker cake. Once baked, let it cool completely on a wire rack. This is crucial for clean cuts!
- Cut Out Your Trees: Once the cake is fully cooled, use a clean, sharp Christmas tree-shaped cookie cutter to cut out individual tree shapes. For best results and to minimize crumbling, ensure your cake is thoroughly chilled, even popping it into the fridge for 15-20 minutes before cutting can help. Collect any cake scraps; while they won’t be used for the tree cakes, they’re perfect for snacking or making cake pops!
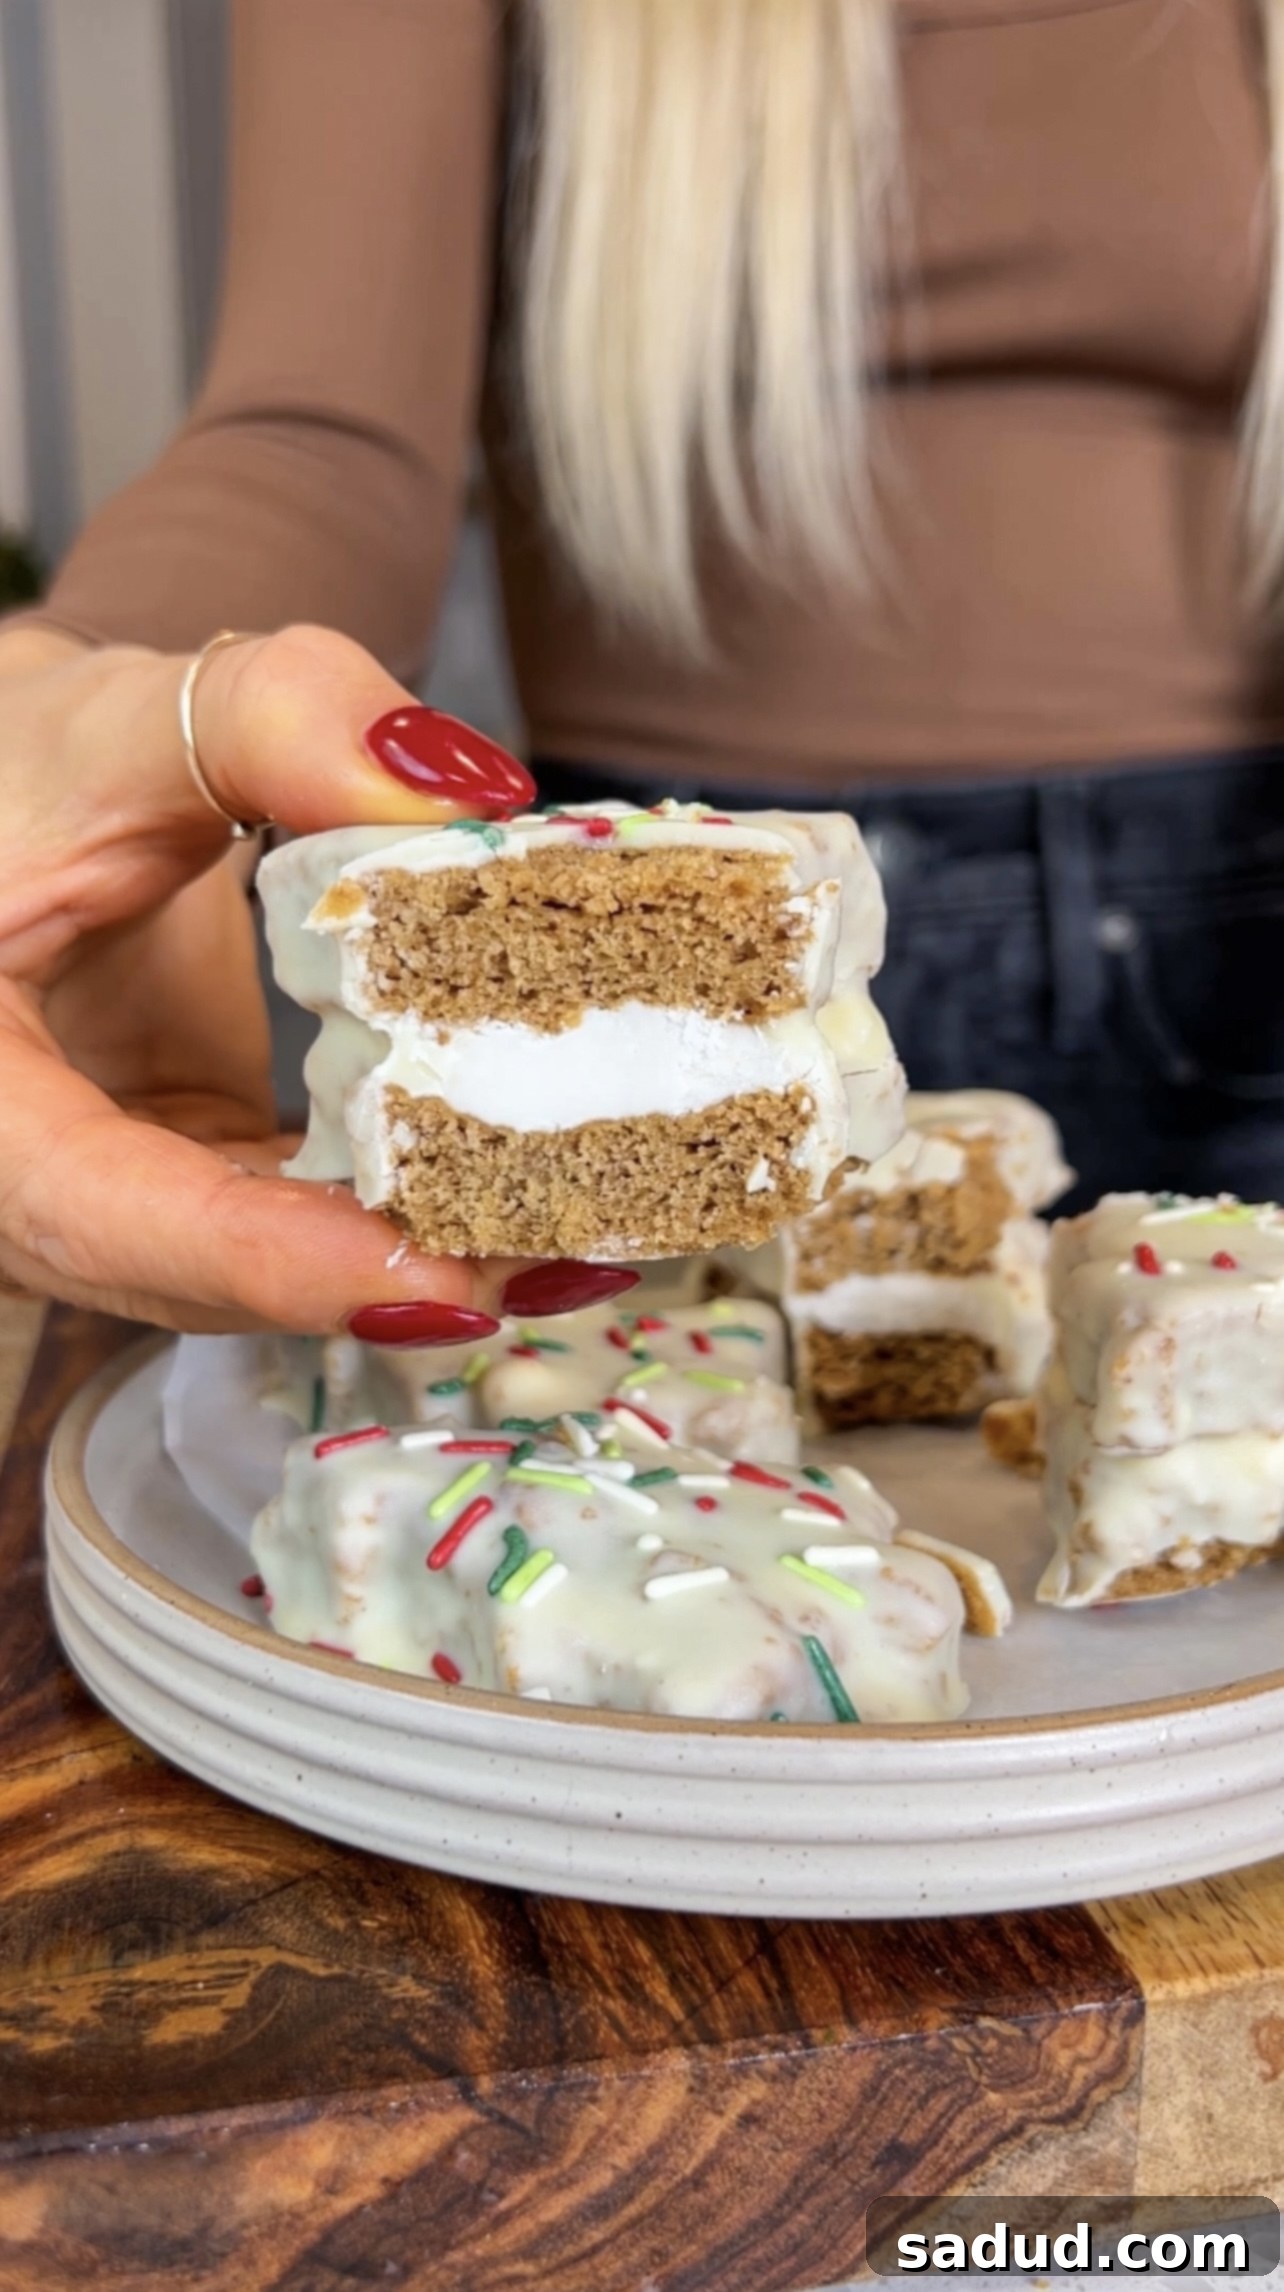
- Assemble the Cake Sandwiches: Take half of your cut-out cake trees. On each of these, spread a generous layer of your chosen frosting. Then, gently place the remaining cake halves on top to create delightful cake sandwiches. Press lightly to secure, making sure the frosting is evenly distributed.
- Melt the White Chocolate: In a large, shallow, microwave-safe bowl, add your white chocolate chips. Microwave in 30-second increments, stirring thoroughly after each interval, until the chocolate is completely smooth and melted. Alternatively, you can use the double-boiler method for a gentler melt. Stir in 2-3 teaspoons of coconut oil to thin the chocolate; this makes dipping much easier and gives a smoother coating.
- Dip and Decorate: Carefully dip each frosted cake sandwich into the melted white chocolate. You can use a fork to help submerge and lift the cake, allowing any excess chocolate to drip off. Place the dipped cakes back onto the parchment-lined sheet pan. Immediately, before the chocolate sets, liberally top each cake with your festive sprinkles. This ensures the sprinkles adhere well.
- Chill to Set: Once all cakes are dipped and decorated, place the sheet pan into the fridge. Allow them to chill for at least 15-30 minutes, or until the white chocolate coating has completely firmed up. This step is essential for that perfect Little Debbie’s texture and to prevent messy handling. Once firm, they are ready to enjoy!
Tips for Perfectly Healthier Christmas Tree Cakes
Achieving that iconic look and taste with a healthier twist is easier than you think. Here are some extra tips to ensure your Christmas Tree Cakes turn out absolutely perfect:
- Don’t Overbake the Cake: A slightly underbaked cake is moist, while an overbaked one will be dry and crumbly, making it harder to cut and handle. Keep a close eye on your sheet pan cake; it will cook much faster than a standard cake.
- Chill Your Cake Thoroughly: Before cutting the tree shapes, ensure your baked cake is completely cool, preferably chilled in the refrigerator for at least 30 minutes. A cold cake is firm and will yield much cleaner, more precise cuts, reducing crumbling.
- Use a Sharp Cookie Cutter: A good quality, sharp metal cookie cutter will make a big difference in the neatness of your tree shapes. If the edges aren’t clean, you can gently trim them with a small knife.
- Consistency of Frosting: Your frosting should be firm enough to hold the two cake halves together without oozing out excessively, but soft enough to spread easily. If it’s too soft, chill it for a bit; if too stiff, add a tiny bit more milk.
- Thin the Chocolate Properly: The coconut oil is key here. It thins the white chocolate to the perfect dipping consistency, ensuring a smooth, even coating without being too thick or clumpy. Adjust the amount slightly if needed, adding a tiny bit more oil if it’s too thick, or letting it cool slightly if it’s too runny.
- Work Quickly with Sprinkles: Once you dip a cake, apply the sprinkles immediately. White chocolate sets relatively quickly, and you want the sprinkles to adhere well before it hardens.
Creative Variations and Customizations
While the classic vanilla tree cake is beloved, feel free to get creative and customize your healthier Christmas Tree Cakes to suit your taste and holiday theme:
- Different Cake Flavors: Instead of vanilla, try a healthier chocolate cake mix or homemade recipe for a rich, dark tree. A festive red velvet cake could also be stunning!
- Frosting Fun: Infuse your frosting with different flavors. Add a drop of peppermint extract for a minty twist, a dash of almond extract for a nutty depth, or even a tiny bit of natural green food coloring to make your frosting extra festive before dipping.
- Alternative Coatings: While white chocolate is traditional, you could dip some of your cakes in melted dark chocolate (choose a lower sugar, high-cocoa option) for a more intense flavor. You could also tint your white chocolate green or red using natural food colorings for vibrant, colorful trees.
- Decorations Galore: Beyond sprinkles, consider other natural decorative elements. Use finely chopped pistachios for a green “snow” effect, edible glitter for a touch of sparkle, or even tiny edible pearls. You can also use a small piping bag with a fine tip to add delicate icing details (like ornaments or garland) after the main coating has set.
How to Store & Make-Ahead Tips
These healthier Christmas Tree Cakes are wonderful for making in advance, perfect for busy holiday schedules. Proper storage will ensure they stay fresh and delicious:
- Short-Term Storage: Store your finished Christmas Tree Cakes in an airtight container at room temperature for up to 2-3 days. For longer freshness, especially if your kitchen is warm or if you used dairy-based frosting, store them in an airtight container in the refrigerator for up to 1 week. Bring them to room temperature for about 15-20 minutes before serving for the best texture.
- Freezing for Later: These cakes freeze beautifully! Once the white chocolate coating has completely set, arrange the cakes in a single layer on a parchment-lined baking sheet and freeze until solid (about 1-2 hours). Then, transfer them to an airtight freezer-safe container or bag, separating layers with parchment paper to prevent sticking. They can be stored in the freezer for up to 2-3 months.
- Thawing Instructions: To enjoy frozen cakes, simply transfer them from the freezer to the refrigerator overnight, or place them on the counter for a few hours. Let them come to room temperature before serving for optimal flavor and texture.
-
Make-Ahead Components:
- Bake the Cake: You can bake the cake a day or two in advance. Once cooled, wrap it tightly in plastic wrap and store at room temperature or in the fridge.
- Prepare Frosting: Homemade frosting can be made 2-3 days ahead of time and stored in an airtight container in the refrigerator. Let it come to room temperature and re-whip it briefly before assembling.

Other Wholesome & Festive Recipes to Try
If you loved making these healthier Christmas Tree Cakes, explore more delicious and wholesome treats for your holiday season and beyond:
- Healthy Snickerdoodle Creme Pies
- Caramel Pumpkin Pecan Cheesecake (vegan, no bake)
- Healthy Pumpkin S’mores Bars
- Healthier Pecan Pie Twix Bars

Healthier Little Debbie’s Christmas Tree Cakes
Pin Recipe
Ingredients
- 1 box Simple Mills vanilla Cake mix *or batch of homemade cake
- 1 container of Miss Jones vanilla frosting *or a homemade batch of frosting
- 1 1/2 cups white chocolate chips
- 2-3 tsp coconut oil *to help thin the chocolate
- Sprinkles, as needed
Homemade frosting
- 3 cups Monk fruit powdered sugar *or regular powdered sugar
- 1/2 cup vegan or grass-fed butter
- 1 1/2 tsp vanilla extract
- 2 tbsp milk, of choice *I used cashew
Instructions
-
Preheat oven to your cake mix/recipe instructions. Prepare the cake mix.
-
Spread it out onto a small, parchment-lined sheet pan. I used a medium sheet pan. Bake according to instructions (I peak on mine a few minutes earlier as its thinner than normal). Let cool once done.
-
Using a tree cookie cutter, cut trees out of the cake.
-
Add frosting to one side of the cakes. Then sandwich the other halves on top.
-
In a large shallow bowl, add the chocolate chips. Melt in 30 second increments in the microwave, stirring well between each, until smooth. Or use the double-boiler method to melt them.
-
Dip each cake carefully, using a fork to help lift it out & drain off excess chocolate. Place on the sheet pan. Top with sprinkles.
-
Place the cakes in the fridge to firm up! Enjoy.
Homemade Frosting
-
Using a stand mixer or hand mixer, beat the butter until light and fluffy. Add in the vanilla, beating until combined. Add the powdered sugar ½ cup at a time, mixing well between each addition, until you reach your desired consistency. You may need to add more to make it thicker!
Notes
